All articles
Create a wallet with Multi-share Backup
This article provides a step-by-step guide for creating a new wallet utilizing the Multi-share Backup scheme. If you don't understand how a Multi-share Backup works, please read our article called Multi-share Backup on Trezor.
Multi-share backup is available on both the Trezor Model T and Safe models.
Important remarks before you start:
- You will be presented with a sequence of 20 English words, each displayed on the screen of your device. These words will never be shown on your computer screen, so do not use backups offered to you by your computer.
- These wordlists are referred to as recovery shares, which can later be used to recover a wallet in case of theft, loss, or destruction of your Trezor device.
- Safely store your recovery shares offline. Do not take pictures of them, do not make digital copies of them, and never upload them online.
- Write your recovery shares down on paper, or use a dedicated backup solution to keep them safe.
For the easiest onboarding experience, book a Trezor Expert session to get up and running right away.
The process shown below is performed using a Trezor Safe 5, but the steps remain the same for other supported devices.
- Start Trezor Suite and connect your Trezor
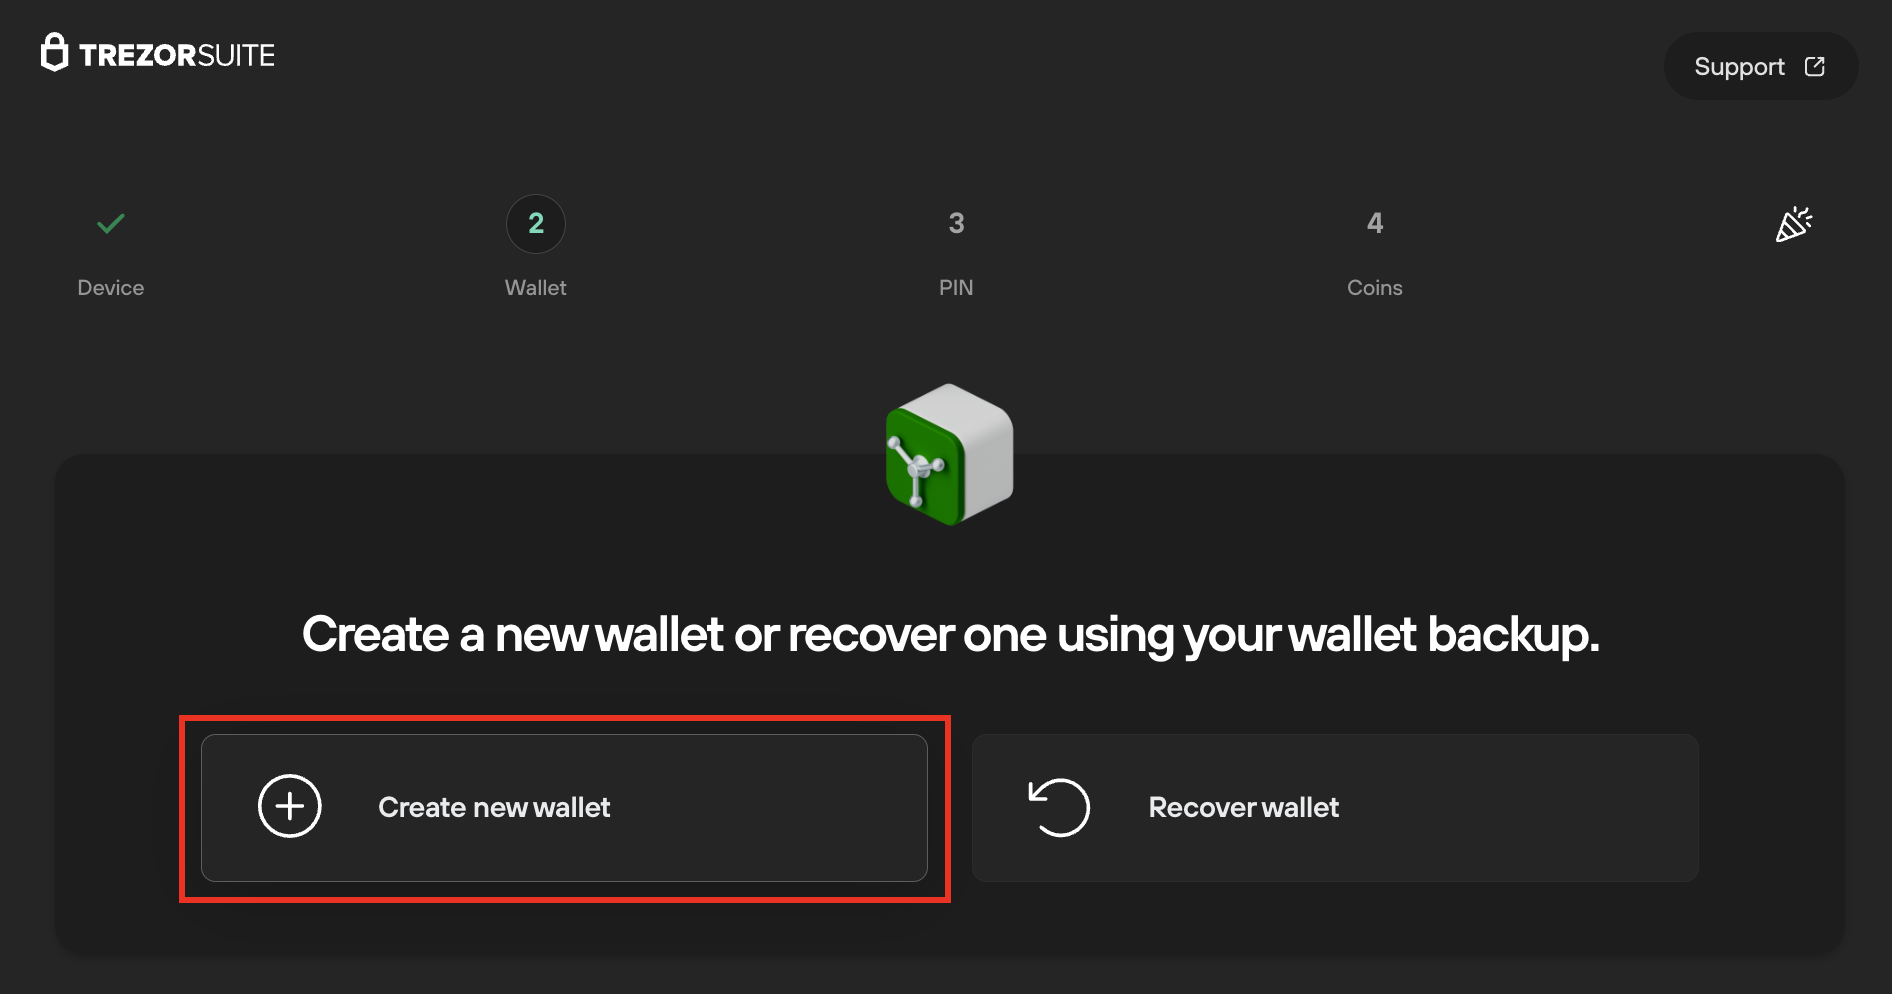
- Following the Firmware check / installation, and device authenticity verification, in the Wallet step choose 'Create new wallet':
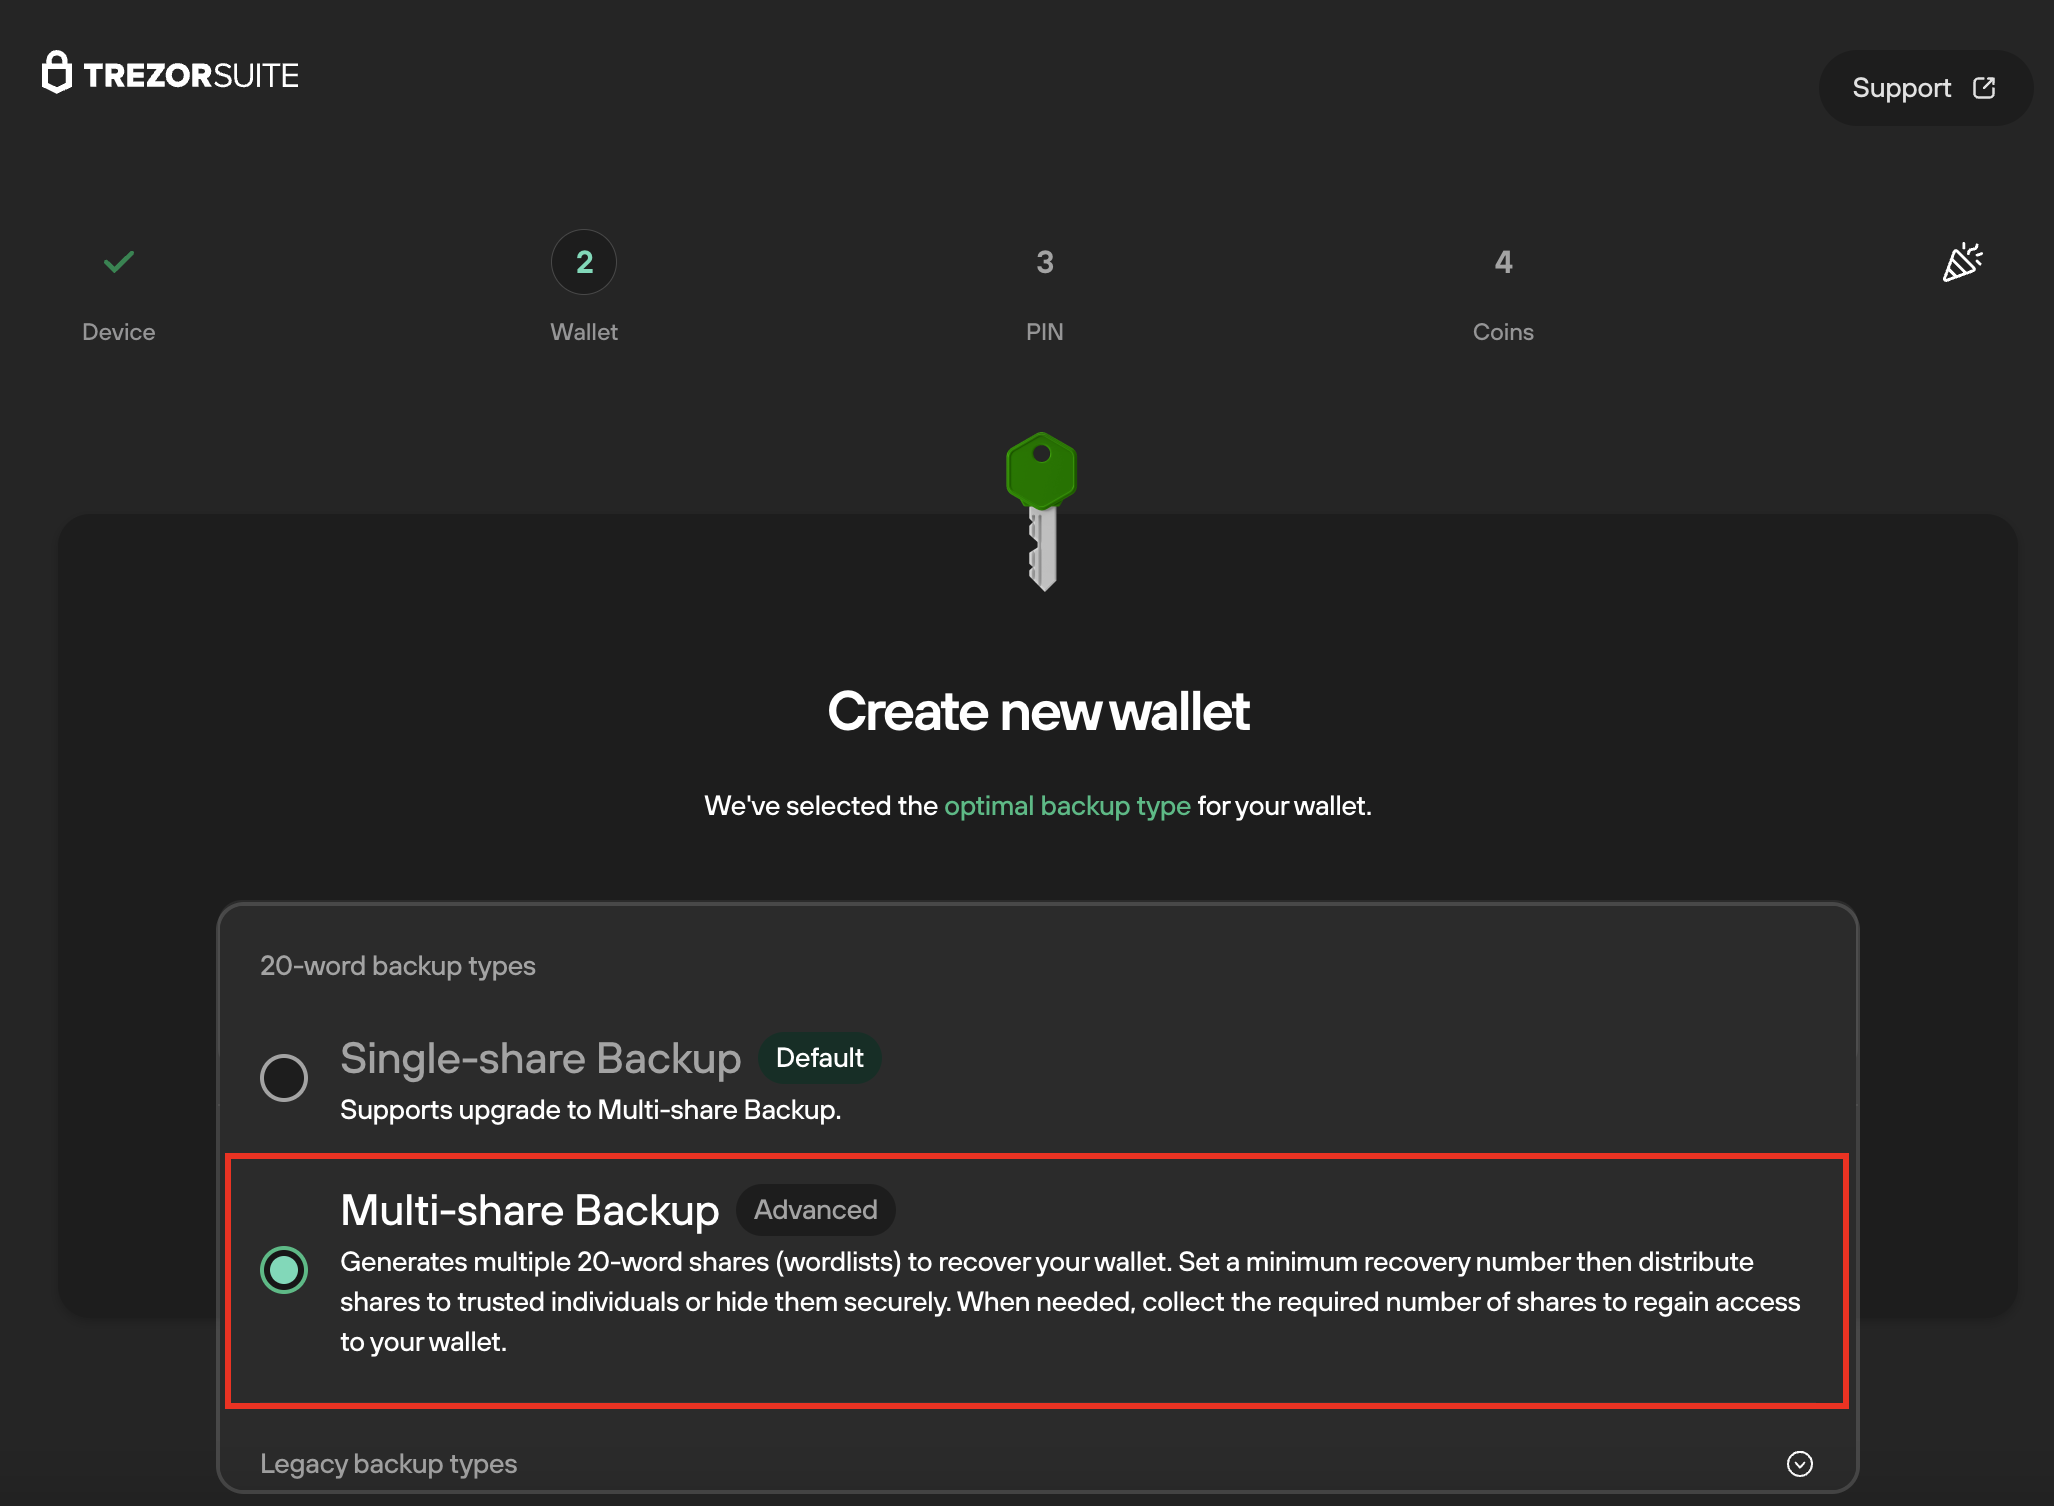
- Then choose Multi-share Backup from the drop-down menu:
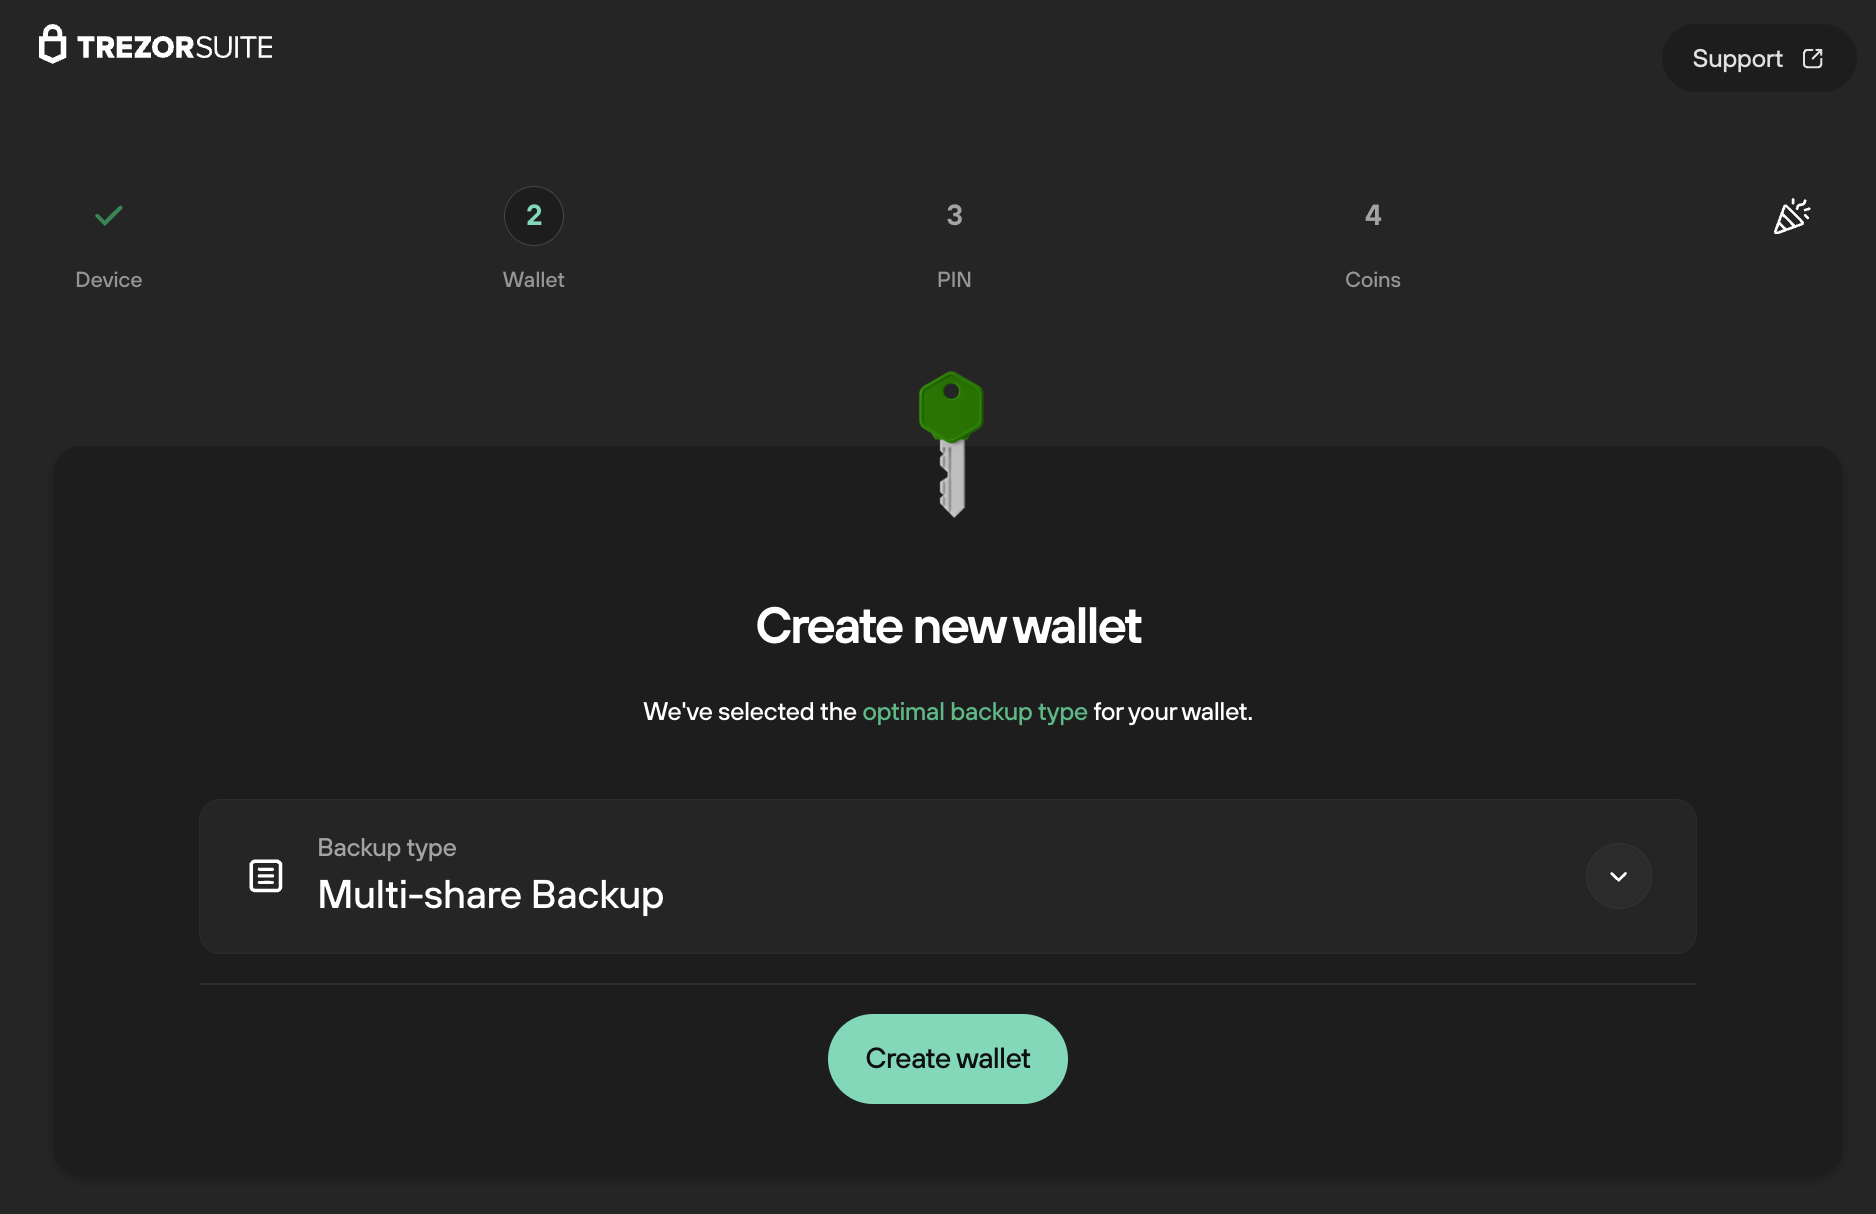
- Then click on Create wallet:
- Confirm you agree to the Terms & Conditions by swiping up on the touchscreen, then hold to confirm.
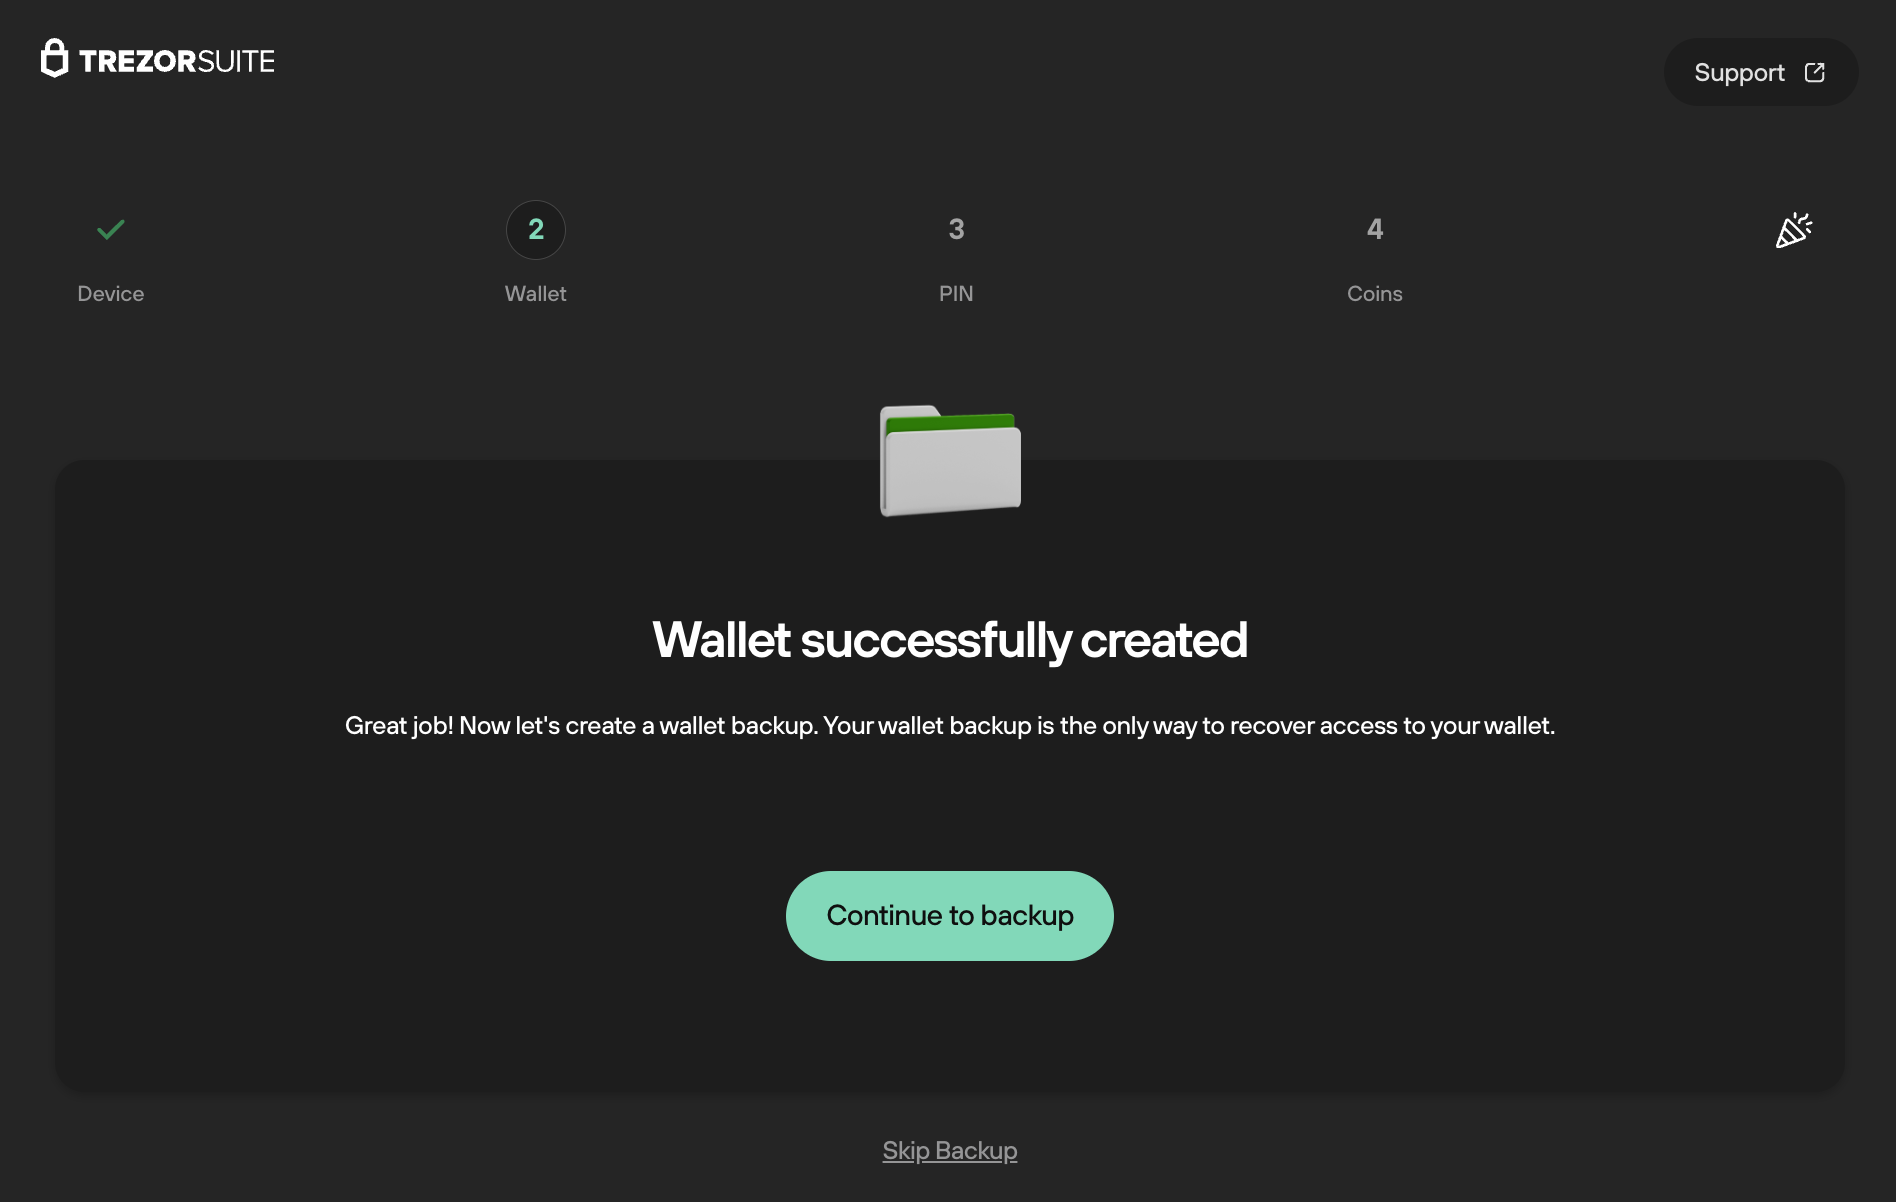
- Once the wallet is created, tap to continue again to proceed; in Trezor Suite, select Continue to backup:
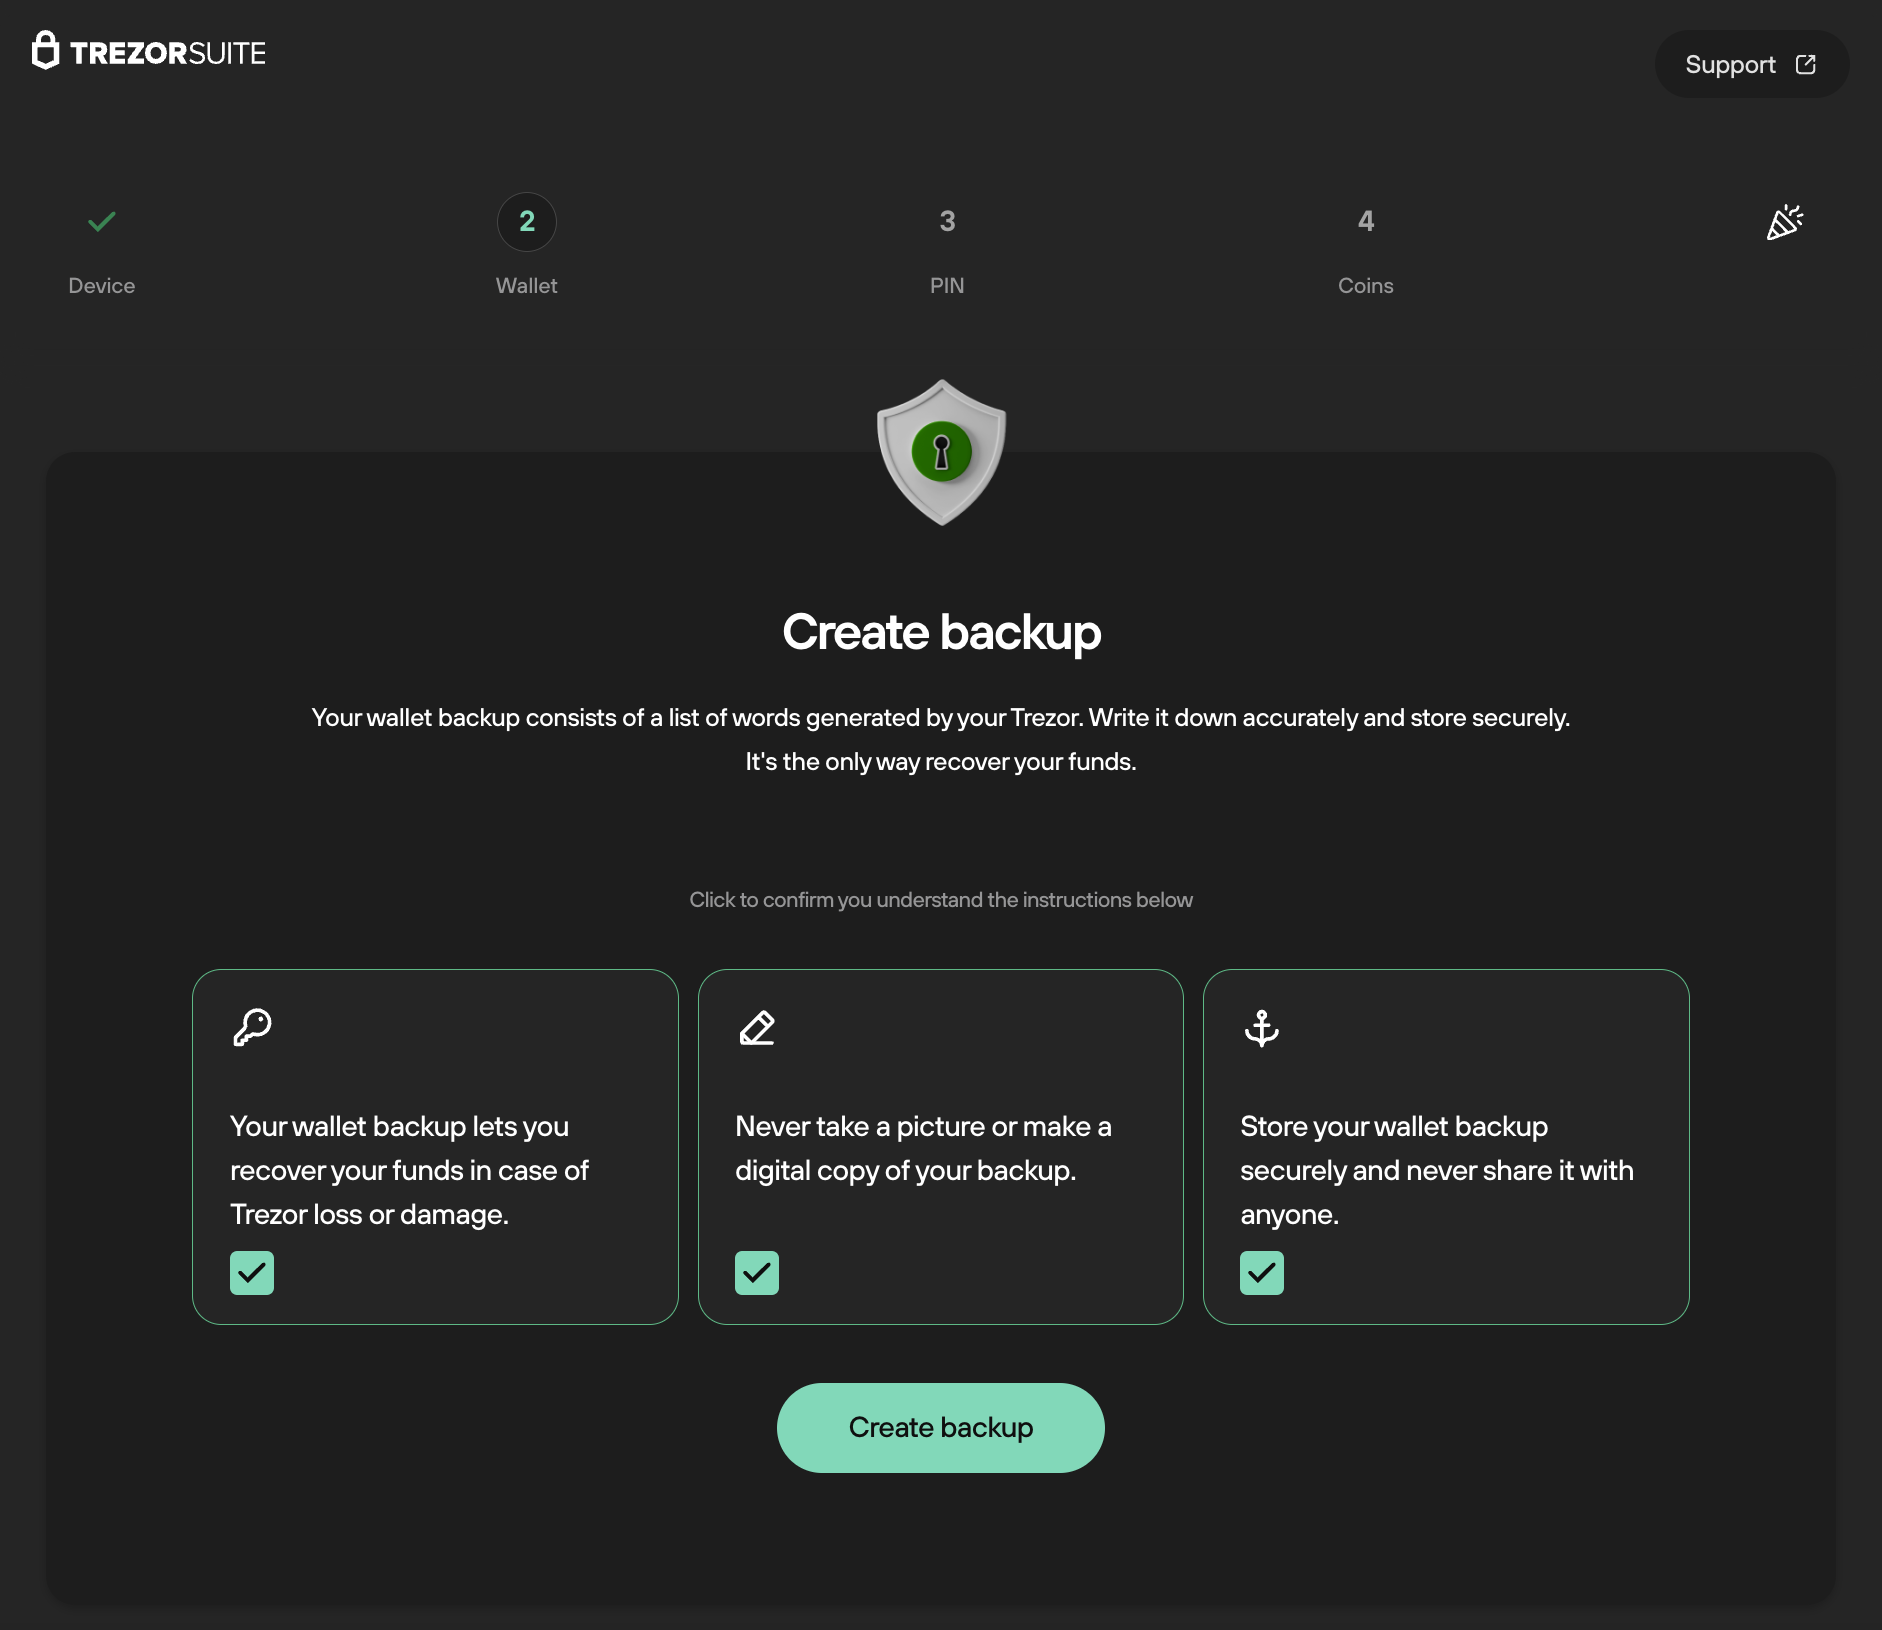
- In the next window, read and confirm that you've understood the instructions by checking the three boxes, then select Create backup:
- Follow the instructions displayed on your Trezor device in order to set the number of shares and threshold:

- Once you’ve written down all 20 words in order, hold to confirm on your Trezor.
- You will then need to confirm you wrote down each share correctly by entering specific words requested by your Trezor.
- Once you’ve confirmed each share, the wallet backup step is completed.
- Tap to continue, and proceed with the remainder of the onboarding process.