Managing NFTs with Trezor
NFTs, or non-fungible tokens, are a type of cryptocurrency that possess unique attributes, making each token distinct from others. Unlike fungible tokens that are interchangeable, NFTs are unique and distinct, which means they cannot be replaced or exchanged for another token on a one-to-one basis. This makes NFTs ideal for representing unique digital assets like collectible items, artwork, and other assets that have intrinsic value.
As the popularity of NFTs grows, robust security becomes more important. Trezor hardware wallets are designed to store cryptocurrency of various types, and your Trezor can be used to store and secure NFTs, as long as they exist on a network which is already supported in device firmware, such as Ethereum.
While Trezor hardware wallets are capable of storing NFTs, currently they cannot be managed directly through Trezor Suite. To manage NFTs safely, a third-party interface like MetaMask should be utilized. By connecting MetaMask directly with your Trezor device, you can ensure that your wallet backup remains offline, providing additional security for your NFT holdings.
Trezor Hardware Wallets and Ethereum Improvement Proposals
Trezor hardware wallets support two Ethereum Improvement Proposals (EIPs), EIP-1559 and EIP-712.
EIP-1559: This proposal makes gas prices more predictable, making it a suitable choice when buying NFTs. Trezor hardware wallets support EIP-1559, reducing the risk of failed transactions and potentially reducing transaction costs in the long run.
EIP-712: This proposal improves the presentation of data during signing and is frequently encountered when listing NFTs for sale on certain marketplaces.
ERC-721: This NFT standard provides rules for handling NFT metadata and is different from the ERC-20 standard as it is tailored to each unique token rather than multiple identical fungible tokens.
ERC-1155 (Multi-Token Standard): This NFT standard enables creation and transfer of fungible and non-fungible tokens with a single smart contract.
Storing NFTs with Trezor
As of the January 2025 release of Trezor Suite, it is possible to view NFT collections stored on EVM blockchains like Ethereum, BNB Smart Chain and Polygon directly in Trezor Suite.
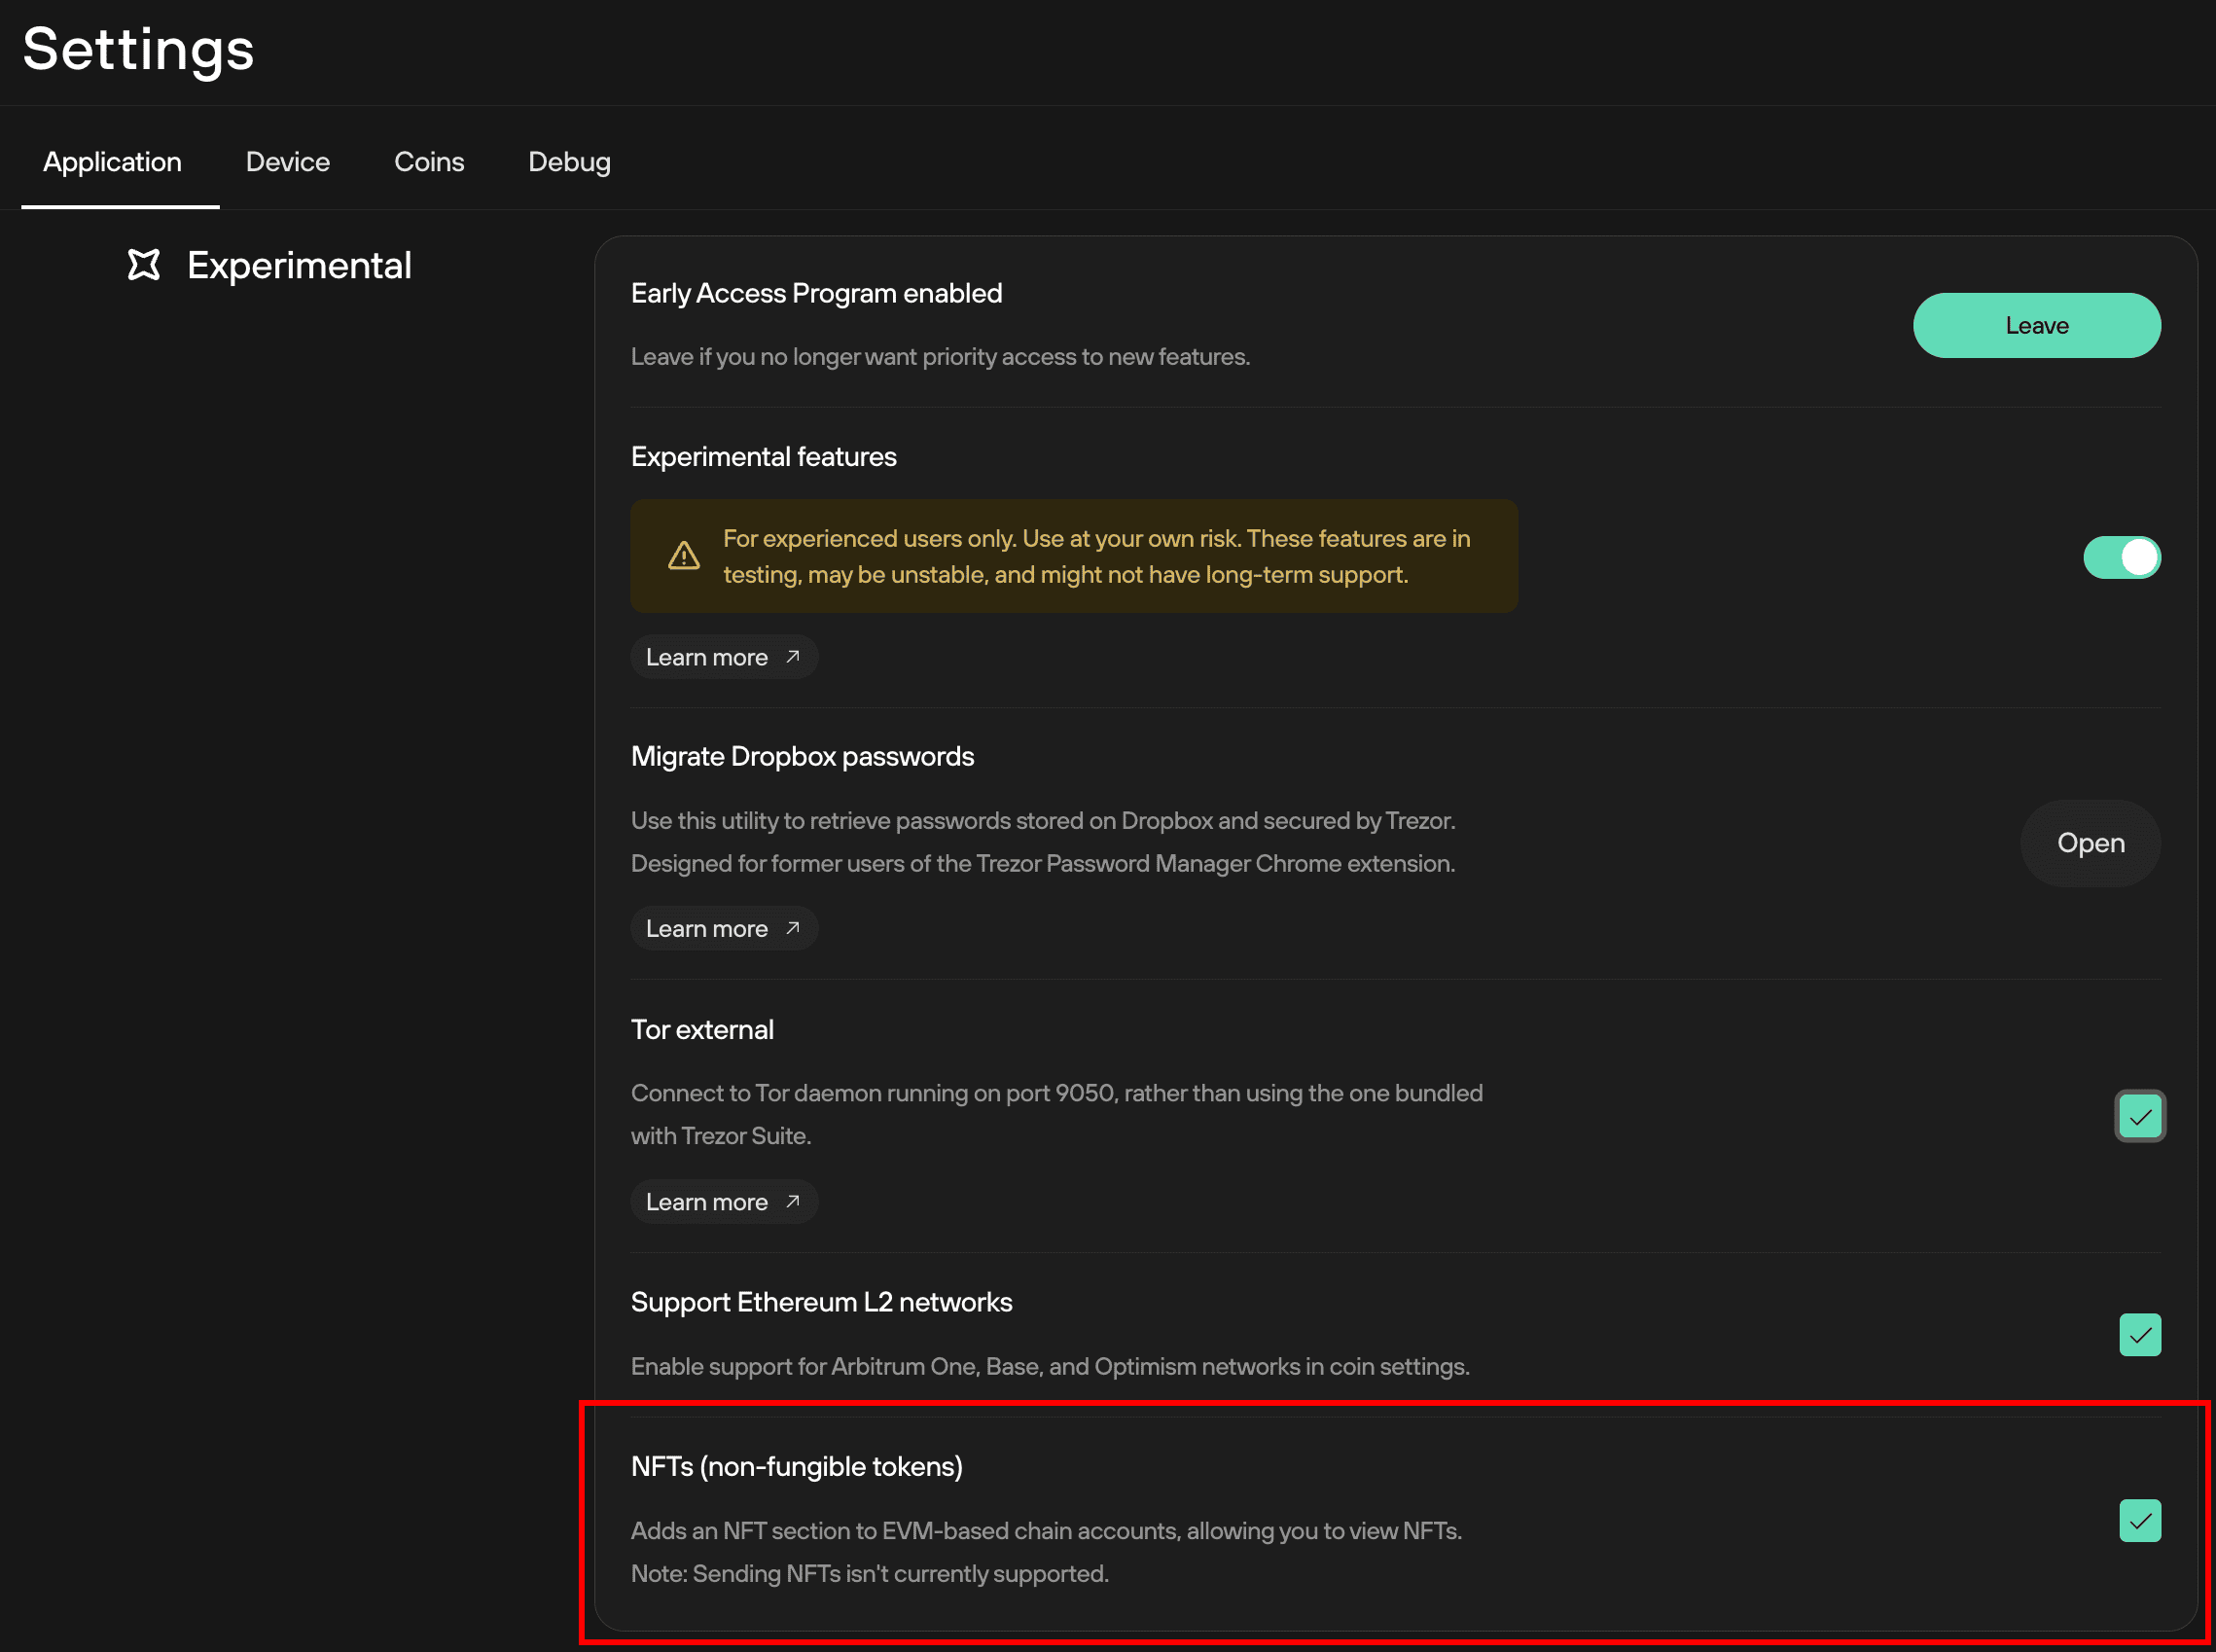
The NFT feature can be enabled via the Experimental features menu in the Applications settings:
- Go to Settings > Application
- Scroll down to the Experimental section
- Toggle Experimental features on, then enable NFTs by checking the box:
- Once enabled, you will find the NFT view next to Tokens in the EVM network detail menu:
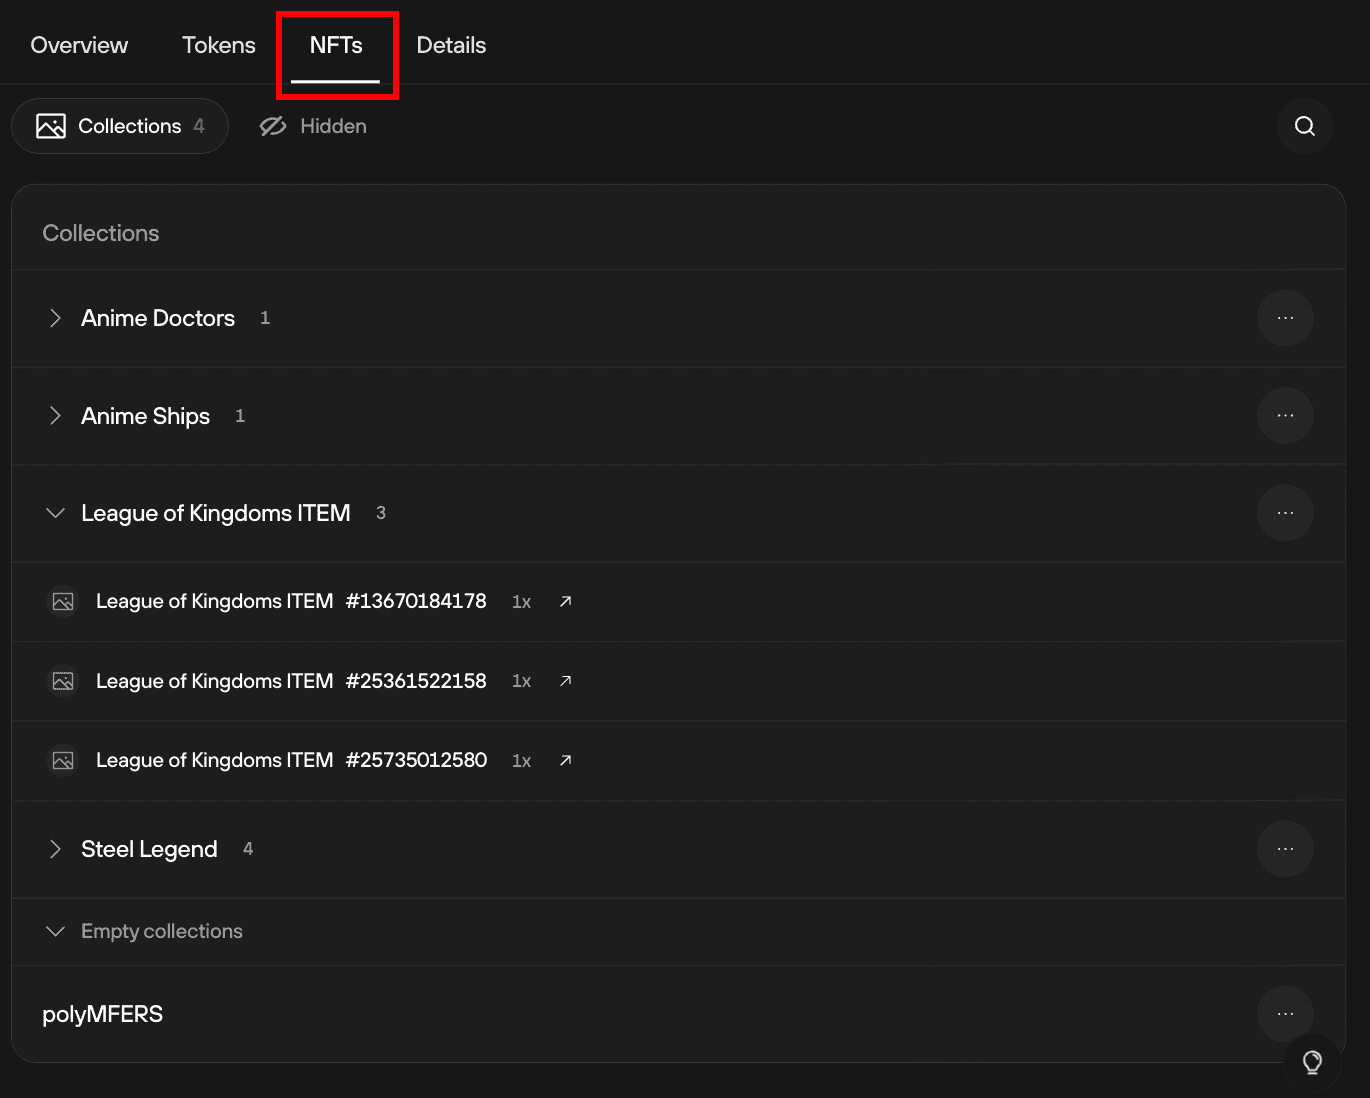
Please note that the NFT section does not display the NFT images, but rather the collection names and token IDs. You can check the image on the blockbook by clicking the arrow next to the token name.
Trezor Suite currently displays NFTs on all EVM chains, but not others. This means Suite will not show e.g. NFTs on Solana.
Empty collections
You will see the Empty collections row in the NFT list if you send all NFTs (using a third-party wallet) out of the associated account. As it is not yet possible to transfer or interact with your NFTs using Trezor Suite, if you want to send or sell your NFTs, you will need to use a third-party wallet.
How to manage your NFTs with Trezor
Managing your NFTs requires a suitable third-party wallet. MetaMask—a browser extension that supports Ethereum NFTs.
Step-by-step guide and Trezor your NFTs safely and securely:
To store NFTs, all you need is an Ethereum address to send them to. Set up an Ethereum account in Trezor Suite
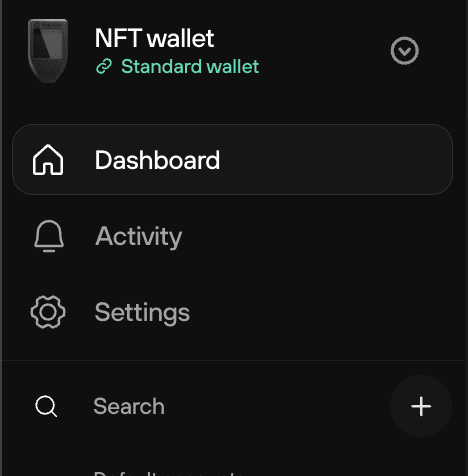
- In Trezor Suite, click the plus (+) sign next to "Search".
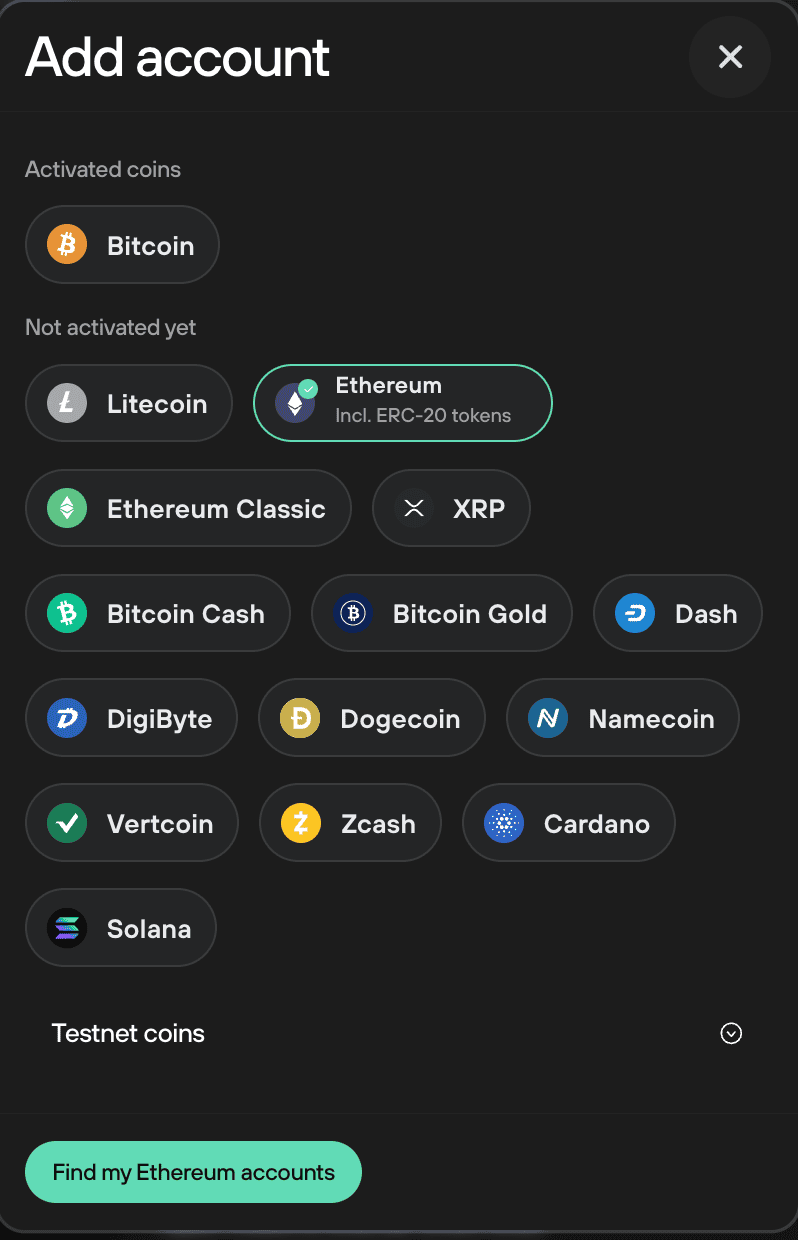
This will open a menu for adding new coins. Choose Ethereum from the list, and click** Find my Ethereum accounts**:
Now you have a new empty Ethereum Account. To get your receiving address, stay on the Ethereum account main page and click Receive, and then Show full address.
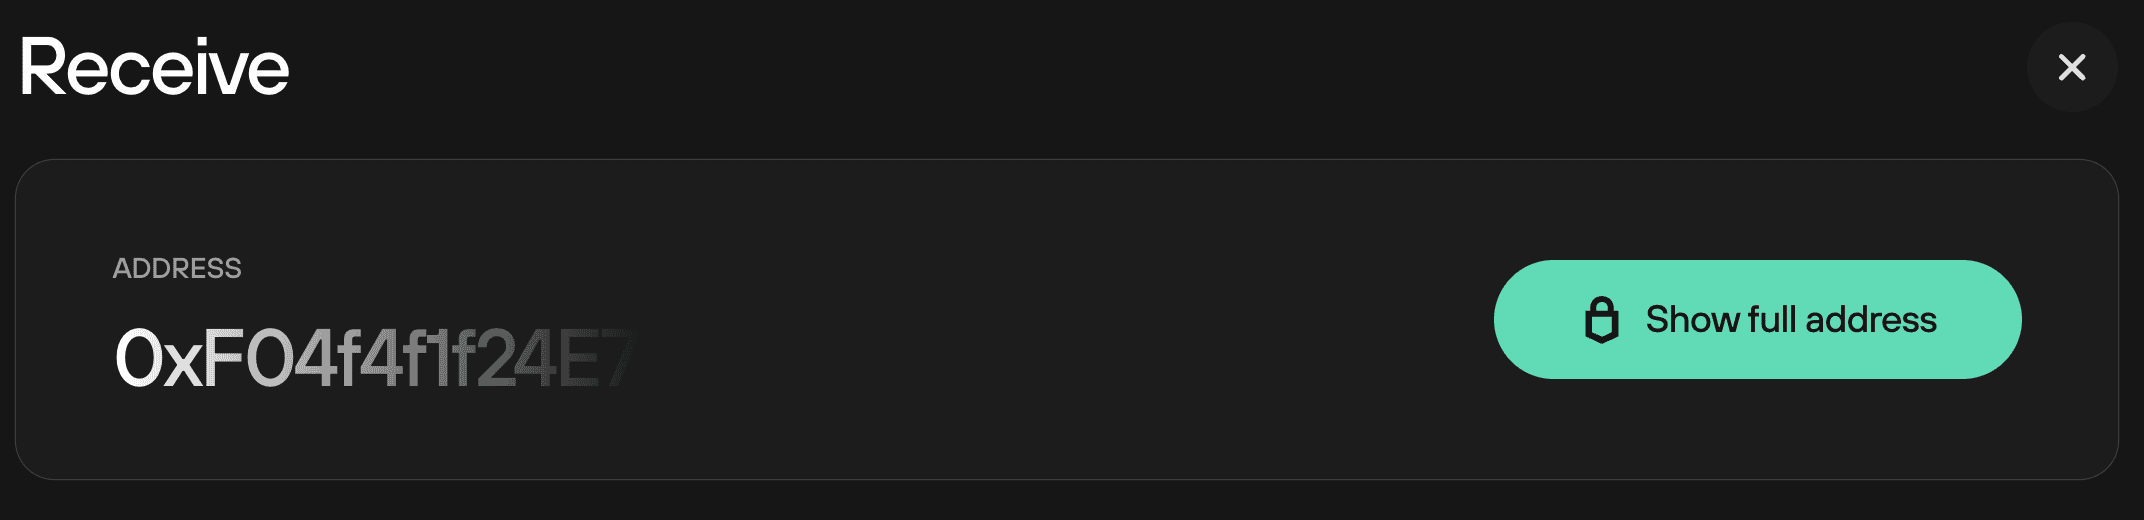
Double-check every character of that address against the one shown on your Trezor screen. If they match, you’re good to go and can copy the address. If not, there may be malware on your host computer and the address must not be used.
Connect your Trezor to MetaMask or another interface
Now that you have an address to send your NFTs to, you can set up MetaMask which will communicate with the NFT marketplace you plan to use.
To connect to MetaMask, first install the extension and create a new account with a password, and write down a backup of the wallet backup it generates.
Metamask calls a wallet backup a secret recovery phrase, and it will ask you to set one up upon setup.
This account will not be used but it needs to be set up before you can add a hardware wallet to the extension.
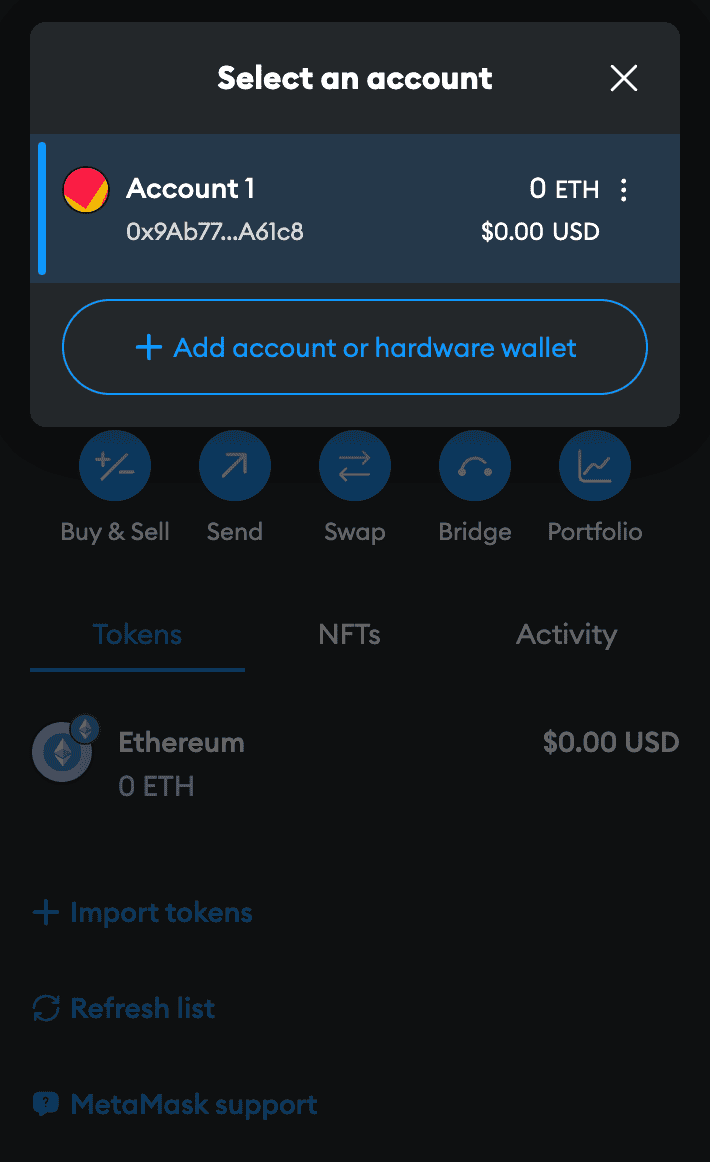
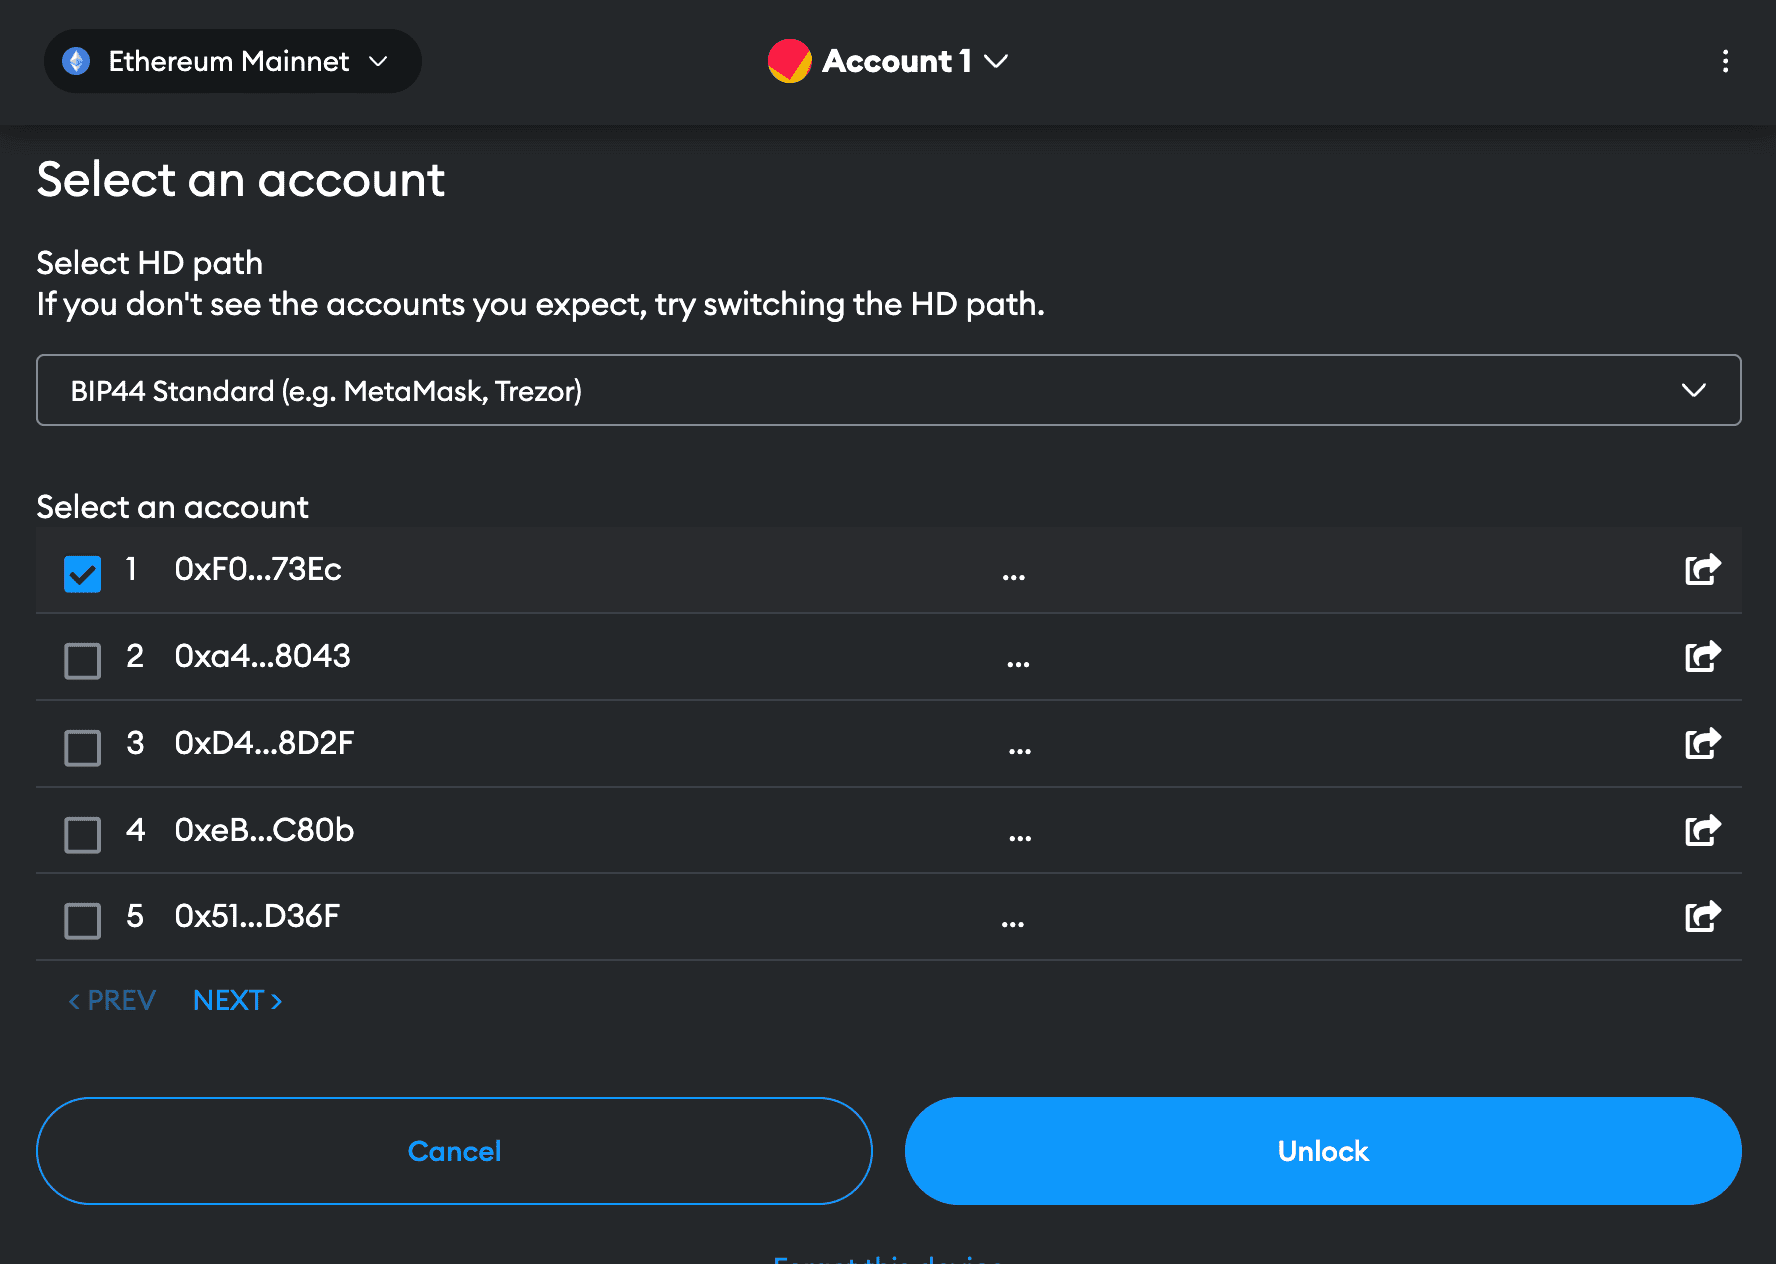
Next, click on the "Account 1" generated by the MetaMask extension in the top part MetaMask interface. A dropdown will appear showing all connected accounts. Click + Add account or hardware wallet then select Add hardware wallet and a new page will open.
- Choose Trezor from the options shown and you will be redirected to Trezor Connect. This is Trezor software that allows third-party wallets to communicate securely with your device.
- Allow the MetaMask extension to read public keys from your Trezor device.

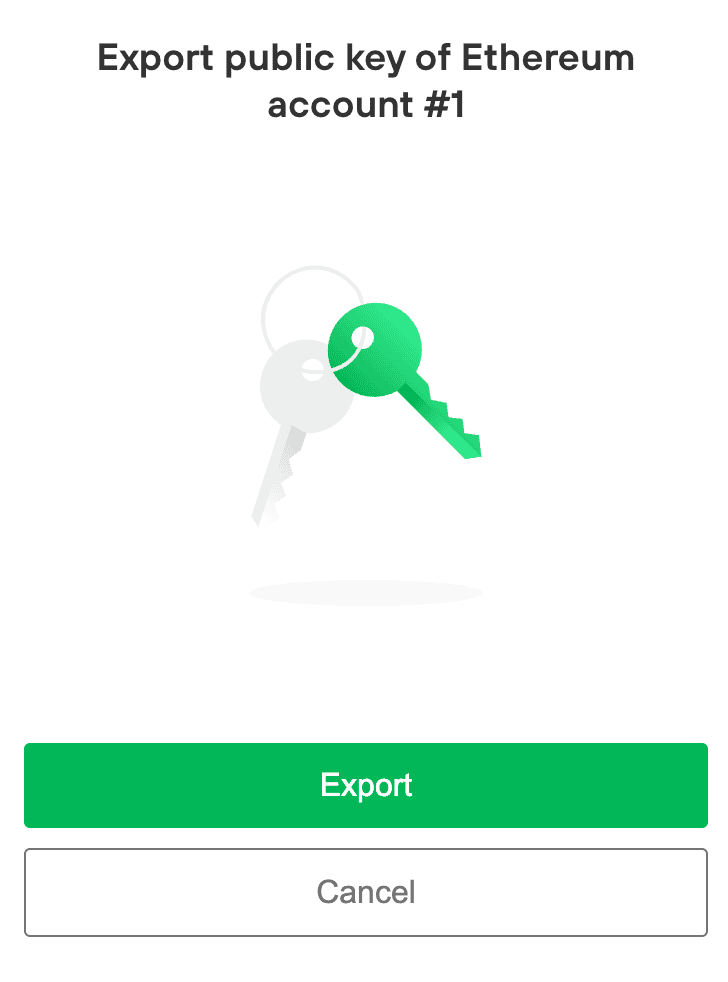
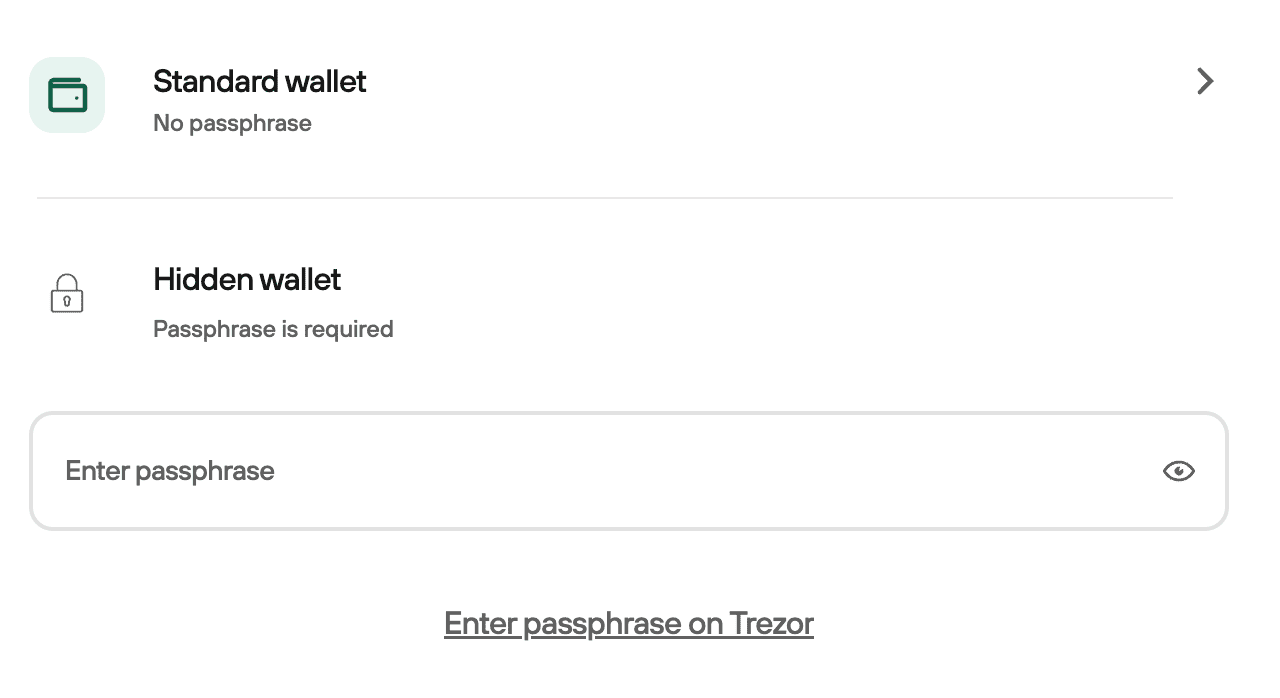
Check the account you are exporting is correct and click Export. Your Trezor must be connected and unlocked. Then, enter any passphrase associated with the account.
- Now, MetaMask can read your public keys, and see which Ethereum accounts are associated with your Trezor wallet backup.
- Select an account to use, making sure you choose the one you set up earlier, usually the first option on the list, and click Unlock.
Your NFT will not be lost if you accidentally choose the wrong account to use with MetaMask at this step, but for security reasons you should make sure it perfectly matches the address shown on your Trezor in the previous step. Ethereum accounts only have one address associated with them, so the other accounts shown at this step can be found by adding more Ethereum accounts in Trezor suite, as shown in step 1.
Your wallet address will now be ‘watched’ by MetaMask and any transactions initiated through this MetaMask account will need to be signed by your Trezor.
Now you can use MetaMask to manage NFTs on any supported platform and, as long as you ensure you always use the account connected to your hardware wallet, all your Ethereum and related assets will be secured offline by your Trezor.
Once you have confirmed the address using your Trezor and have double-checked the address matches the one you imported into MetaMask, you can start using it for receiving NFTs, ERC-20 tokens and other Ethereum transactions.