Using GPG encryption and signing with your Trezor
GNU Privacy Guard (GPG, also GnuPG) is free encryption software that is compliant with the OpenPGP (RFC4880) standard. Using GPG, it is possible to encrypt (and decrypt) files that contain sensitive data or sign / verify the documents.
Why use GPG with Trezor?
GPG Trezor integration lets users sign emails, git commits, and software packages, manage passwords (with pass and gopass, among others), authenticate web tunnels or file transfers, encrypt files, and more.
Instead of keeping your GPG keys on a computer and decrypting it with a passphrase when you want to use it, the key is generated and stored on the Trezor device and never reaches your computer. If the device is stolen or damaged, user can easily restore the keys using wallet backup (recovery seed) - on the new device.
To read more about common use cases of GPG, please visit Roman Zayde's Trezor-agent documentation on GitHub.
Note: this guide was tested on the following clean systems: Linux Mint 19, Ubuntu 18.04.1 LTS (Bionic Beaver). It works with Trezor One with 1.6.0 bootloader and 1.7.0 firmware or higher and with Trezor Model T.
Install and use Trezor GPG signing/encrypting on Linux
1 - Update repositories, install dependencies and GPG
$ sudo apt update && sudo apt install -y python3-pip python3-dev libusb-1.0-0-dev libudev-dev gnupg2
2 - Install setuptools and wheel
& pip3 install setuptools wheel
3 - Install trezor agent
$ pip3 install trezor_agent
4 - Update your $PATH by running
$ source .profile
5 - Install Udev rules
Reconnect your Trezor device after this step.
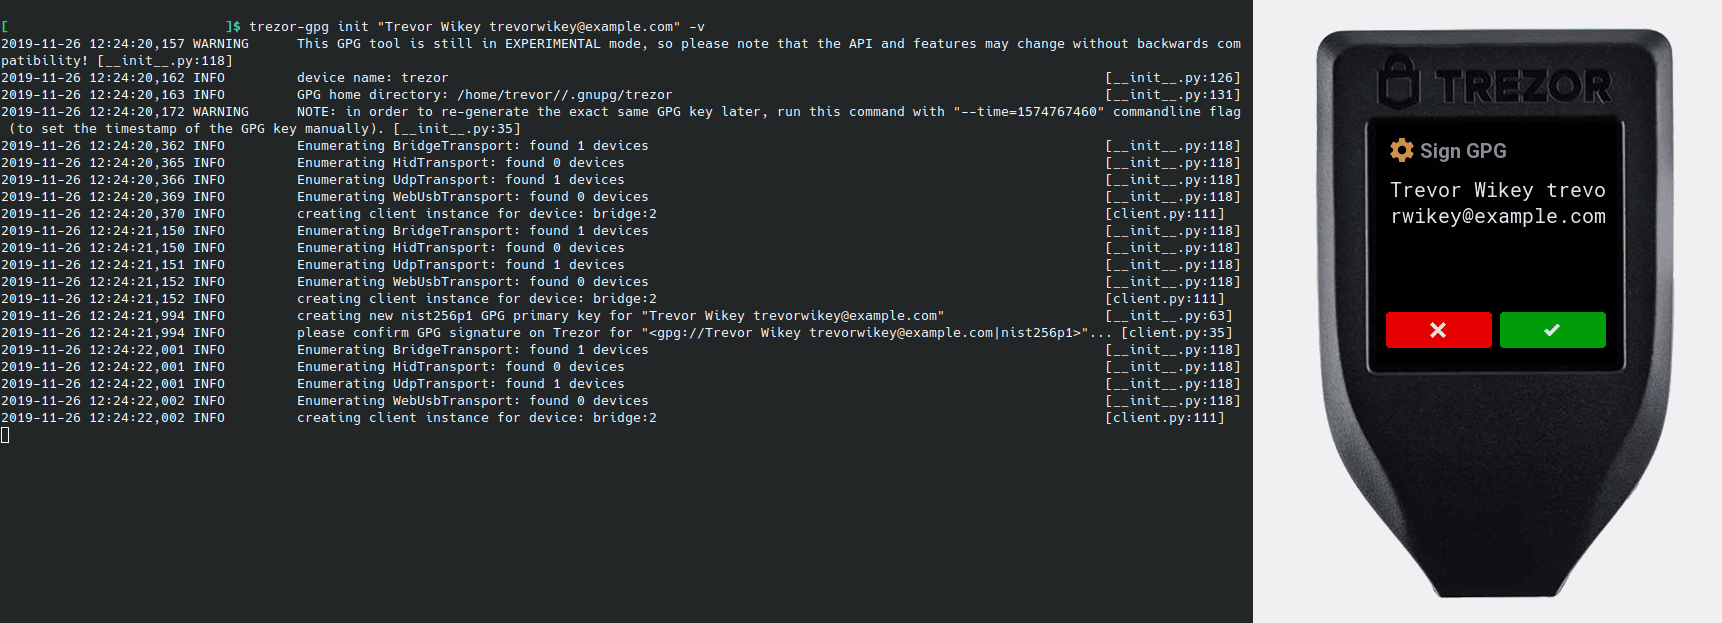
6 - Initialize the agent GPG directory
$ trezor-gpg init "Username " -v
If you use Trezor Agent v.0.14.1 or newer, your key will be generated with a default timestamp of 0 (unless you set it manually). With timestamp 0, you do not have to pay much attention to it, your keys will be derived from your seed deterministically.
If you generate your key pair with older version of Trezor Agent, pay close attention to the warning about the produced timestamp and record the timestamp somewhere safe. You will need to use the specific timestamp in combination with your seed to produce the same set of keys if you ever lose your Trezor device.
7 - Add the following line at the end of your .bashrc file which is located in your home directory. If there's no such file yet, create it.
export GNUPGHOME=~/.gnupg/trezor
This GNUPGHOME contains your hardware keyring and agent settings. The agent software assumes all keys are backed by hardware devices, so you cannot use standard GPG keys in GNUPGHOME (if you do mix keys, you will receive an error when you attempt to use them).
8 - Close and reopen terminal.
Using the Trezor keys
Sign or encrypt document with Trezor
$ gpg2 --sign your document
For example:
$ gpg2 --sign file.txt
$ gpg2 --encrypt -r Username your document
Verify or decrypt the document
$ gpg2 --verify your document
$ gpg2 --decrypt -r Username your document
Note: We would like to thank Roman Zeyde for his contribution to Trezor GPG implementation.
Recovering the key
If you ever lose your Trezor device or decide to use another device to use with the key pair, you will need to use the trezor-gpg init command together with the UNIX timestamp which was first used when you generated the key pair for the first time. If you generated your keypair with the timestamp=0 (default in version 0.14.1 and newer), you do not have to specify the timestamp in this process.
For example:
$ trezor-gpg init "Trevor Wikey " -v --time=1574767460
Sources: https://kb.iu.edu/d/awio