Trezor Password Manager will soon be deprecated (June 2023). We advise any users who currently rely on the tool to export their passwords from Trezor Password Manager and switch to a different service. Details on how to do this are provided below in the section "Deprecation of Trezor Password Manager: what to do now"
TABLE OF CONTENTS
- Deprecation of Trezor Password Manager: what to do now
- Exporting your data
- Importing login credentials to a new service
- Introduction to password managers
- Setting up your Trezor Password Manager
- Install the Trezor Password Manager Chrome extension (TPM)
- Sign in with Dropbox
- How do Trezor and Dropbox work together?
- Connect Your Trezor device and enter your PIN
- Enable Password Manager on your Trezor device
- Tags
- Add a password entry
- Manage your bookmarks with Trezor Password Manager
- Trezor Password Manager in Action
- Keyboard shortcuts
- Enabling and disabling Trezor Password Manager
- Export and import of passwords
Deprecation of Trezor Password Manager: what to do now
To save users from any inconvenience, the following guide shows you how to export your data protected by Trezor Password Manager so that it can be used with an alternative application.
The data will be downloaded as a .csv file, which is formatted the same as LastPass exports:
url,username,password,extra,name
Where extra is the “Note”, and name is the “Title” you assigned to an entry in Trezor Password Manager.
The .csv file format is compatible with other popular password managers such as Bitwarden and 1Password; this means you can easily switch to another service without hesitation.
Exporting your data
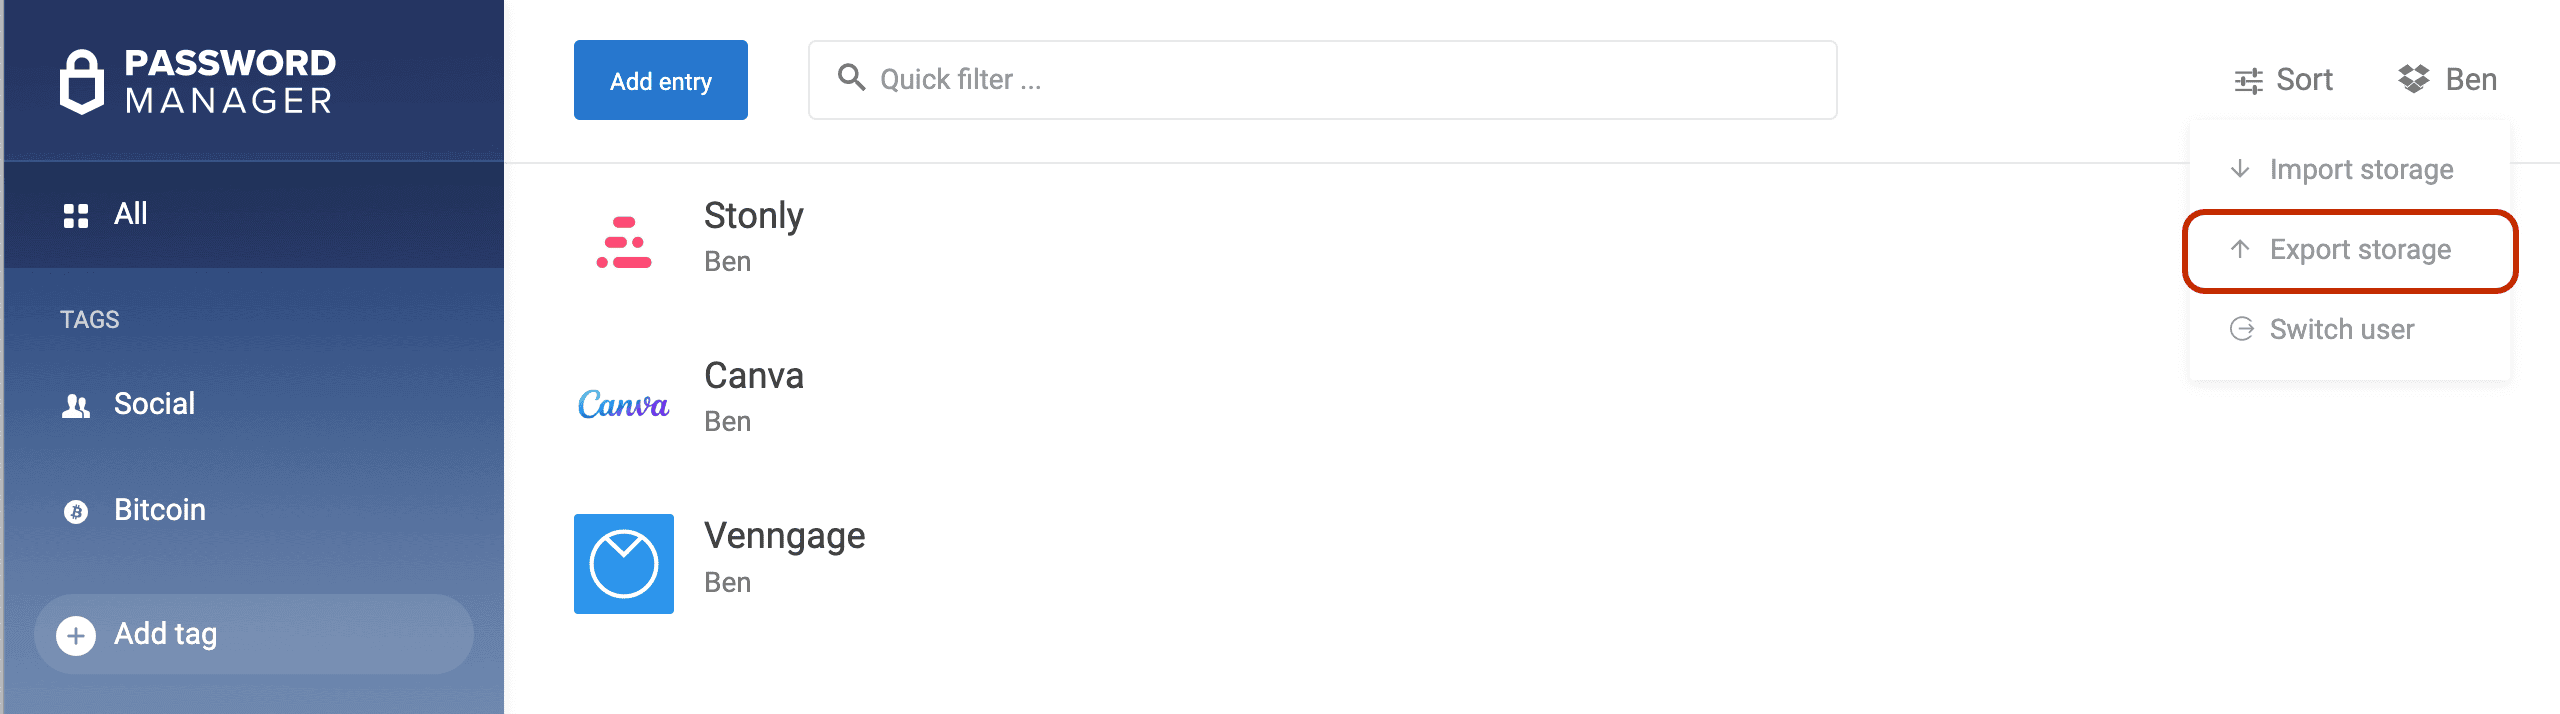
- Click on your user name in the top-right corner of the Trezor Password Manager interface:
- Select Export storage from the drop-down menu:
- Using the checkboxes on the left-hand side of each entry, select which items to export:
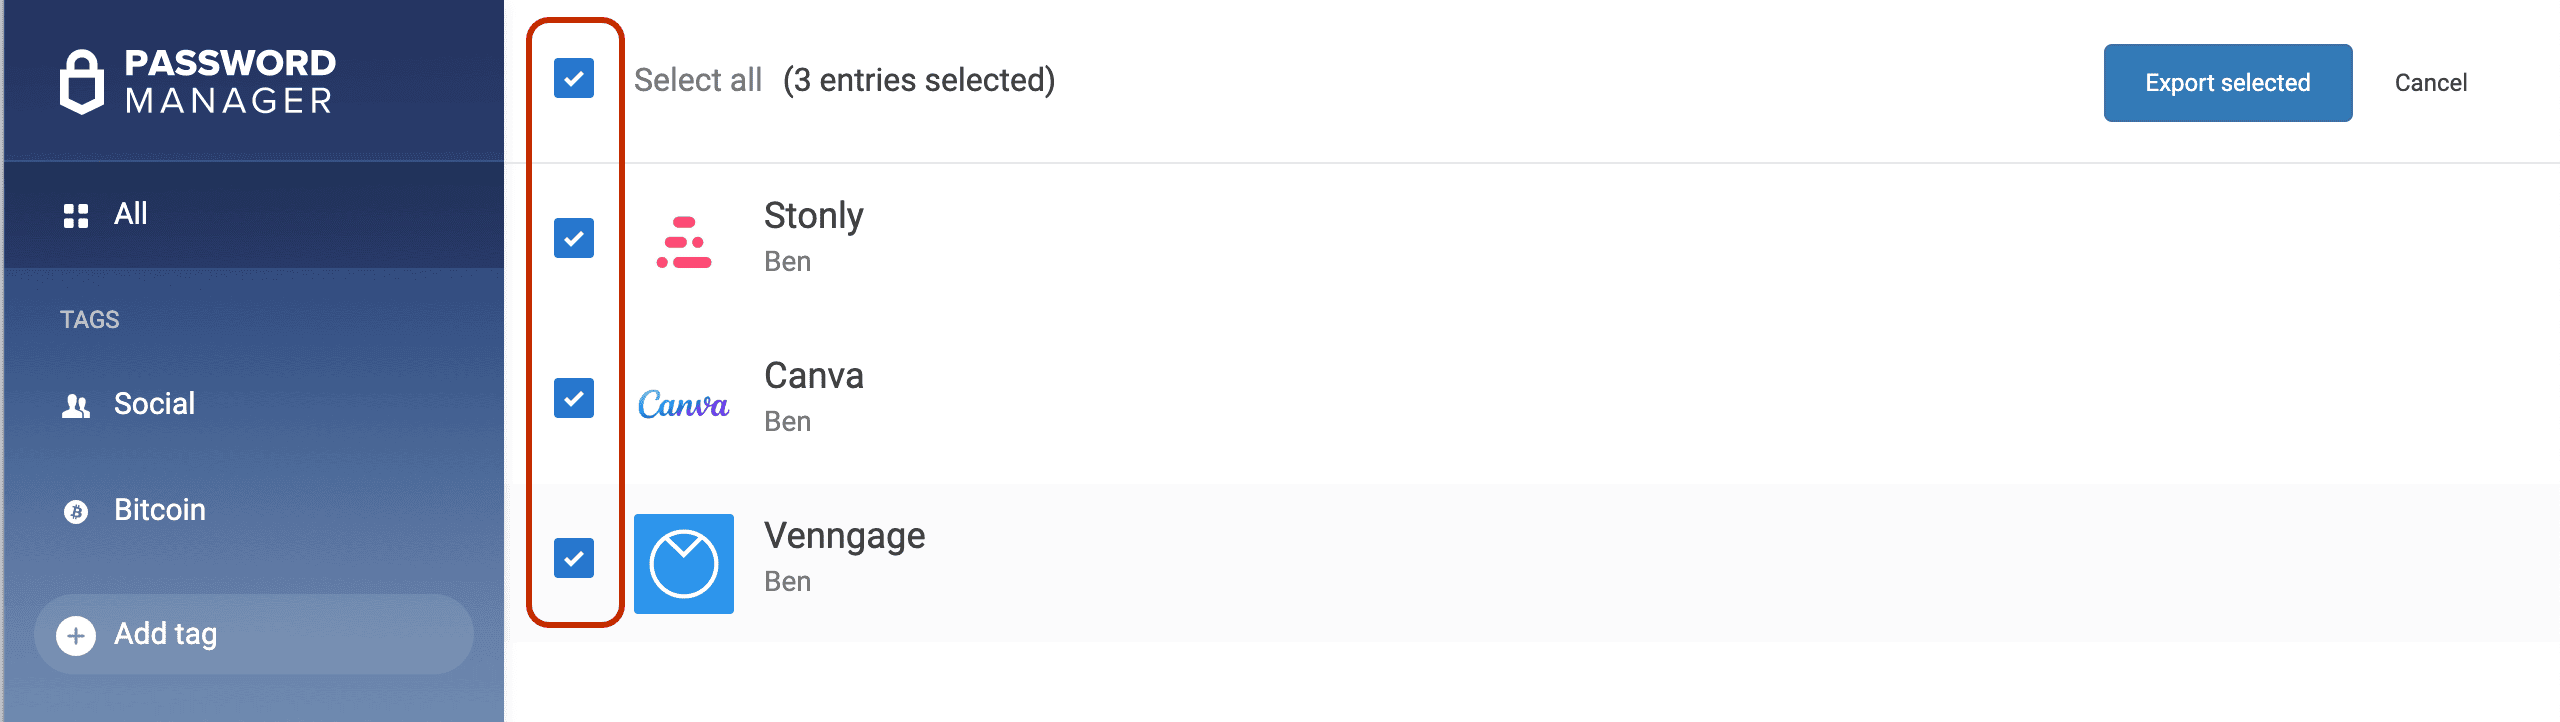
- Click on the Export selected button (top-right corner of the Trezor Password Manager window) and confirm the action using your Trezor device (you will need to approve each item export individually)
- Once completed, you will find the ‘trezor-export.csv’ file in your Downloads folder
The .csv file can be inspected using standard spreadsheet software.
Importing login credentials to a new service
Once you’ve downloaded your data, you can then import you login credentials to an alternative password manager such as Bitwarden or 1Password.
- Create an account with the software provider of your choice (in this example we use Bitwarden)
- Login in to the Bitwarden web vault at https://vault.bitwarden.com
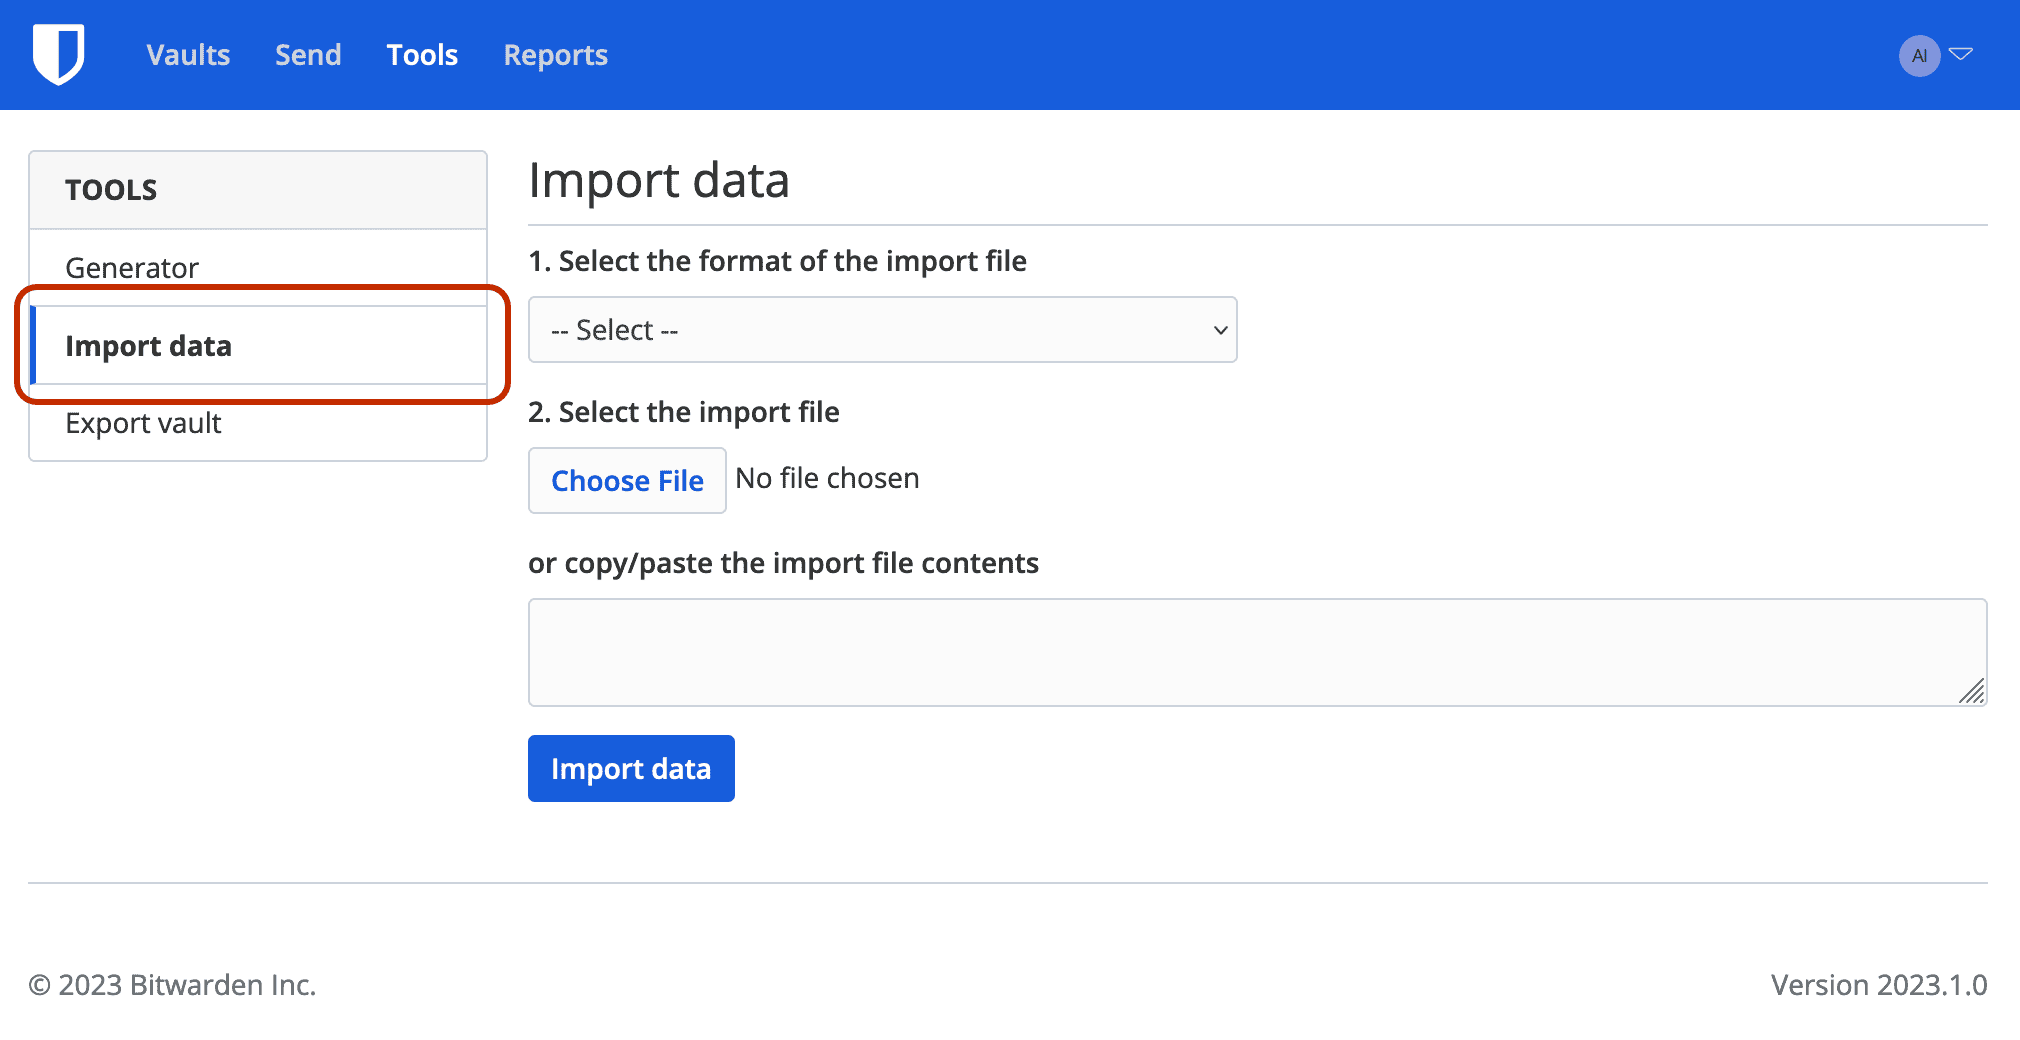
- Select Tools from the menu bar:
- Then select Import data in the Tools sidebar menu:
- Using the drop-down menu, select LastPass (csv) as the file format (Trezor Password Manager file format mirrors that of LastPass):
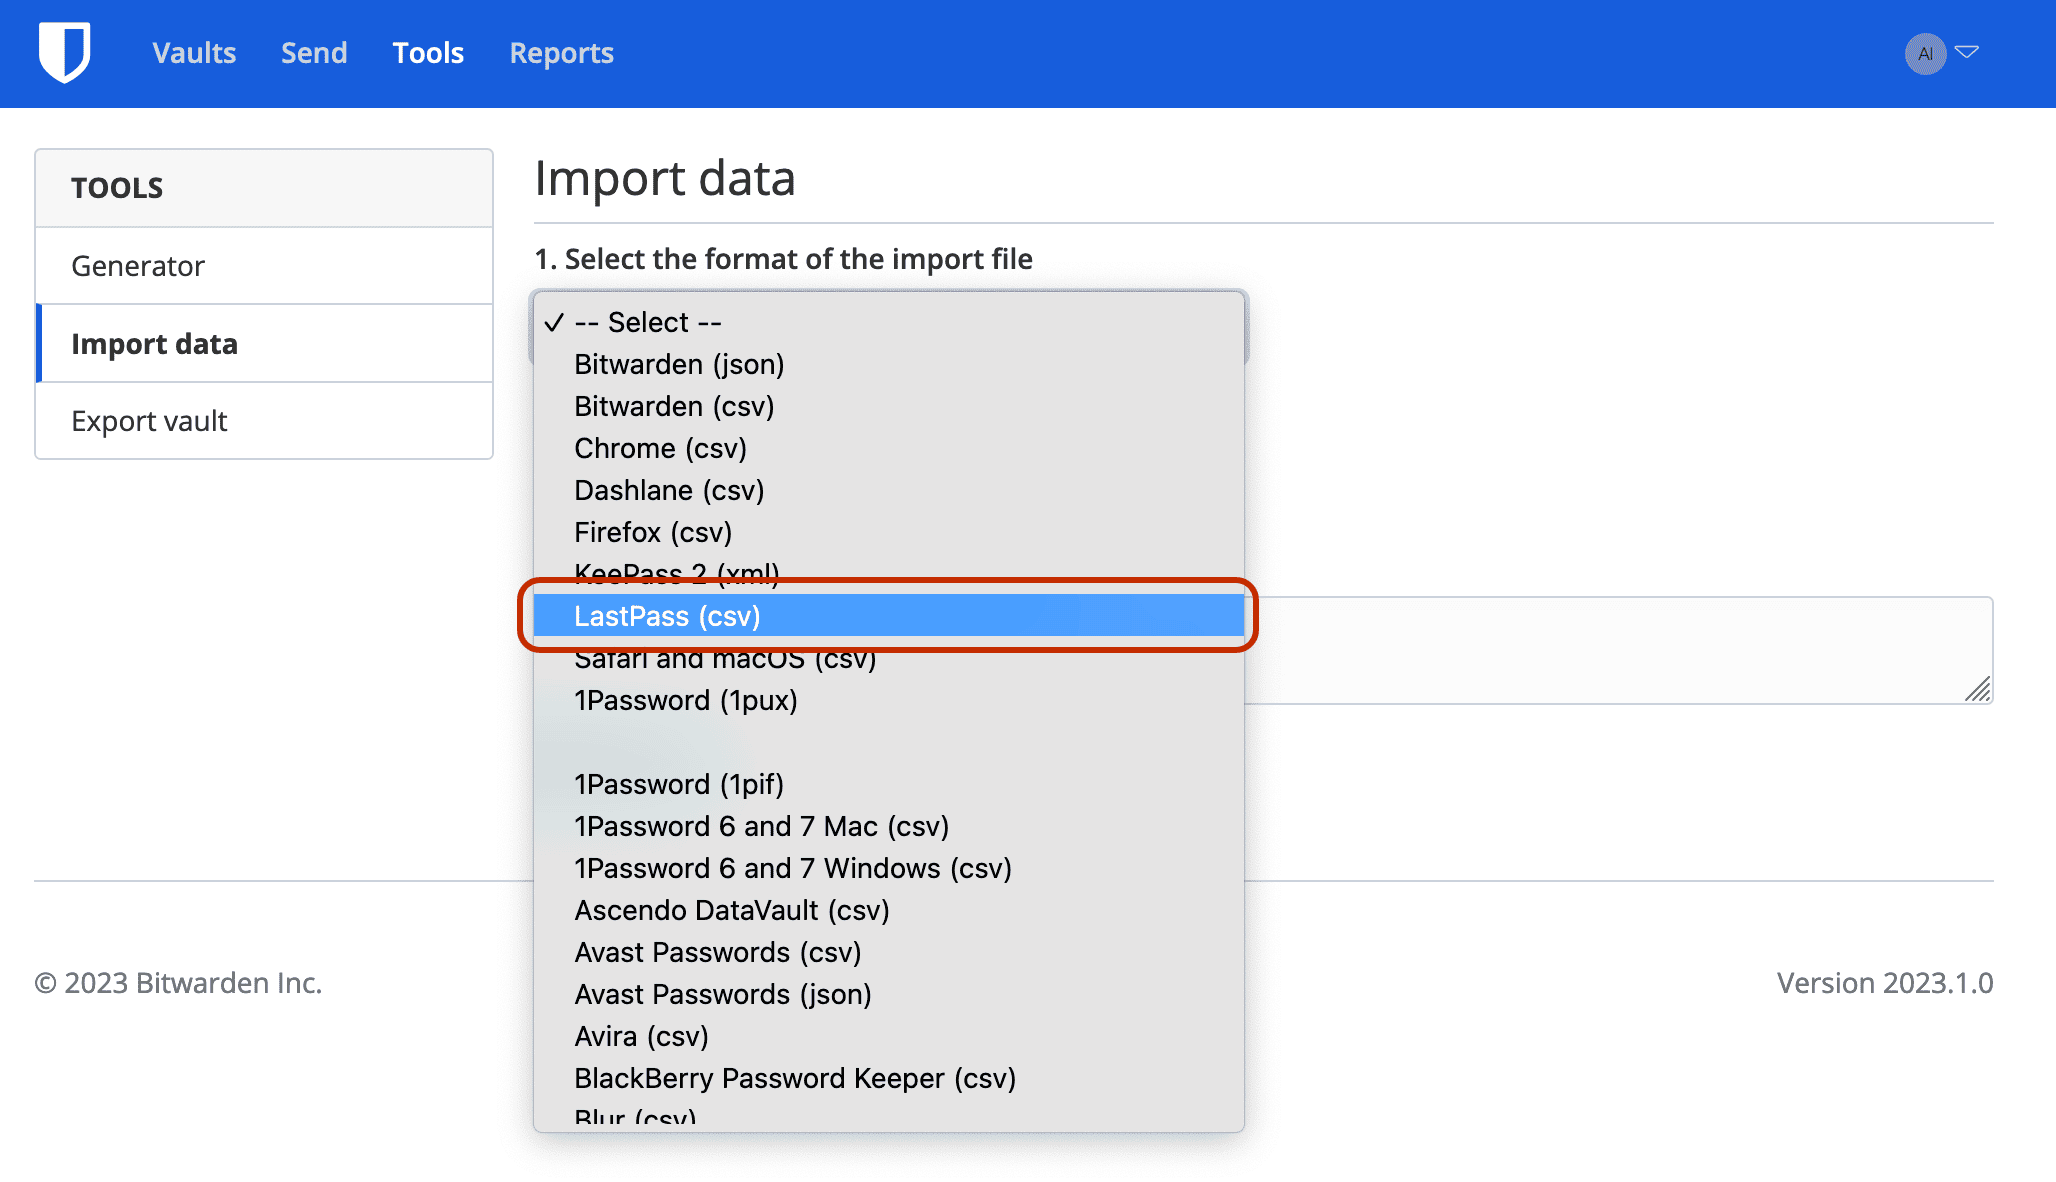
- Click the Choose File button to open the file upload window; select the trezor-export.csv file
- Then click on Import data to import your login credentials:
Following a successful import, we recommend deleting the .csv file so that you do not have sensitive information stored on your computer.
This is just one example of how to transfer your login details from Trezor Password Manager to an alternative provider. Each password manager provides their own how-to guides for importing csv files (plus many other file types) on their respective web pages:
[The original Trezor Password Manager content now follows]
Introduction to password managers
A password manager helps users to generate and store complex and secure passwords. Password managers are a convenient solution to store a large amount of difficult-to-remember passwords under one master password. The master password is used to unlock access to all encrypted passwords.
The Trezor Password Manager allows you to use your Trezor device as a password manager. It does not require remembering one master password, as access is granted by pressing the physical button on your Trezor device.
Your passwords are stored on Dropbox in an encrypted form using encryption keys derived and safely stored in your Trezor. The passwords are selectively decrypted on demand when needed. Note that all data stored on your Trezor device is derived from your recovery seed, which is an essential part of your wallet backup.
Setting up your Trezor Password Manager
Trezor Password Manager works with Chrome and cross-platform on your MacOS, Windows, and Linux. To set it up, follow the steps below.
Install the Trezor Password Manager Chrome extension (TPM)
Add the Trezor Password Manager Chrome extension into your browser. Then click on the Trezor icon in the top right corner of your browser.
Sign in with Dropbox
Click on 'Sign in with Dropbox' and log in with your account. If you do not have a Dropbox account yet, you can create one for free. If logging in with Dropbox, give your Trezor permission to create a folder in your Dropbox to store all the passwords and confirm. Do not worry, the passwords in your Dropbox will be encrypted and inaccessible without your Trezor.
How do Trezor and Dropbox work together?
Trezor Password Manager creates the folder “/Apps/Trezor Password Manager/” in your Dropbox and stores each password entry in an encrypted ".pswd" file.
All files are encrypted using keys derived from your Trezor. It is not possible for anyone else to access your passwords nor to make any edits.
Connect Your Trezor device and enter your PIN
Enter the PIN you set up during device initialization.
Enable Password Manager on your Trezor device
Each password is encrypted separately after the Password Manager is enabled. Congratulations! You are ready to use Trezor Password Manager.
Tags
- Tags are used to filter and find your passwords easily. You can add and remove tags according to your needs.
- The overview of your tags is in the left pane. You can edit the name and the icon of the tag
To create a new tag:
- Click the 'Add tag' button at the bottom of your list of tags:
- Write down the name.
- Switch between the list of available icons by using little blue arrows.
- When done, click on 'Save'
If you wish to edit an existing tag, click on its name and edit or remove the tag by navigating through the three dots on the right.
Add a password entry
To add a new password please click on 'Add entry':
- URL: Enter the login URL of the service.
- Title: Keep the same as the URL or rename if needed (e.g., to identify several accounts with the same service.)
- Username: Enter your username.
- Password: Note that you can generate a new secure password.
- Tags: Select from tag list below the field.
- Secret note: Does not appear in the passwords preview and can be used for example to store your 2FA tokens.
Manage your bookmarks with Trezor Password Manager
Select 'Add Entry' and fill in the URL and Title. Consider adding a tag "bookmarks" for faster search.
Trezor Password Manager in Action
- Open to log in: Click on the entry name and a new tab with pre-filled user credentials will open. You will be asked to confirm this action on your Trezor first.
- Copy password: One click to copy the username into the clipboard. You will be asked to confirm the password on your Trezor device.
- Edit entry: To edit an entry, click on 'Edit'. You will need to confirm the action on your Trezor device.
Keyboard shortcuts
You can use some of the keyboard shortcuts below to make it easier to work with Trezor Password Manager:
- CTRL + Shift + L opens the Trezor Password Manager extension in a new tab.
- CTRL + Shift + U enters the username and password in the login form of a website (that you have stored previously with Trezor Password Manager). You will be asked to confirm this action on your Trezor.
Mac users should use the CMD key instead of CTRL.
It is also possible to fill in the username and password by right clicking on a website where you want to log in and choosing the "Log in to" option.
Remember to have your Trezor connected. Otherwise, it will not work. The little green square in the corner of the Password Manager extension icon indicates that your device is connected and that your credentials are stored for the currently open website.
Enabling and disabling Trezor Password Manager
To enable or disable Trezor Password Manager:
- Open Chrome
- At the top right, click on Customize and control Google Chrome
- Go to More tools > Extensions
- Find Trezor Password Manager and click on the toggle button to enable or disable the extension.
Export and import of passwords
The exported CSV file is in plain text and it is not encrypted, please be careful with your passwords when using this feature.
Starting with Password Manager version 0.6.3, users can export or import the passwords to or from third-party password manager services. To export or import passwords, click on the account in the right top corner in the Password Manager and choose import or export.
During export, it is possible to export only selected passwords. The CSV file does not have a header. The columns in the exported file are as follows:
URL, Title, Username, Password, Tags, Secret note
When importing your passwords from third-party services, it is possible to sort your CSV columns by type.