Backpack and Trezor
What is Backpack?
Backpack Wallet is an all-in-one open source web3 app that functions as a noncustodial wallet, allowing users to buy, hold, sell, and transfer cryptocurrencies. For Solana users, the Backpack app provides the ability to store, send, receive, and stake SOL (the primary currency of Solana) and other Solana-based tokens. Backpack can also connect with various decentralized applications (dApps) through its web3 browser, ensuring a convenient experience when interacting with Solana and other supported networks. For additional information on Backpack Wallet, visit their support discord group.
On Trezor Model One only pairing Backpack with the Ethereum mainnet is supported.
This guide is tailored for using your Solana account with Backpack; you can also use Backpack for managing assets on an Ethereum account.
Trezor Suite also includes WalletConnect, which works with many DeFi protocols on Ethereum and other EVM-compatible applications so long as they are supported by Trezor Suite.
How to use Backpack with Trezor?
- Download the latest version of Backpack for Google Chrome browser. After downloading the app, you will need to pair it with your Trezor device.
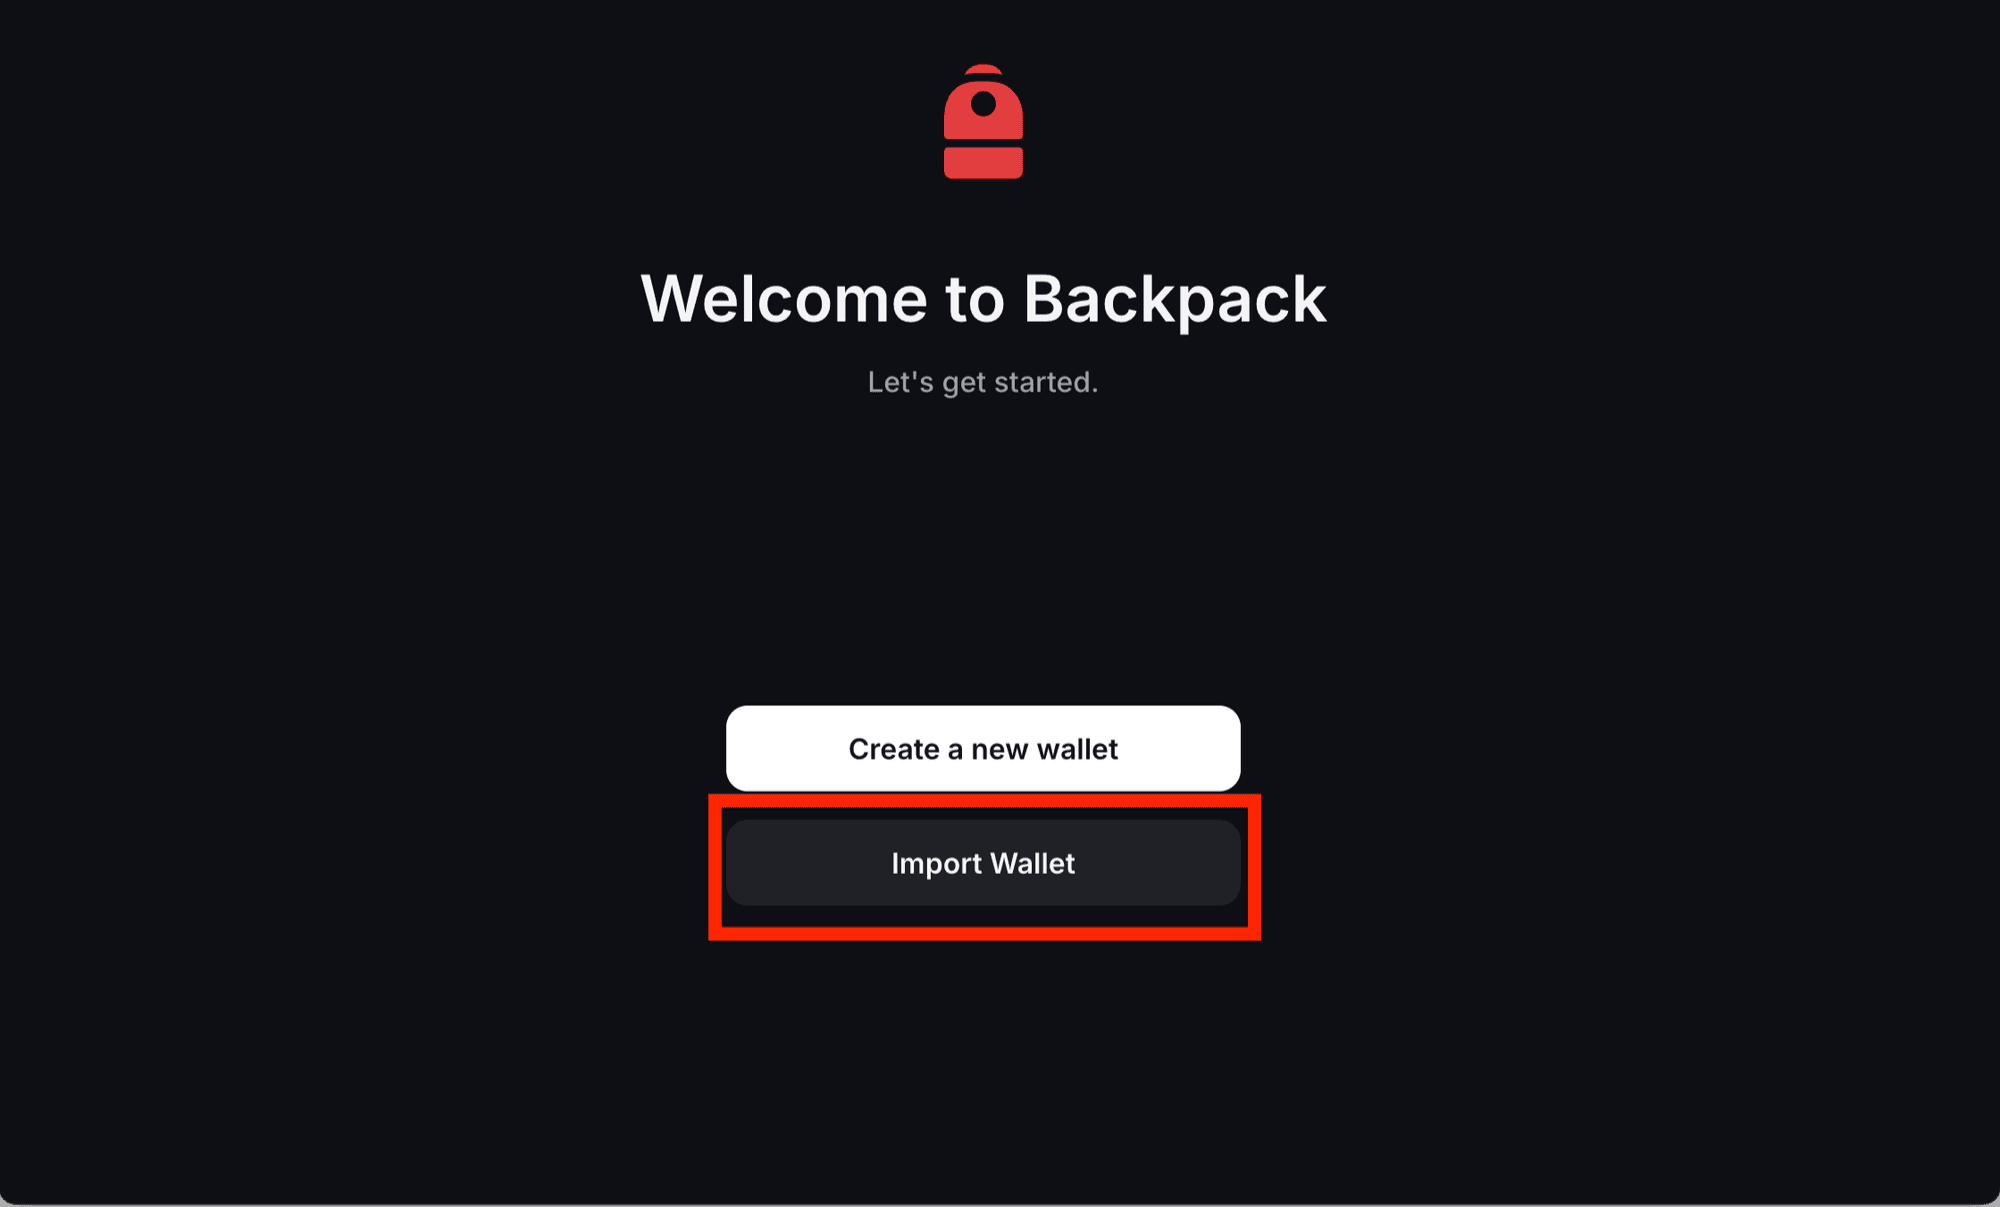
- Open Backpack
- Select Import Wallet:
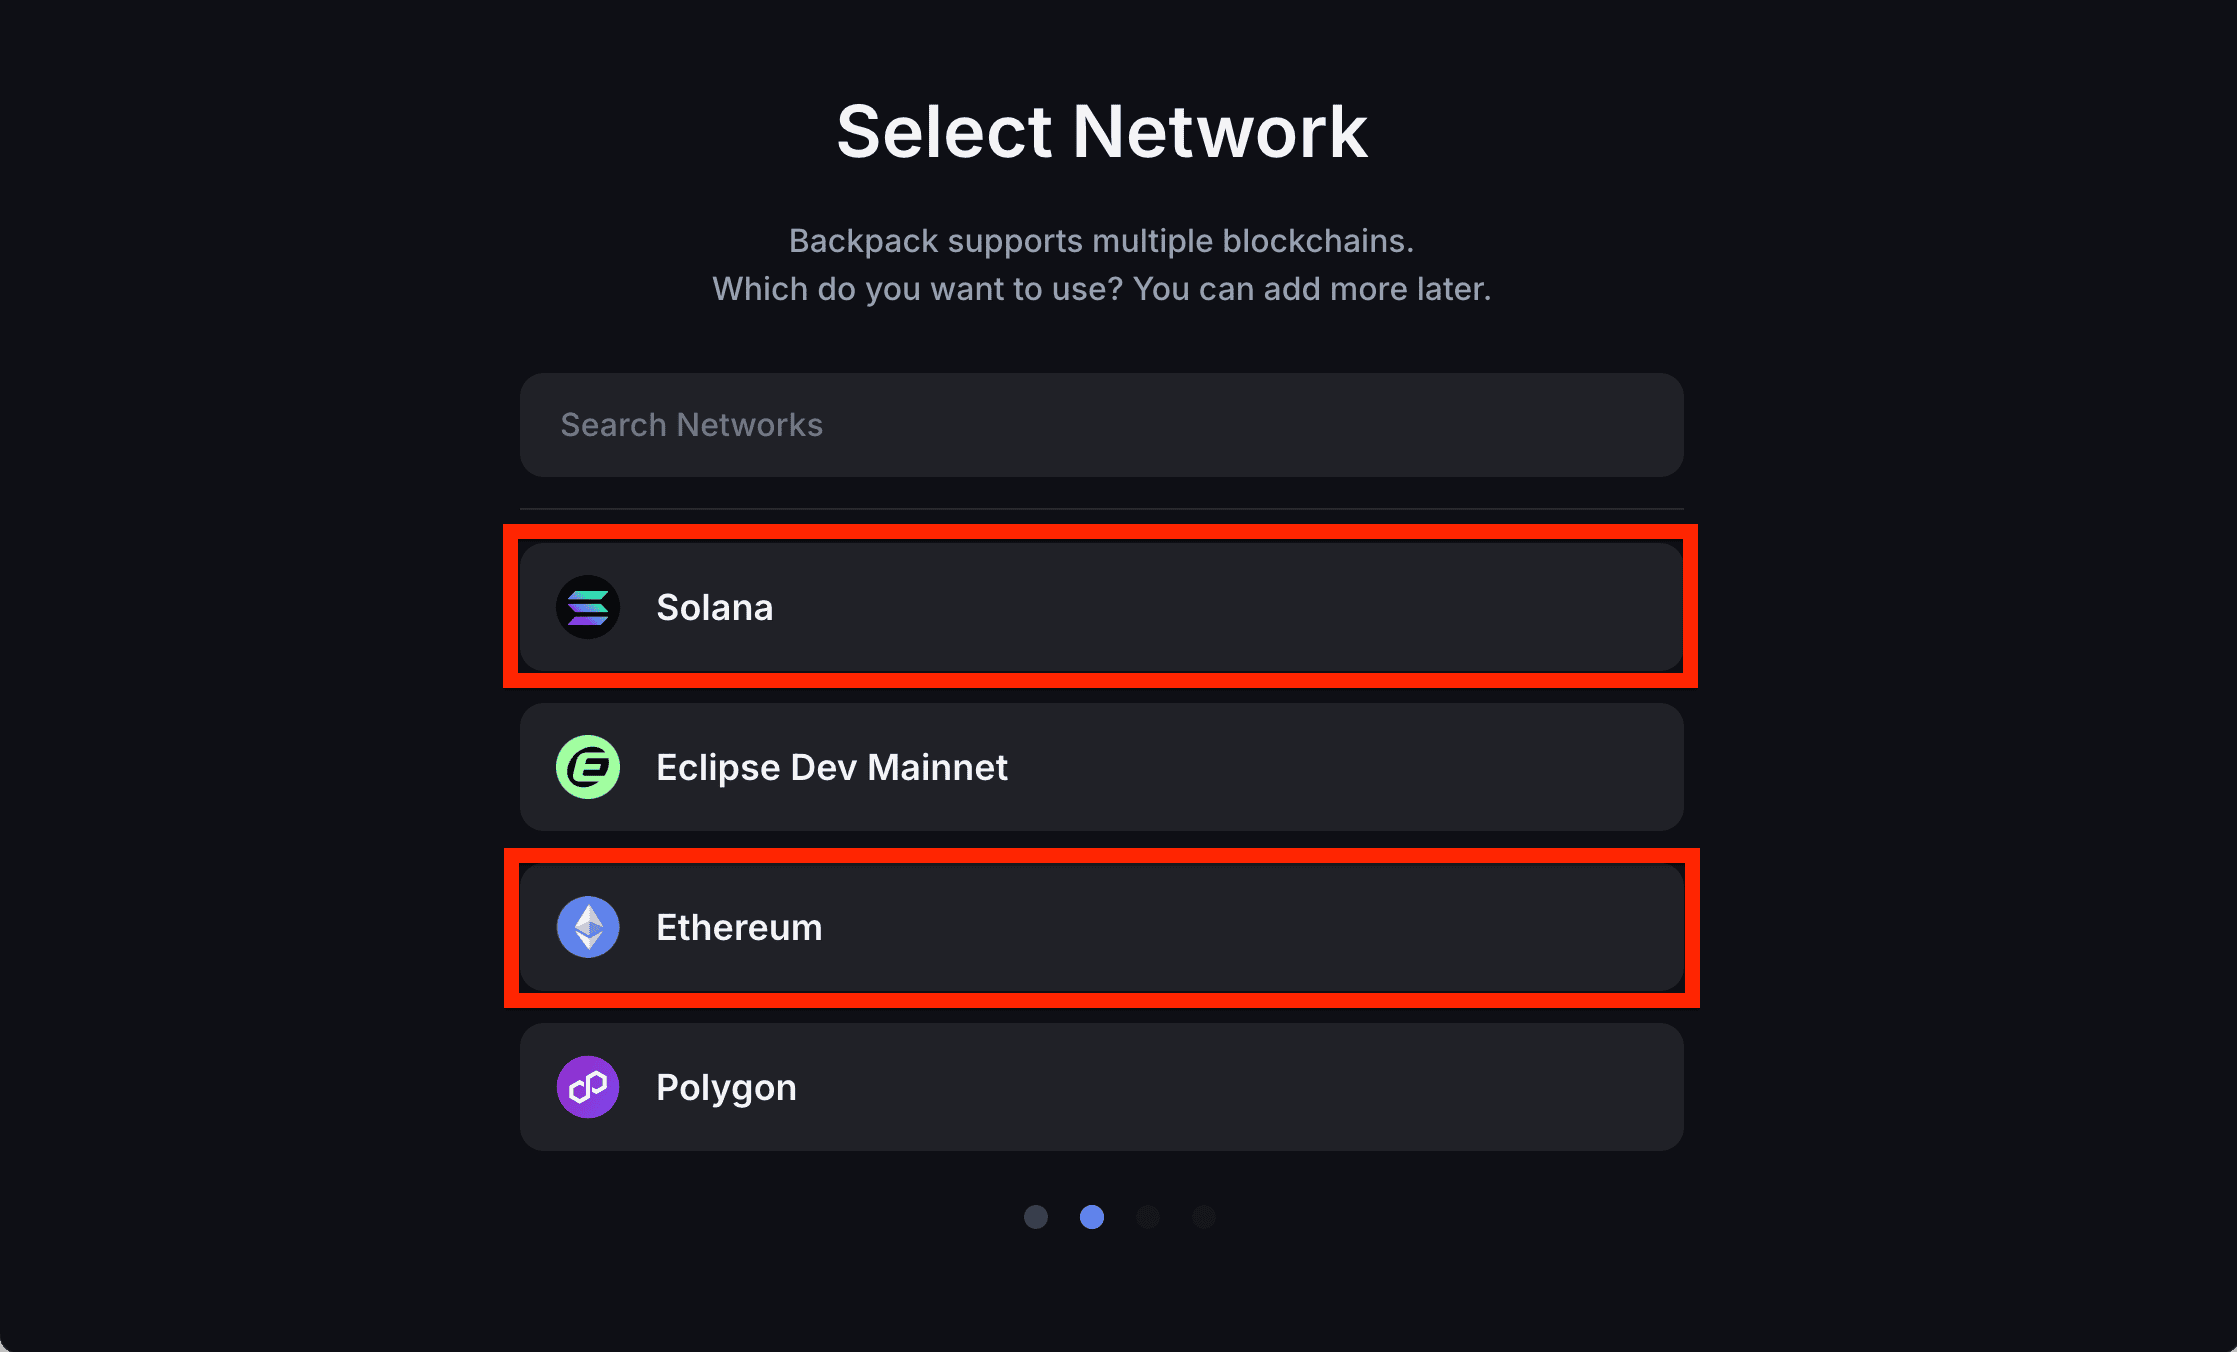
- Select your preferred network, Solana or Ethereum (you can always add the other one later by switching between wallets and networks):
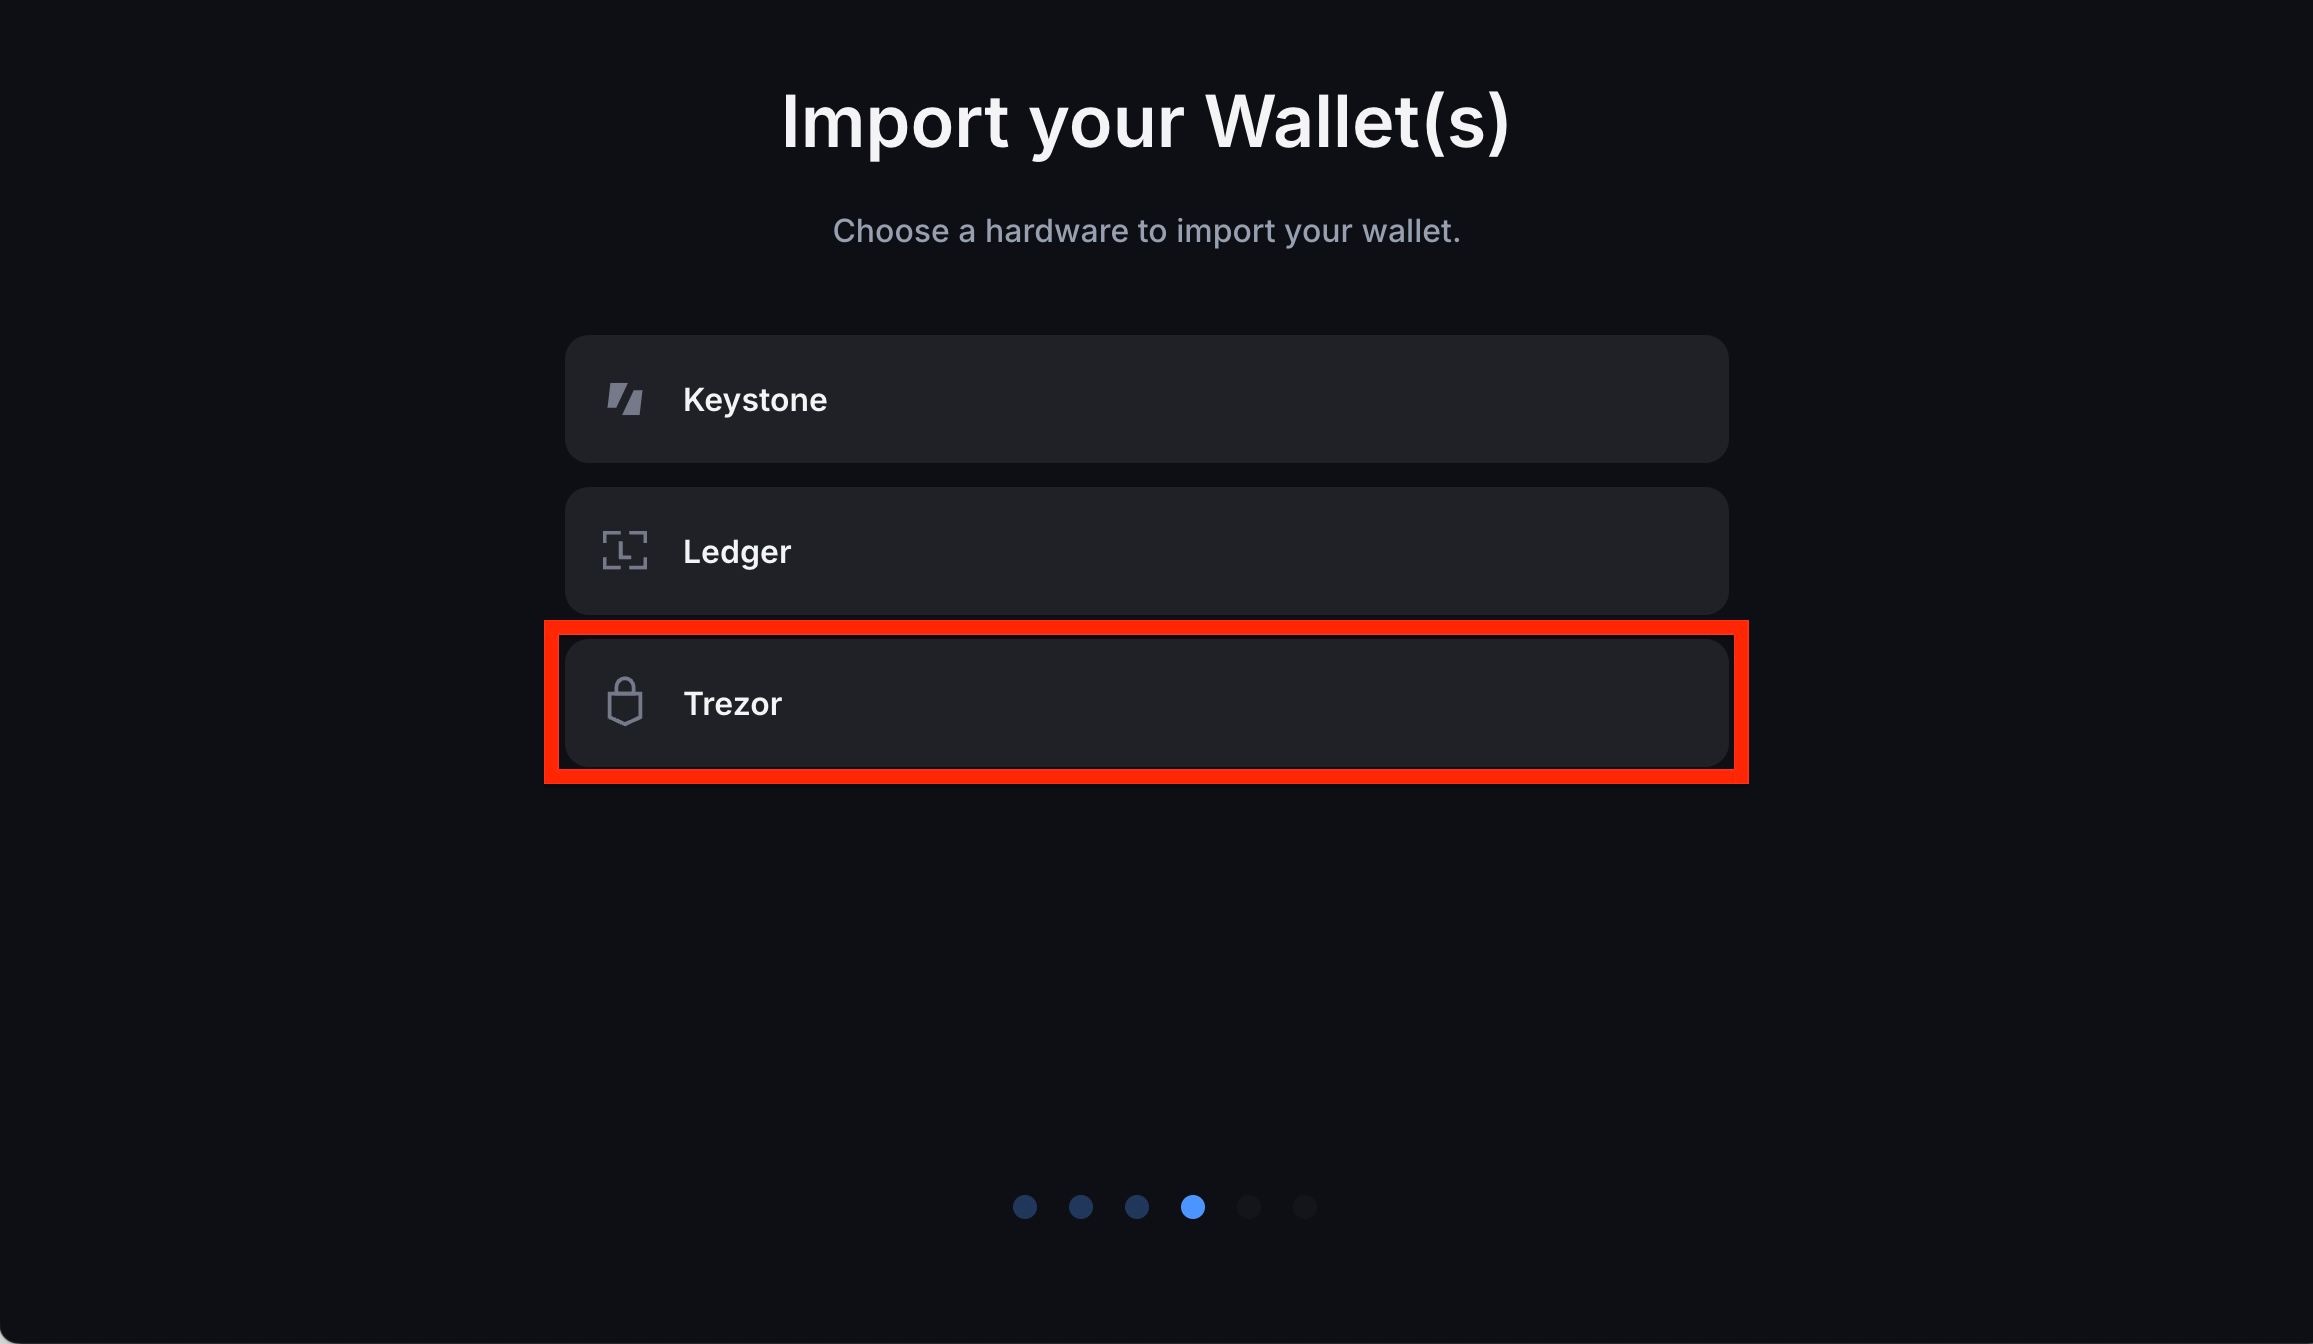
- Select Use a hardware wallet:

- Import Trezor as your hardware wallet:
- A Trezor Connect prompt will then pop up asking for permissions. Select the Allow option.
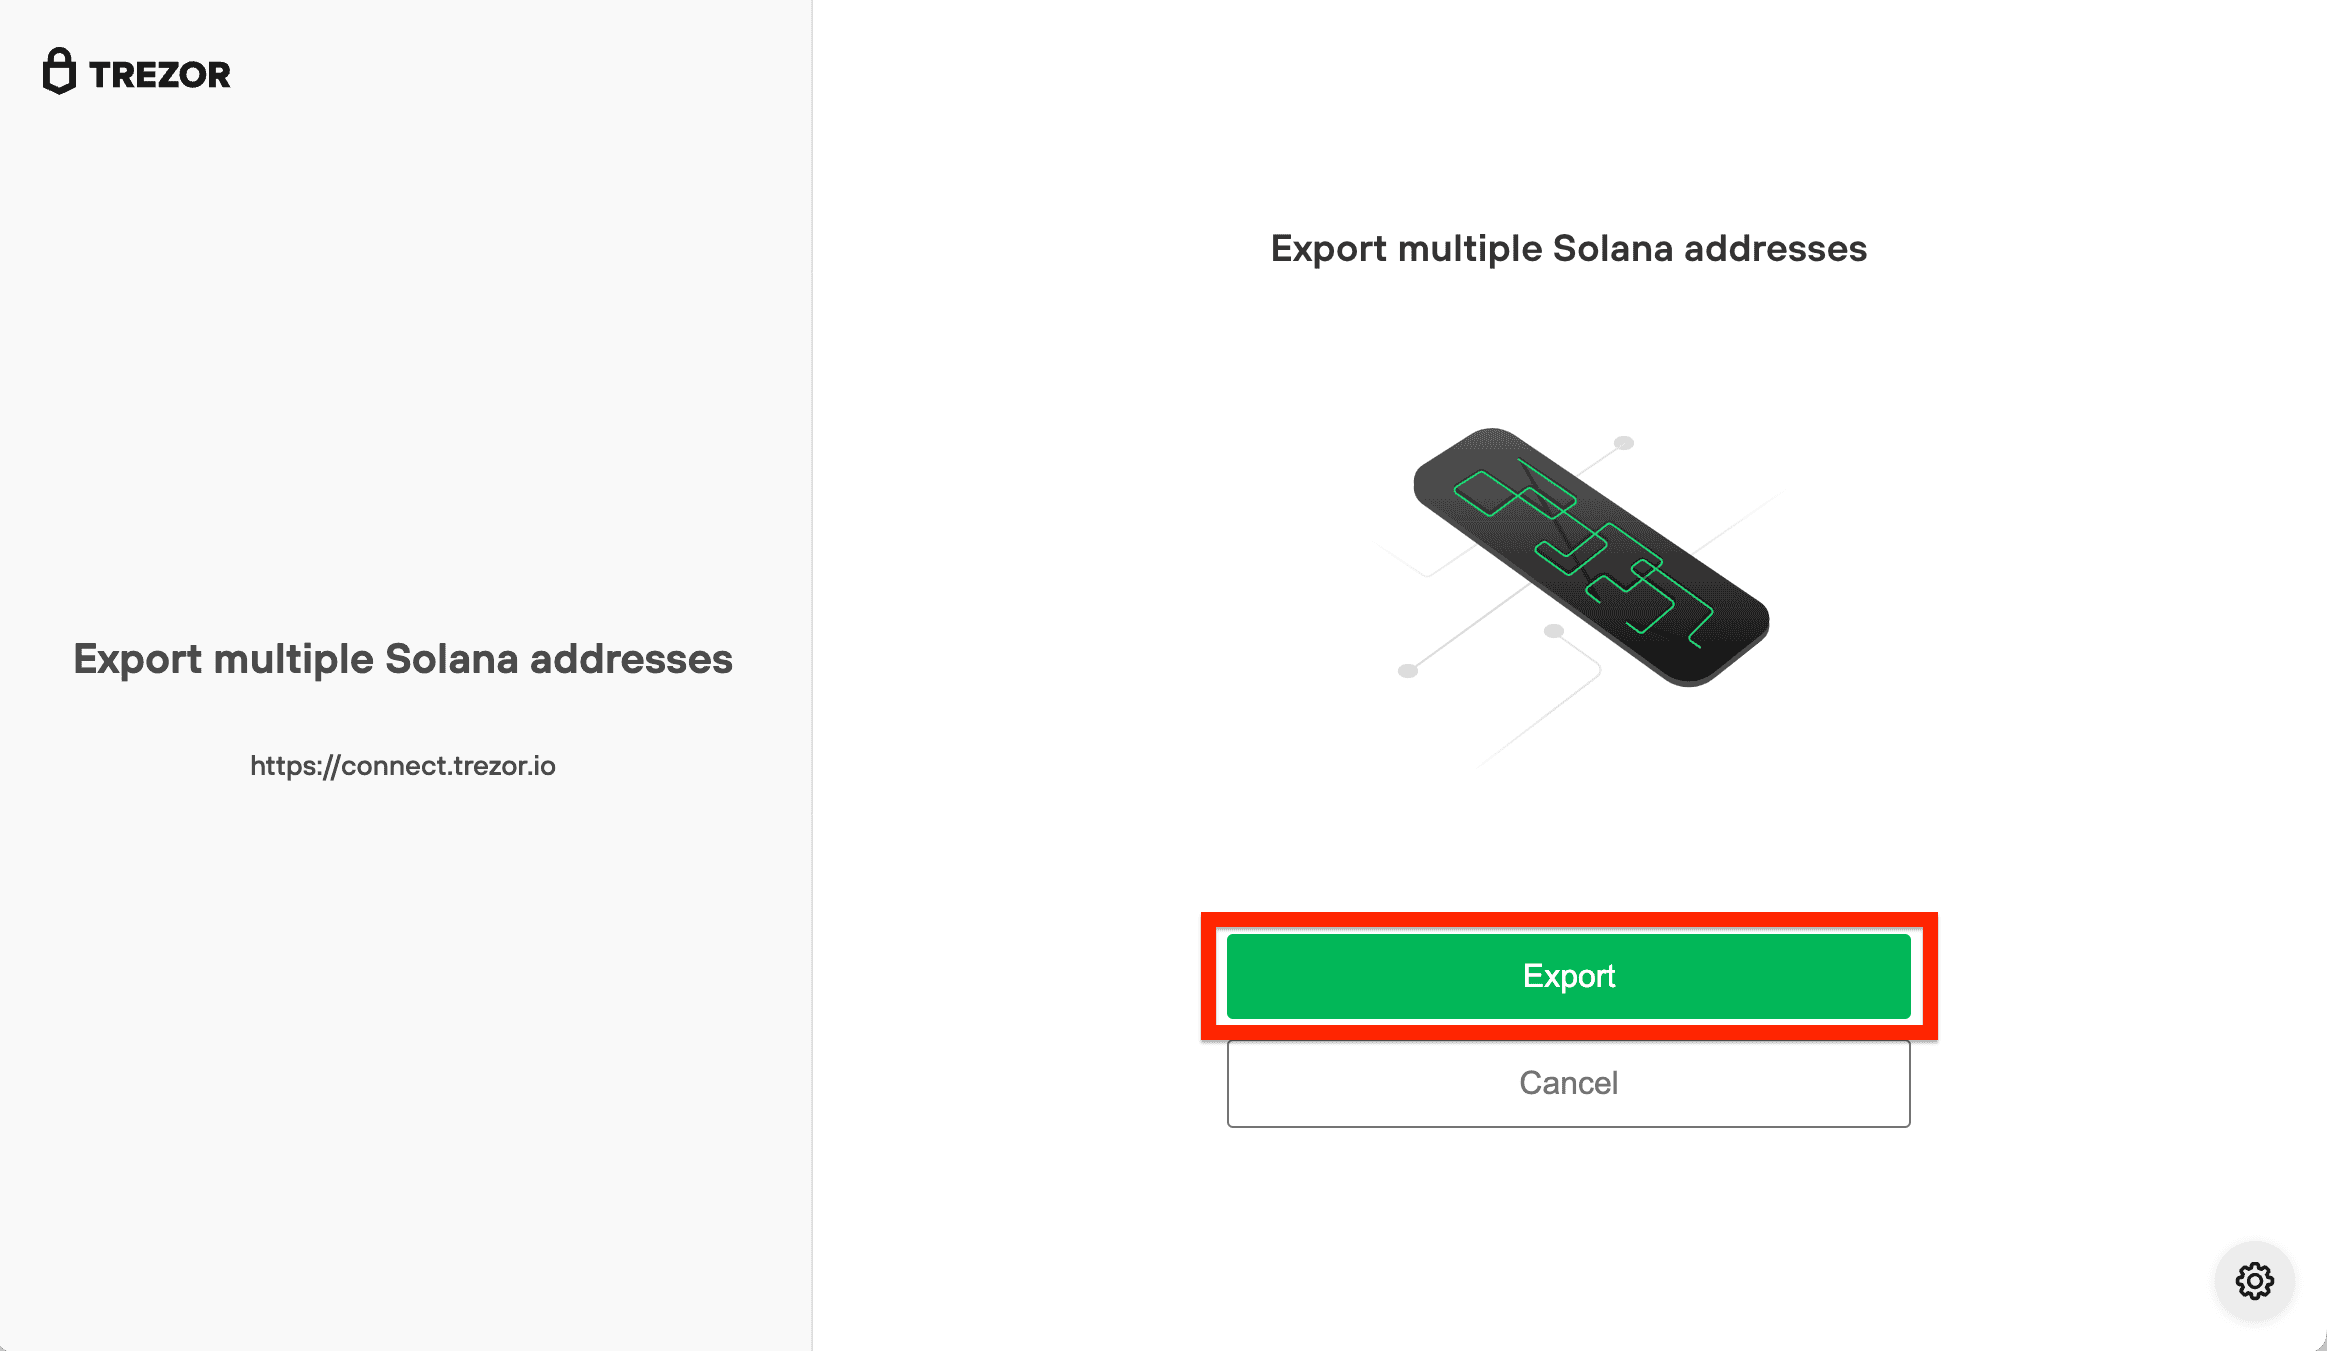
- Then another popup will appear with a request to export the public key. Select Export:
- Now you have the ability to select what type of Trezor wallet you are using. If you are using a standard wallet, click on Standard Wallet.
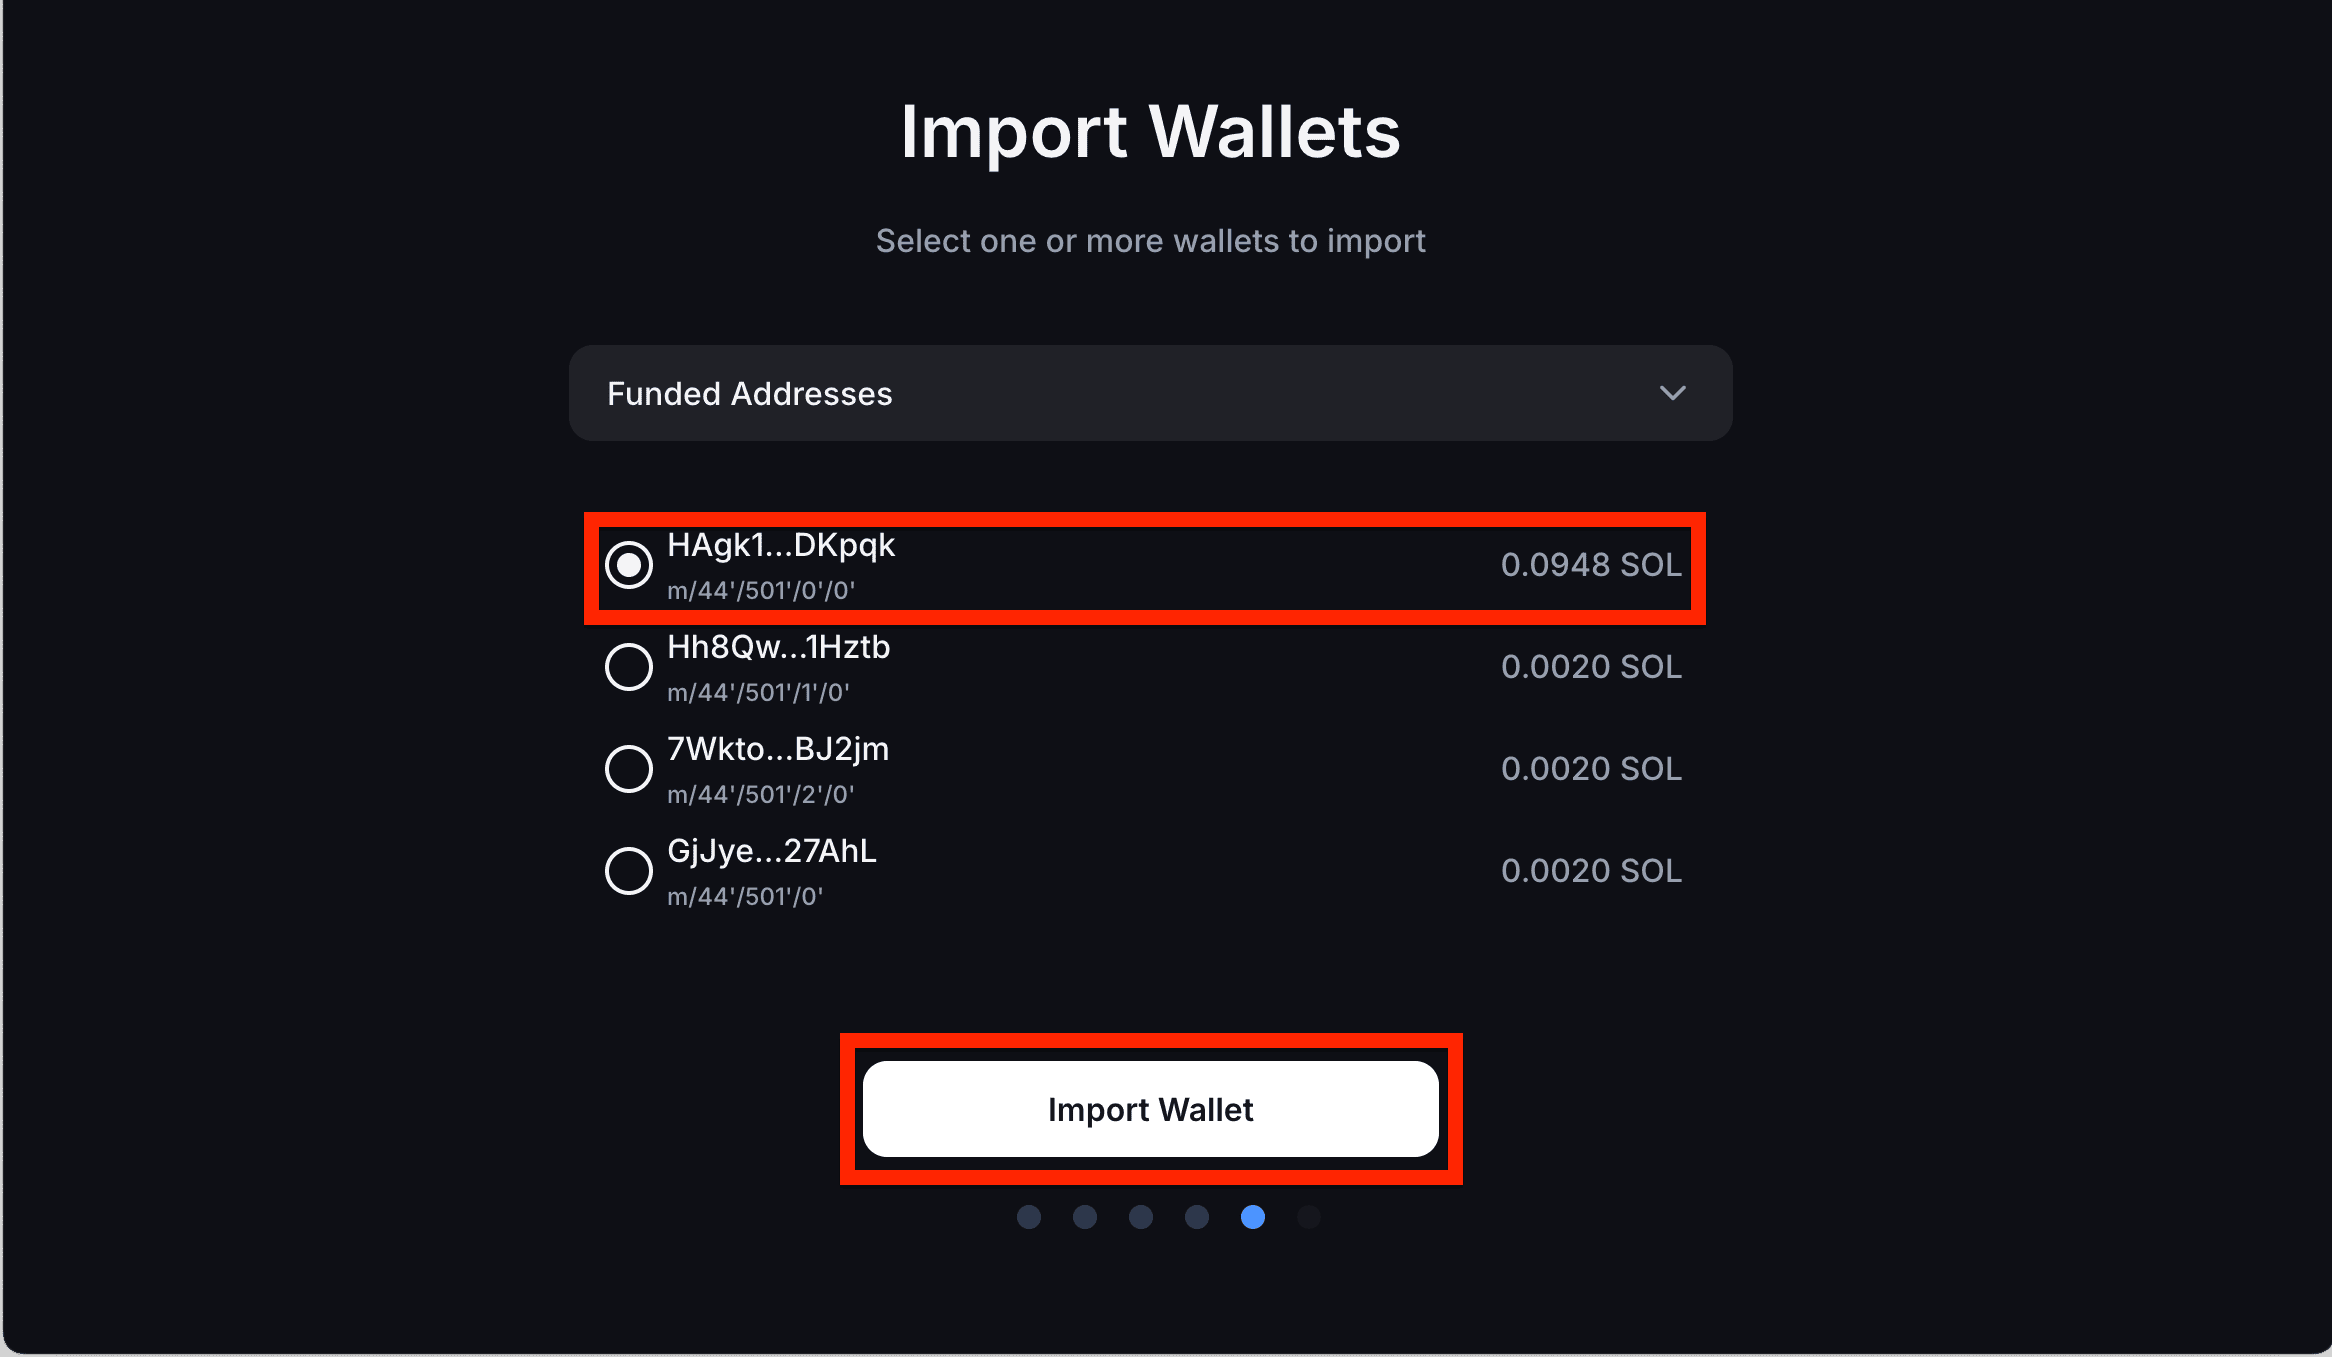
- Now you need to select your public Solana addresses that you want to share with Backpack. If you do not have funds, it is recommended to select the first one, and then click Import Wallet:
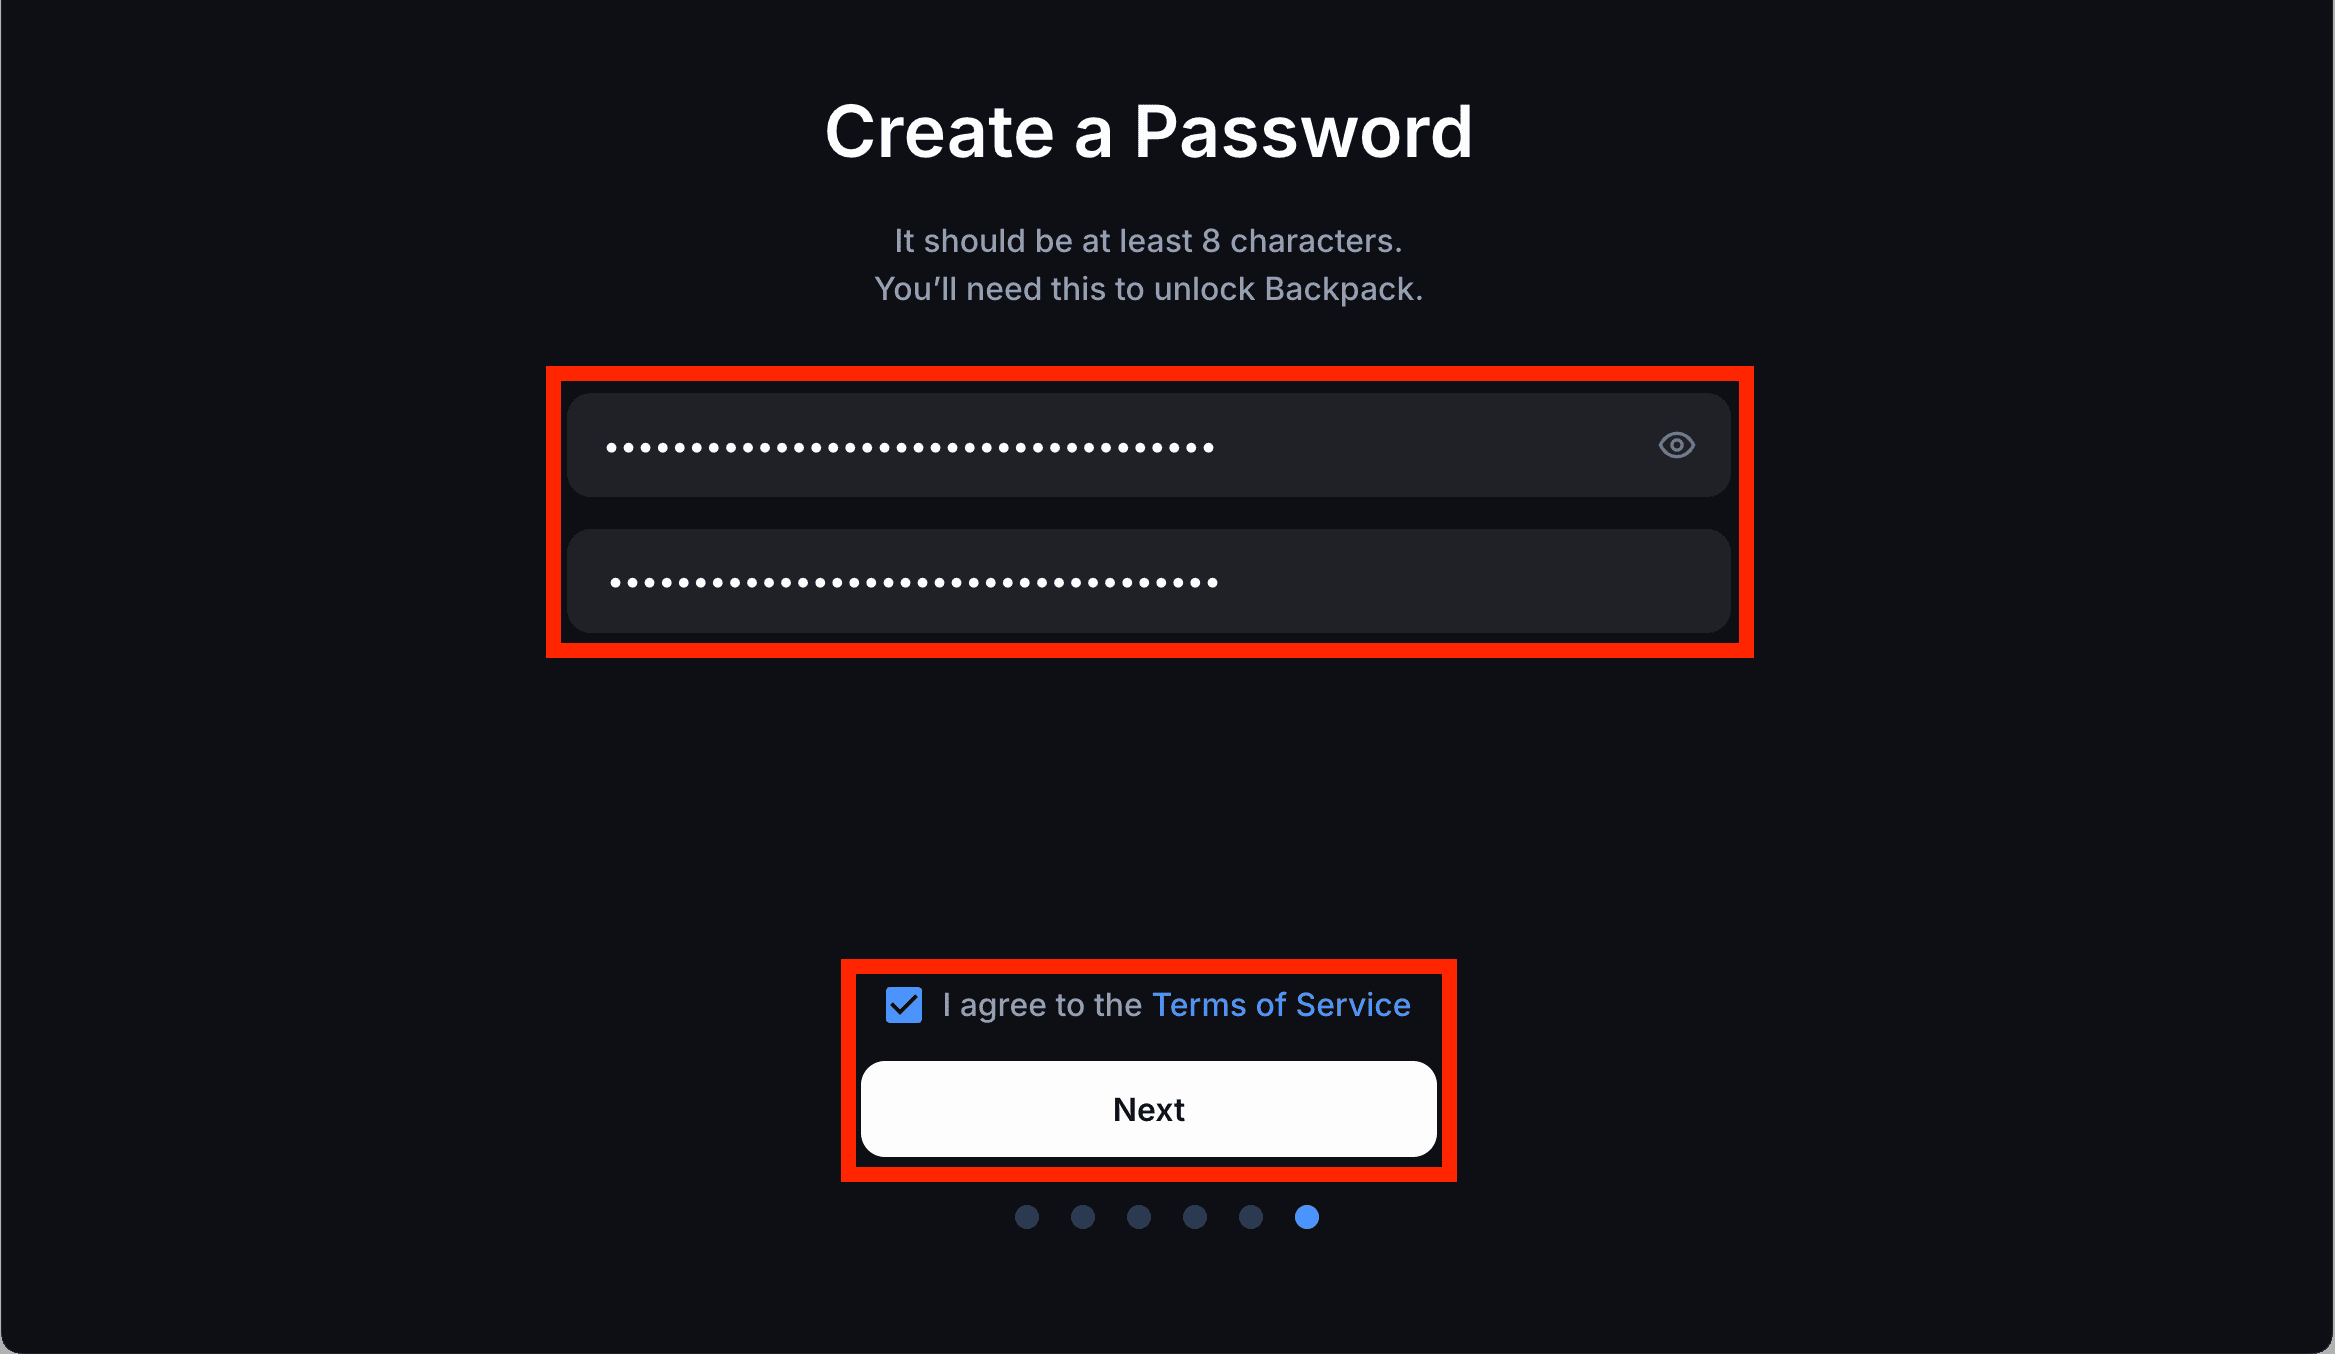
- Create a password, which is used every time you access Backpack, then review and agree to Backpack’s Terms of Service via the link and checkbox at the bottom of the screen, and click the Next button below it:
- Click Open Backpack:
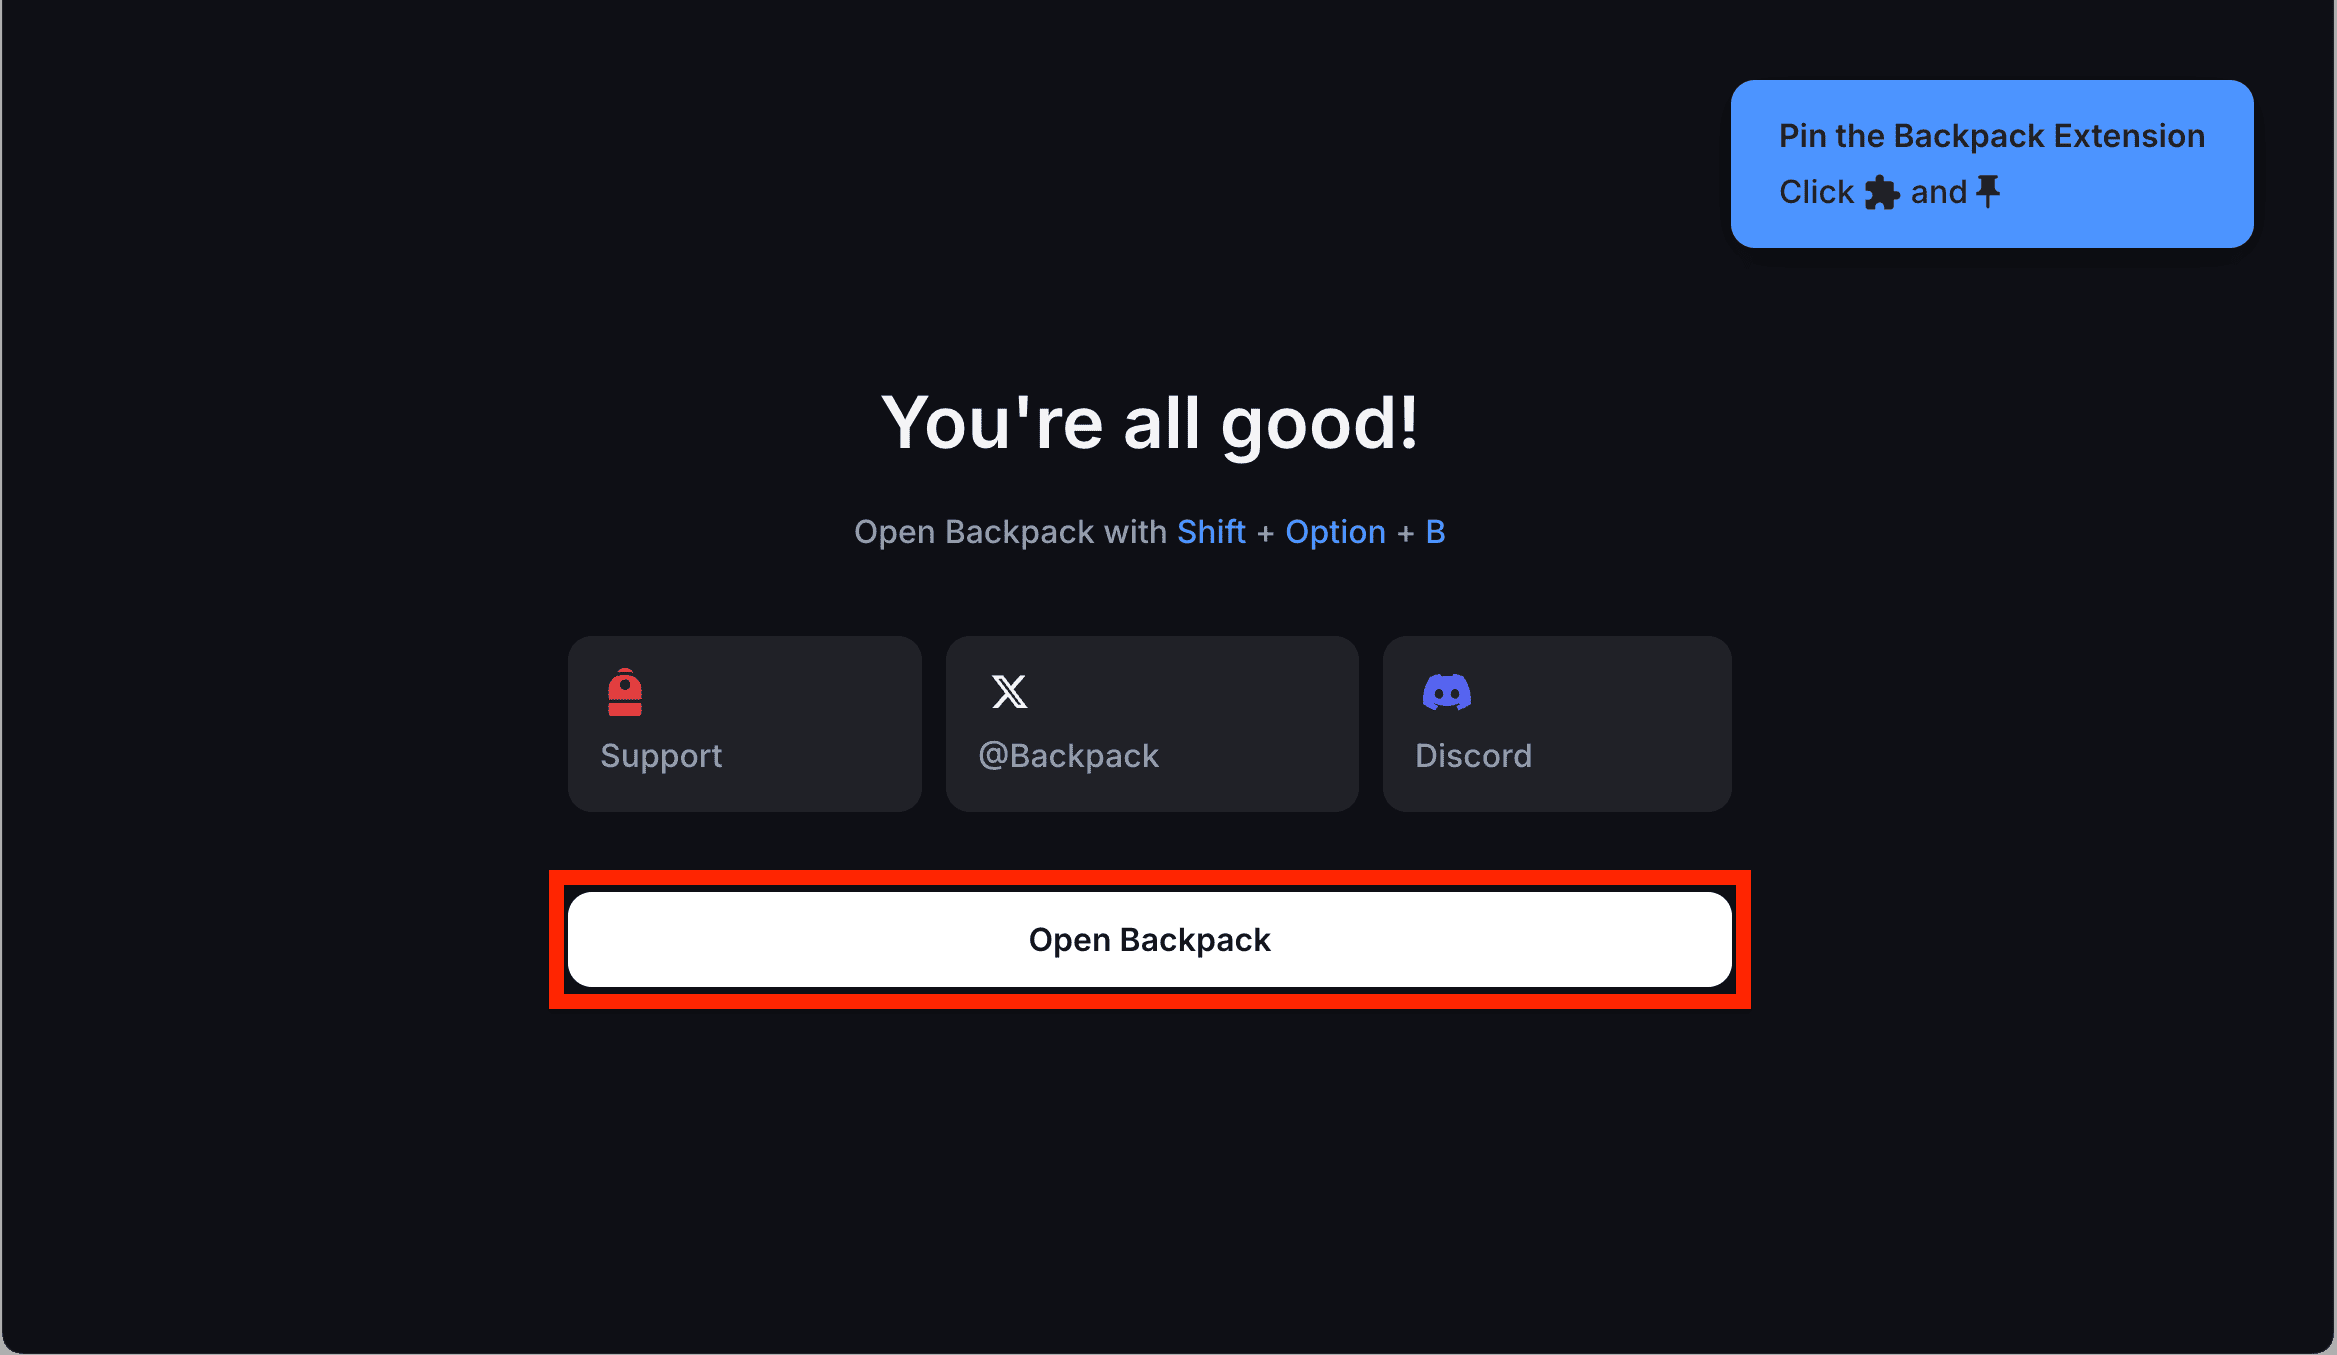
- Backpack will open as a popup window.
- Congratulations, You have connected your Trezor with Backup!
- Note that when connected with Trezor, Backpack needs to be used as a separate popup, it is not available directly in the browser.
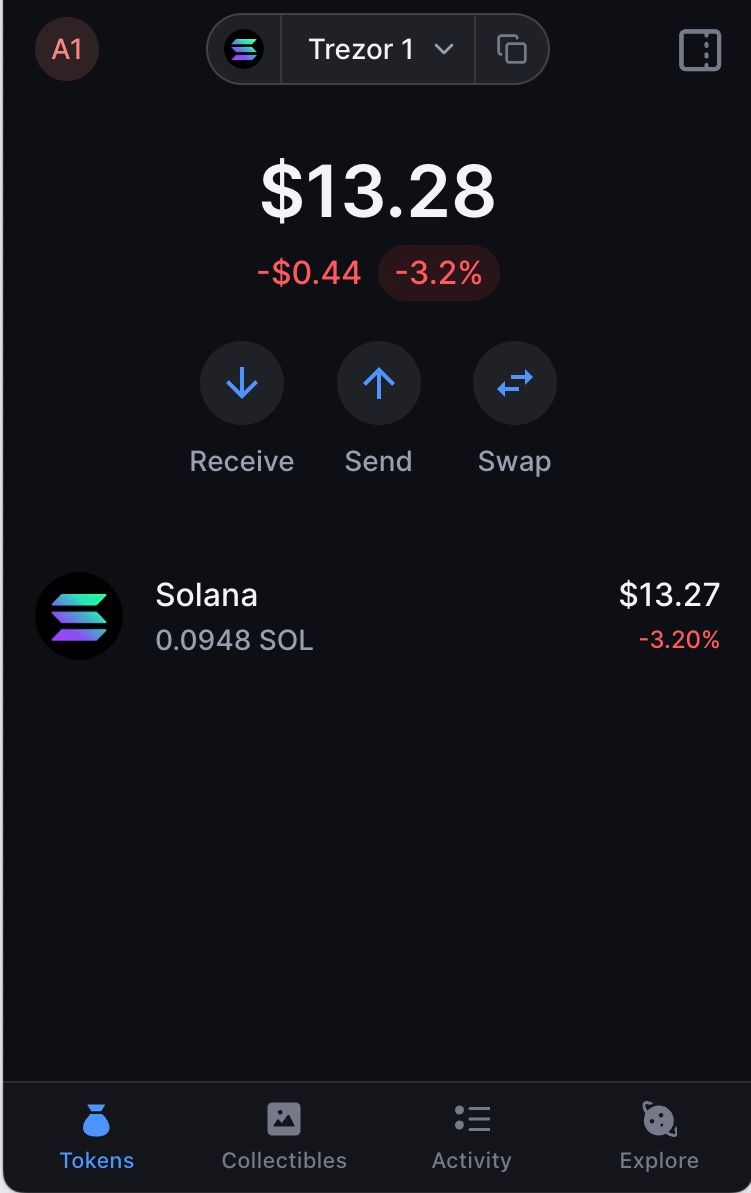
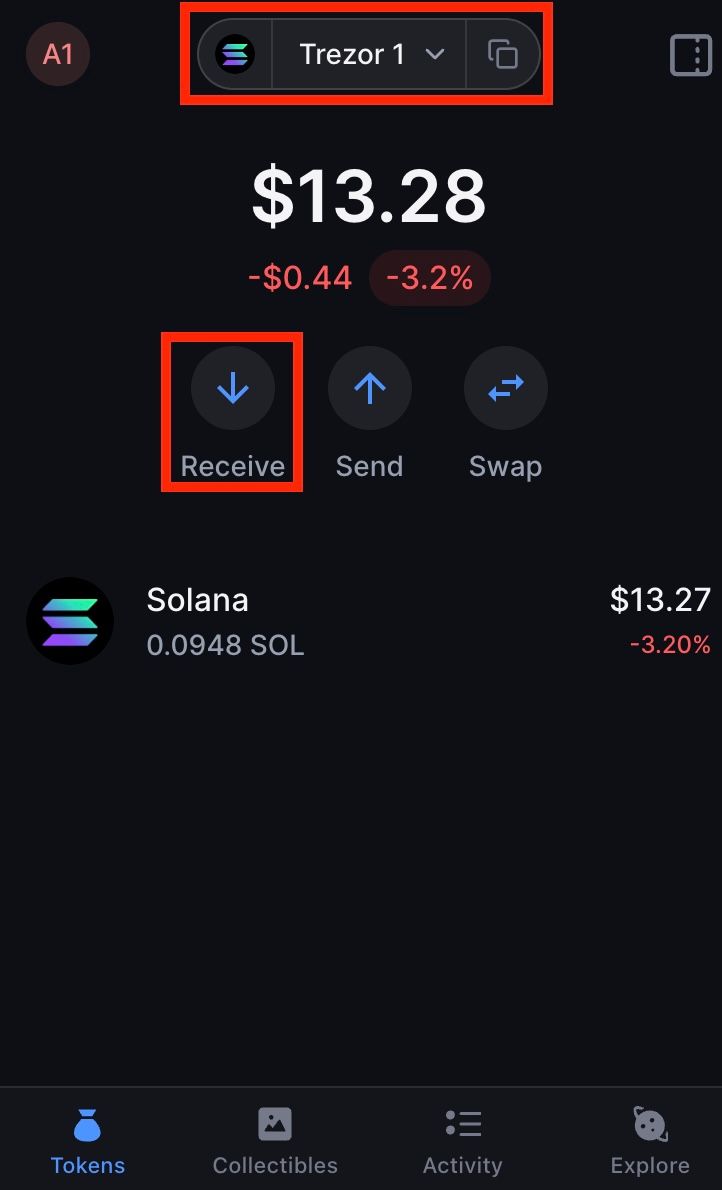
How to Receive a Transaction?
Select the appropriate account and network at the top of Backpack, then click on Receive:
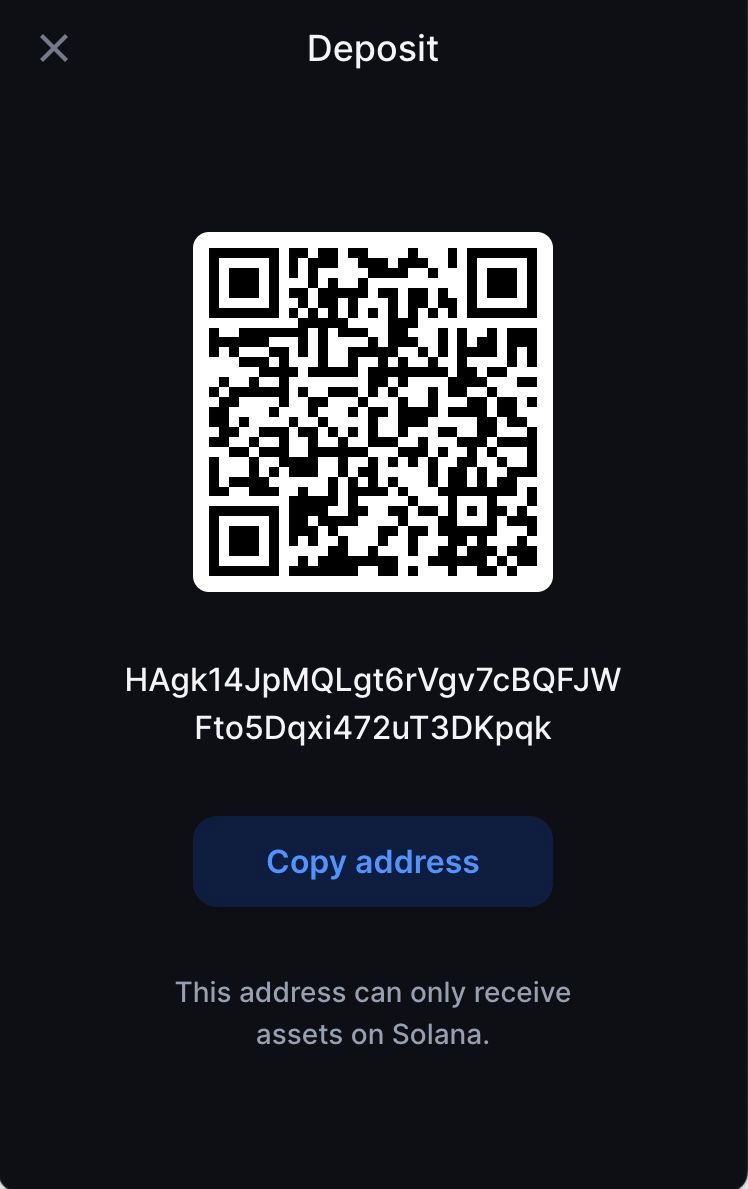
- Click on Copy address or scan the QR code:
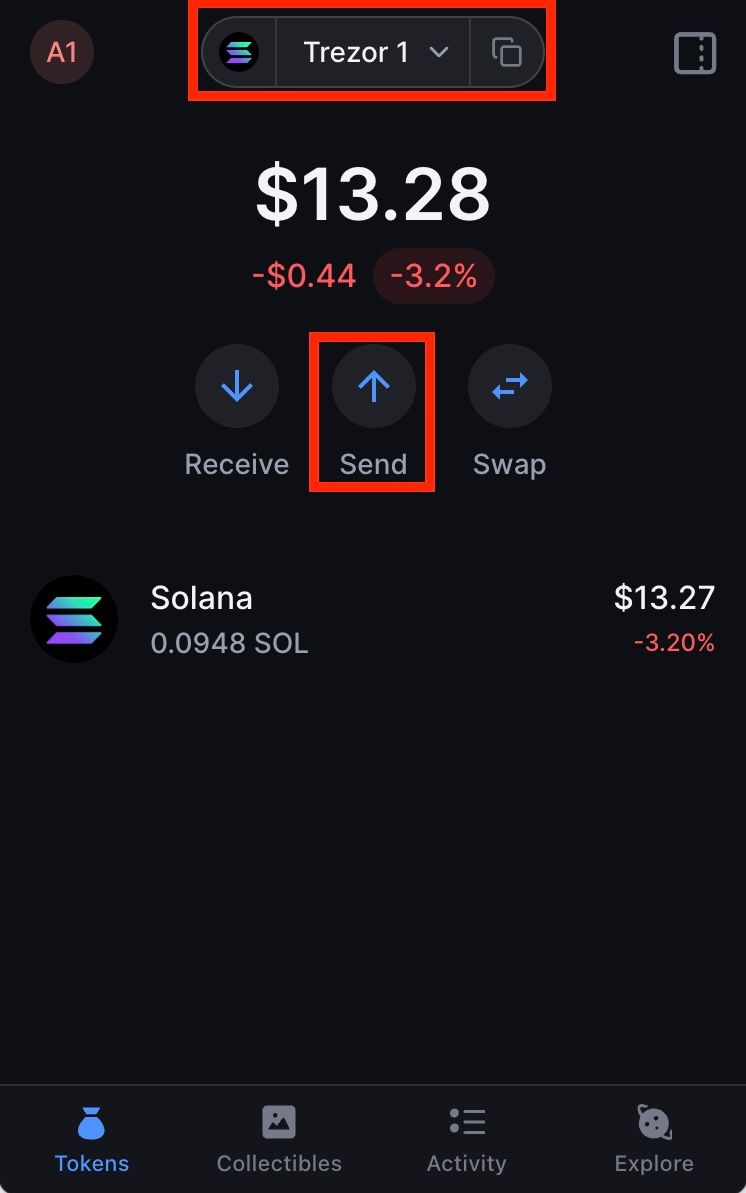
How to Send a Transaction?
- Select the appropriate account and network at the top of Backpack, then click on Send:
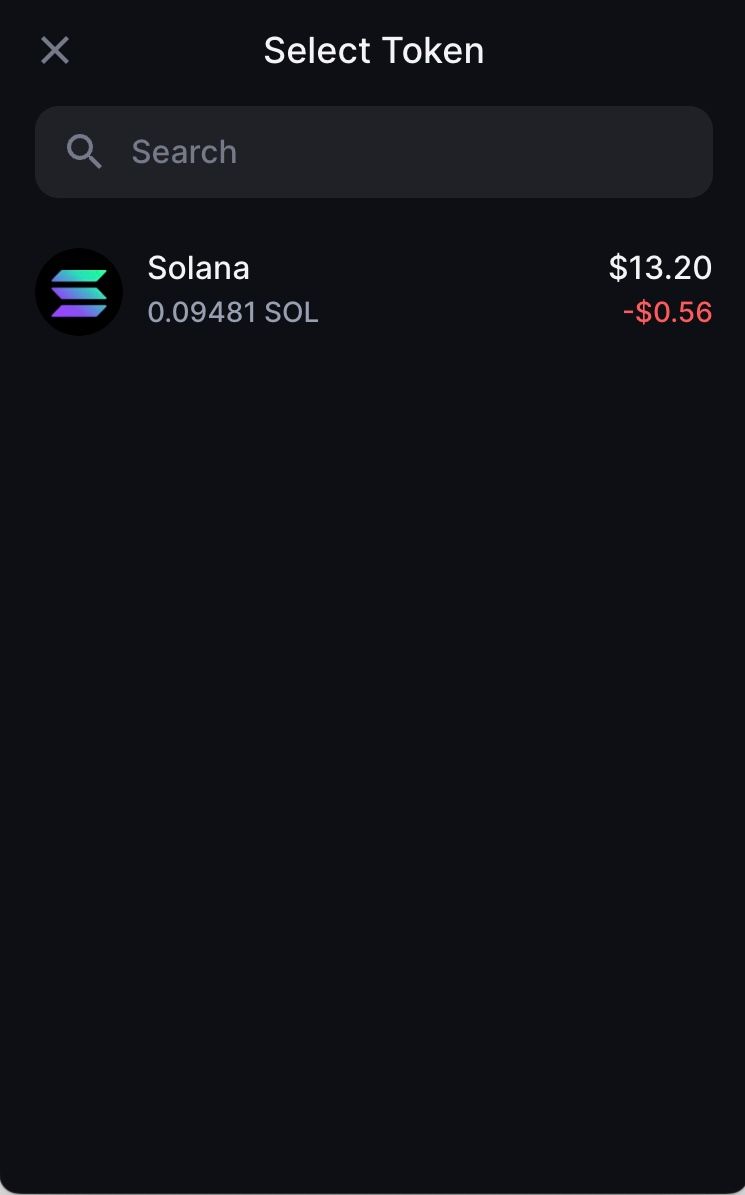
- Select the cryptocurrency you wish to send:
- Enter the address you wish to send to in the text box or select the address from the list of addresses in Backpack:

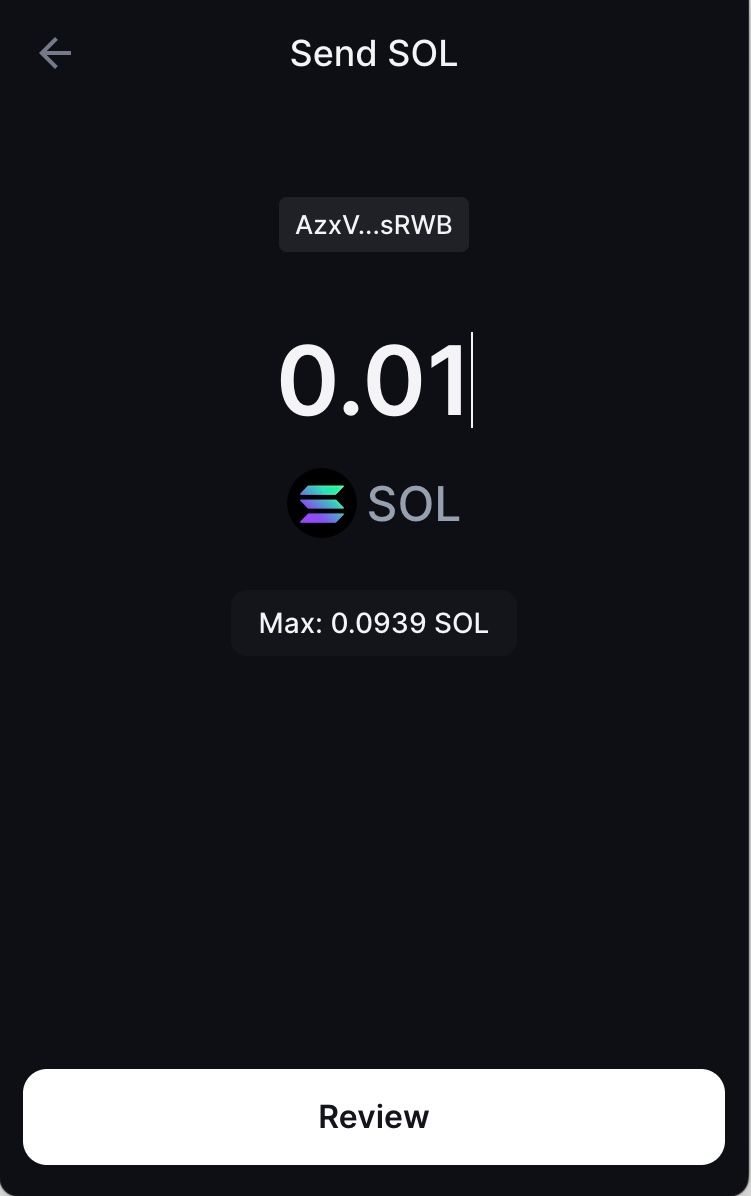
- Enter the amount of the cryptocurrency you wish to send, then click Review:
- Review the transaction details on Backpack.
- Backpack will send the transaction to your Trezor device, follow the prompts and review the transaction on your device, then confirm and send the transaction.
Staking with Backpack
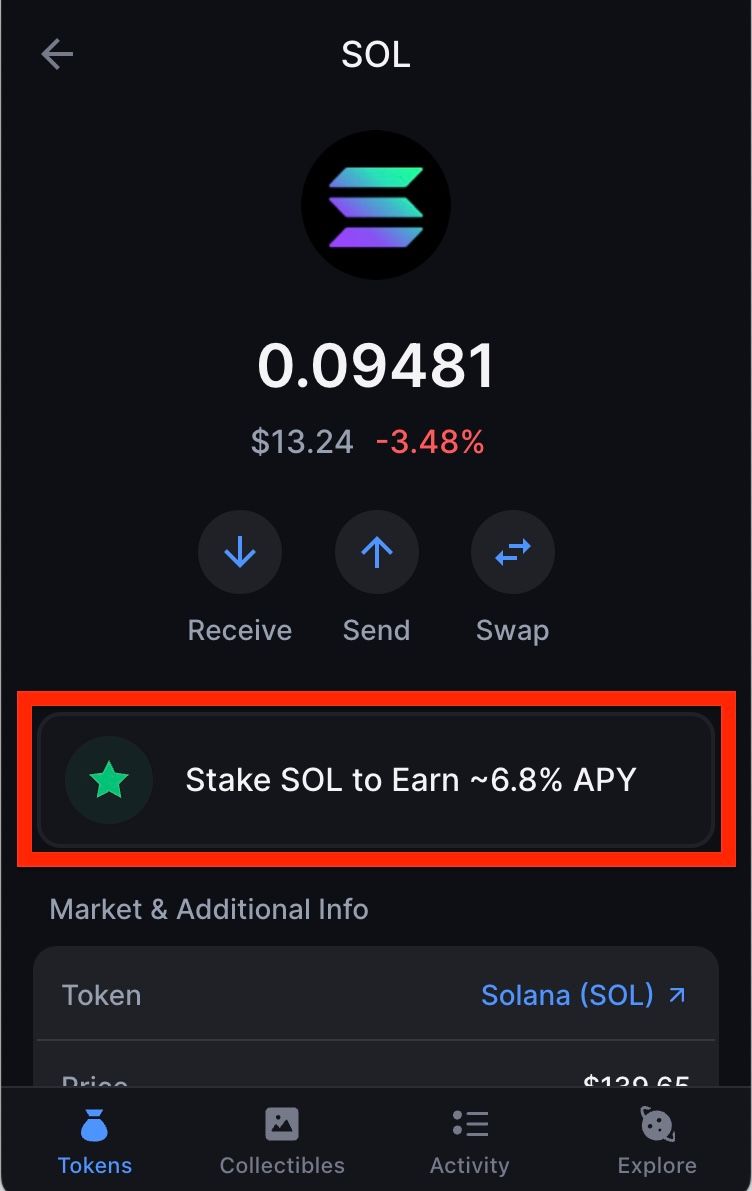
- In the home page click on the cryptocurrency you wish to stake:

- In the cryptocurrency’s page, wait for staking options to load, then click the prompt:
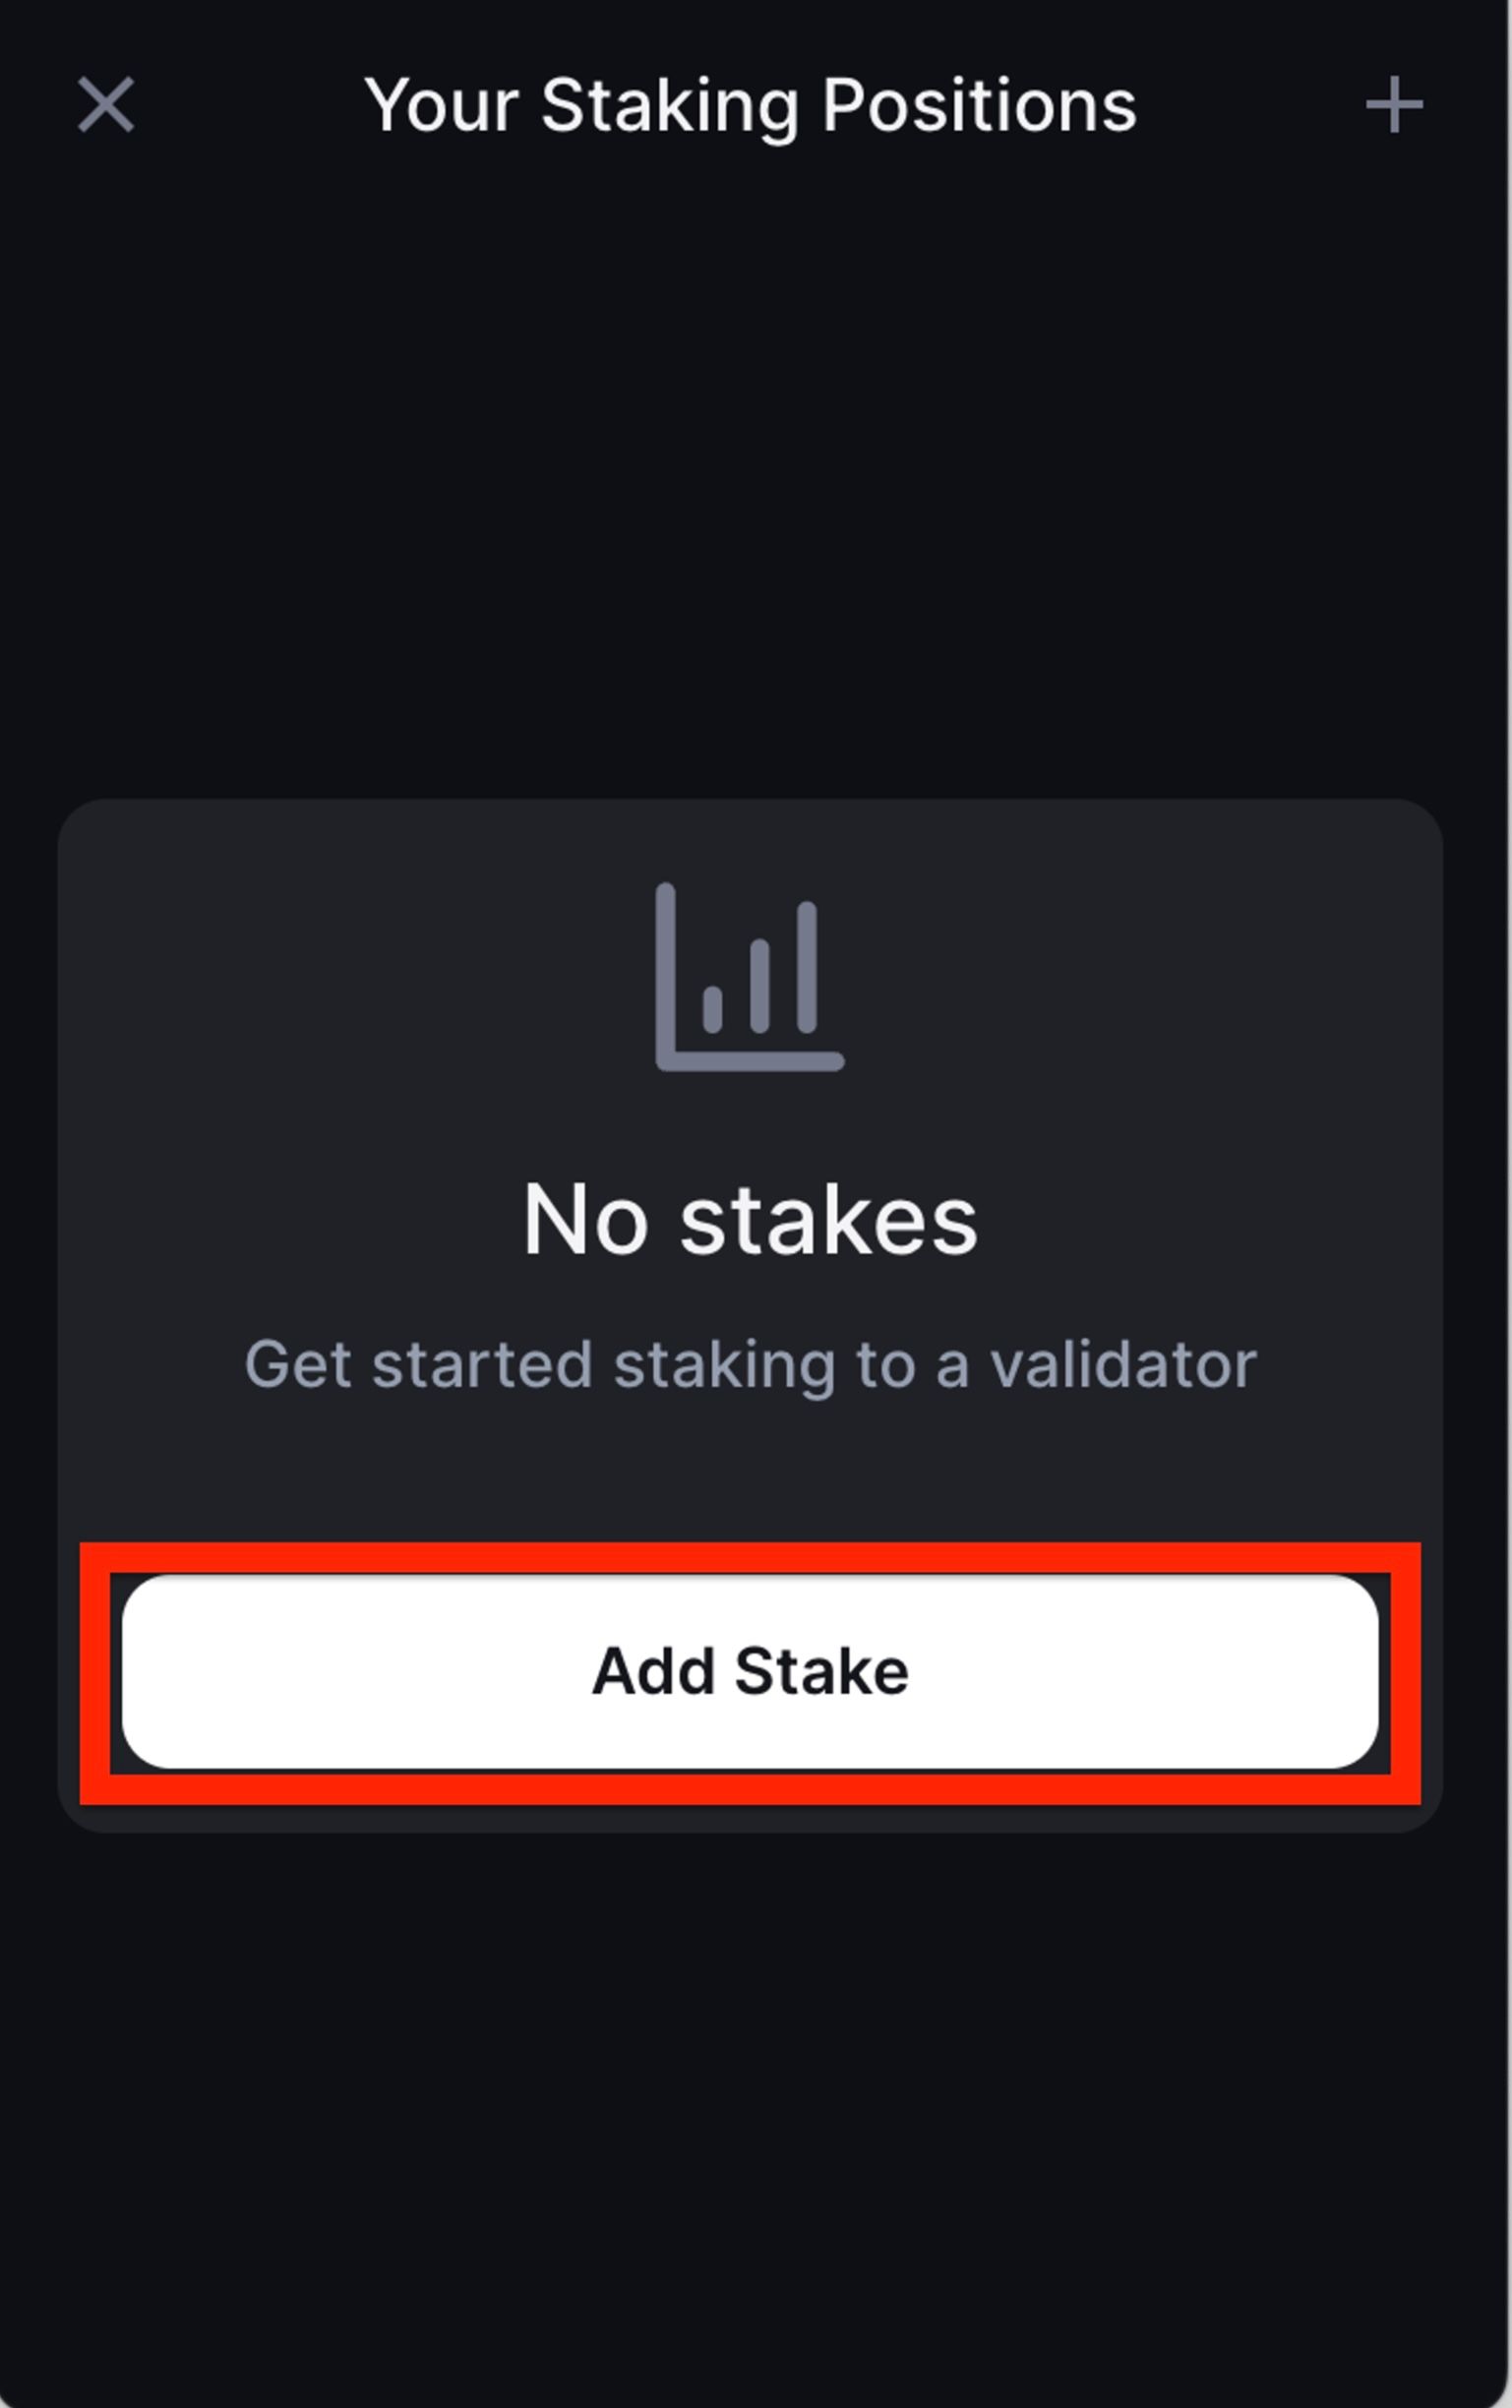
- Select Add Stake:
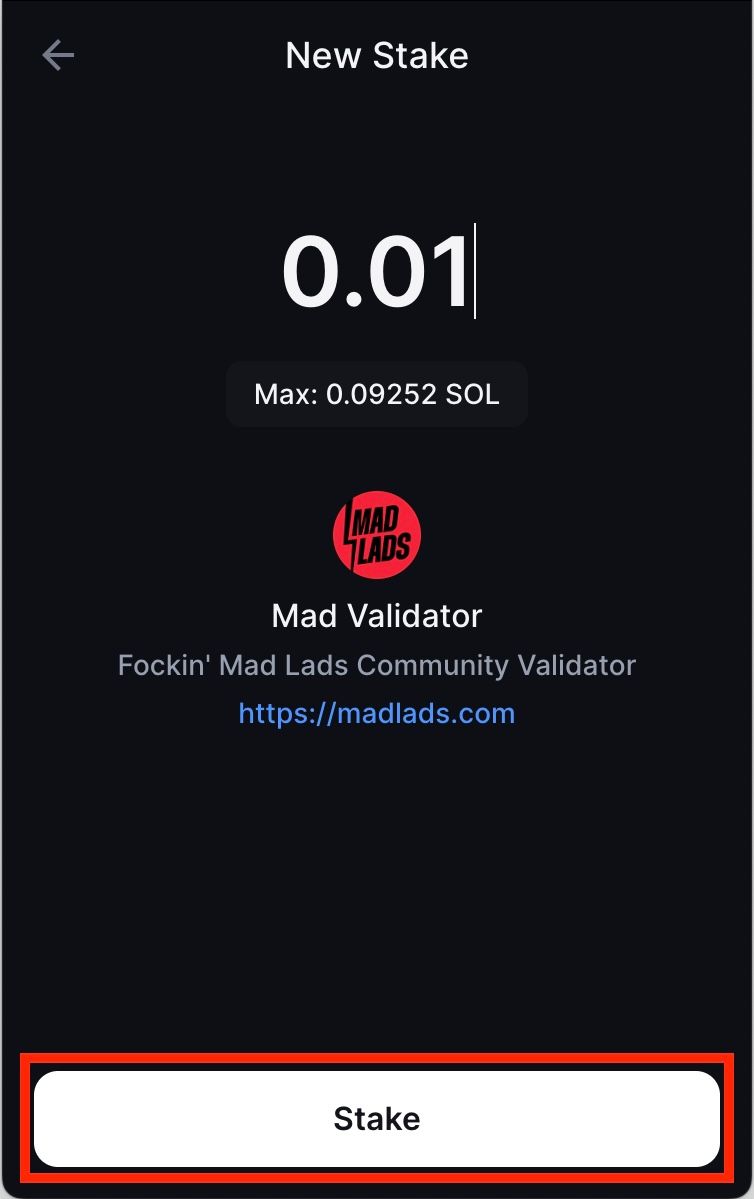
- Enter the amount of cryptocurrency you wish to stake, then click Stake
- Review the transaction details on Backpack.
- Backpack will send the staking transaction to your Trezor device, follow the prompts and review the transaction on your device, then confirm and send the transaction.
Managing your Staked Solana on Backpack
- You can review your stake at any time by clicking View Stakes:
- When staking on Solana, you can choose to unstake SOL at any time however you must wait for the next Solana epoch to withdraw your SOL.