Advanced recovery on Model One
The Trezor Model One is no longer sold, but will continue to receive maintenance until at least 2031 and critical security fixes until at least 2036, ensuring your device stays secure and fully supported. Learn more here.
In contrast to the Standard Recovery, the Advanced Recovery completely obfuscates the letters entered on the computer. Instead of writing whole words in a shuffled order, you will be inputting individual letters on the PIN-pad. The computer will never know what letter is being entered, as the layout of the PIN-pad constantly changes.
Advanced recovery only applies to the Trezor Model One. For other Trezor devices, the recovery process is restricted to on-device input by default.
Checking your Trezor Model One backup
- Open the Trezor Suite Desktop App (alternatively you can use Trezor Suite for web)
- Connect your initialized Trezor and enter your PIN
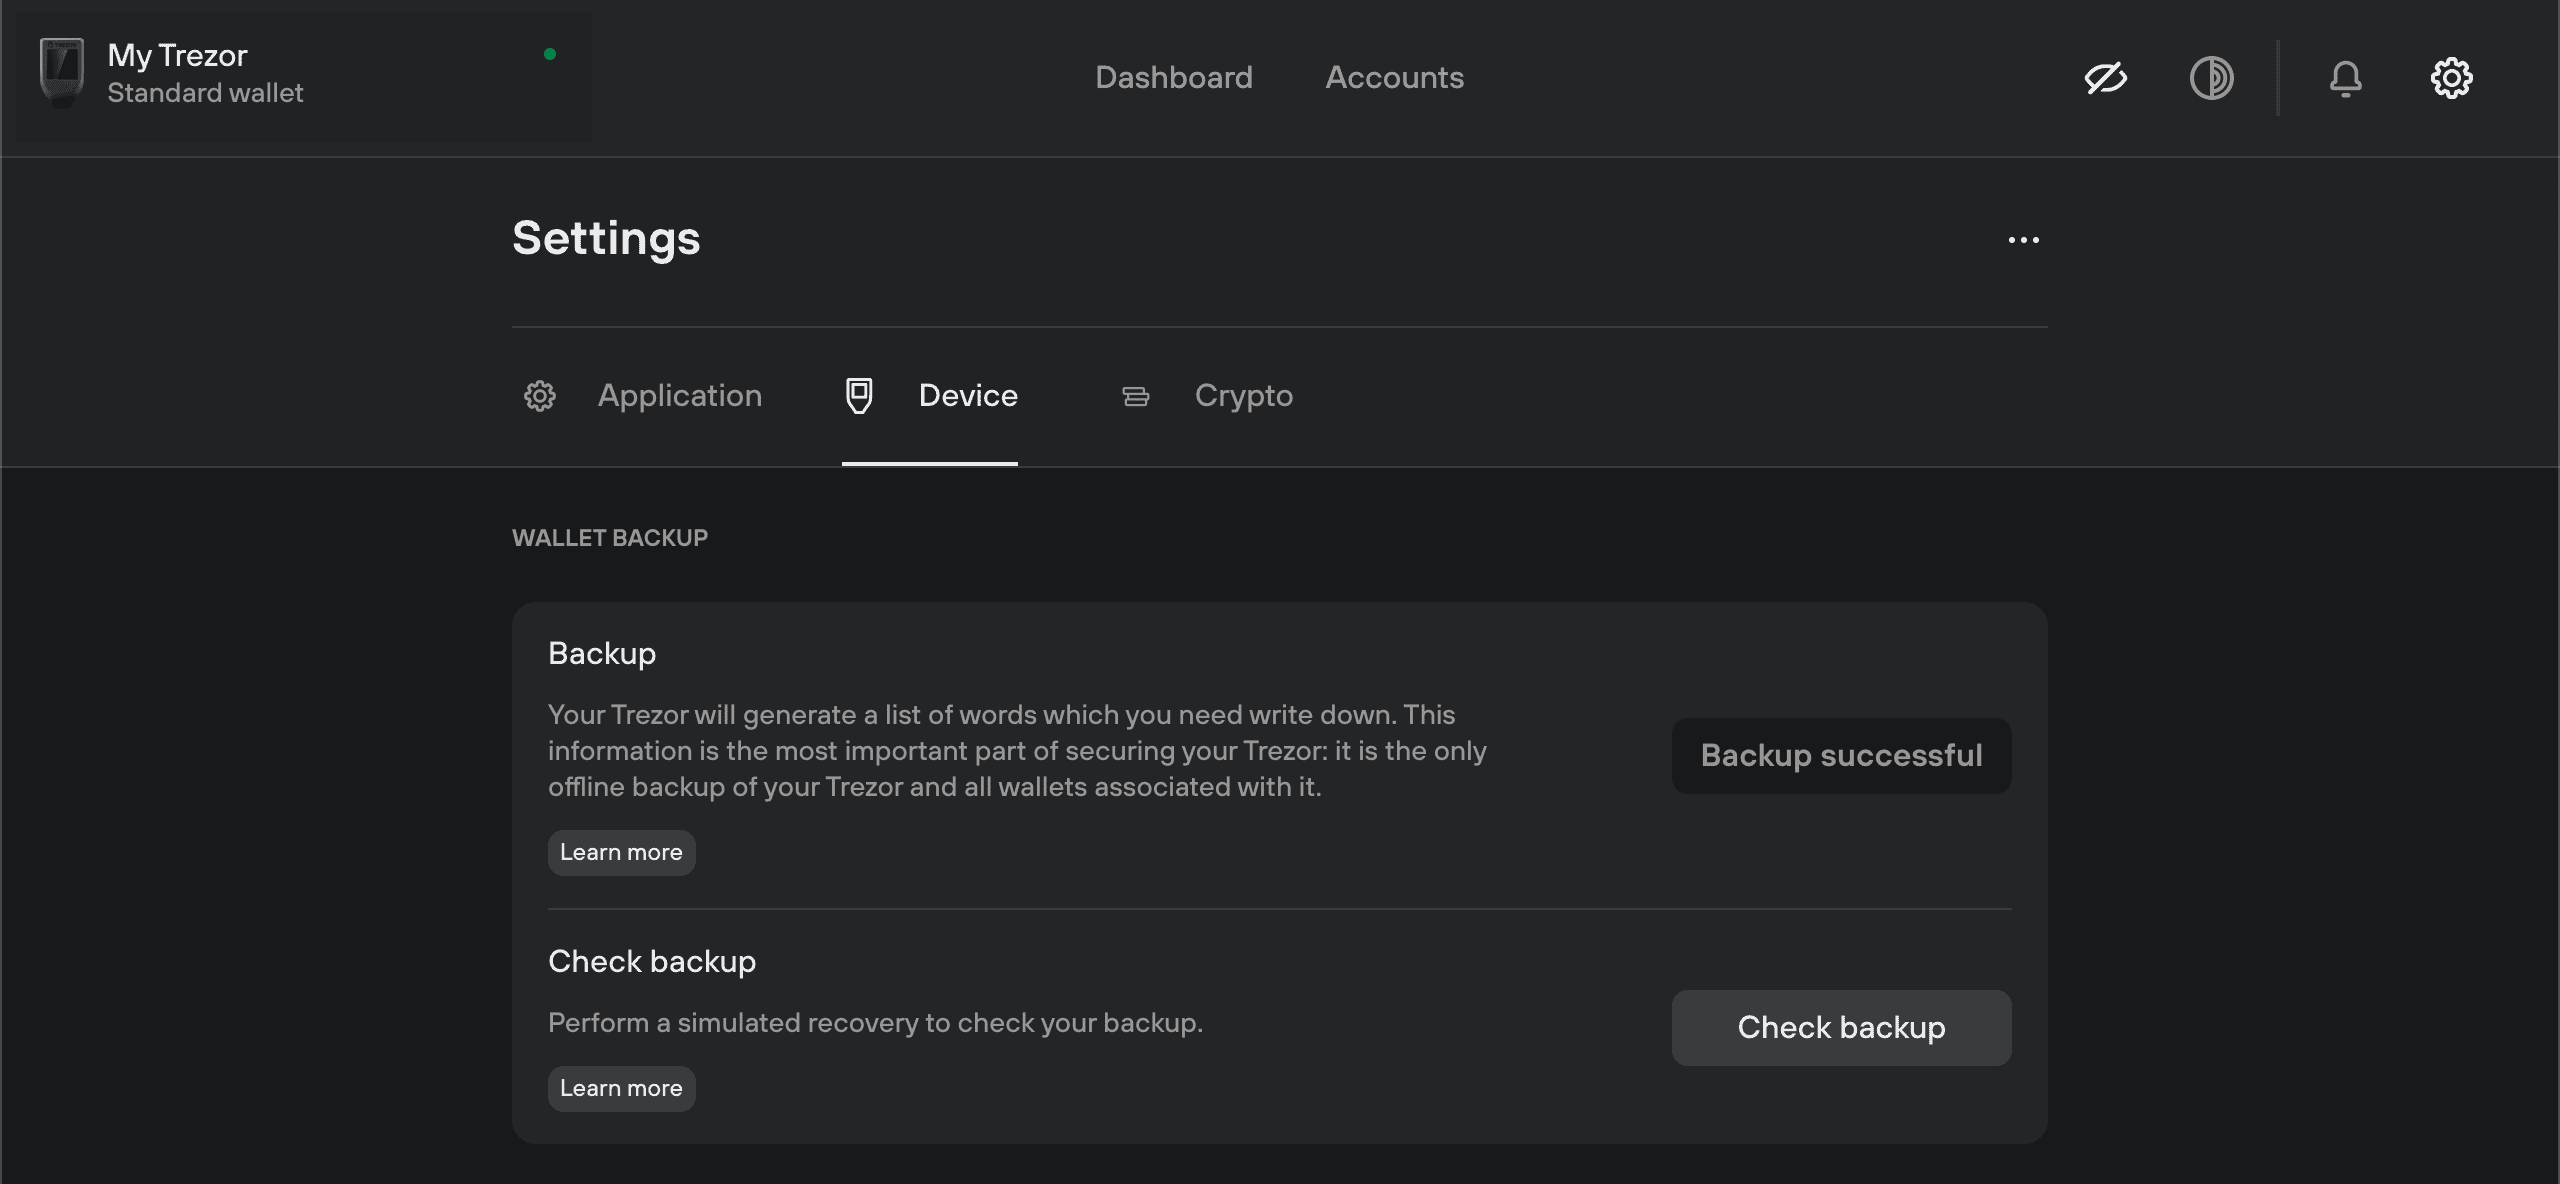
- In Trezor Suite, go to the Device Settings page, which can be accessed via:
- The Settings ‘gear’ icon in the top-right corner of Suite, then choose "Device" from the menu
- Click on your Trezor device name in the top-left corner of Suite, and select the Settings (gear) icon, which will take you directly to the "Device Settings" page
- In the Device Settings menu, navigate to the first set of options named "Wallet Backup" — here you will find the item Check backup:
- In the Check backup window, check the I understand box and then click on Start:
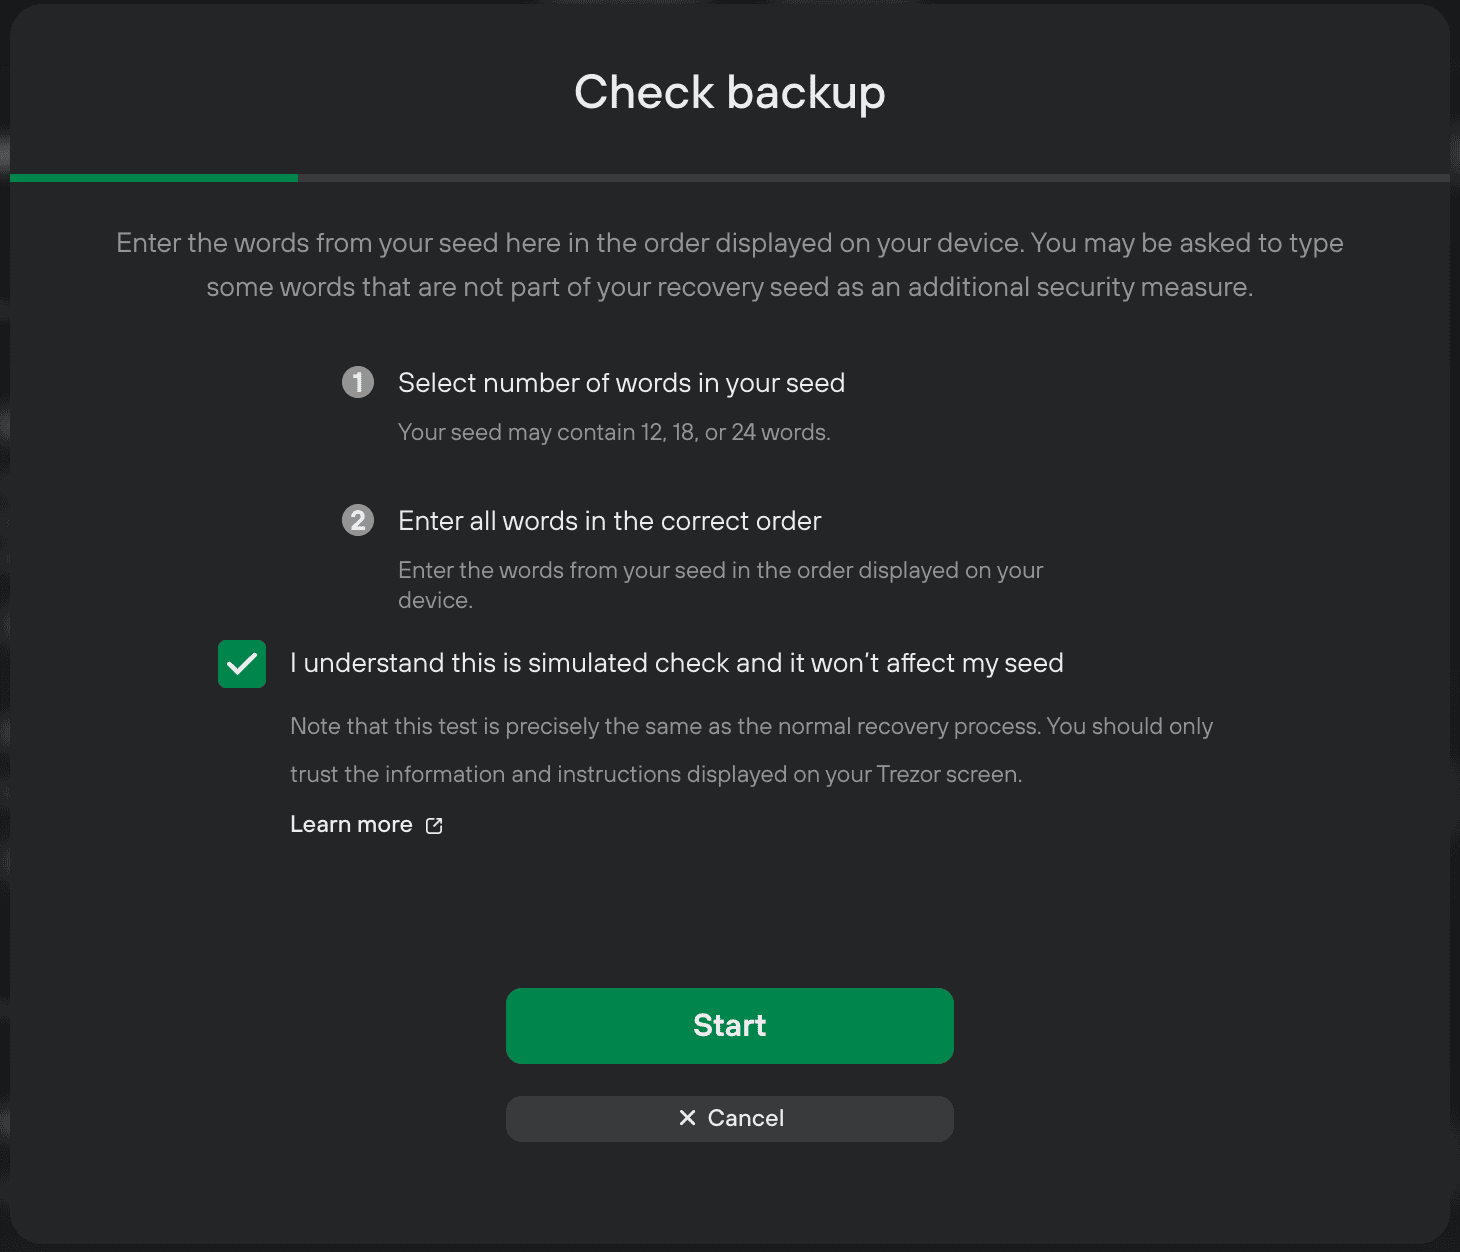
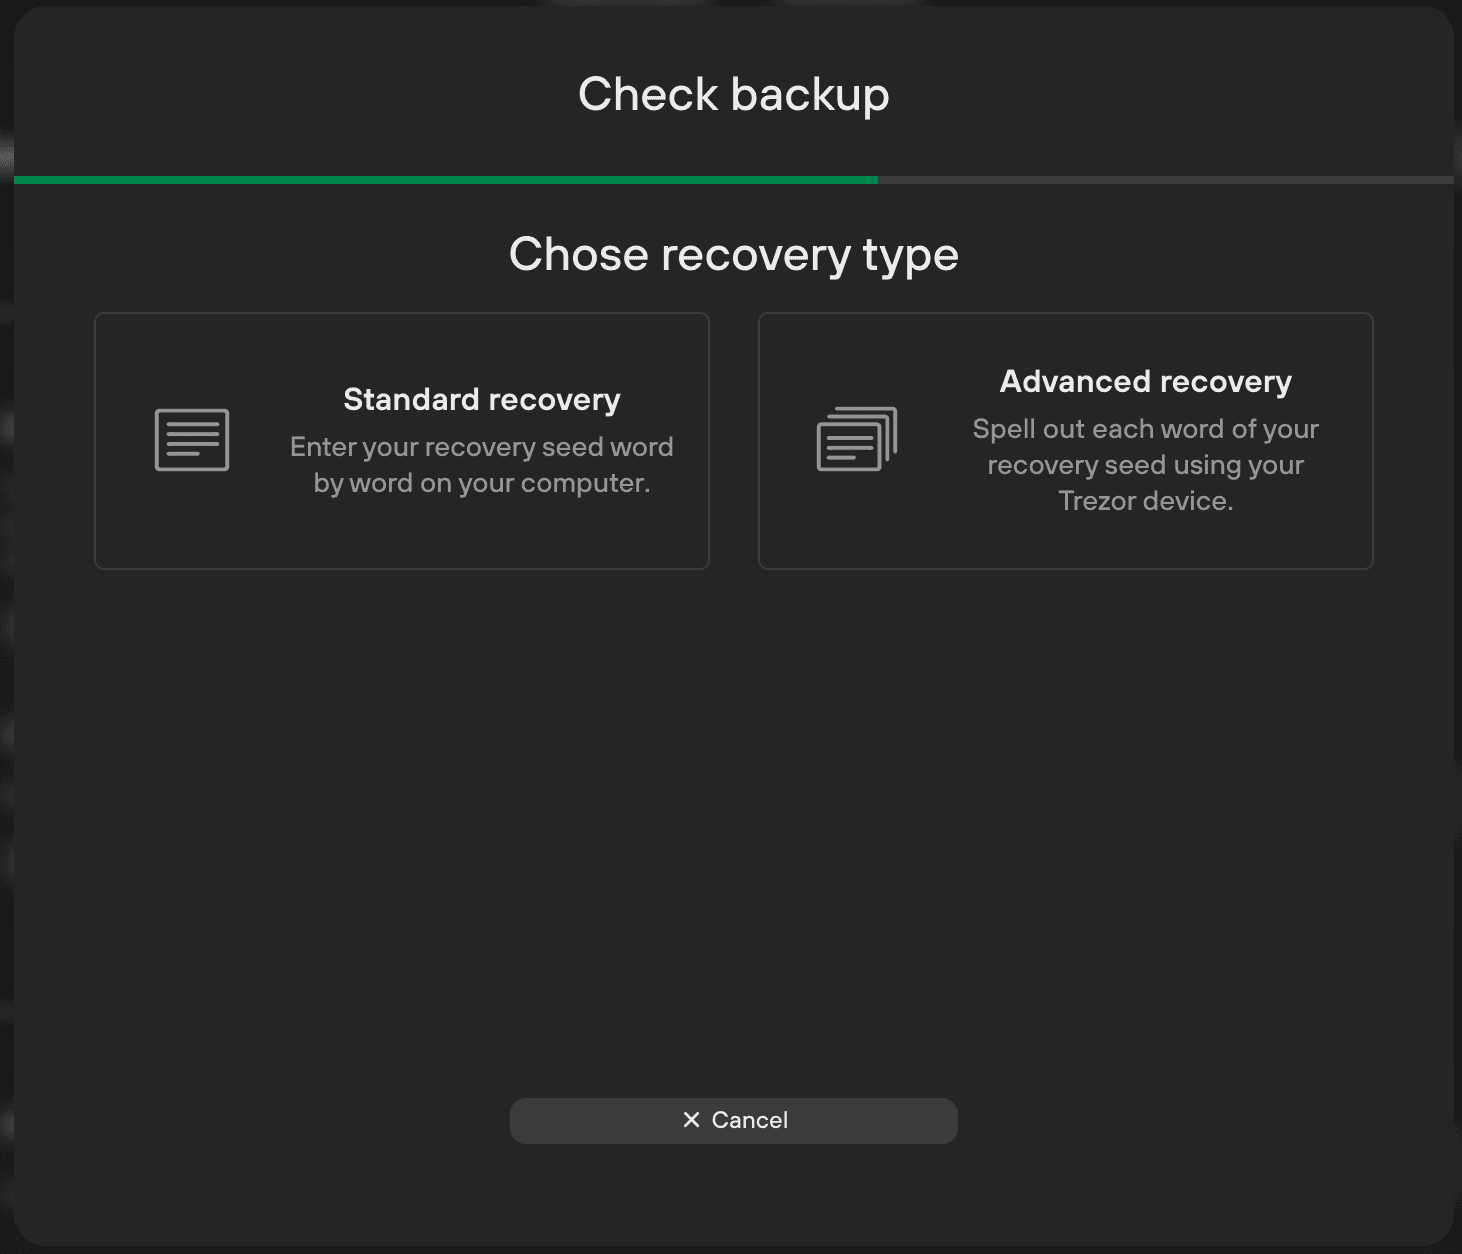
- You will then be prompted to select the number of words in your backup (default for Trezor Model One is 24)
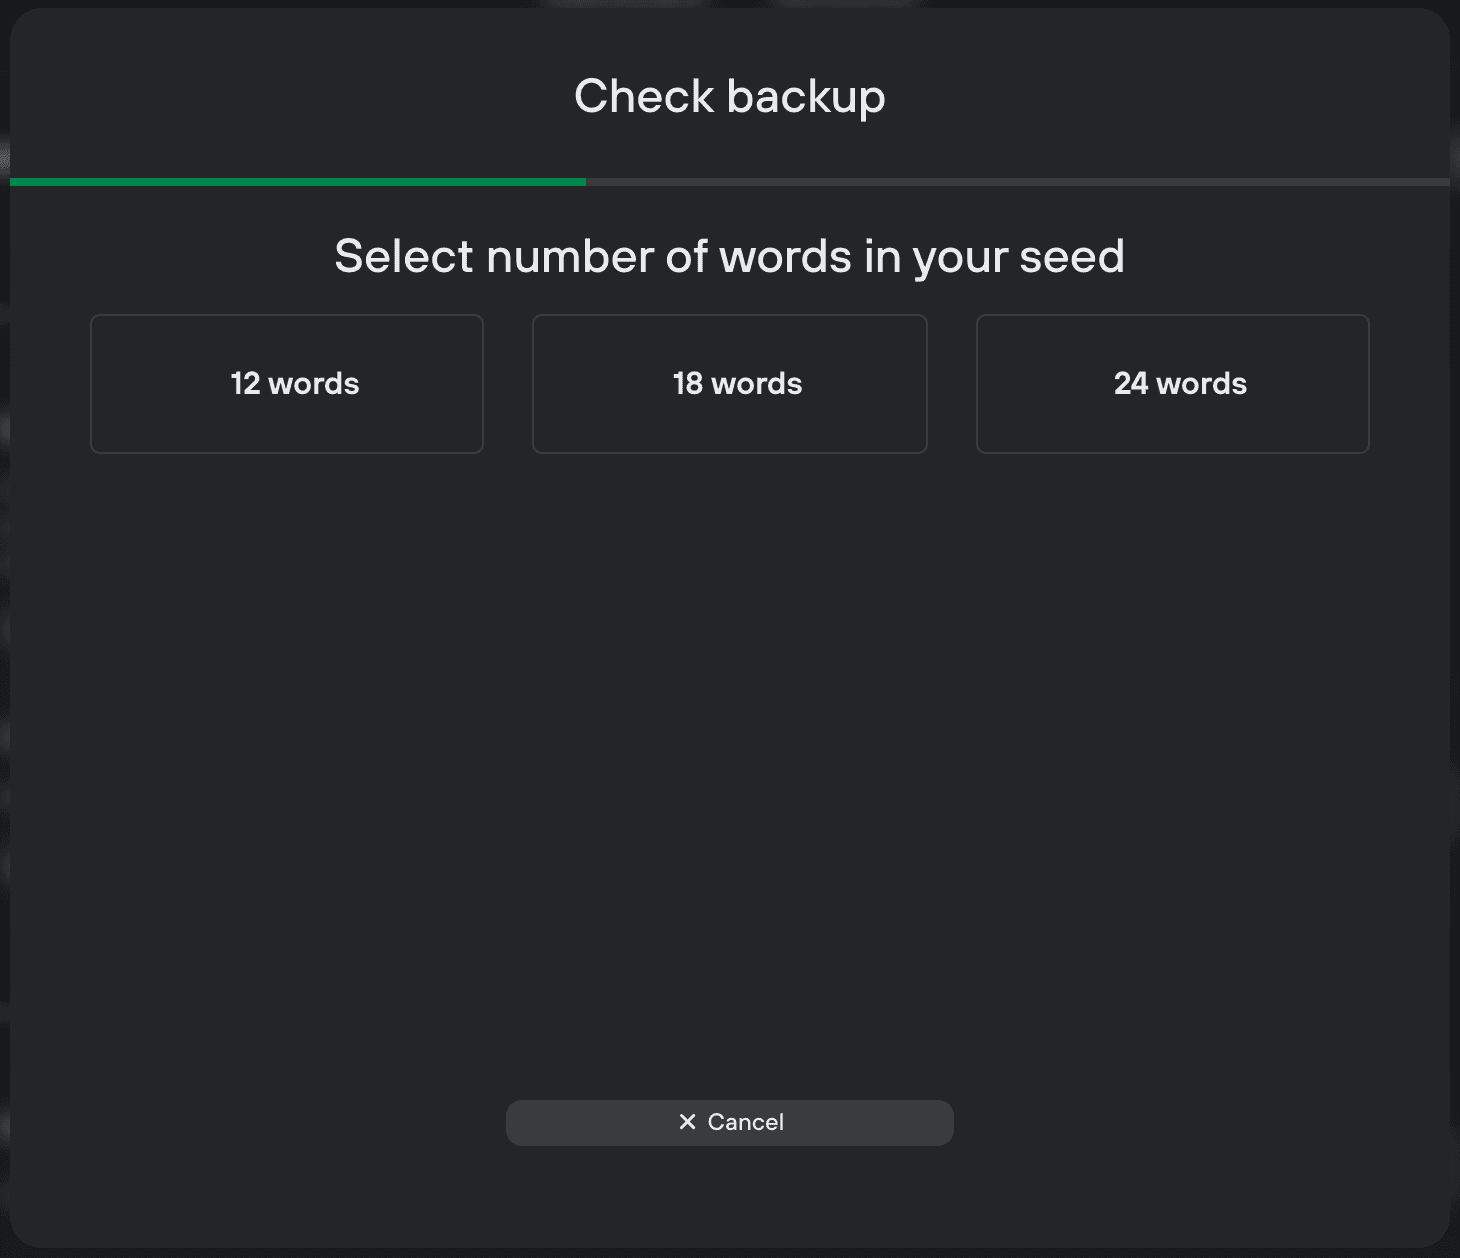
- Once you’ve selected the number of words in your backup (formerly recovery seed), select Advanced recovery (information for Standard recovery)
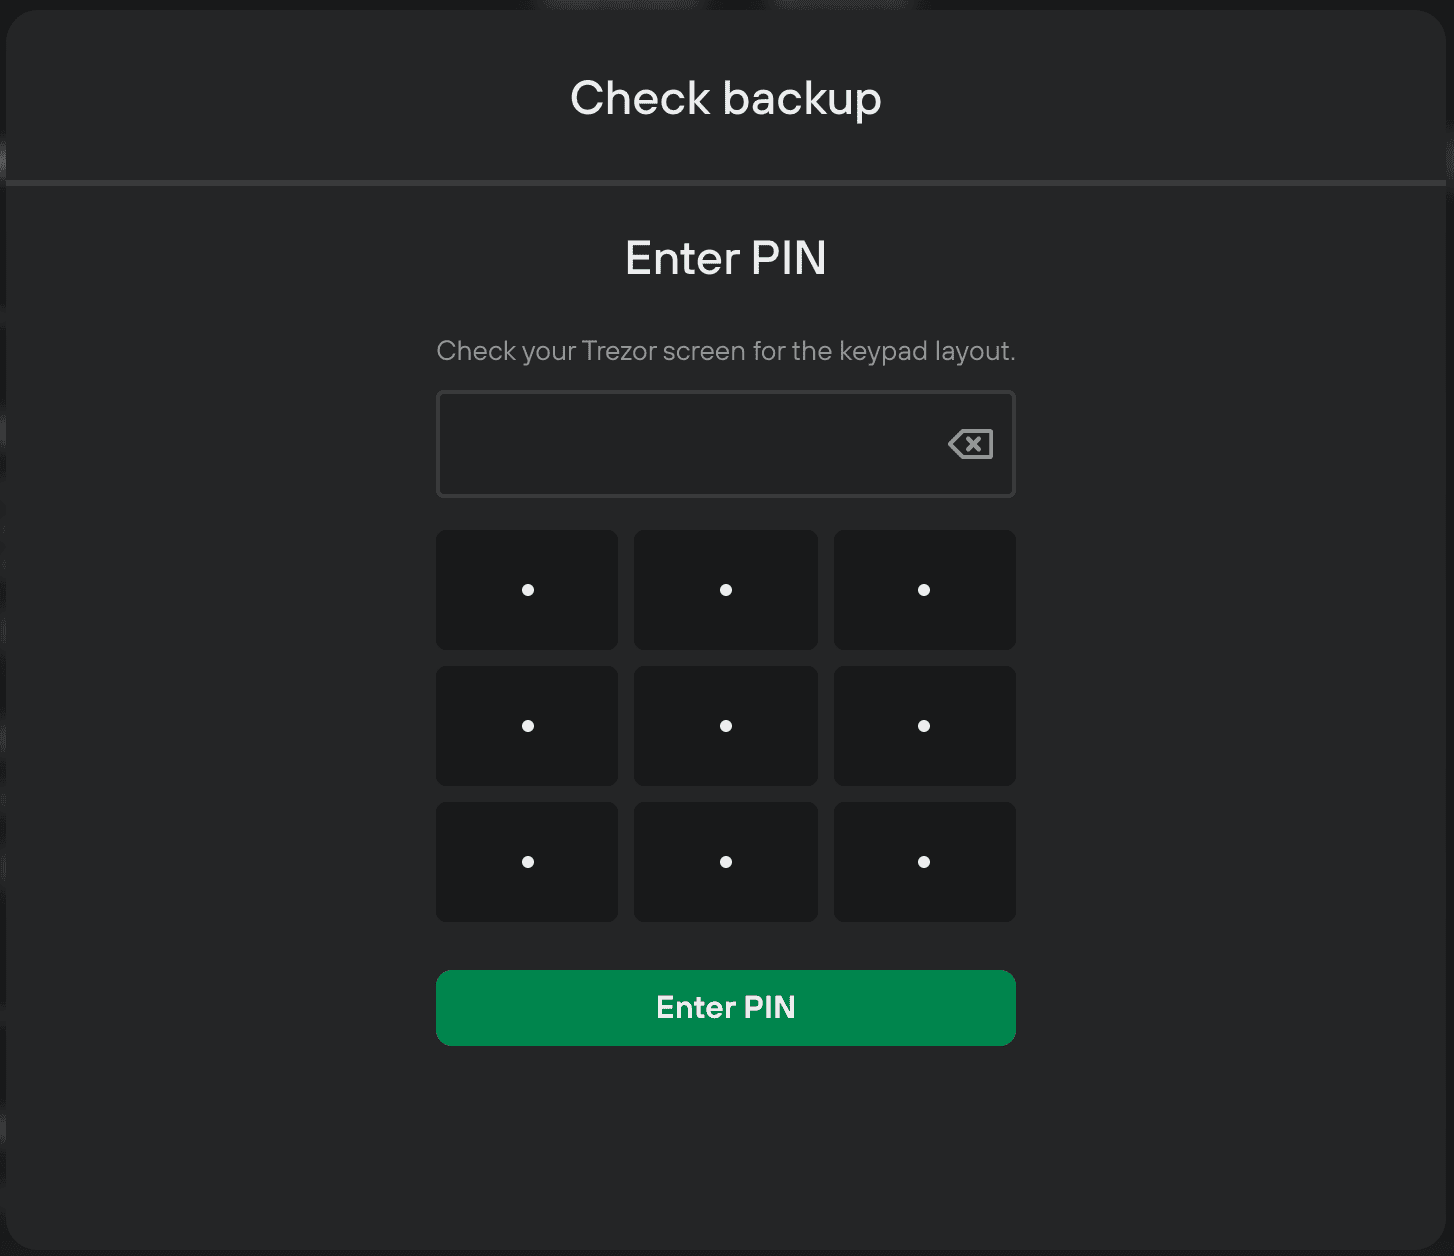
- You will then be prompted to enter your PIN:
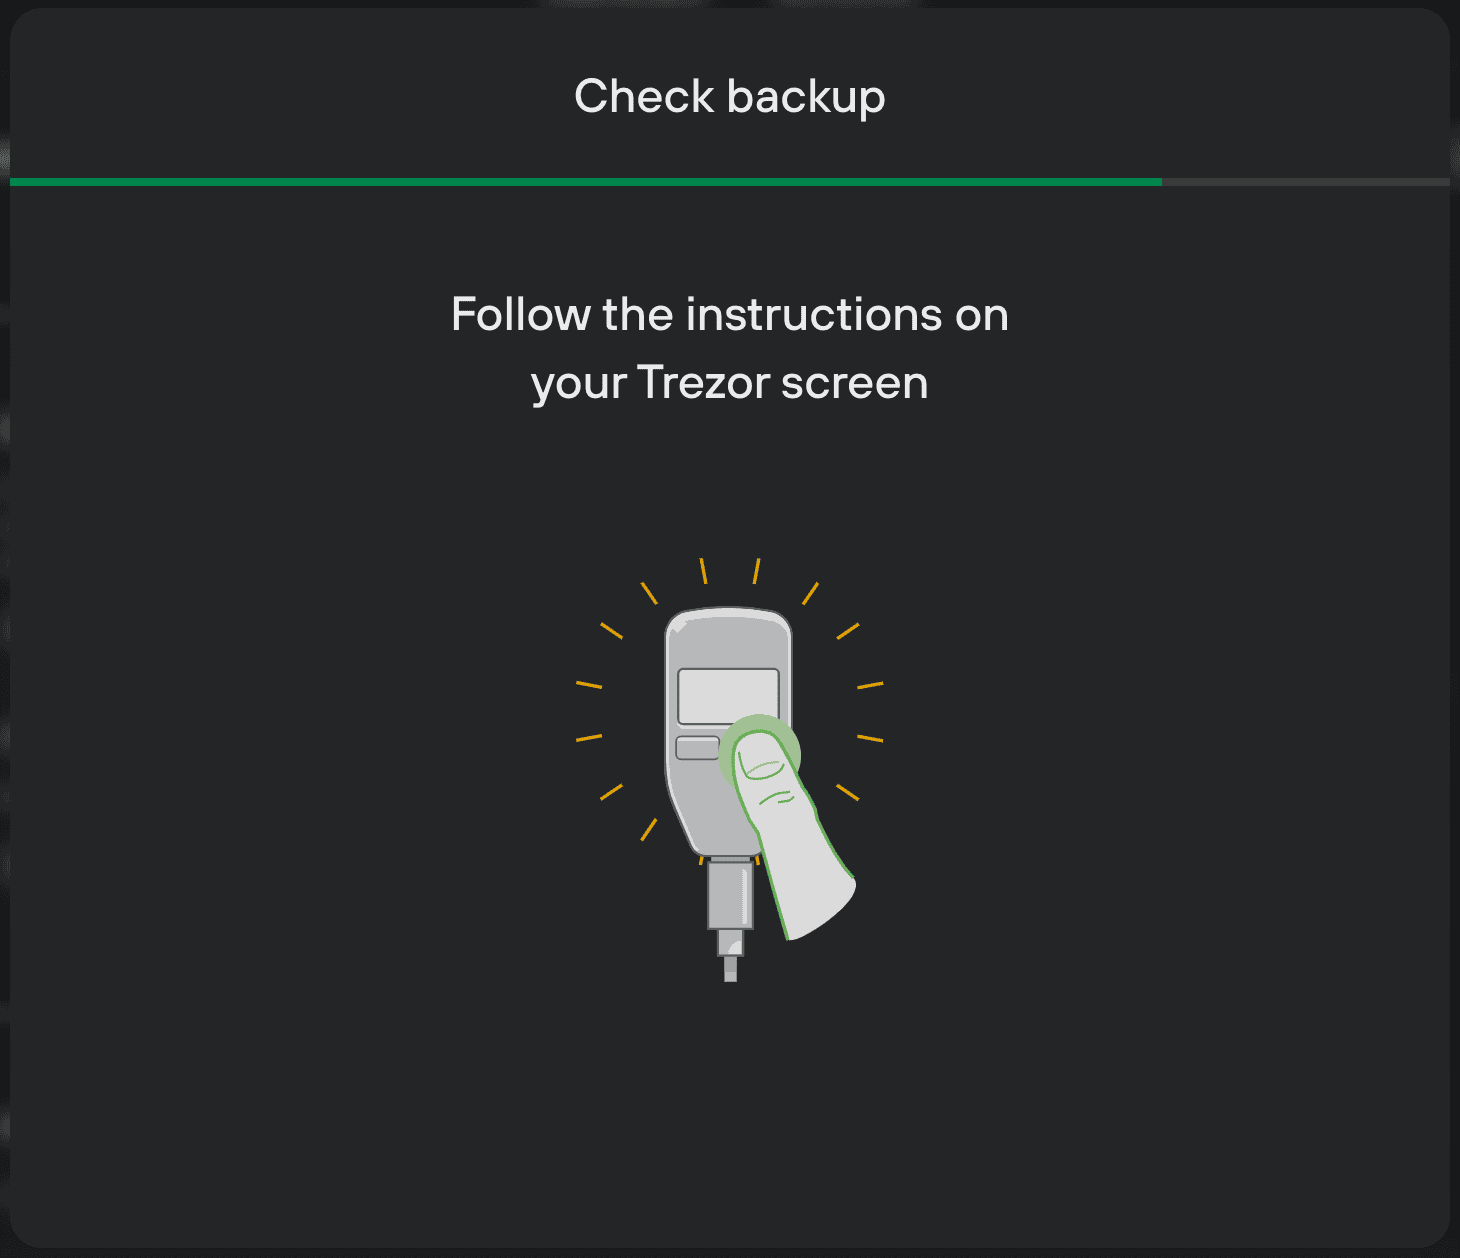
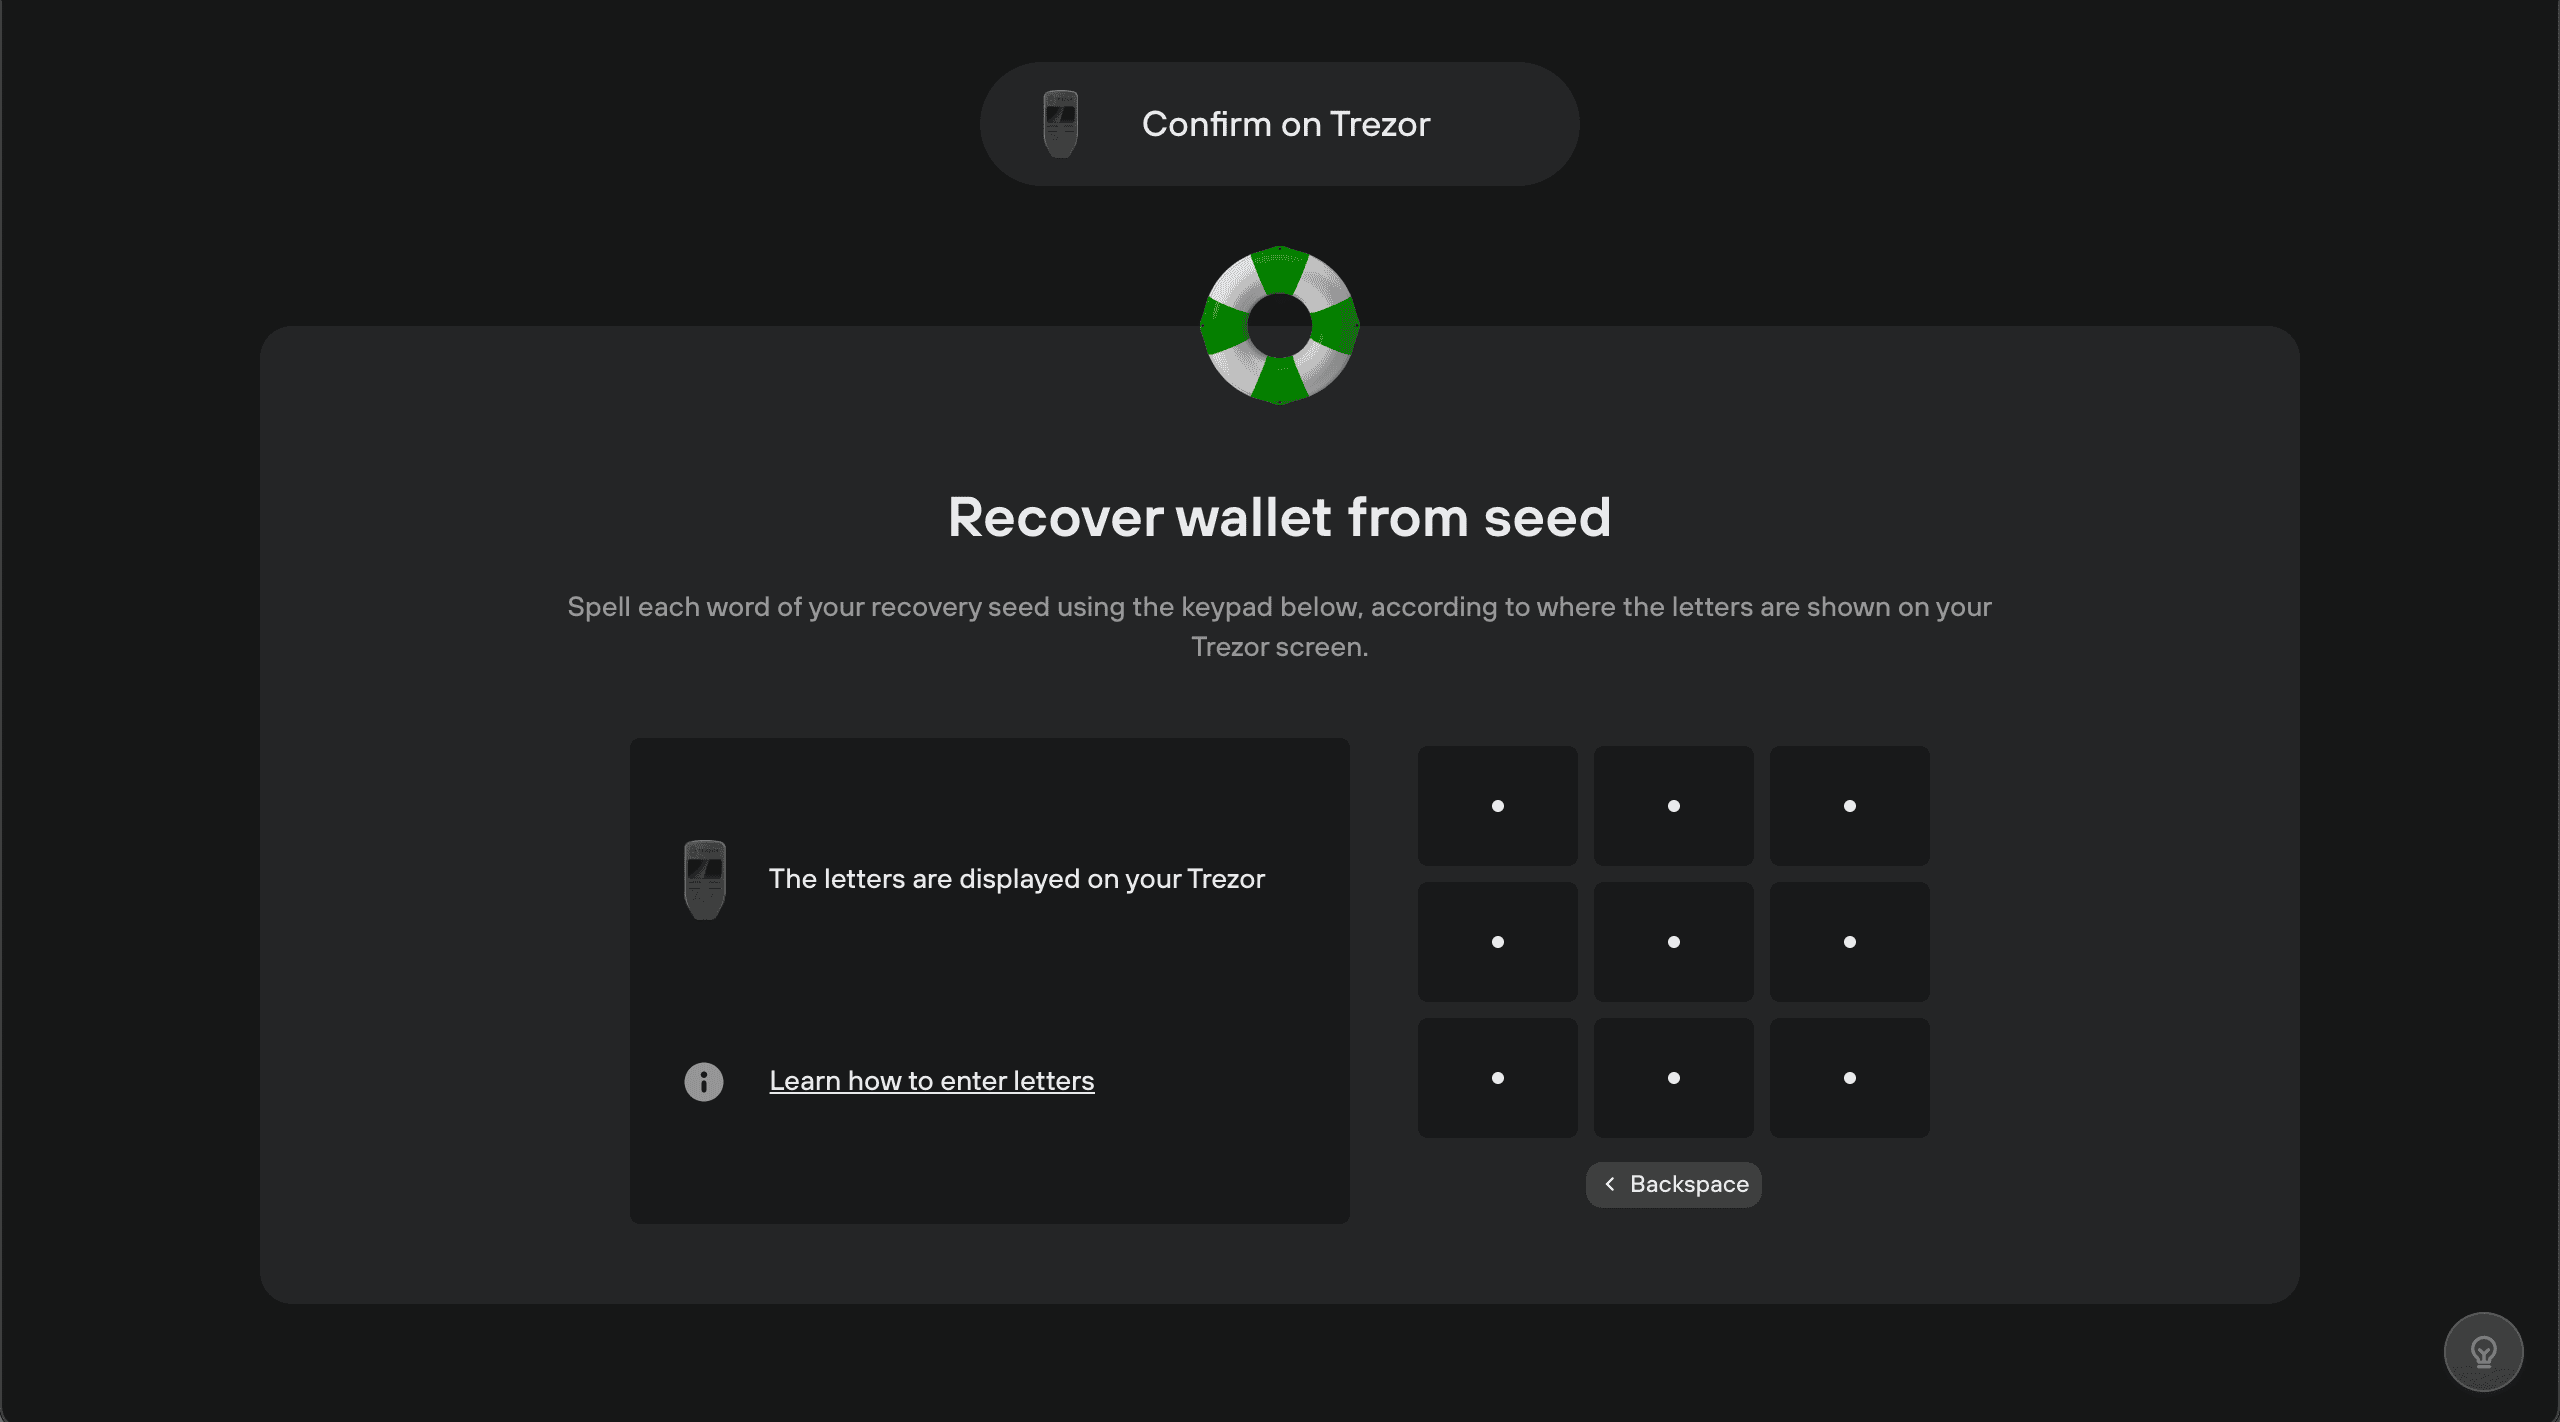
- You will then be prompted to check your Trezor’s screen, which will tell you which particular word to enter via the keypad shown in Trezor Suite, according to where the letters are shown on your Trezor’s screen:
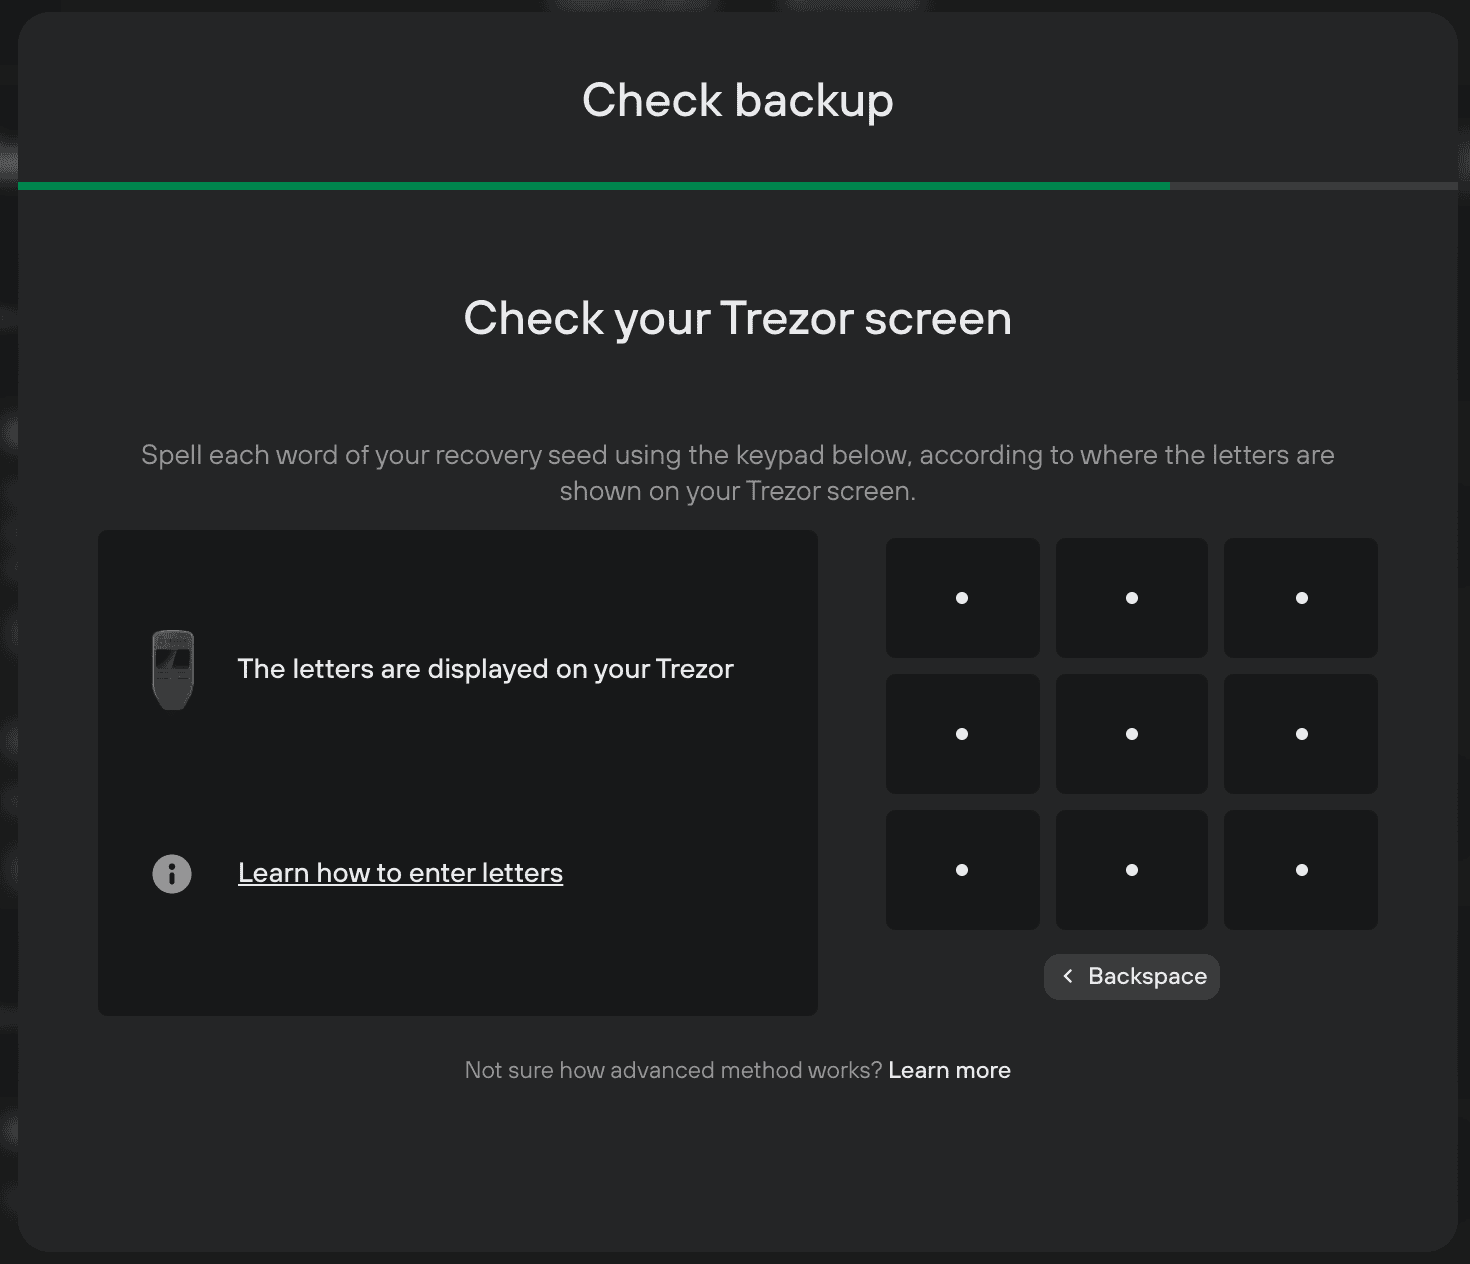
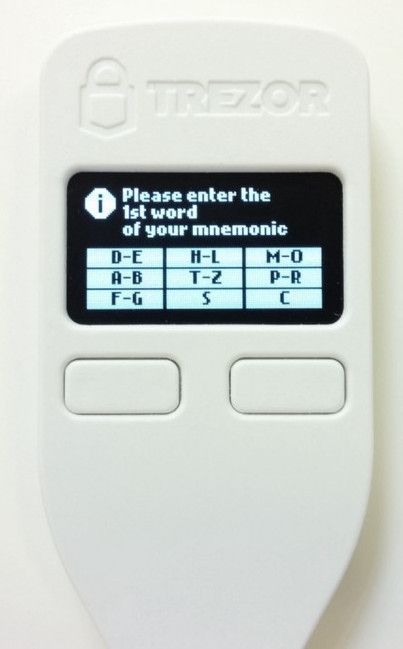
- The Trezor device screen shows a virtual keyboard composed of nine buttons, each assigned to one, two or even three letters:
- Choose the letter by clicking on the corresponding button on your computer - note that the layout of the letters changes with every input.
- You have to type the first four letters for each word. Each letter needs to be selected individually. For instance, let’s say our first word is “heavy”. You would have to click on the following sequence of button: H-L >> HA-HE >> HEA >> heavy.
After the third letter, there is not much left to choose from. The BIP39 wordlist was deliberately made so that there are no words with the same combination of four letters. Having chosen three, there are only a few options left.
To fit all the letters into a 9-key layout, "-" is used to mark a sequence of letters. E.g. the letters J and K are included under H-L.
Please note that this takes longer than the regular recovery process!
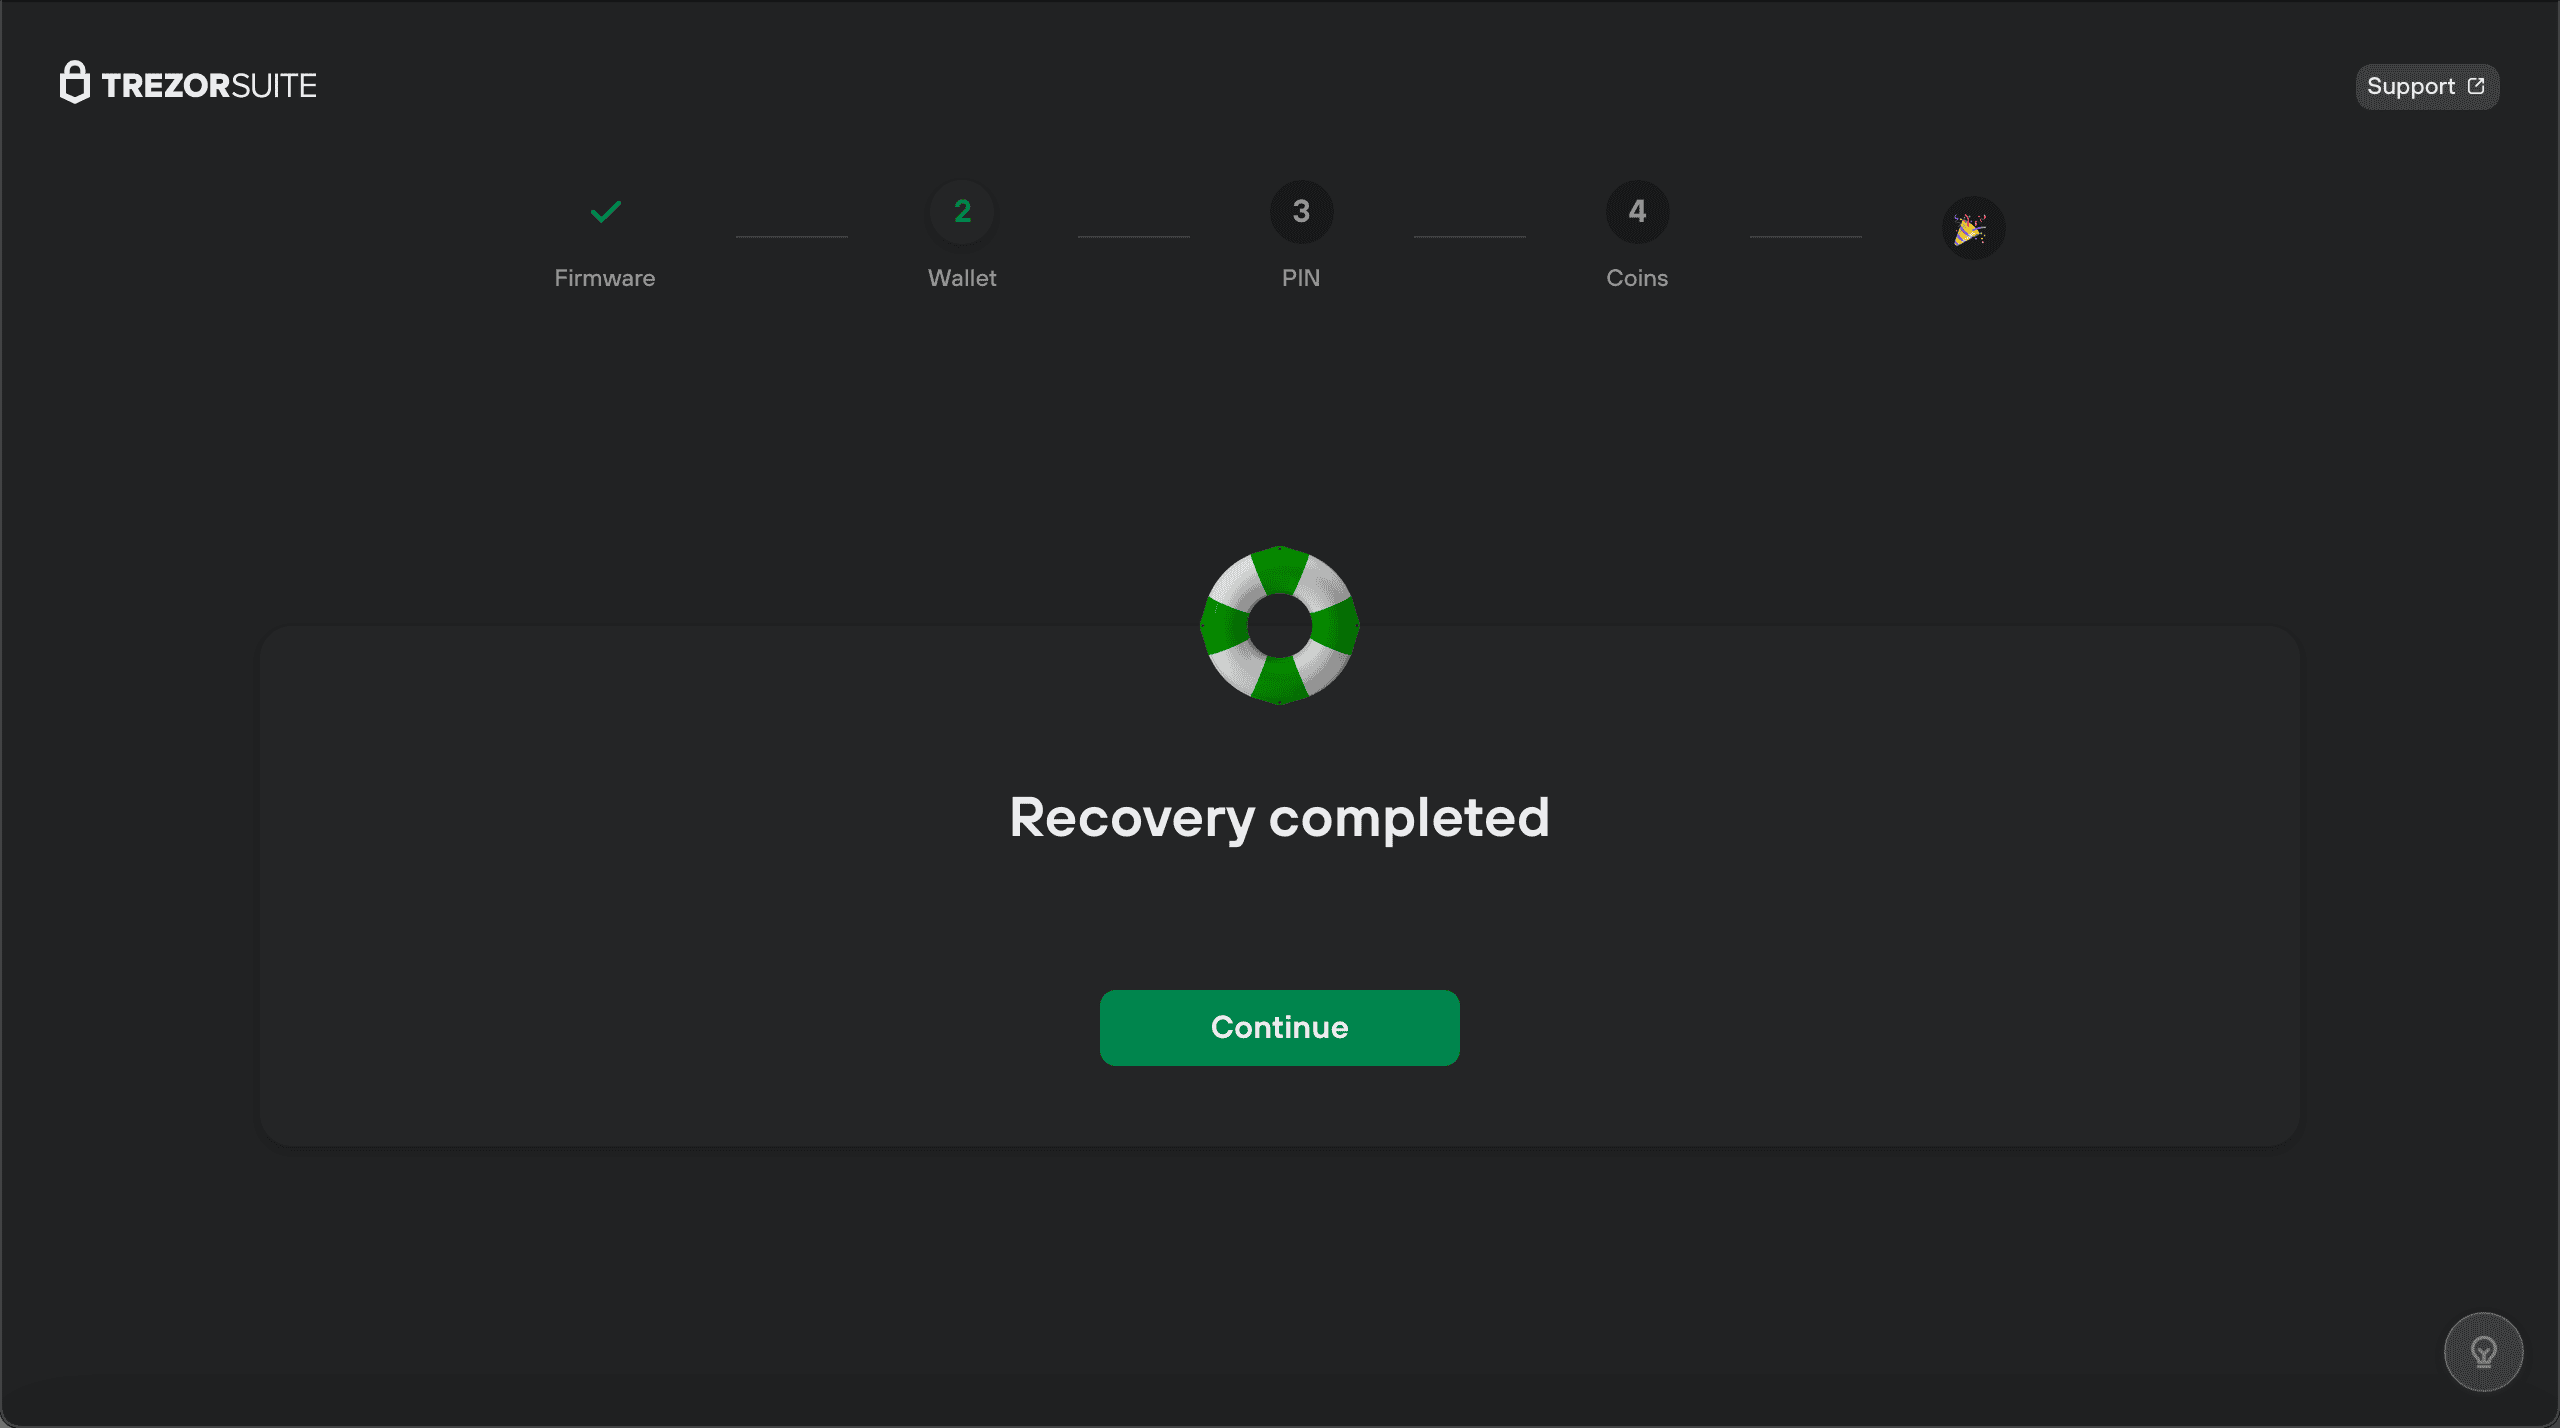
- Once you’ve entered all of the words in the specified order, you’ll be told to check the screen on your Trezor One, which should display the message “The seed is valid and MATCHES the one in the device”
- You can then press the right button on your device to "Confirm"
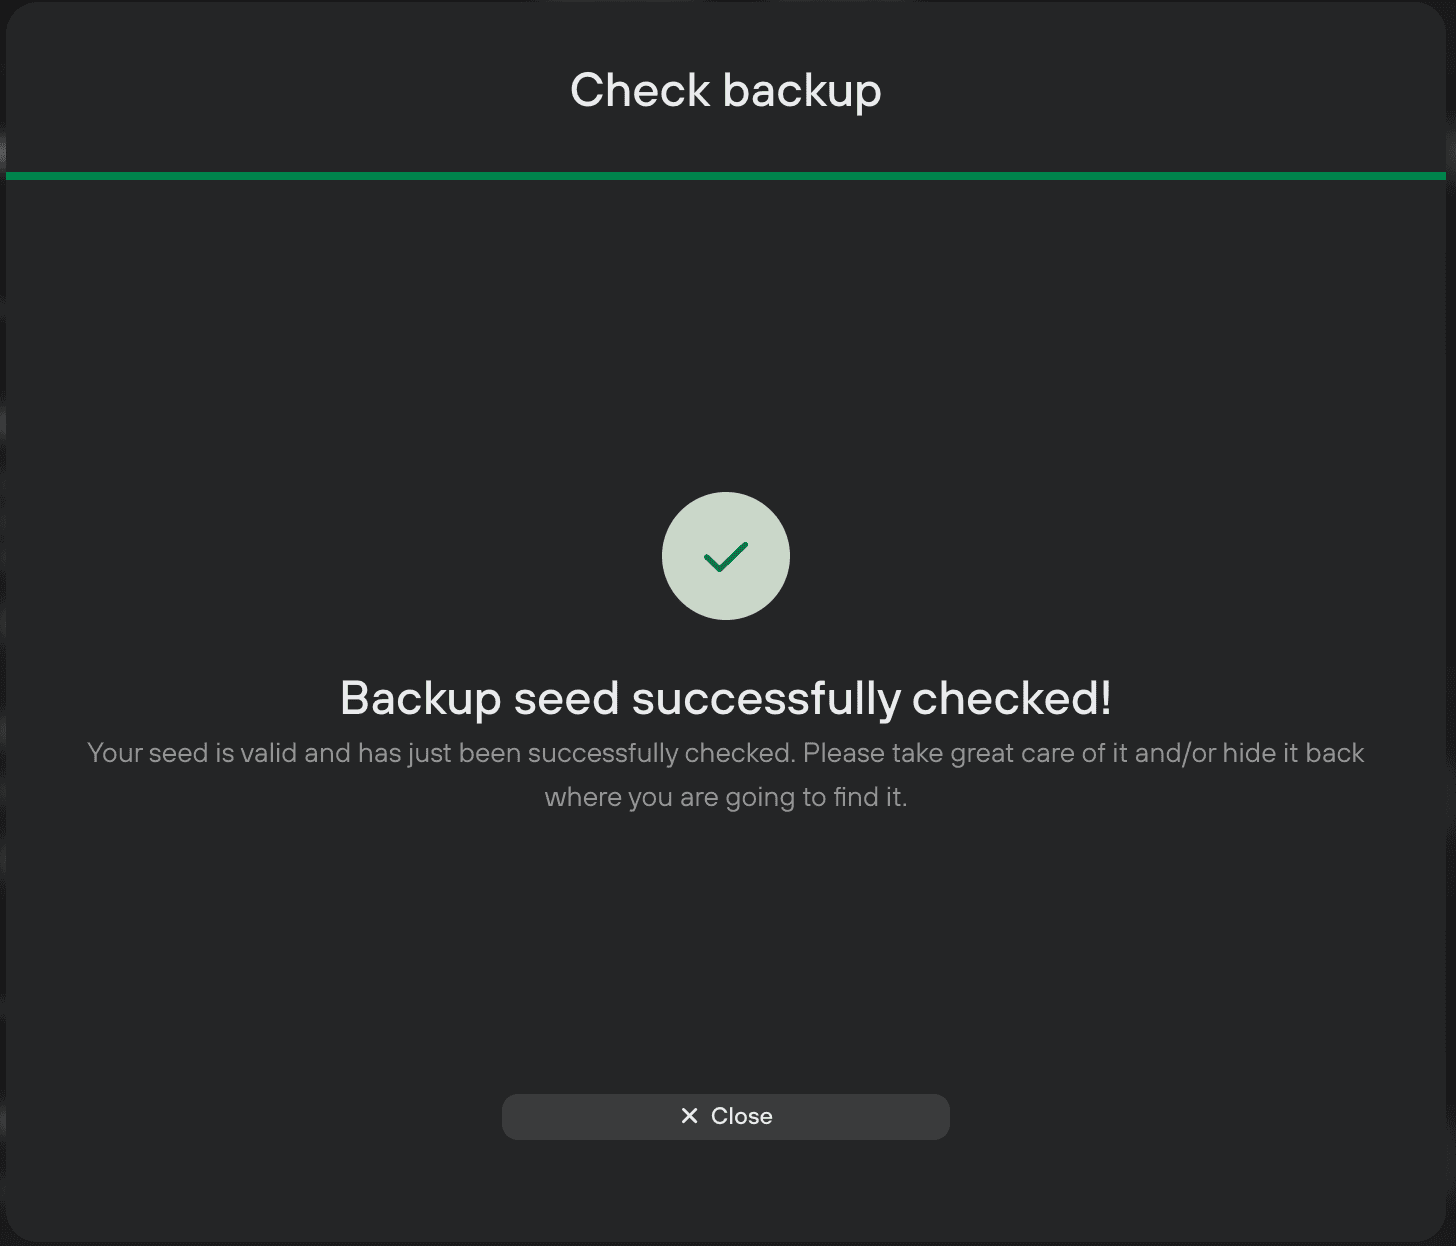
- Then you will receive final confirmation that the Advanced recovery test run was a success:
- You can click the Close button, and you'll then be taken back to the Device settings page in Suite
Wiped / uninitialized Trezor Model One
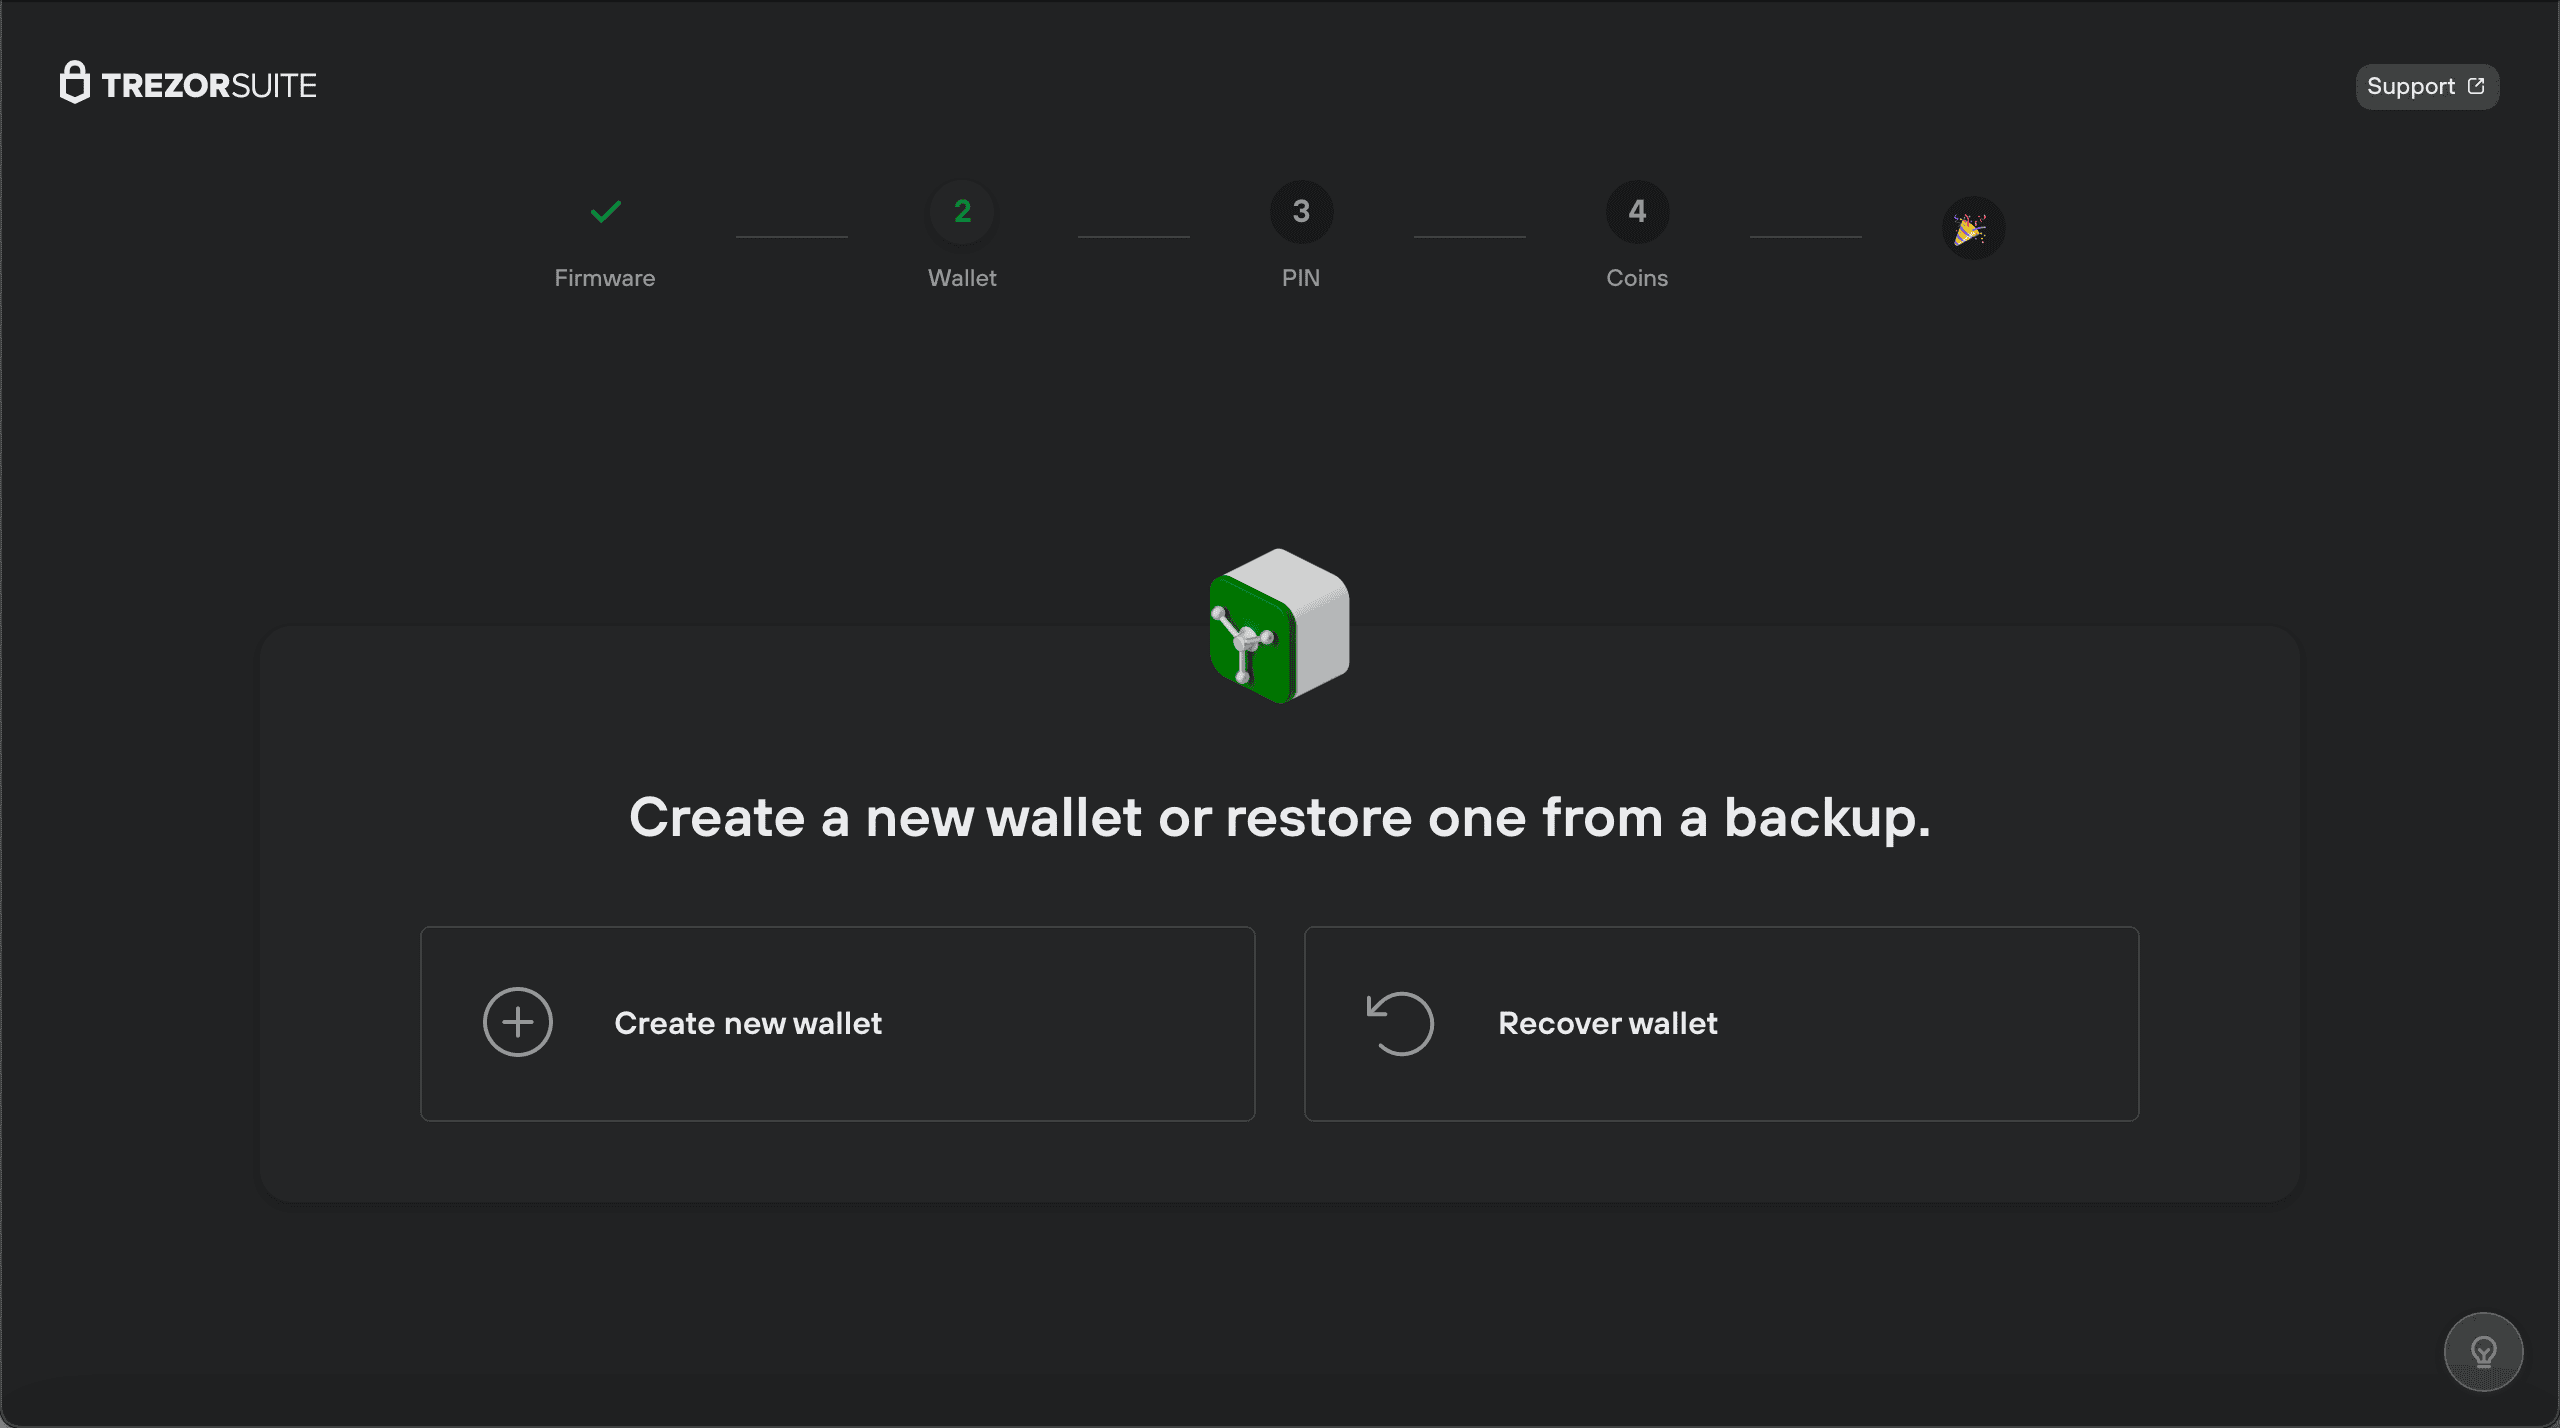
If it’s the first time using your device, or you’ve erased all data from the device via the Wipe device or Factory reset processes, you simply access the "Advanced Recovery" option during the "Recover wallet from seed" step of the device setup.
= During the second stage of setting up your Trezor One (the first stage is installing the firmware), choose the Recover wallet option:
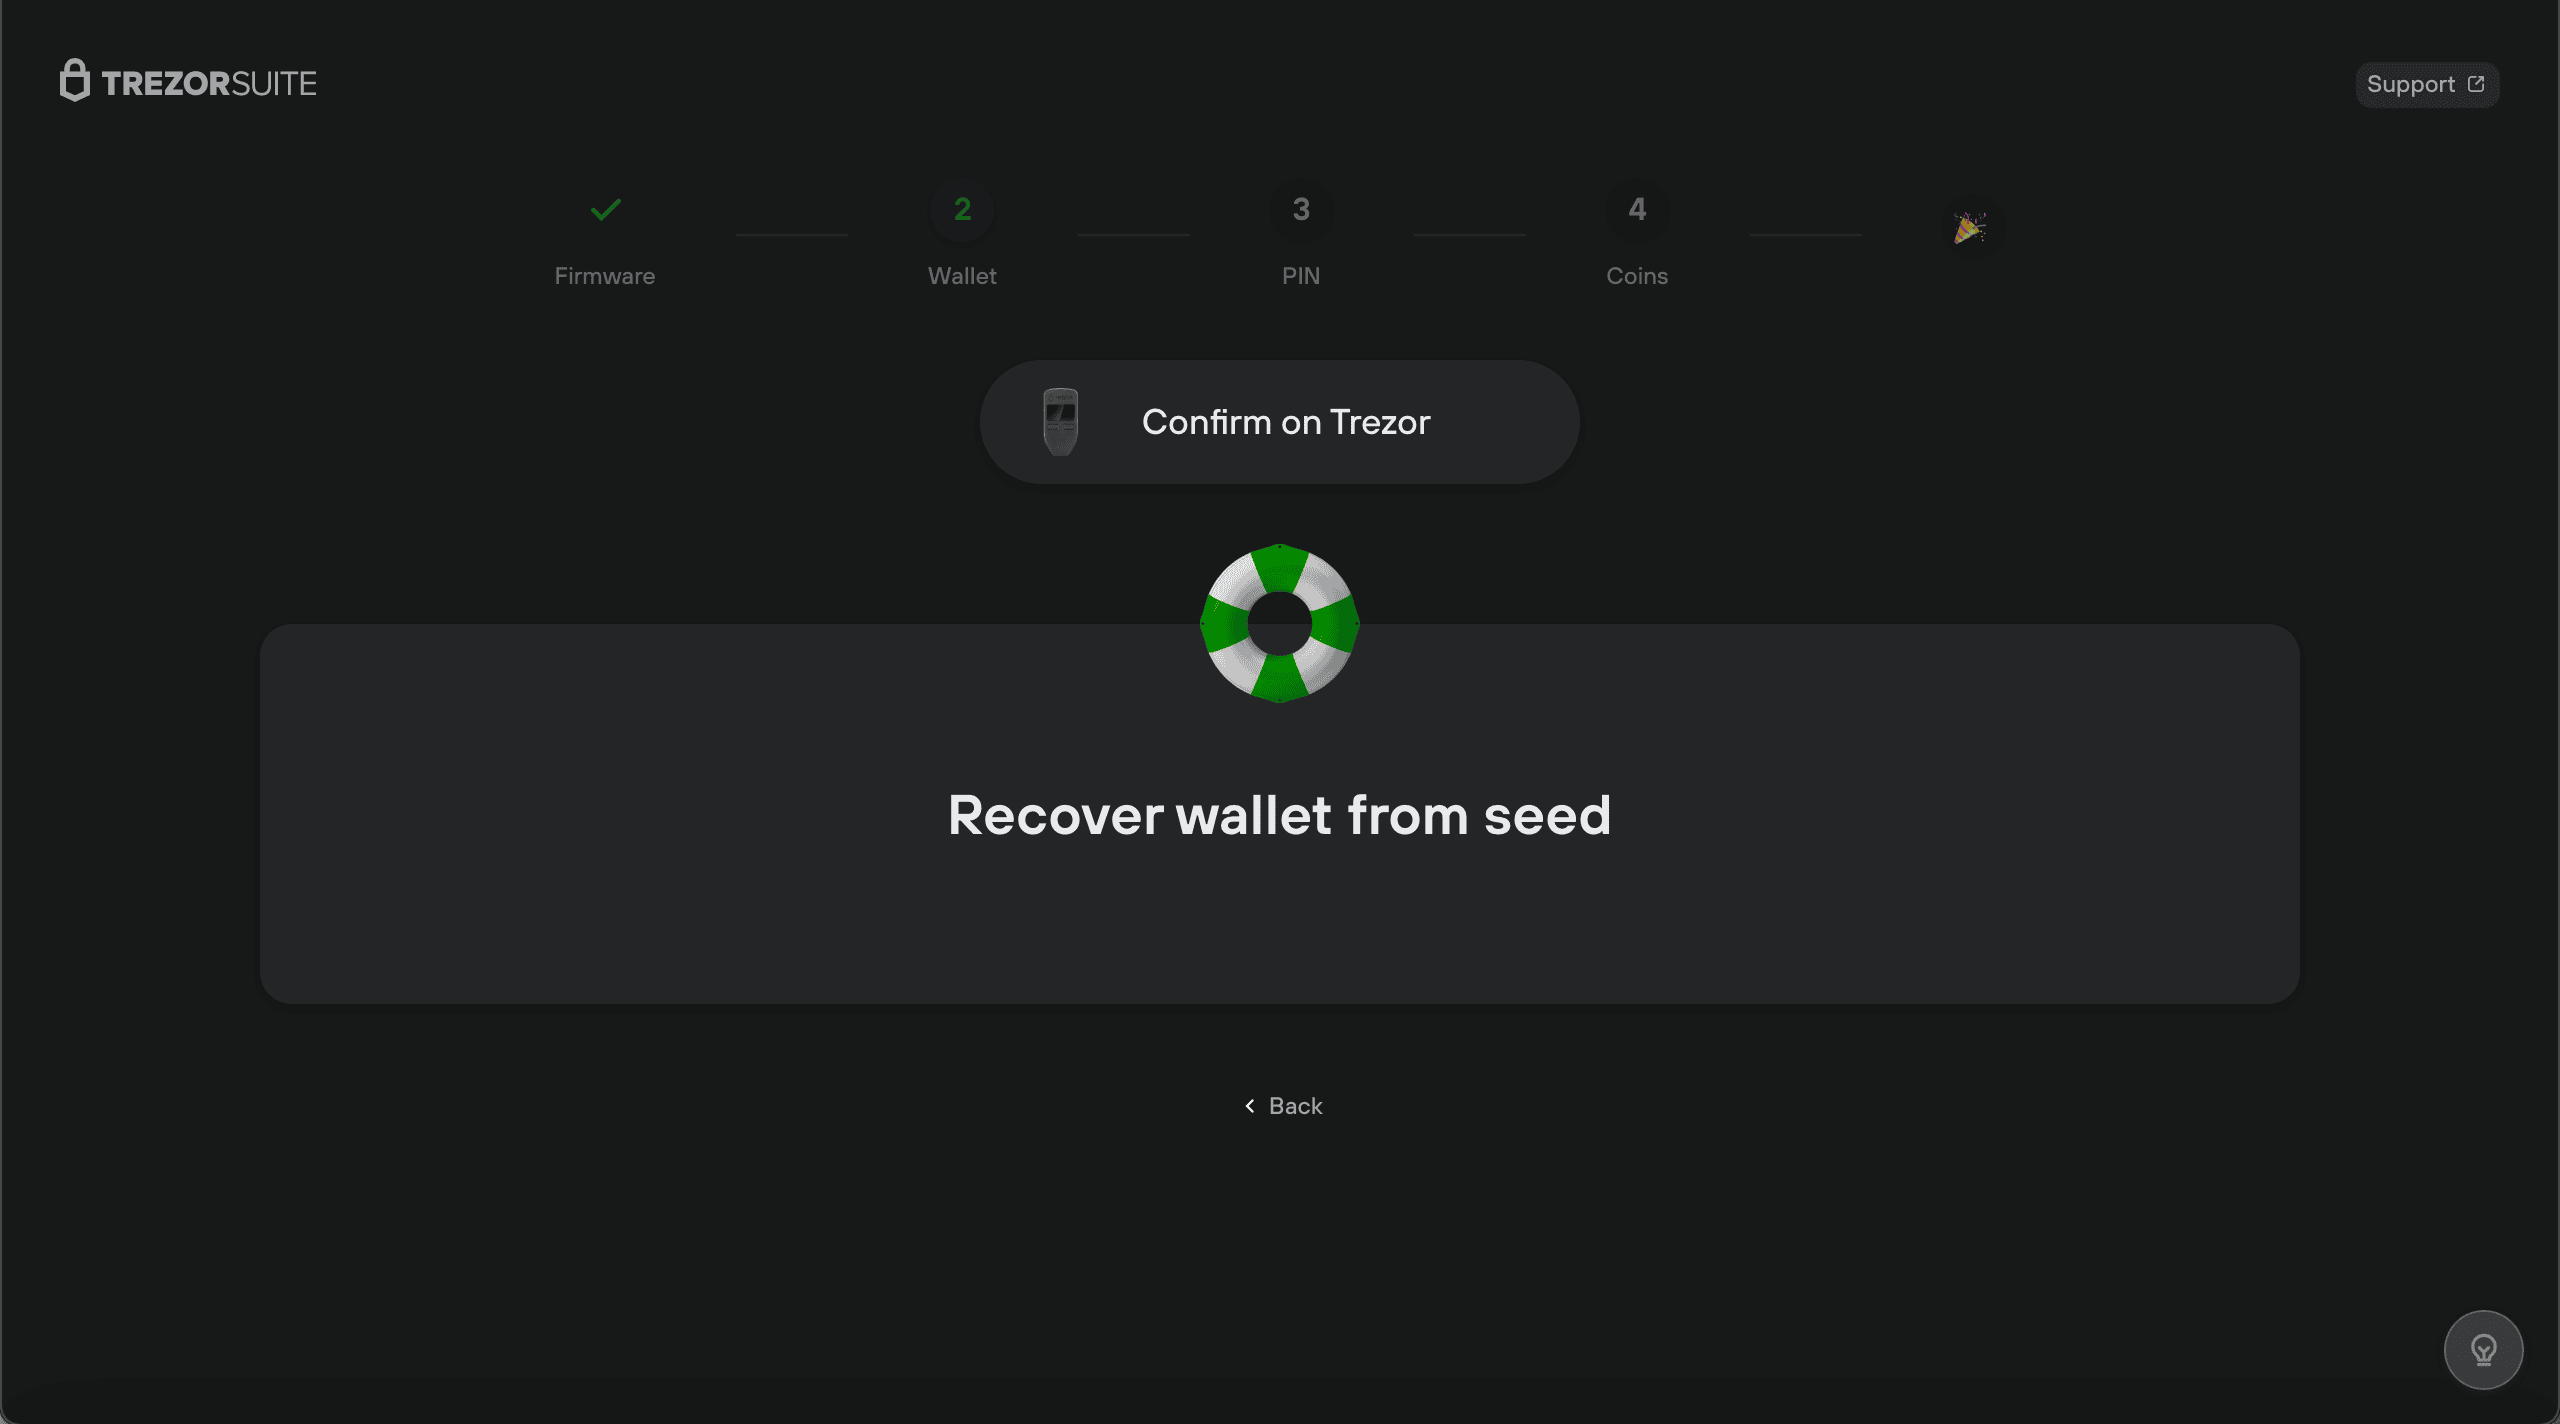
- After selecting "Recover wallet" you will see the "Recover wallet from seed" window, which will ask you to select the number of words in your backup (the default for Trezor Model One is 24)
- You can then choose the Advanced recovery option:

- After selecting "Advanced recovery" you’ll be asked to press the Confirm button on the device:
- You then need to use the blind matrix to enter your backup:
- Once you’ve successfully entered all of the words in your backup, click on Continue.
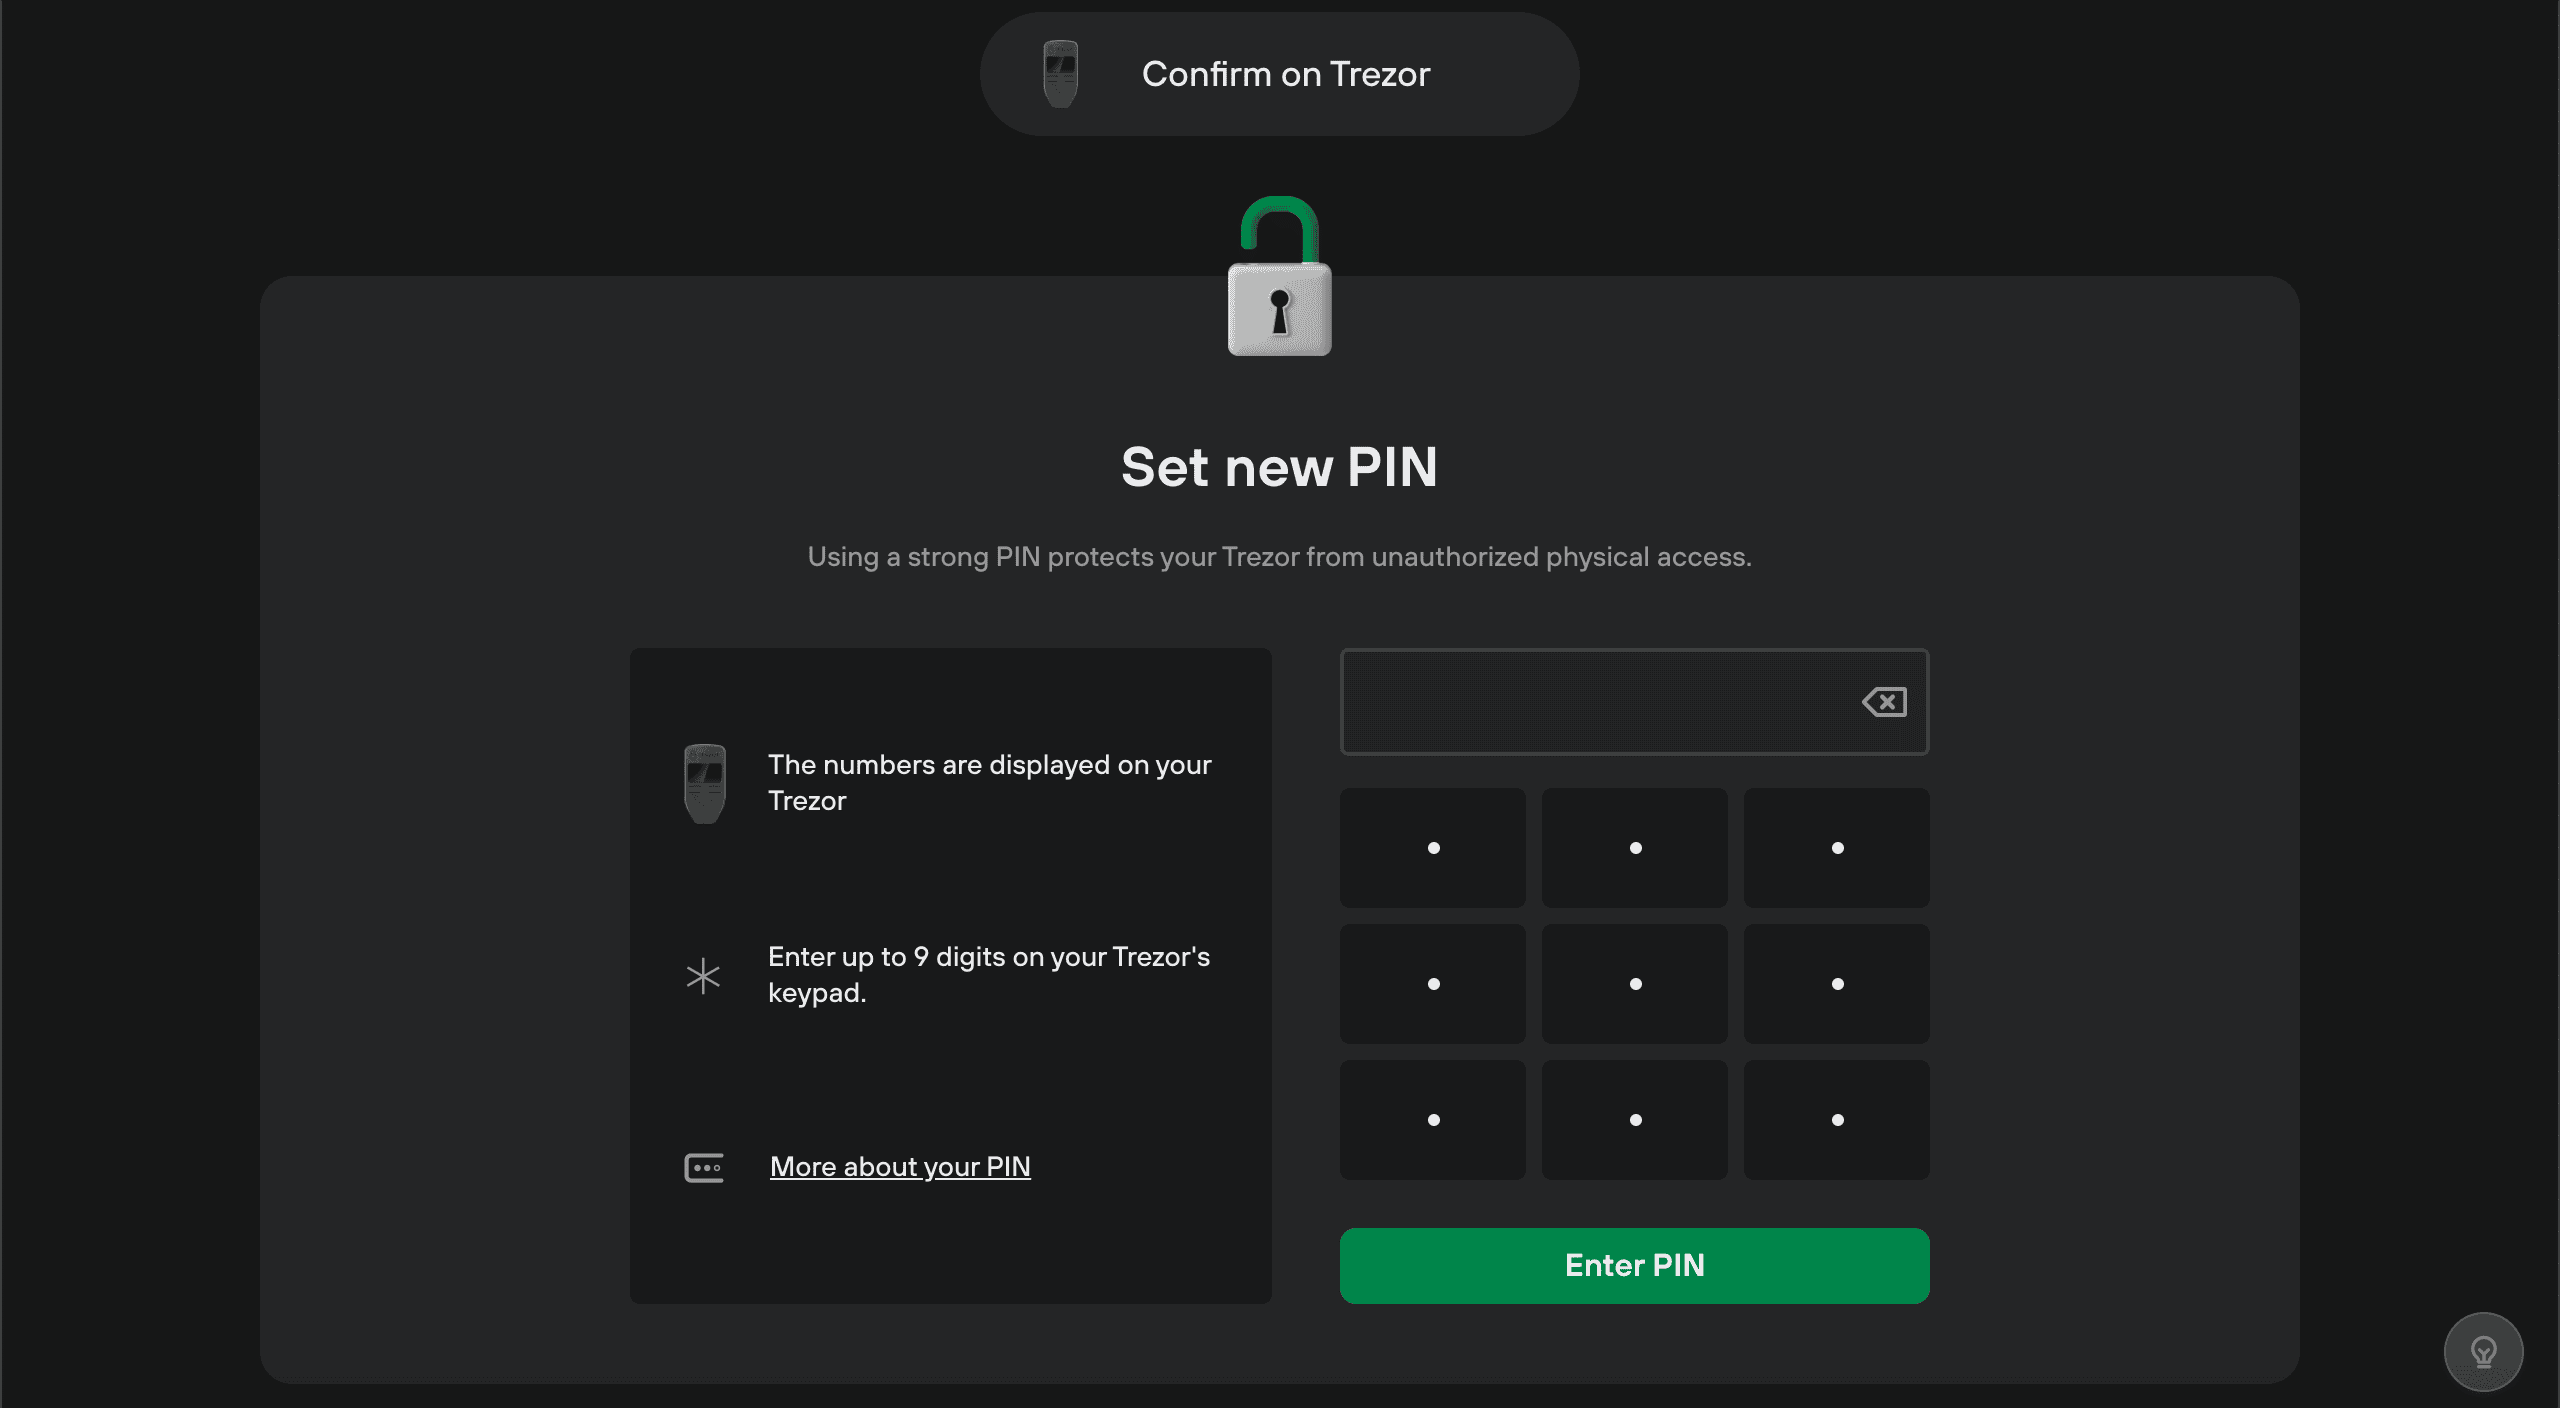
- You will then be prompted to set a new PIN for your device:
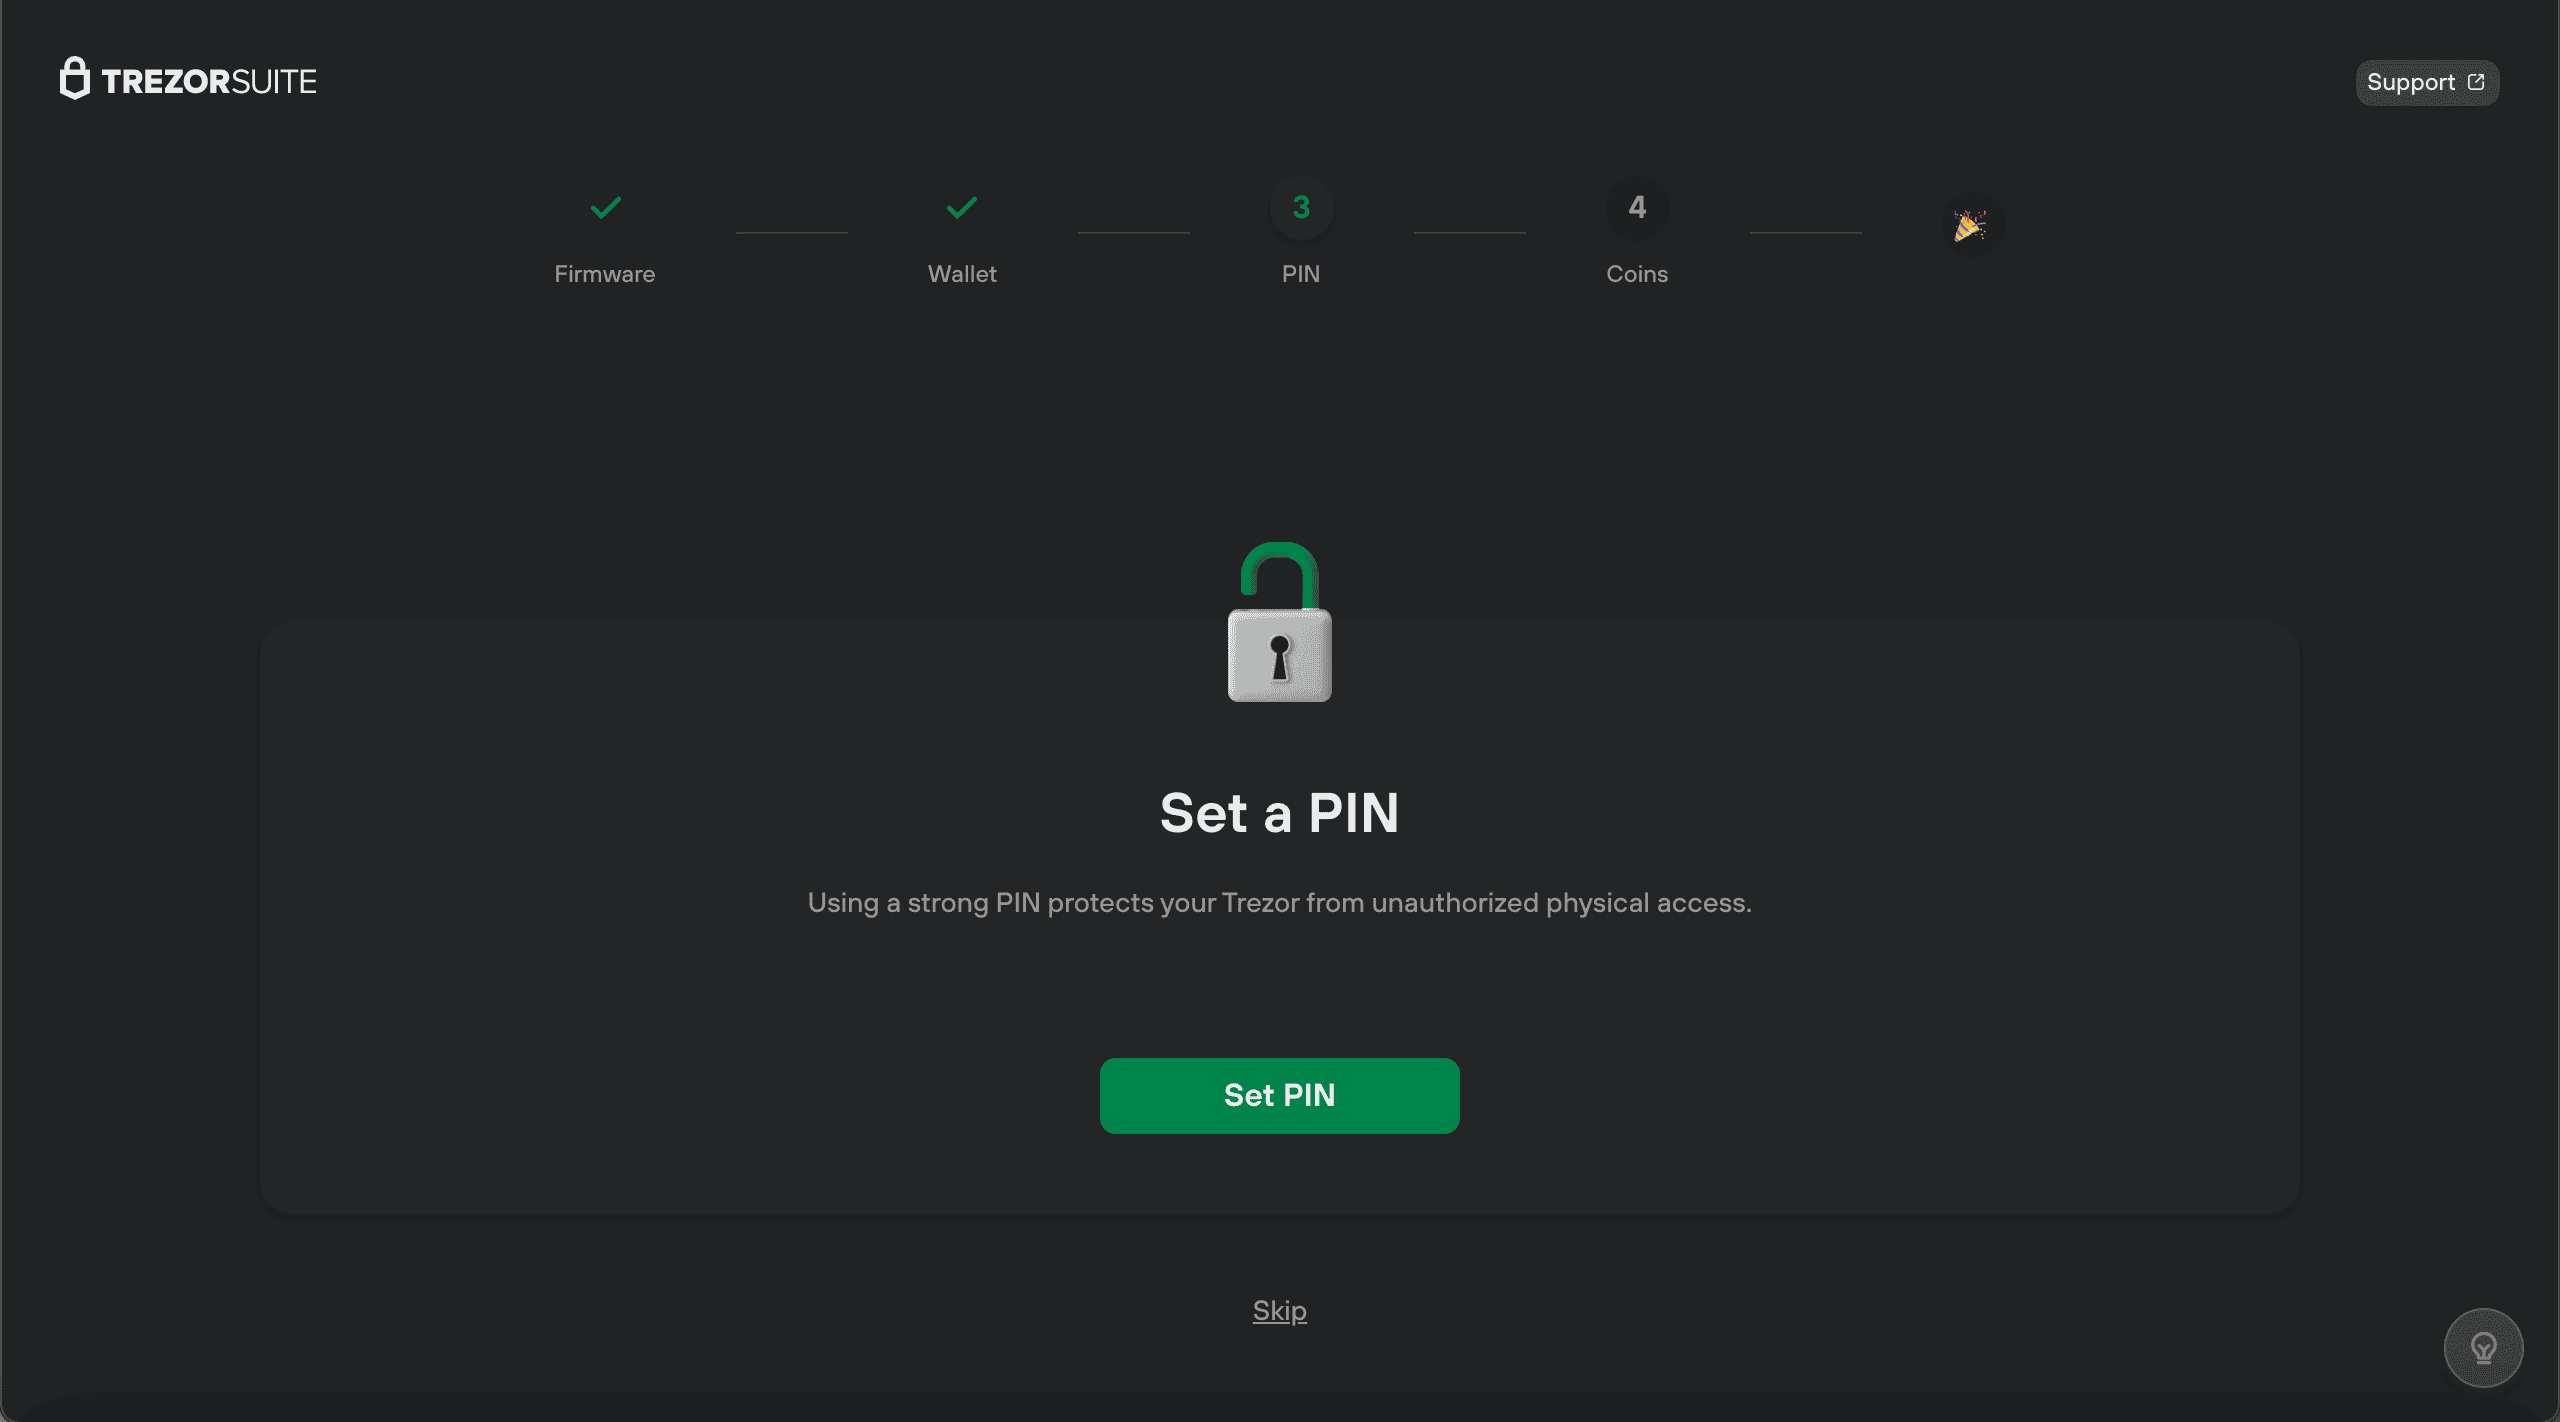
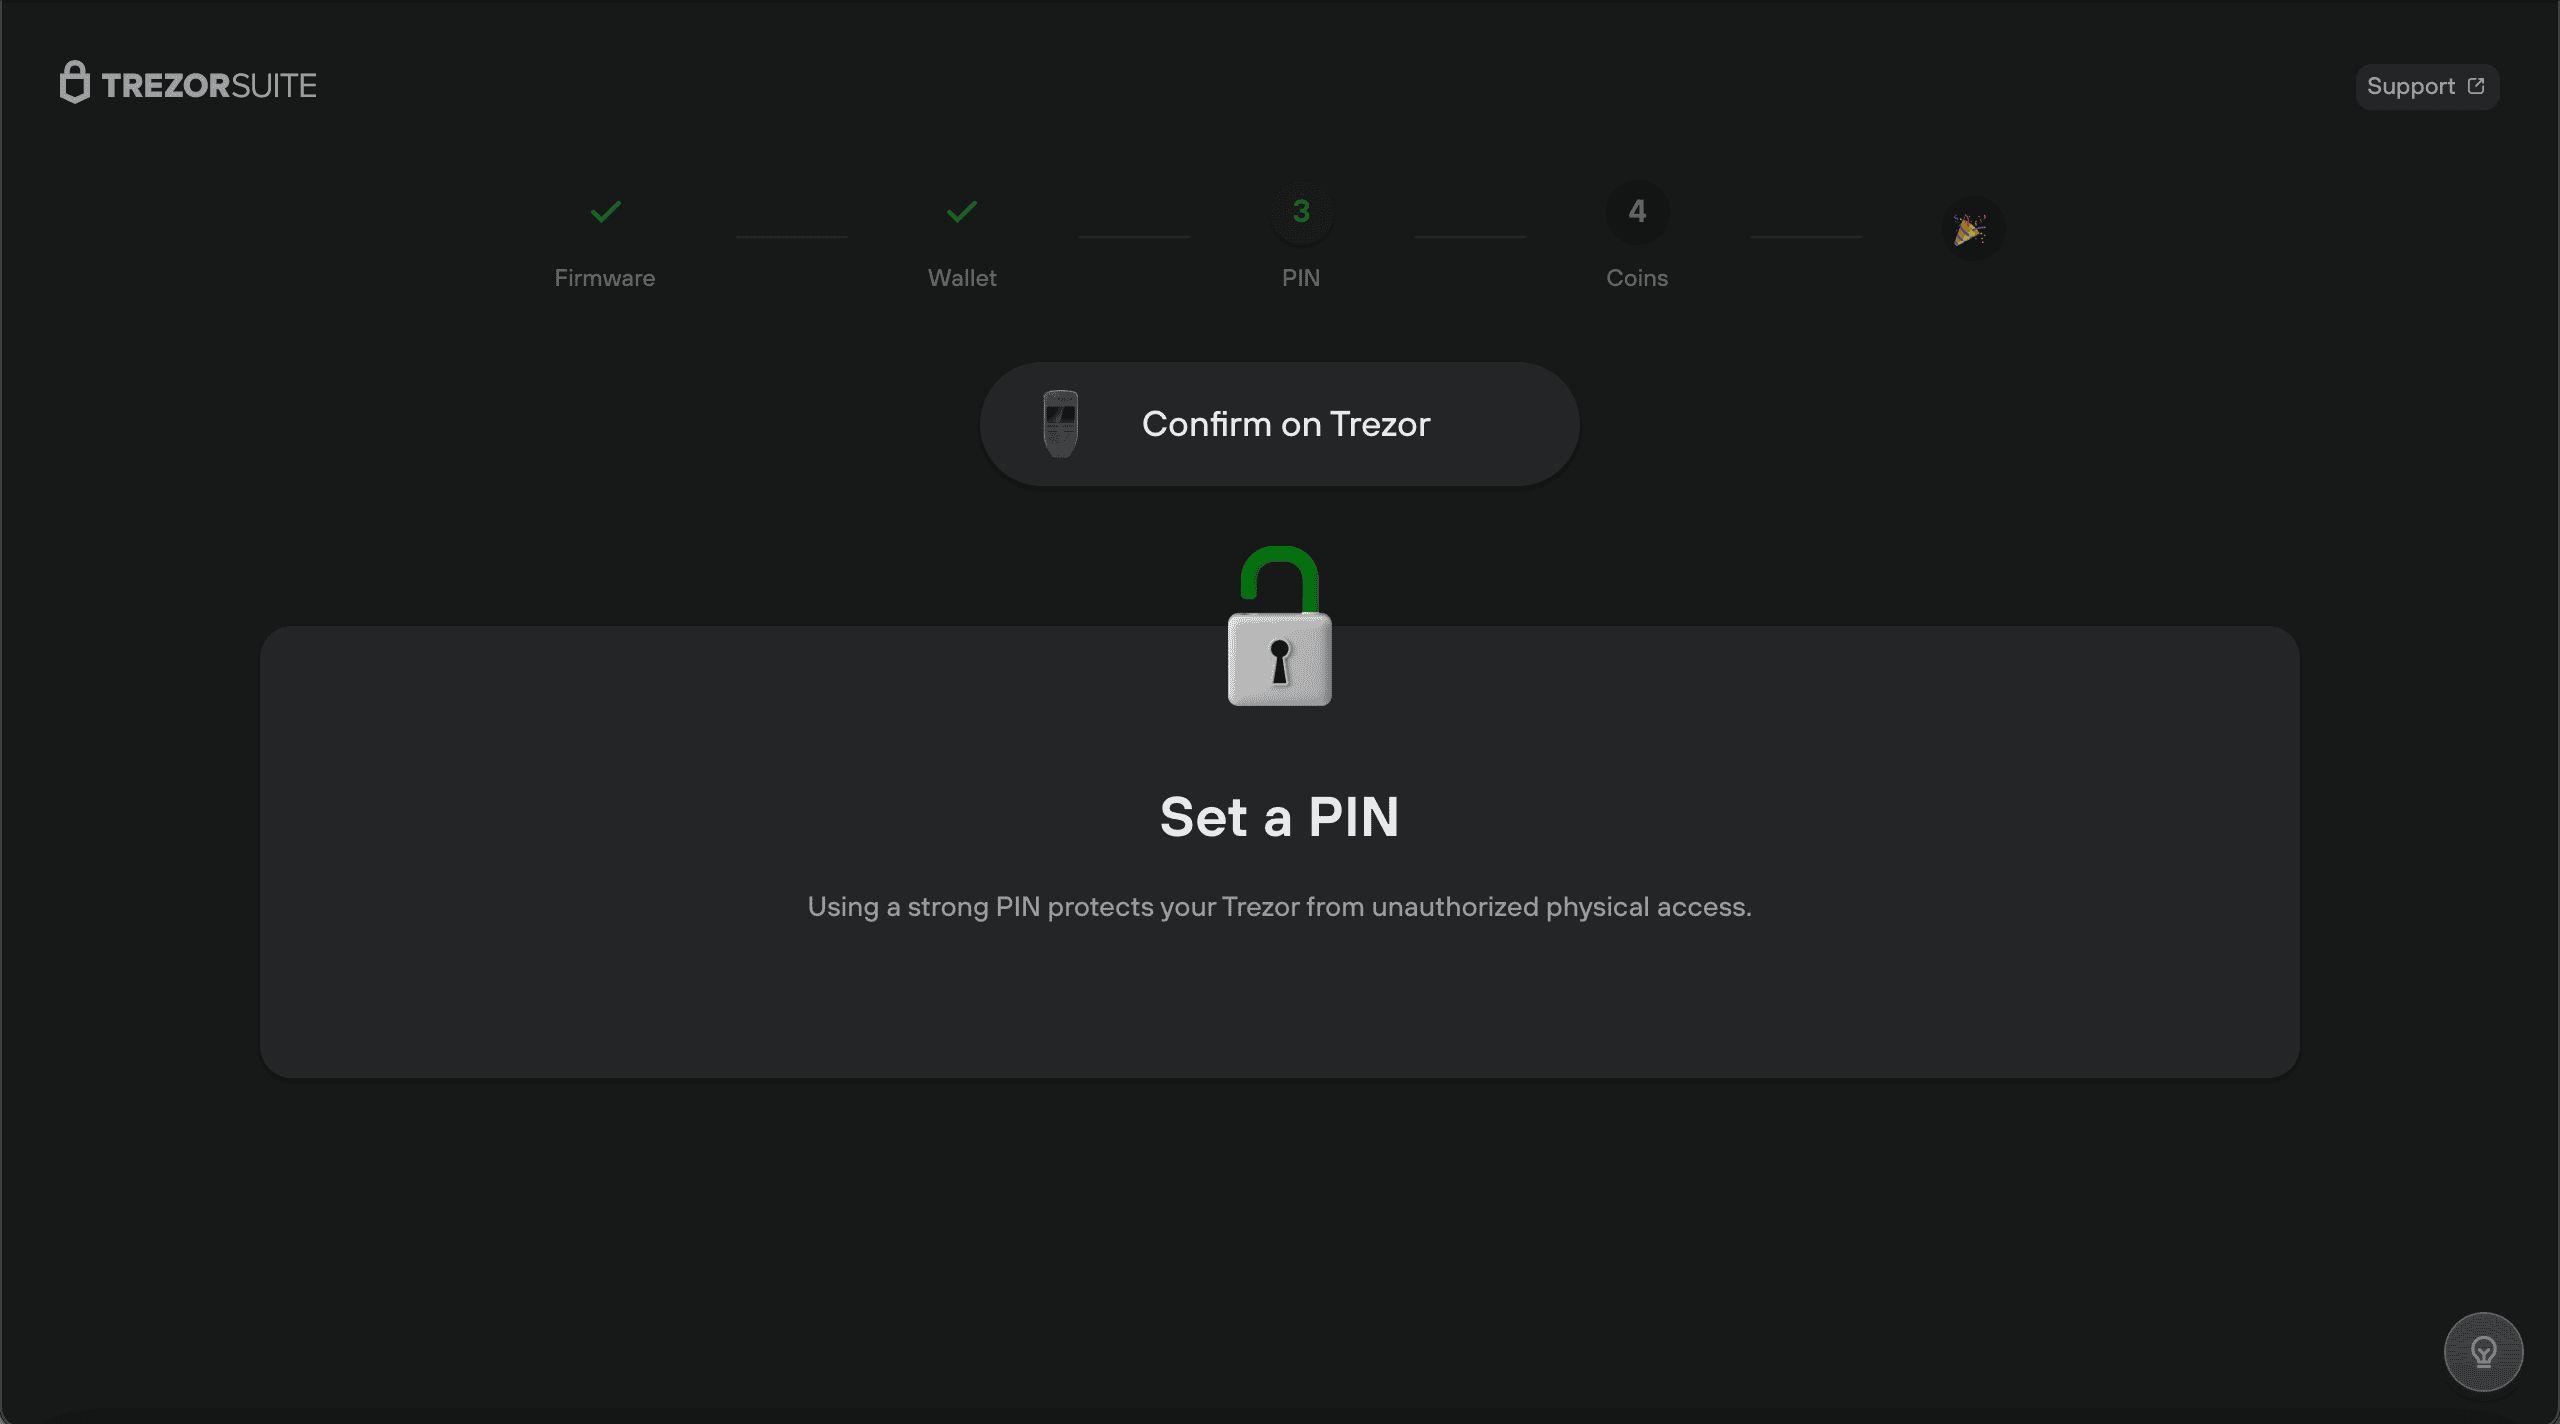
- Click Set PIN and then "Confirm" the action on the device when prompted:
- You can then choose your new PIN using the blind matrix:
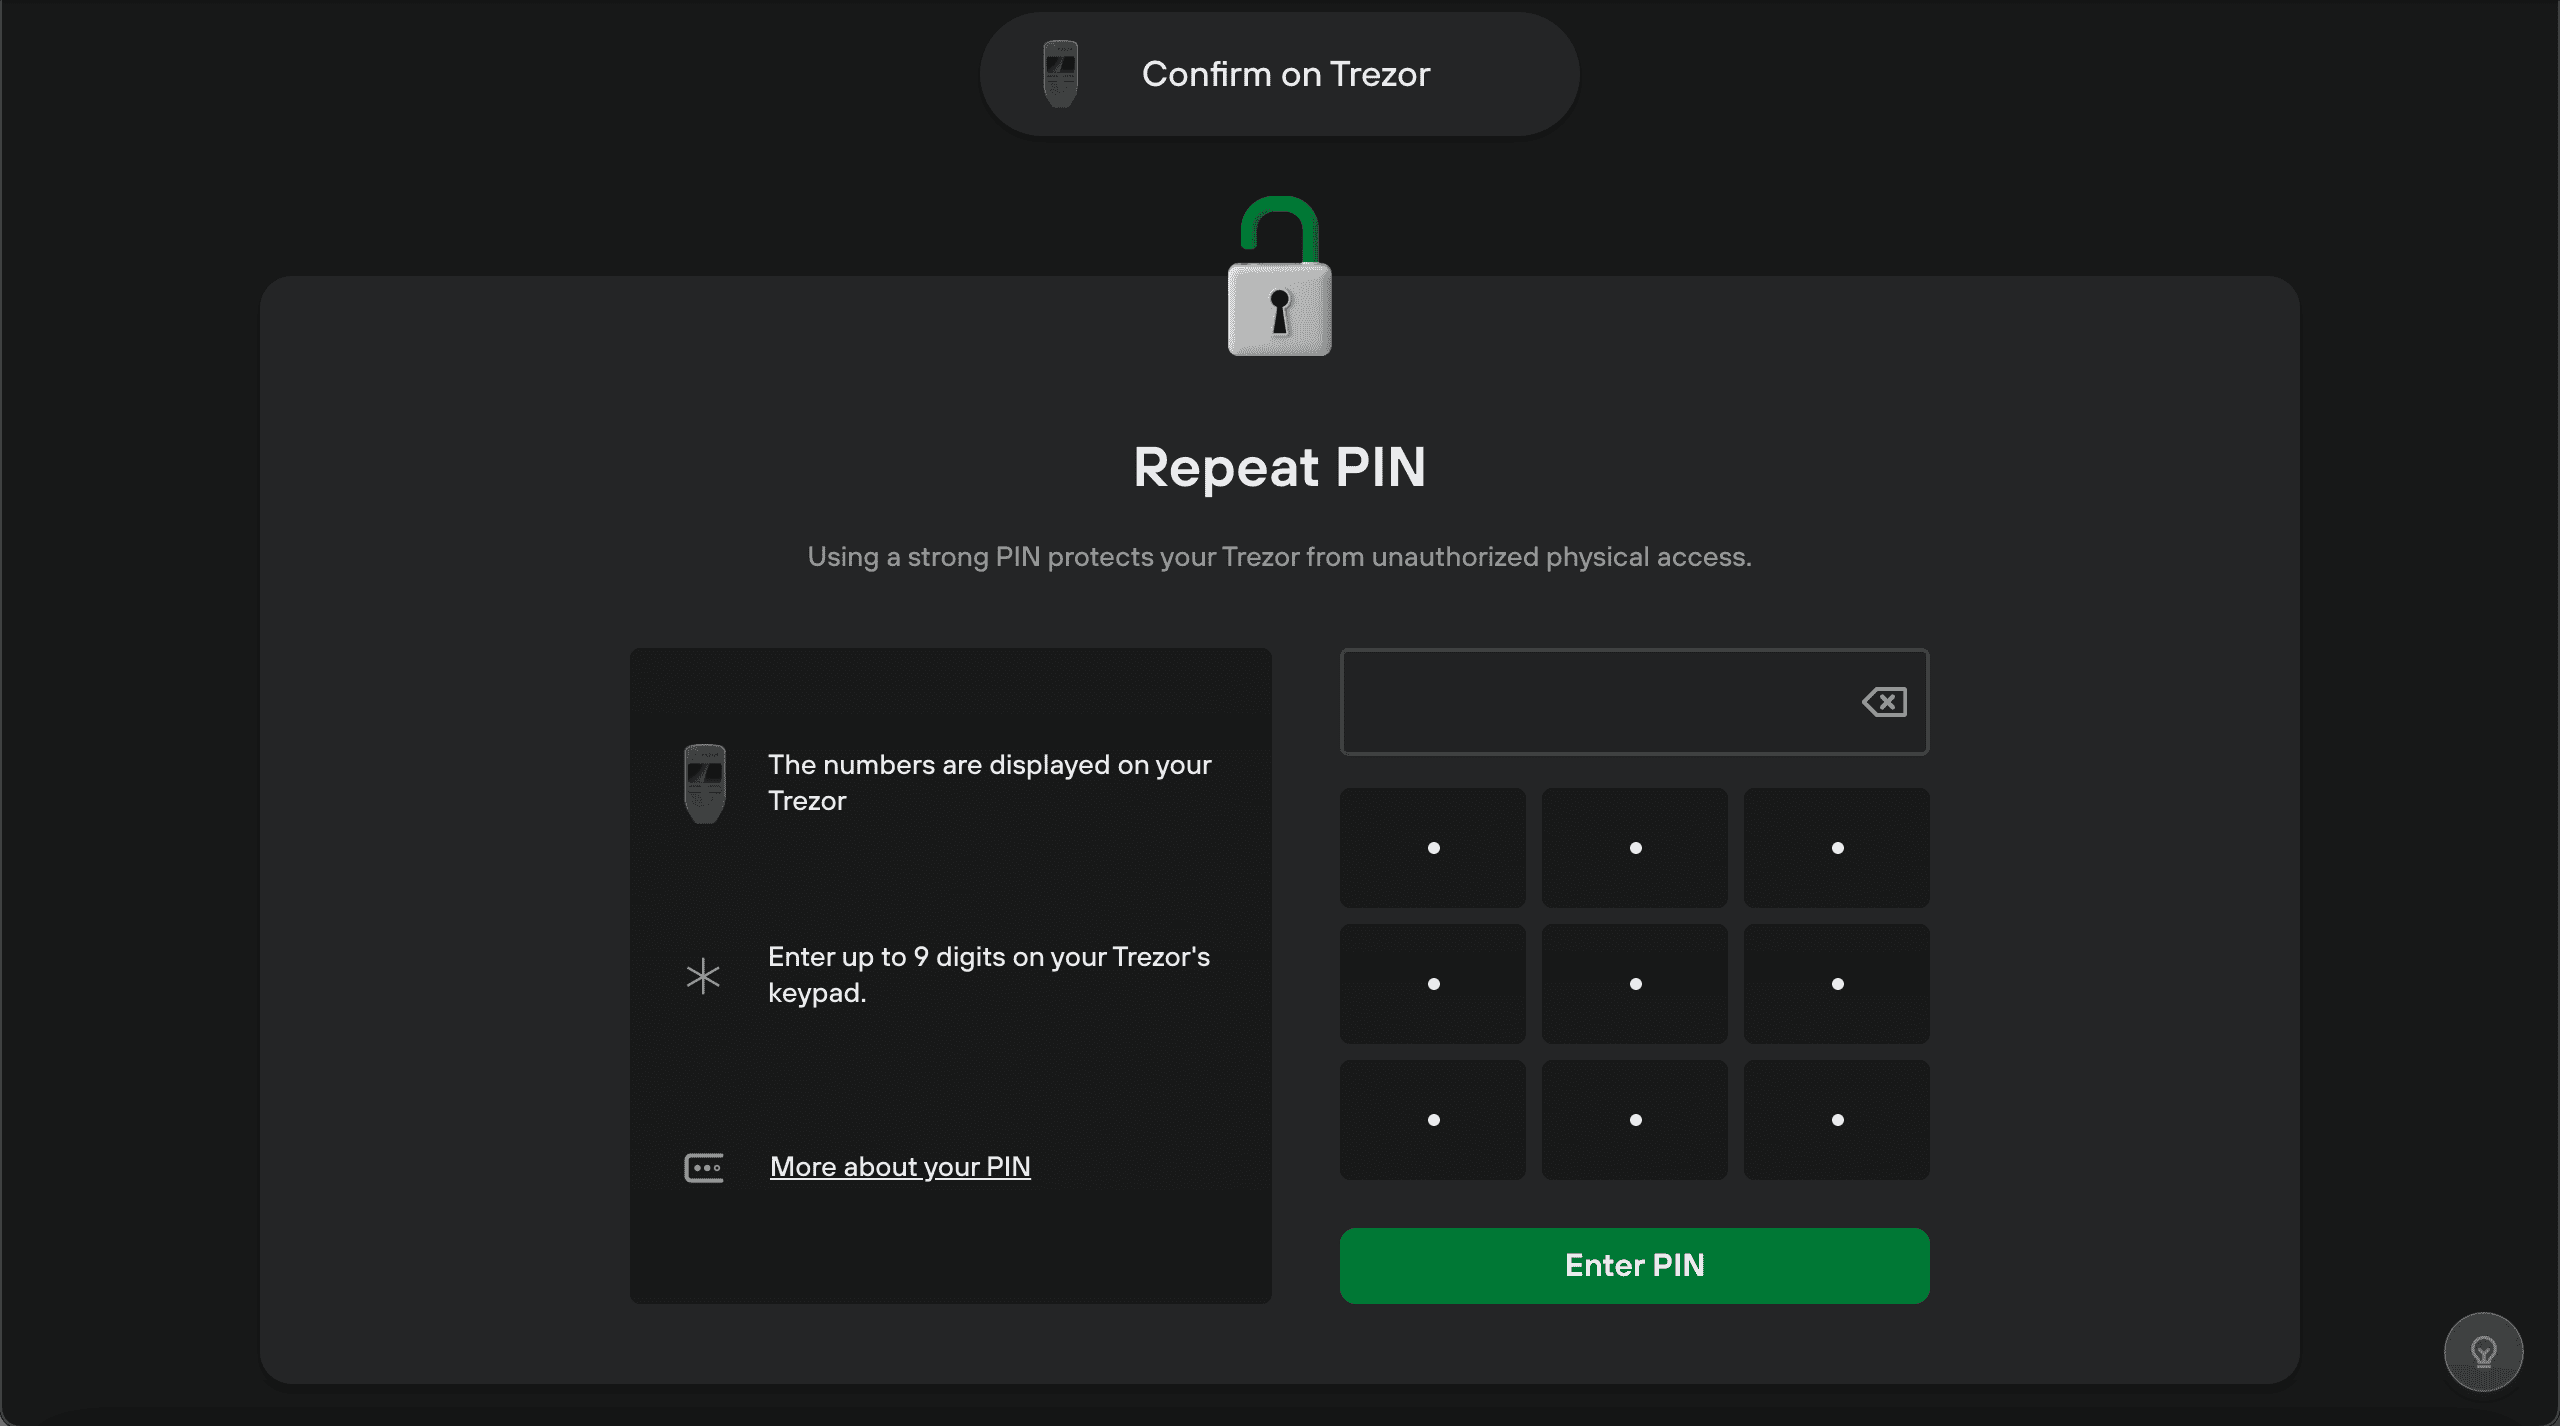
- You will then be asked to repeat your PIN
When setting up your Trezor device for the first time, you have to enter your new PIN twice. Notice that the numbers shown on your device change between the two entries.
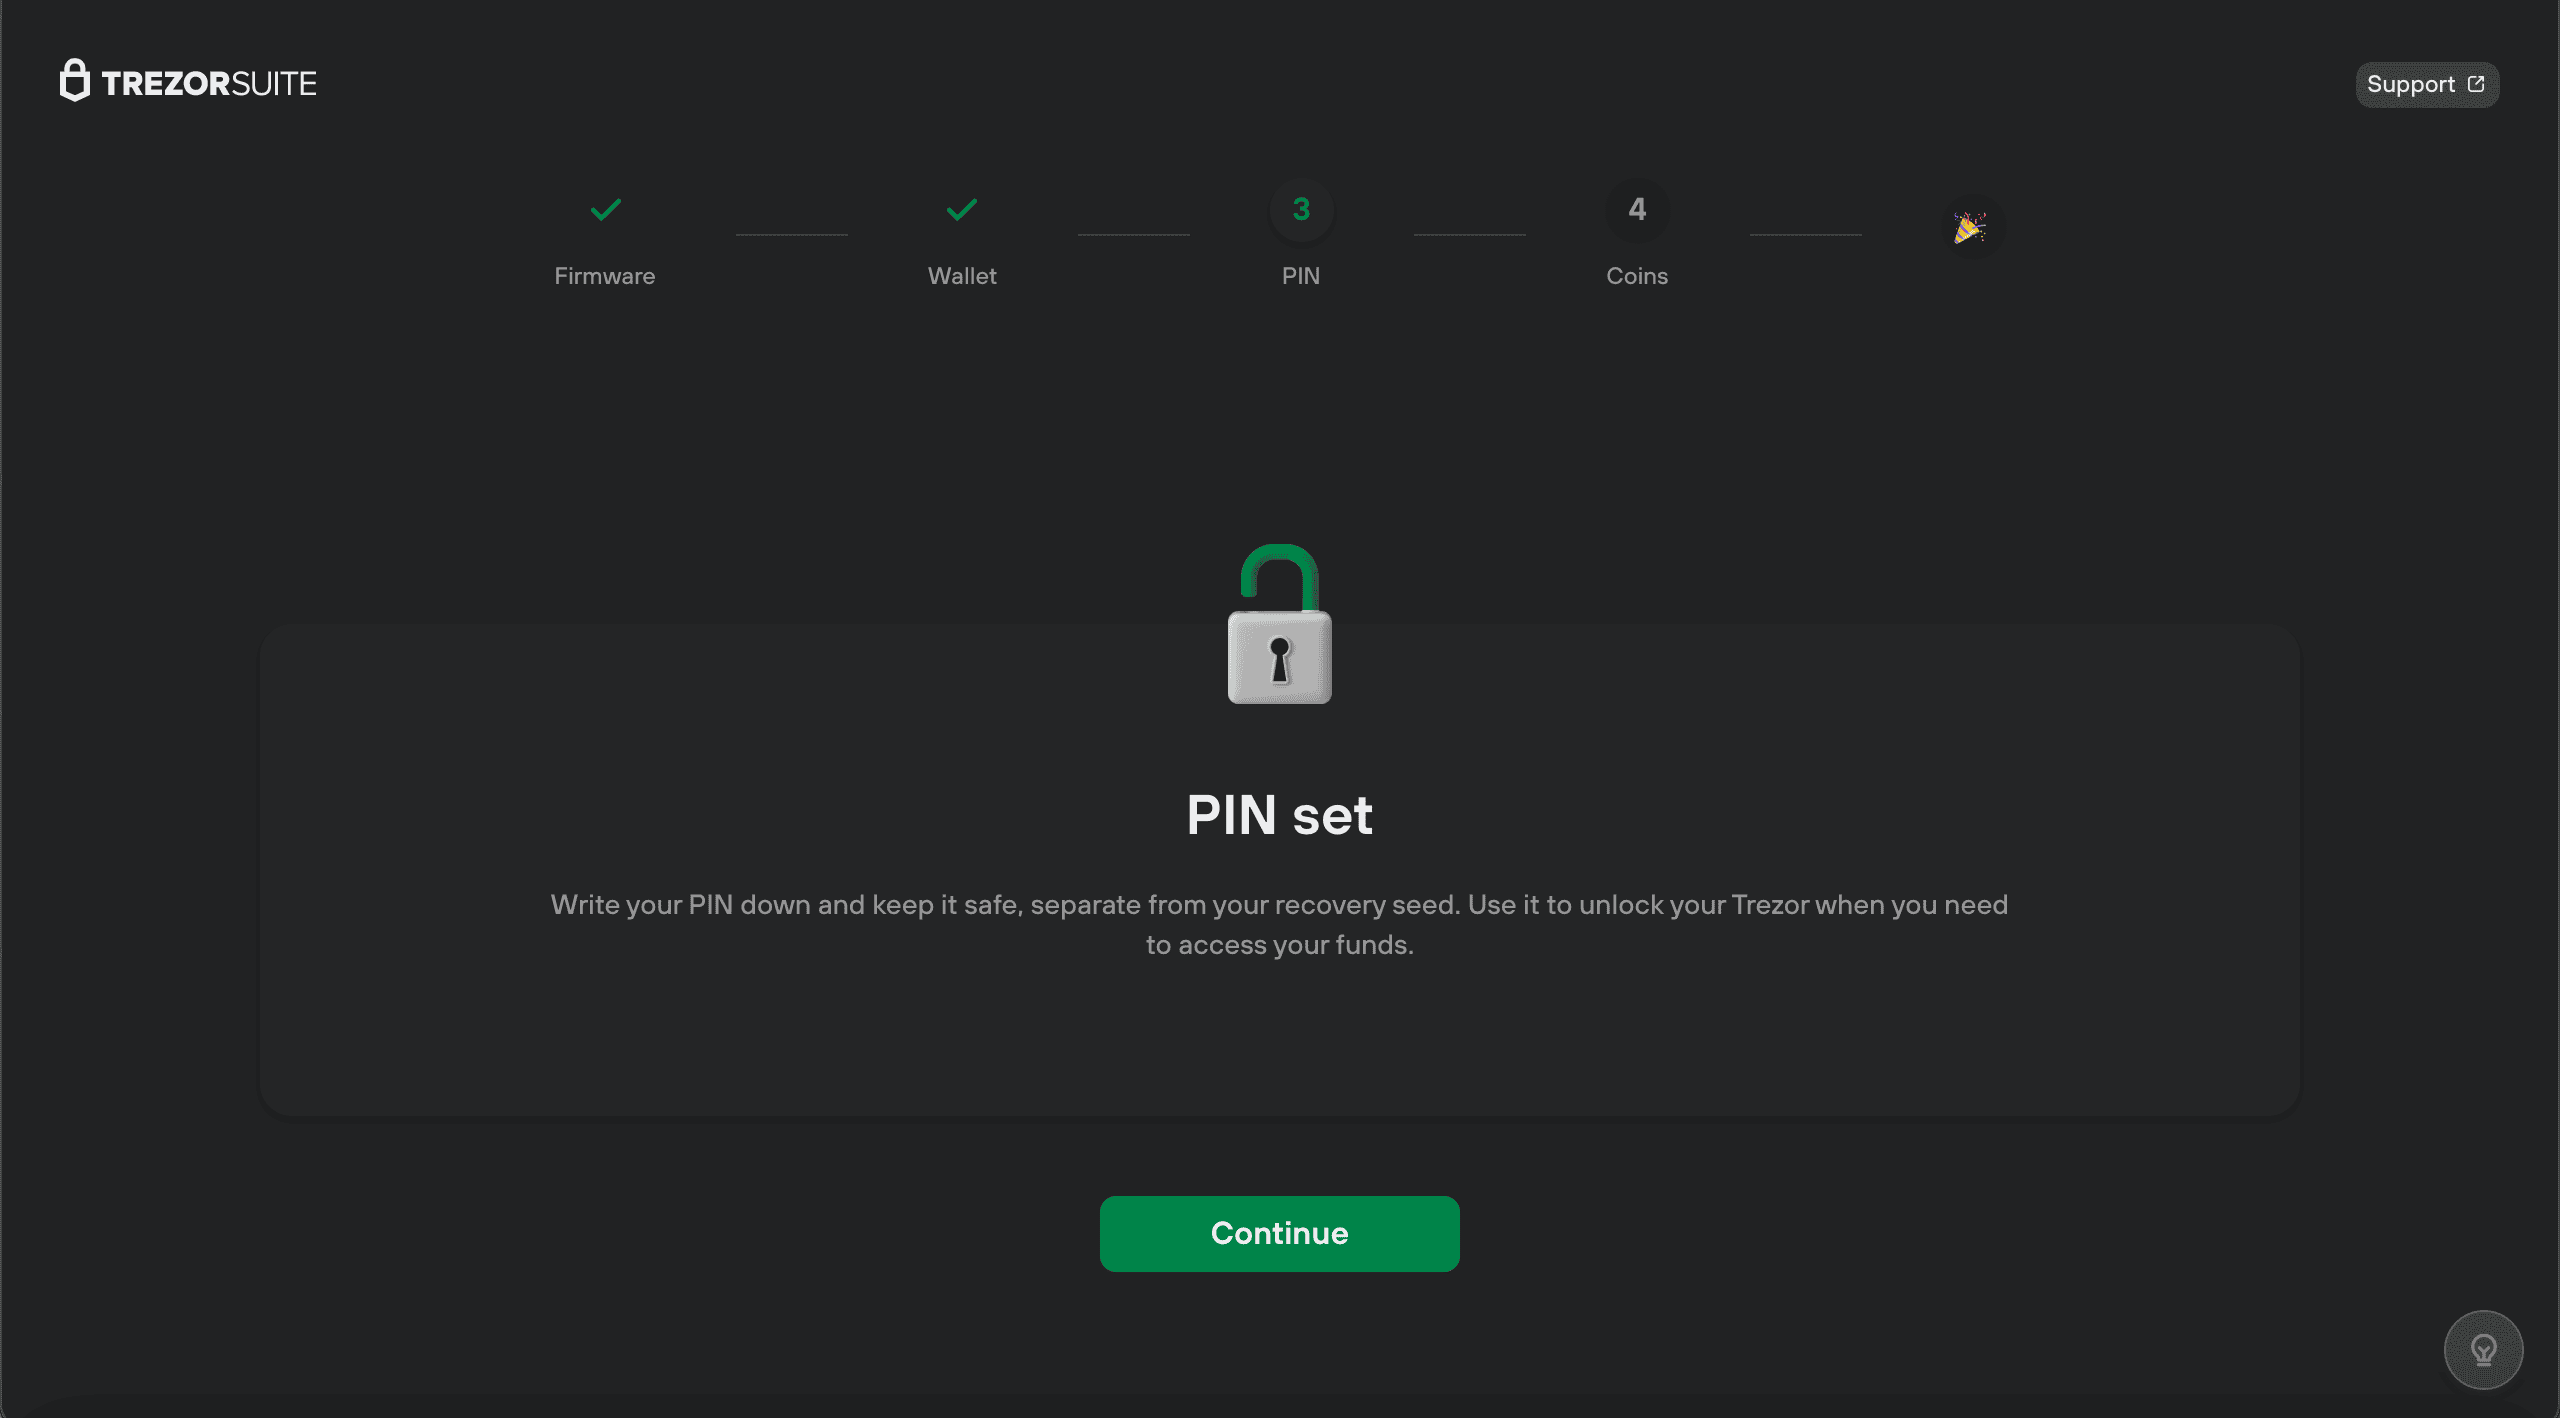
- After you’ve done this, you’ll see the "PIN set" window
- After clicking on Continue you’ll be directed to the "Activate Coins" window, where you’re free to choose which cryptocurrencies are shown in Trezor Suite. This setting can be changed at any time, along with the other (advanced) settings.
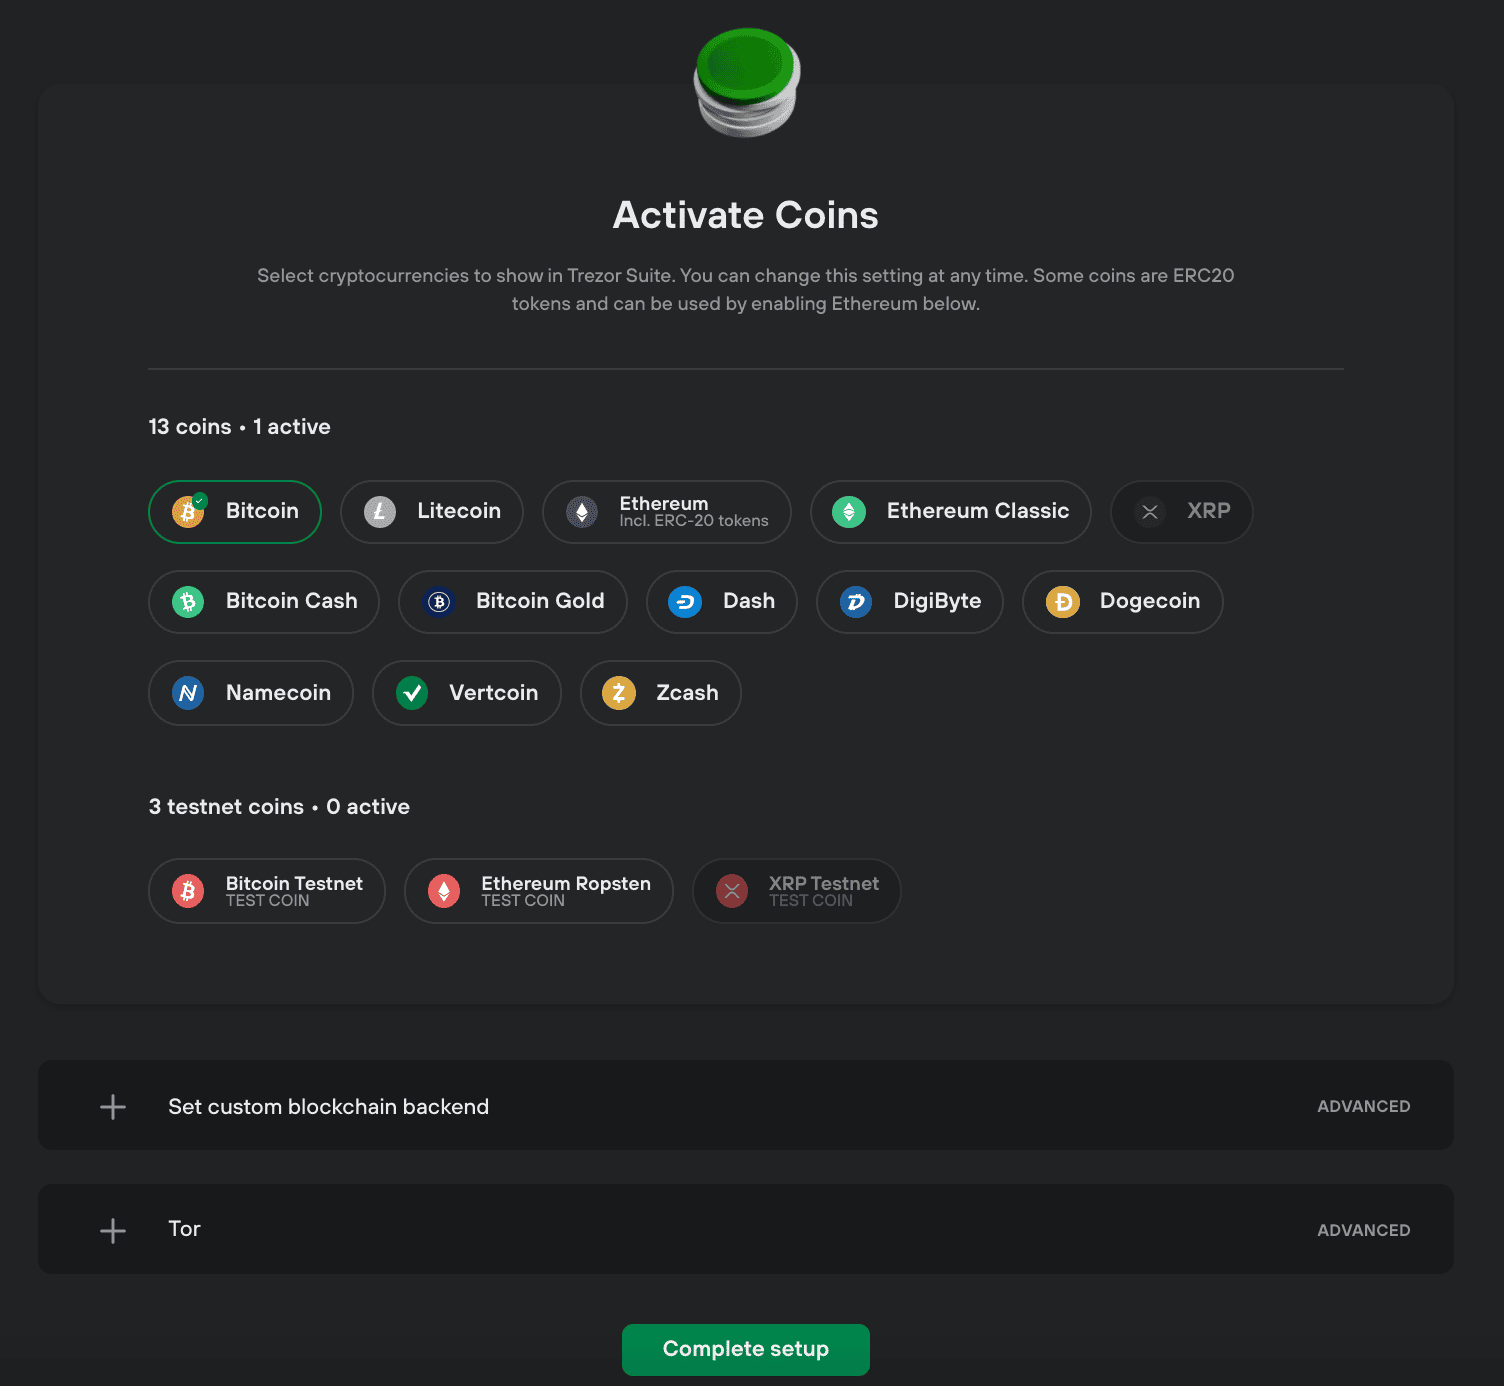
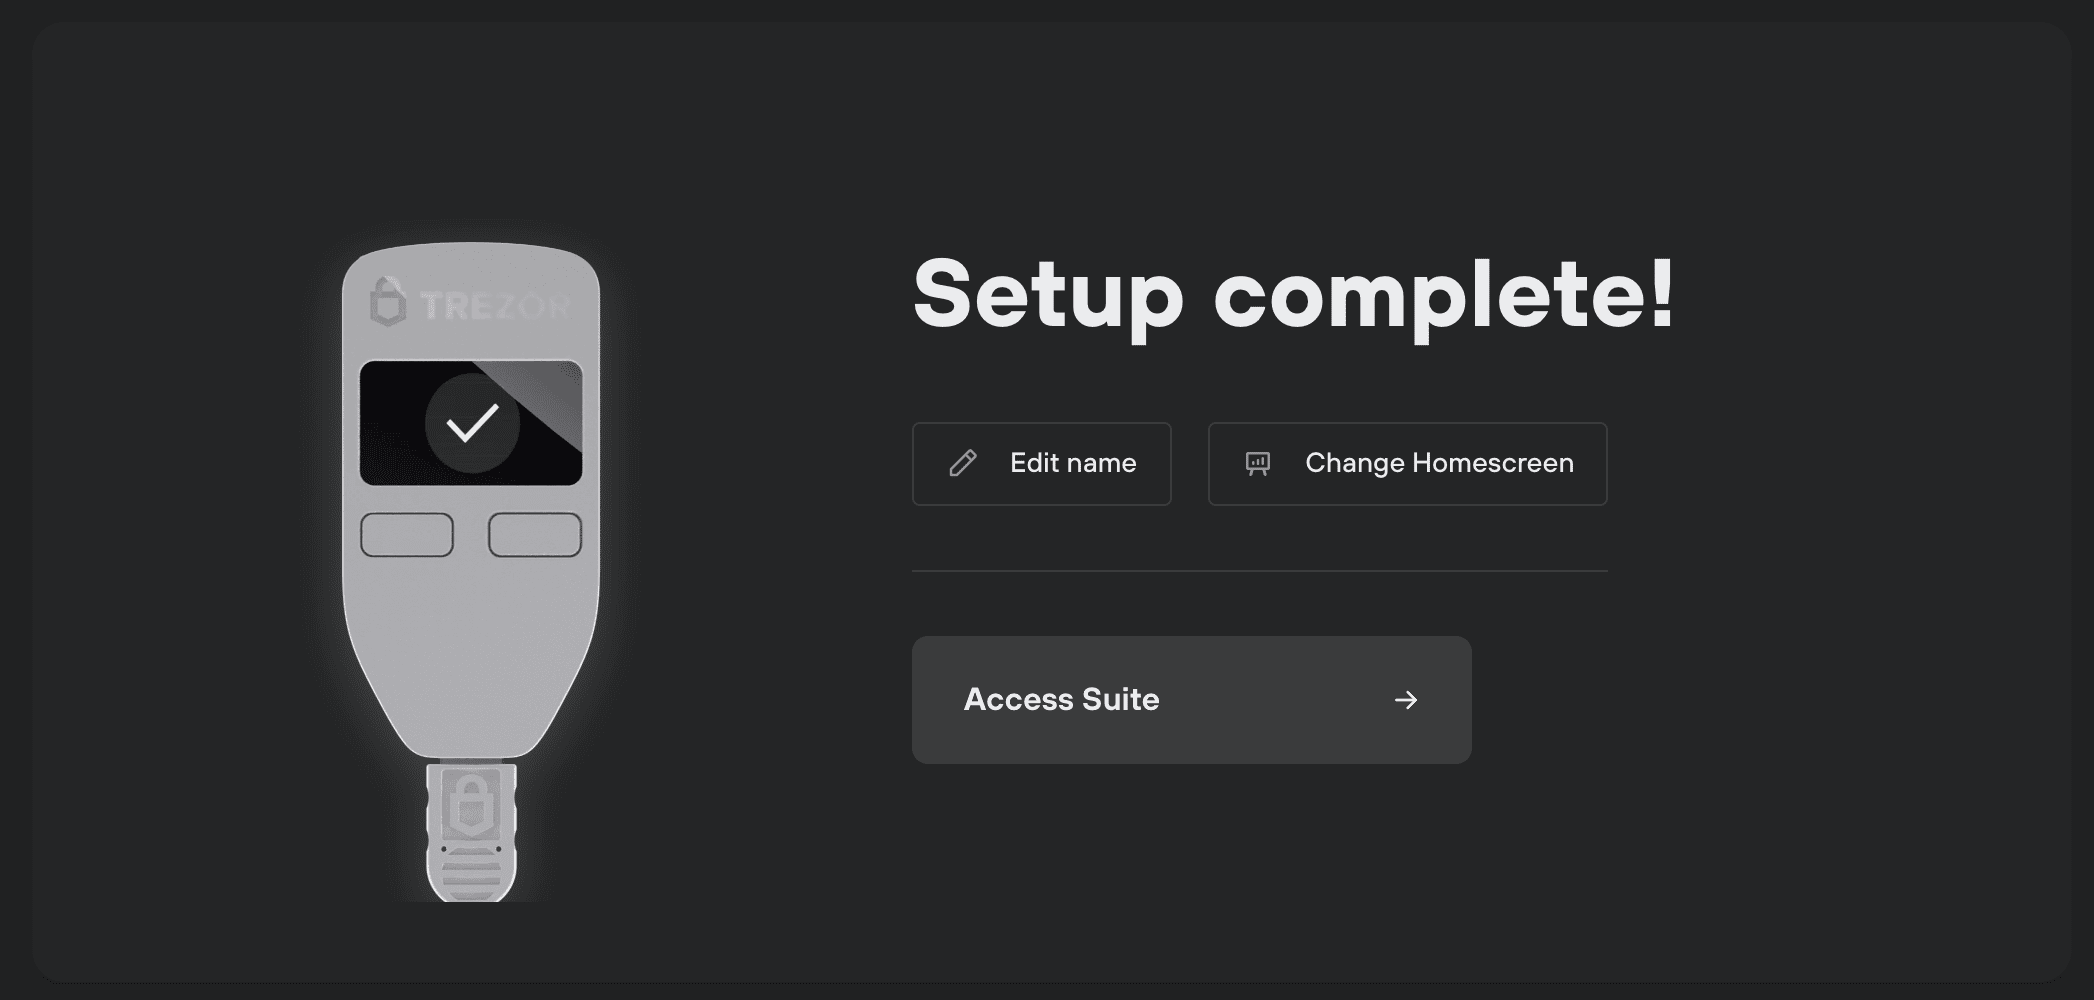
- Once you’re happy with your selection of active coins, simply click Complete setup and you’re all done!