Send crypto in Trezor Suite
Trezor Suite currently supports: Bitcoin, Ethereum, Cardano (Model T, Trezor Safe 3, Trezor Safe 5, Trezor Safe 7), Litecoin, ZCash, Ethereum Classic, Dogecoin, Ripple (Model T, Trezor Safe 3, Trezor Safe 5, Trezor Safe 7), Bitcoin Cash, Solana (Model T, Trezor Safe 3, Trezor Safe 5, Trezor Safe 7), Polygon PoS, BNB Smart Chain, Arbitrum One, Base, and Optimism.
ERC20 tokens can be sent from an Ethereum account. Many other cryptocurrencies can be accessed using third-party wallets. For the full list of supported cryptocurrencies, click here.
Remember to only send and receive funds between accounts of the same cryptocurrency. Mixing accounts of different cryptocurrencies is very likely to end with a loss of funds.
Making payments in Trezor Suite on desktop
- Plug in your Trezor device and go to the Accounts page in Trezor Suite.
- Select the account for the cryptocurrency that you would like to send using the My accounts side-bar menu.
- Click Send in the account menu bar.

- This reveals the Send transaction menu.
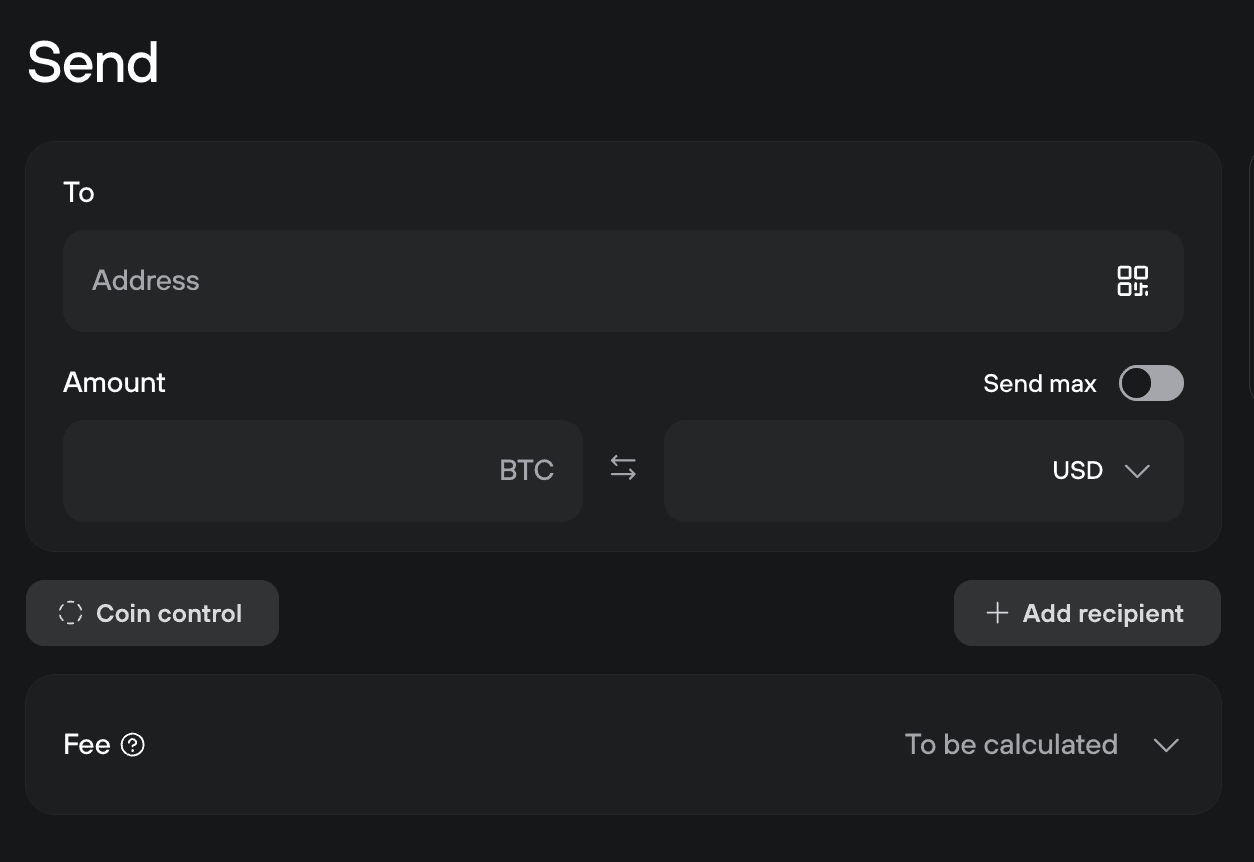
Enter the destination address and the amount
You can type in or copy-paste the destination address for your transaction. You can also scan it in the form of a QR code (if available) by pressing the 'Scan' button, which is displayed when you hover over the address input field.
In order to scan a QR code, you must allow Trezor Suite access to your camera. You can then hold the QR code in front of the camera to scan it.
Enter the amount you want to send (in the selected cryptocurrency or the equivalent value of a fiat currency of your choice). Please remember that the fiat currency exchange rates are estimates based on the current exchange rate provided by CoinGecko. You can also click the 'Send Max' button to send all funds from that particular account. Alternatively, you can click the 'Coin control' button to make a manual coin (or more specifically UTXO) selection for the outgoing transaction; you can learn more about this feature in our coin control article and in the following video:
By pressing the '+ Add recipient button', you can send funds to more addresses in one transaction. You can also add addresses by clicking on the 'Import' button from the drop-down menu. Sending funds to multiple addresses at the same time is convenient and saves you money in transaction fees.
Set a transaction fee
Suite offers three fee rates to choose from (Low, Normal, and High) in the Standard tab; a custom fee can be set by selecting Advanced and entering the fee you wish to pay. Please note that the fees are used to fund the running of the network and are not charged by SatoshiLabs. Learn more in our Transaction fees in Trezor Suite article.
Labeling
In Trezor Suite you can enable Labeling via the Application settings menu. Currently, you can store labels using Google Drive or your Dropbox account, or save them locally to your computer.
Confirm the transaction on your Trezor device
Once you have entered all transaction details and press Review & send, you will be prompted to confirm that the destination address is correct.
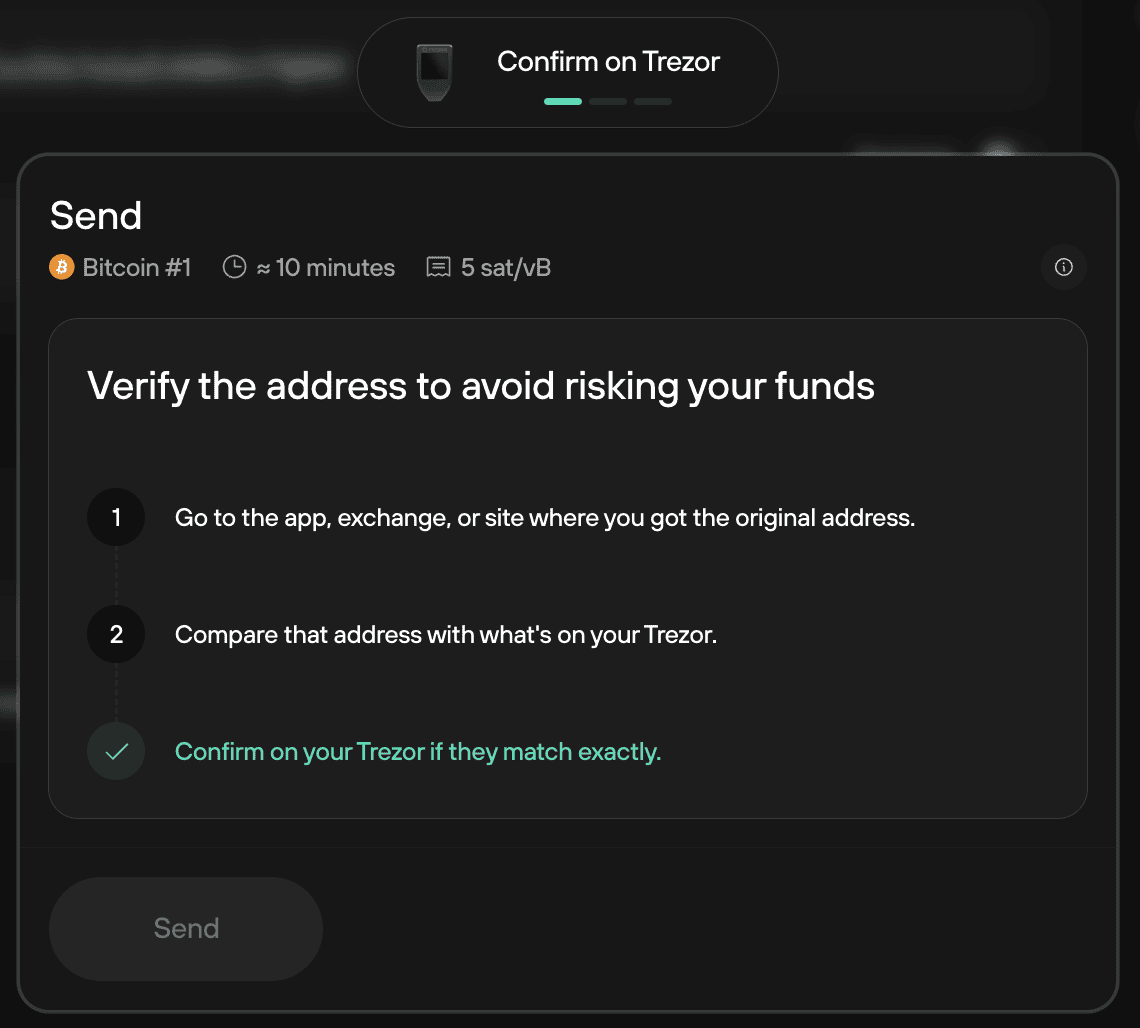
Always verify that the address on your Trezor screen is the intended destination address. Double-check that the address on your Trezor Trusted Display exactly matches the address given by the recipient or exchange. Always copy and verify the address directly from the source; never copy addresses from the transaction history, as it can lead to mistakes.
Once you've done this, you can proceed with confirming the other transaction details, namely the Amount sent and the Total including fee.
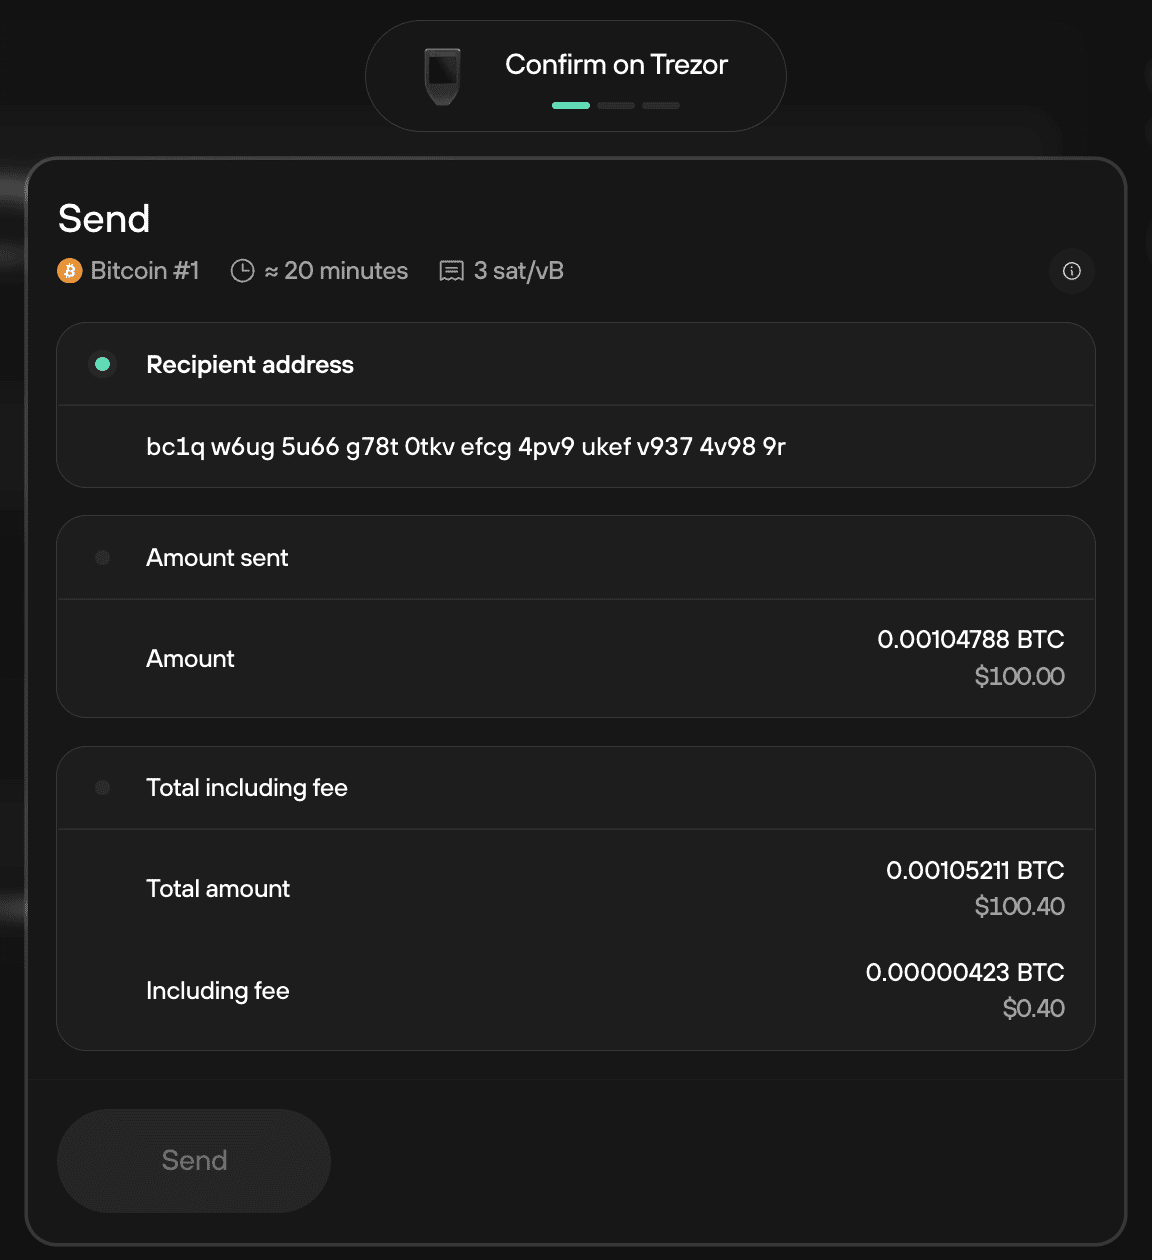
Confirm the transaction total including fee with the Hold to confirm button on your Trezor device.
You can then press Send in Trezor Suite to complete the transaction.
If the amount and address displayed on your Trezor screen are not the same as those on your computer screen, your computer might be infected with malware and you should abort the transaction.
If this happens to you, please contact us via our Chatbot Hal immediately.
Transaction confirmation
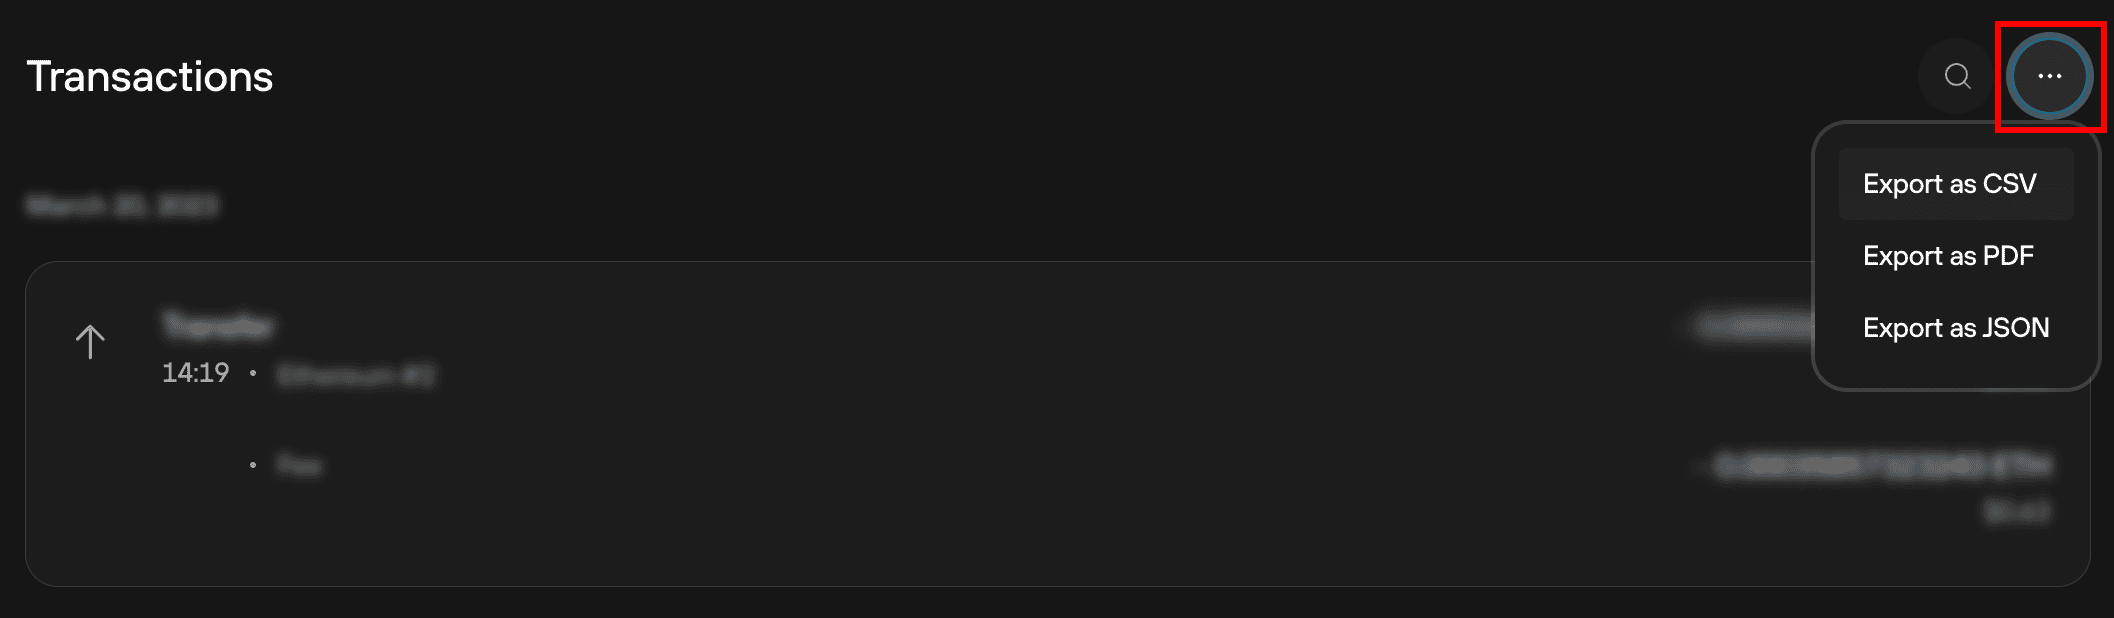
In Trezor Suite, you can check your transaction history in the Overview tab.
- You can search for a particular transaction ID, label, or amount using the magnifying glass search tool.
- You can also export your transaction history in CSV, PDF, or JSON format using the drop-down menu.
At first, a transaction will appear as unconfirmed. After the transaction gets its first confirmation in the network, you will see the time of the confirmation next to the transaction. You can always double-check the status of your transaction in a blockchain explorer by clicking on the confirmation time.
We strongly recommend waiting until the transaction has confirmed multiple times (three to six confirmations is considered safe for a Bitcoin transaction) before considering it complete. Confirmation times vary based on the transaction fee and the state of the network.
Sending tokens in Trezor Suite
From Trezor Suite version 24.12.1 onwards, we’ve made it easier to send tokens with a new Token select element.
At the top of the send form, you’ll see a dropdown where you can select the coin or any available tokens on that coin’s network from your account.
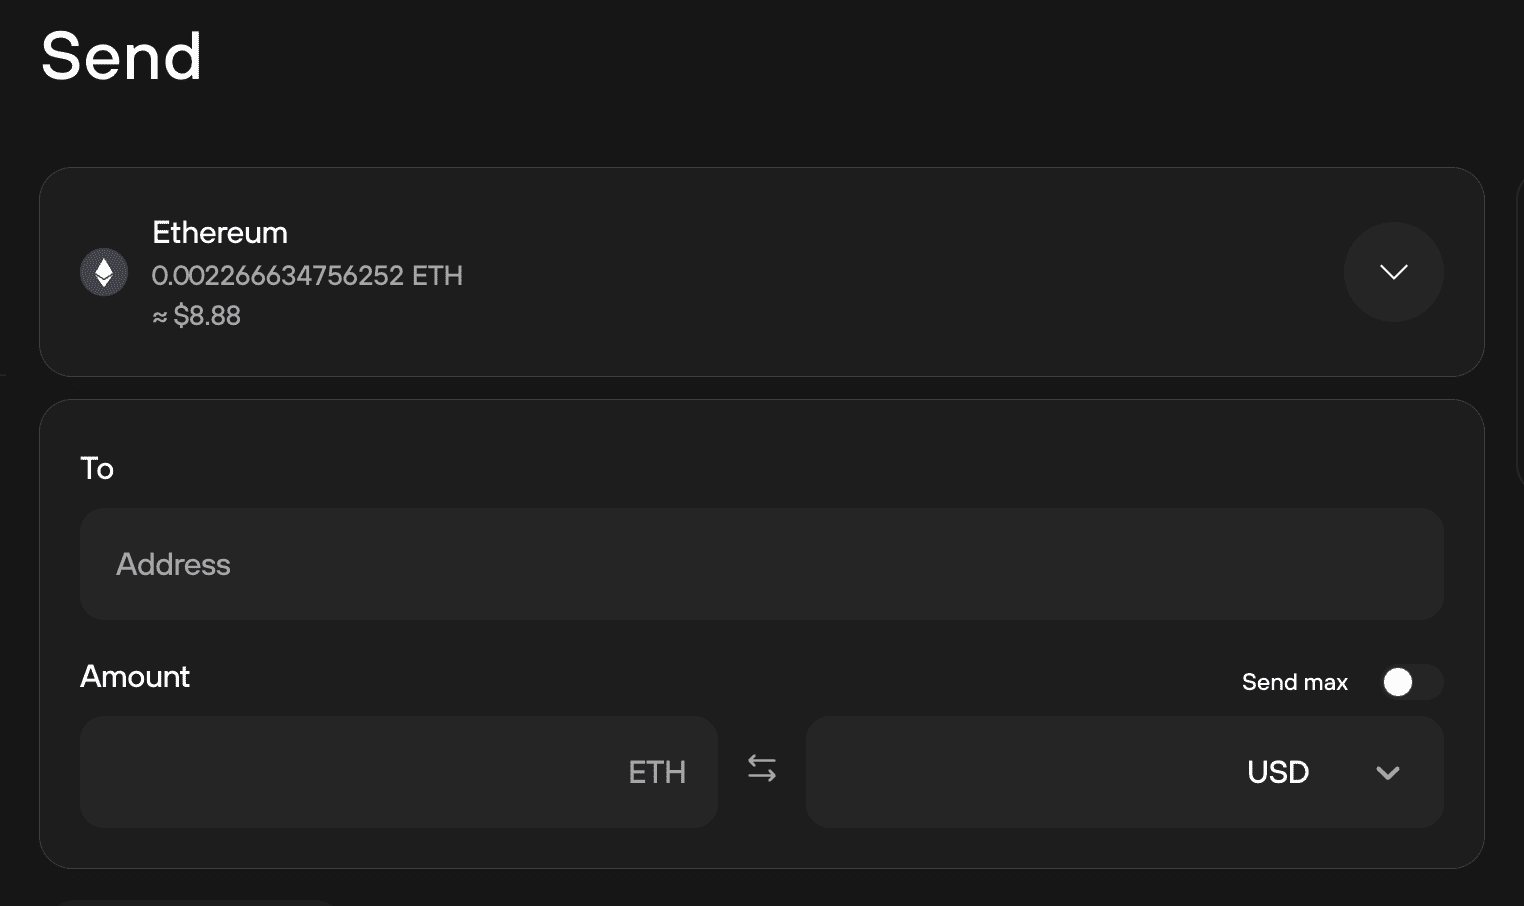
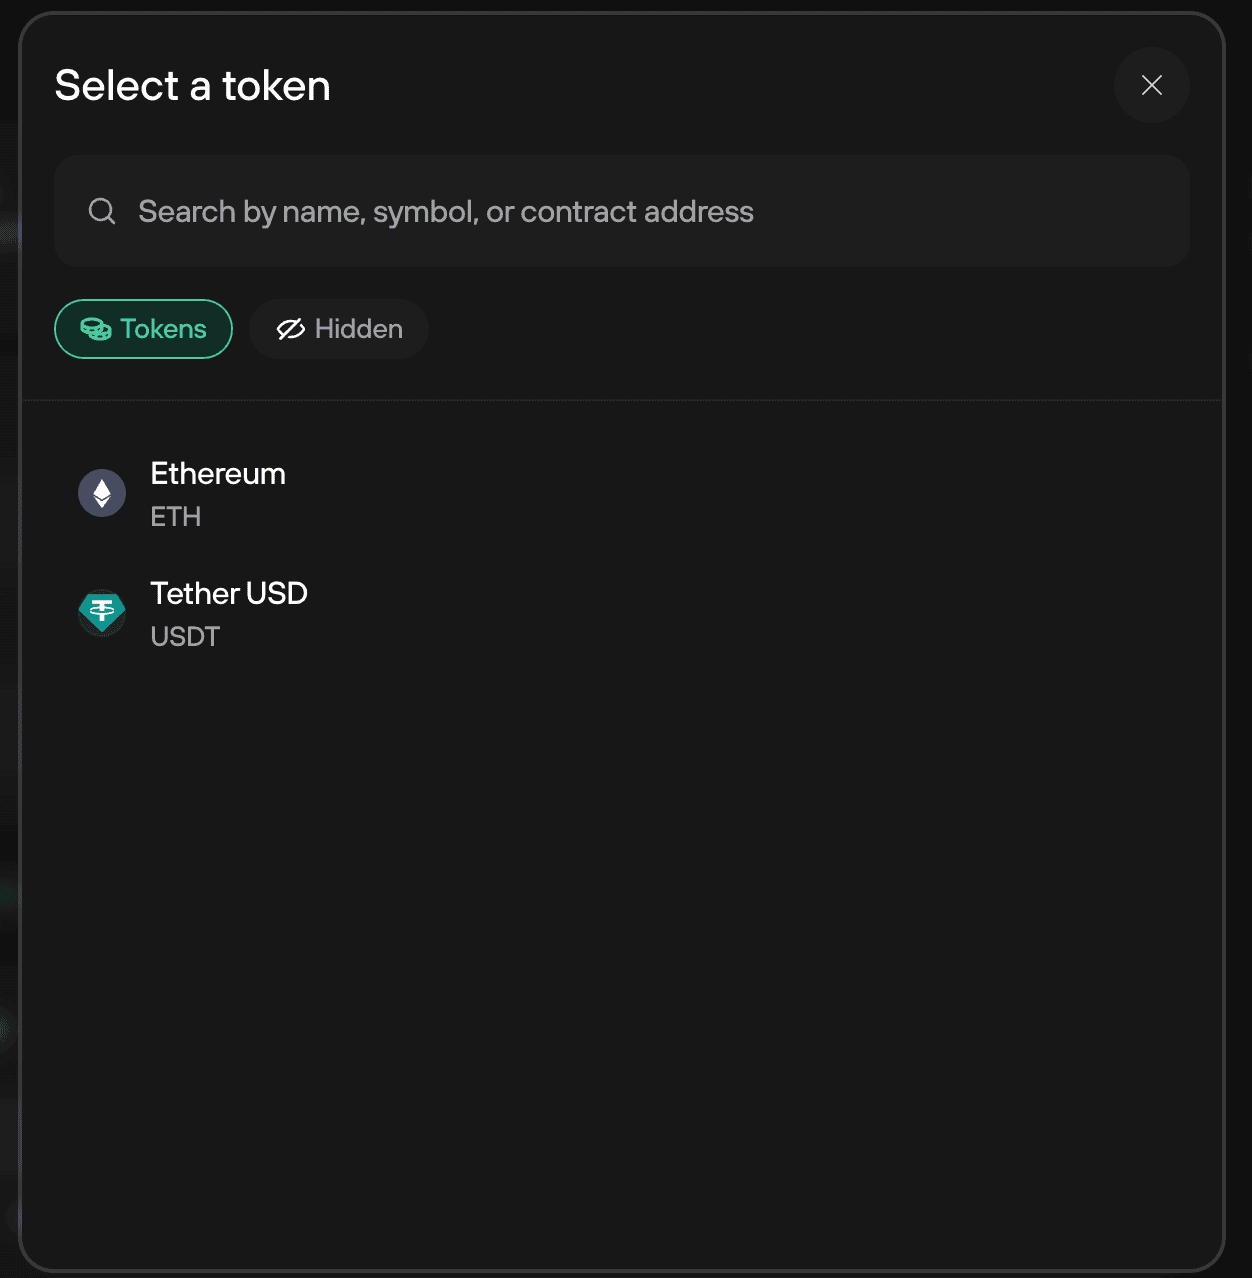
You can switch between tokens and coins whenever you need, and see the contract address for each token displayed under your balance.
You can view the contract on a block explorer by clicking the arrow which appears when hovering over the contract address field with your mouse.
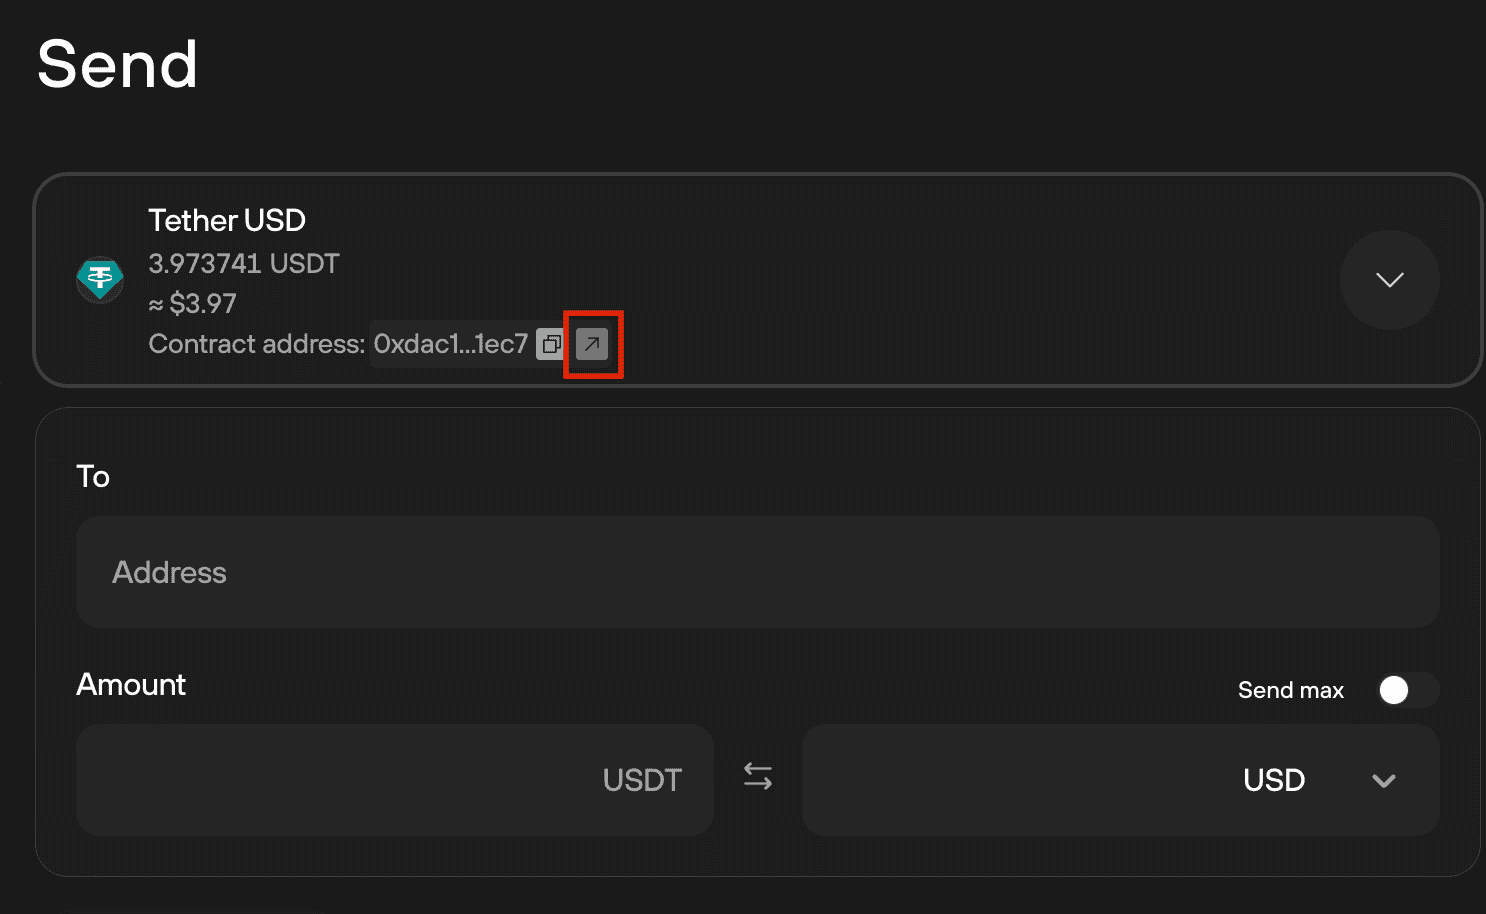
This makes sending tokens a much clearer and more intuitive experience.
Send Raw
Sending a Raw transaction simply means broadcasting a transaction that has already been created and signed. This can be used with any transaction data that has been generated and signed but not broadcast, including Locktime and OP_Return transactions.
Create signed transaction data in the same way as sending a normal transaction but with Broadcast off. Copy the signed data to a different machine and paste it through the Send RAW dropdown menu for privacy.
Making payments in Trezor Suite on mobile
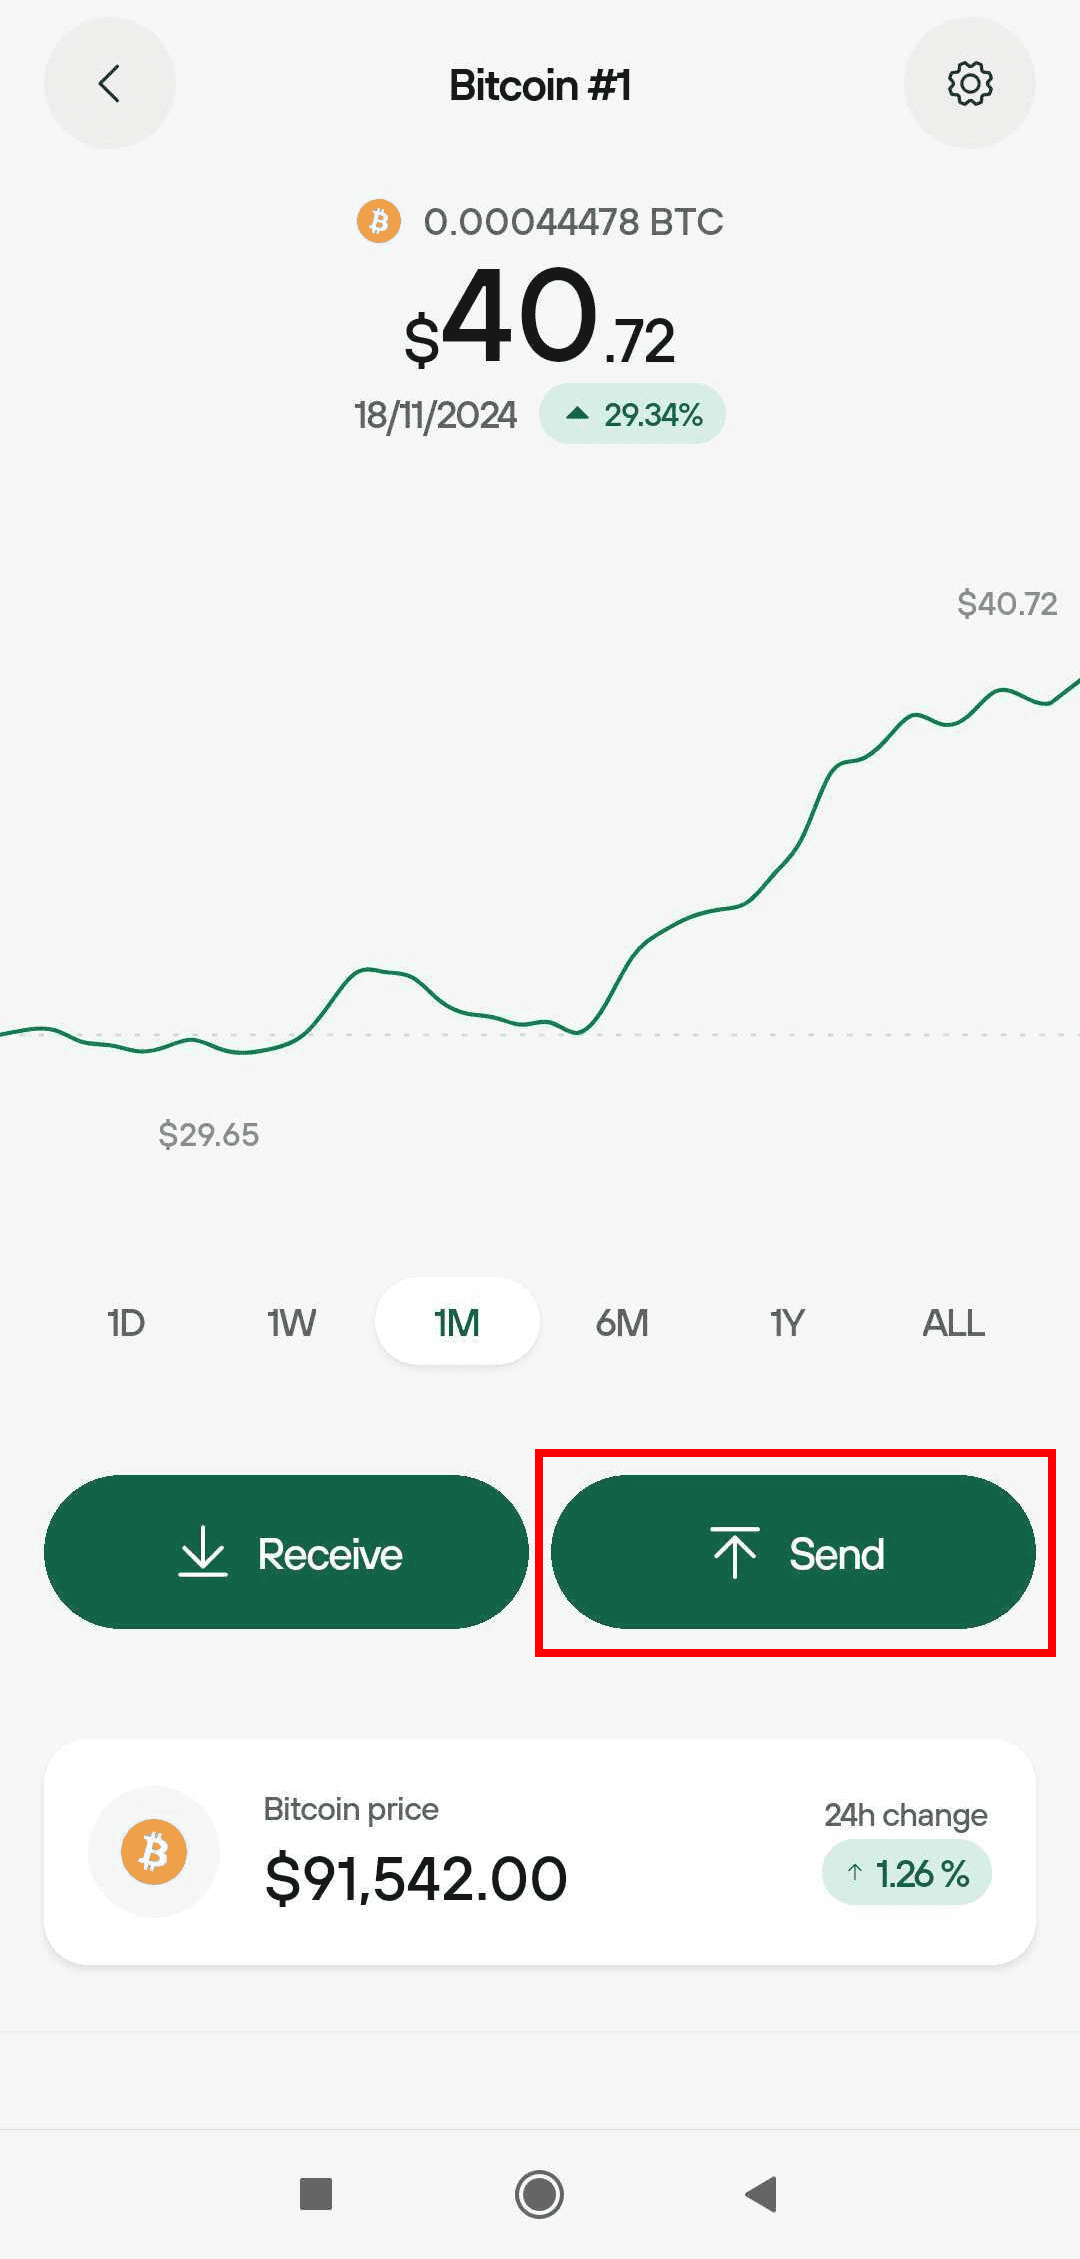
Trezor Suite on mobile offers a streamlined Send flow for bitcoin. This article provides a step-by-step guide for how to safely send bitcoin on the move.
Send bitcoin flow
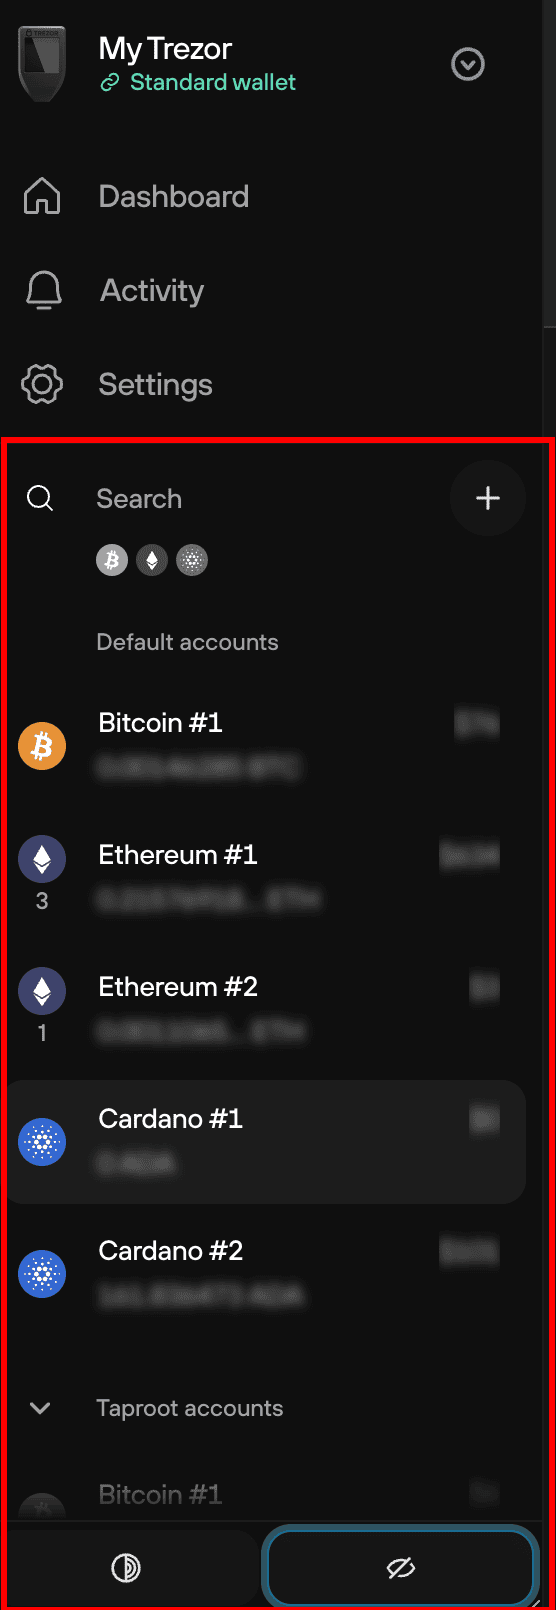
- First, tap Send on the account overview screen:
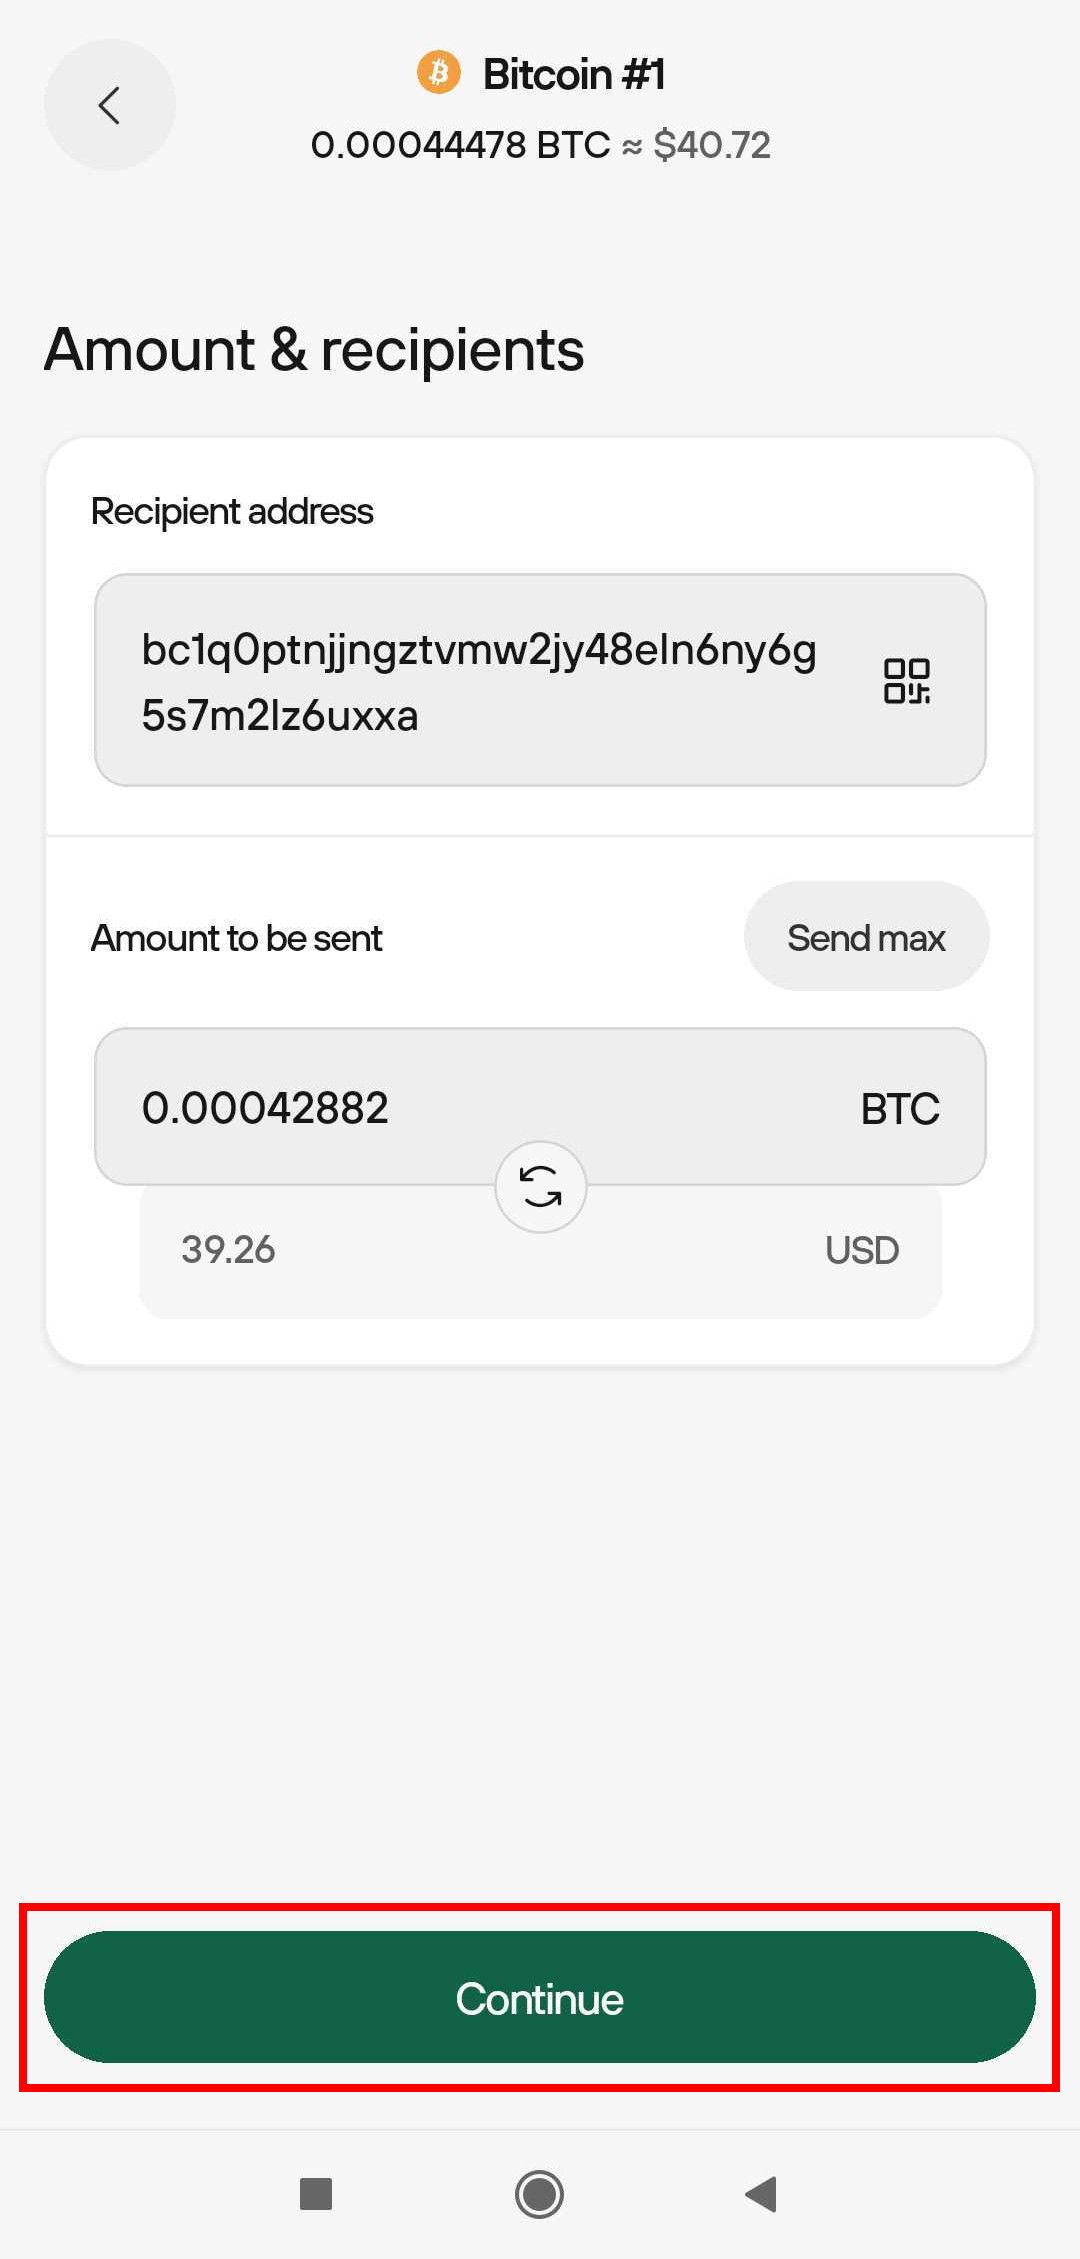
- You’ll be taken to the Amount & recipients page.
- The Recipient address field can be entered manually, copy-pasted in, or by scanning / uploading a receive address QR code.
- The Amount to be sent field can be entered manually, or you can send all funds from the account by selecting the Send max option.
- Once you’ve finalized these inputs, press Continue:
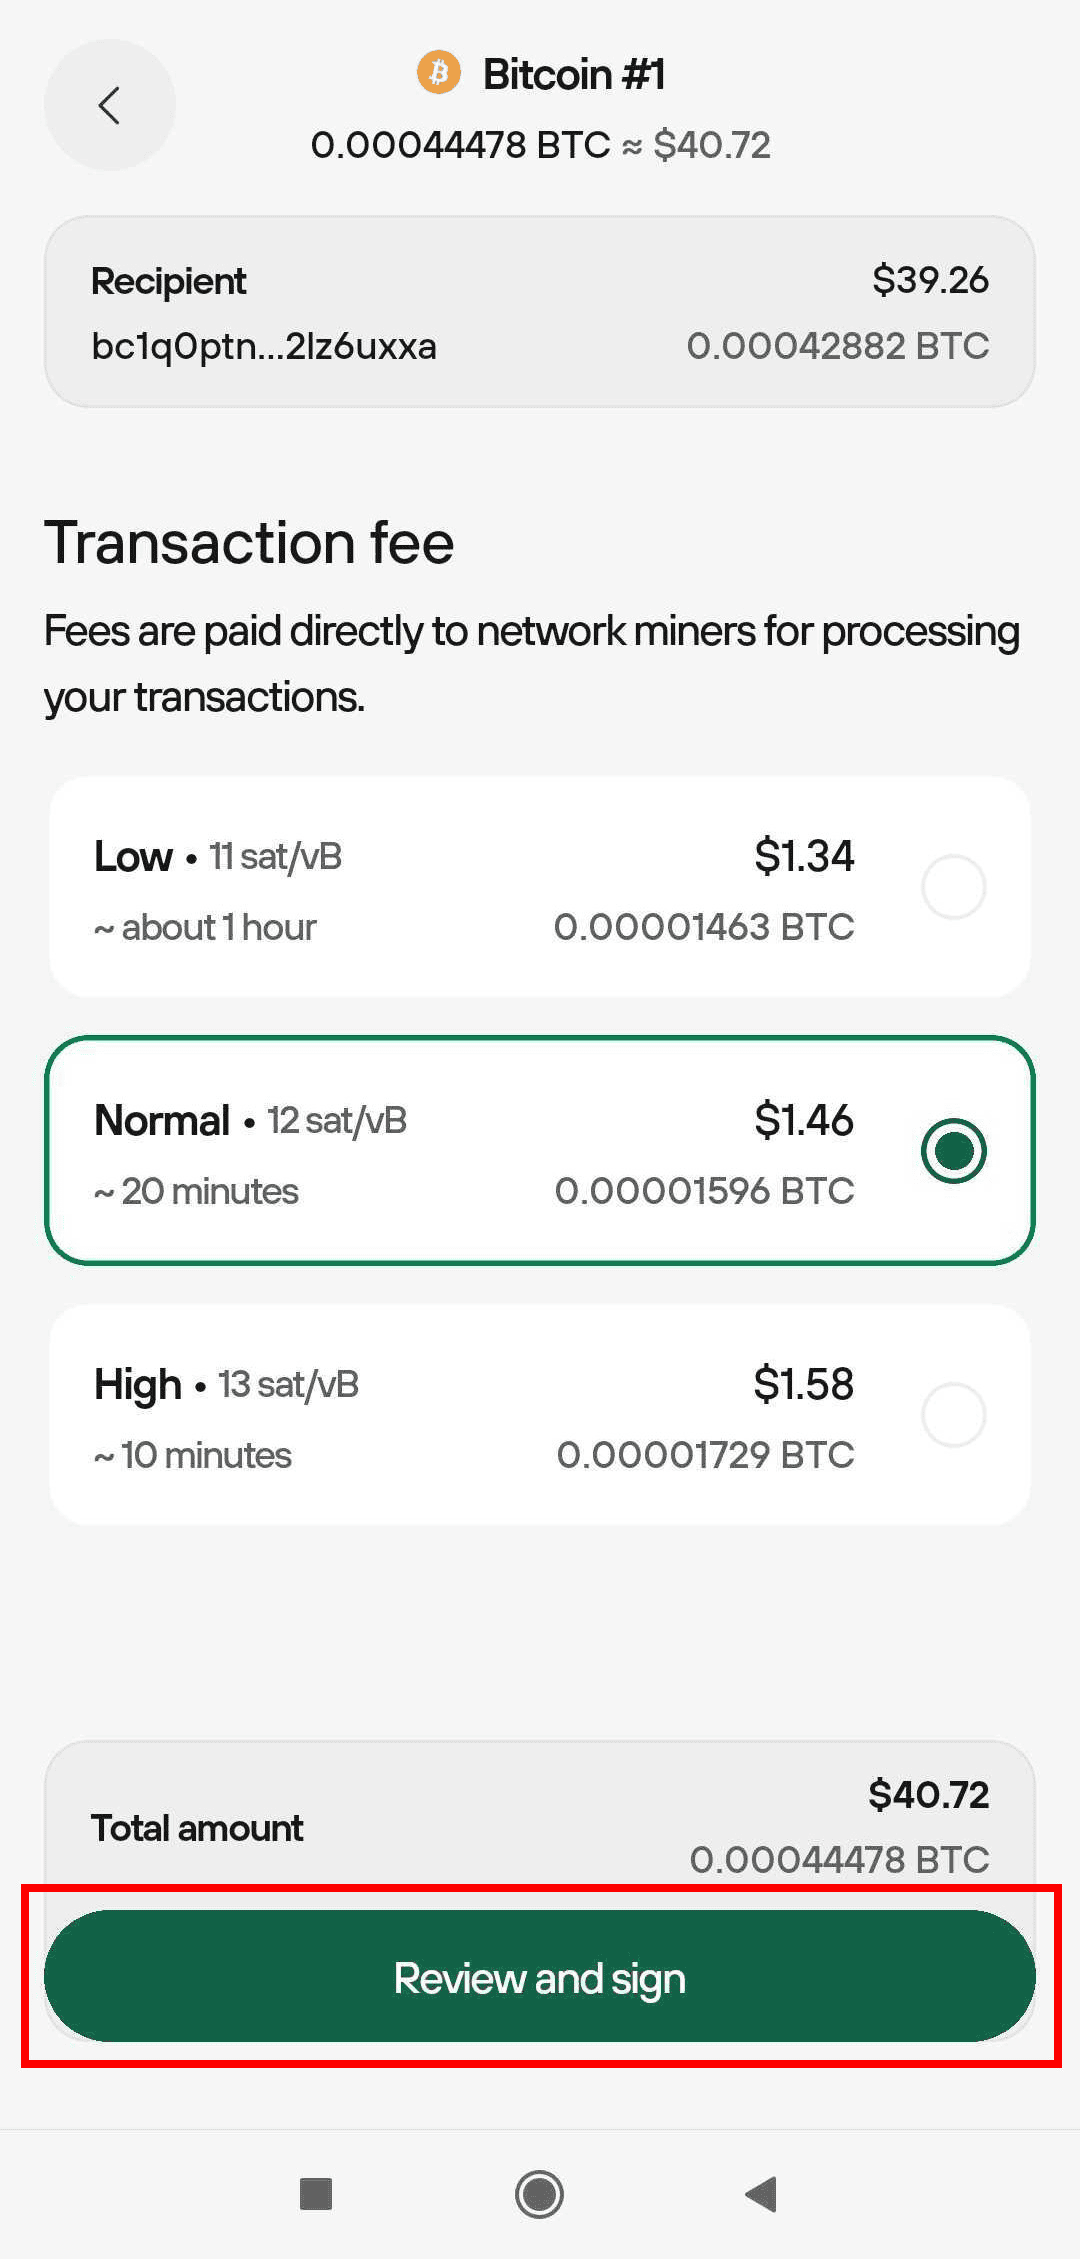
- On the next screen, you’ll need to select the appropriate Mining fee for your transaction; you can choose between Low, Normal and High, with the Normal fee being the default option.
If you need to edit the transaction at this stage, press the arrow in the top-left corner of the screen to return to the Amount & recipients page.
- Once you’ve selected the mining fee, the Total amount (i.e. the amount of bitcoin you’re sending plus the mining fees) for the transaction will be displayed at the bottom of the screen. Once you’re happy with this, press Review and sign:
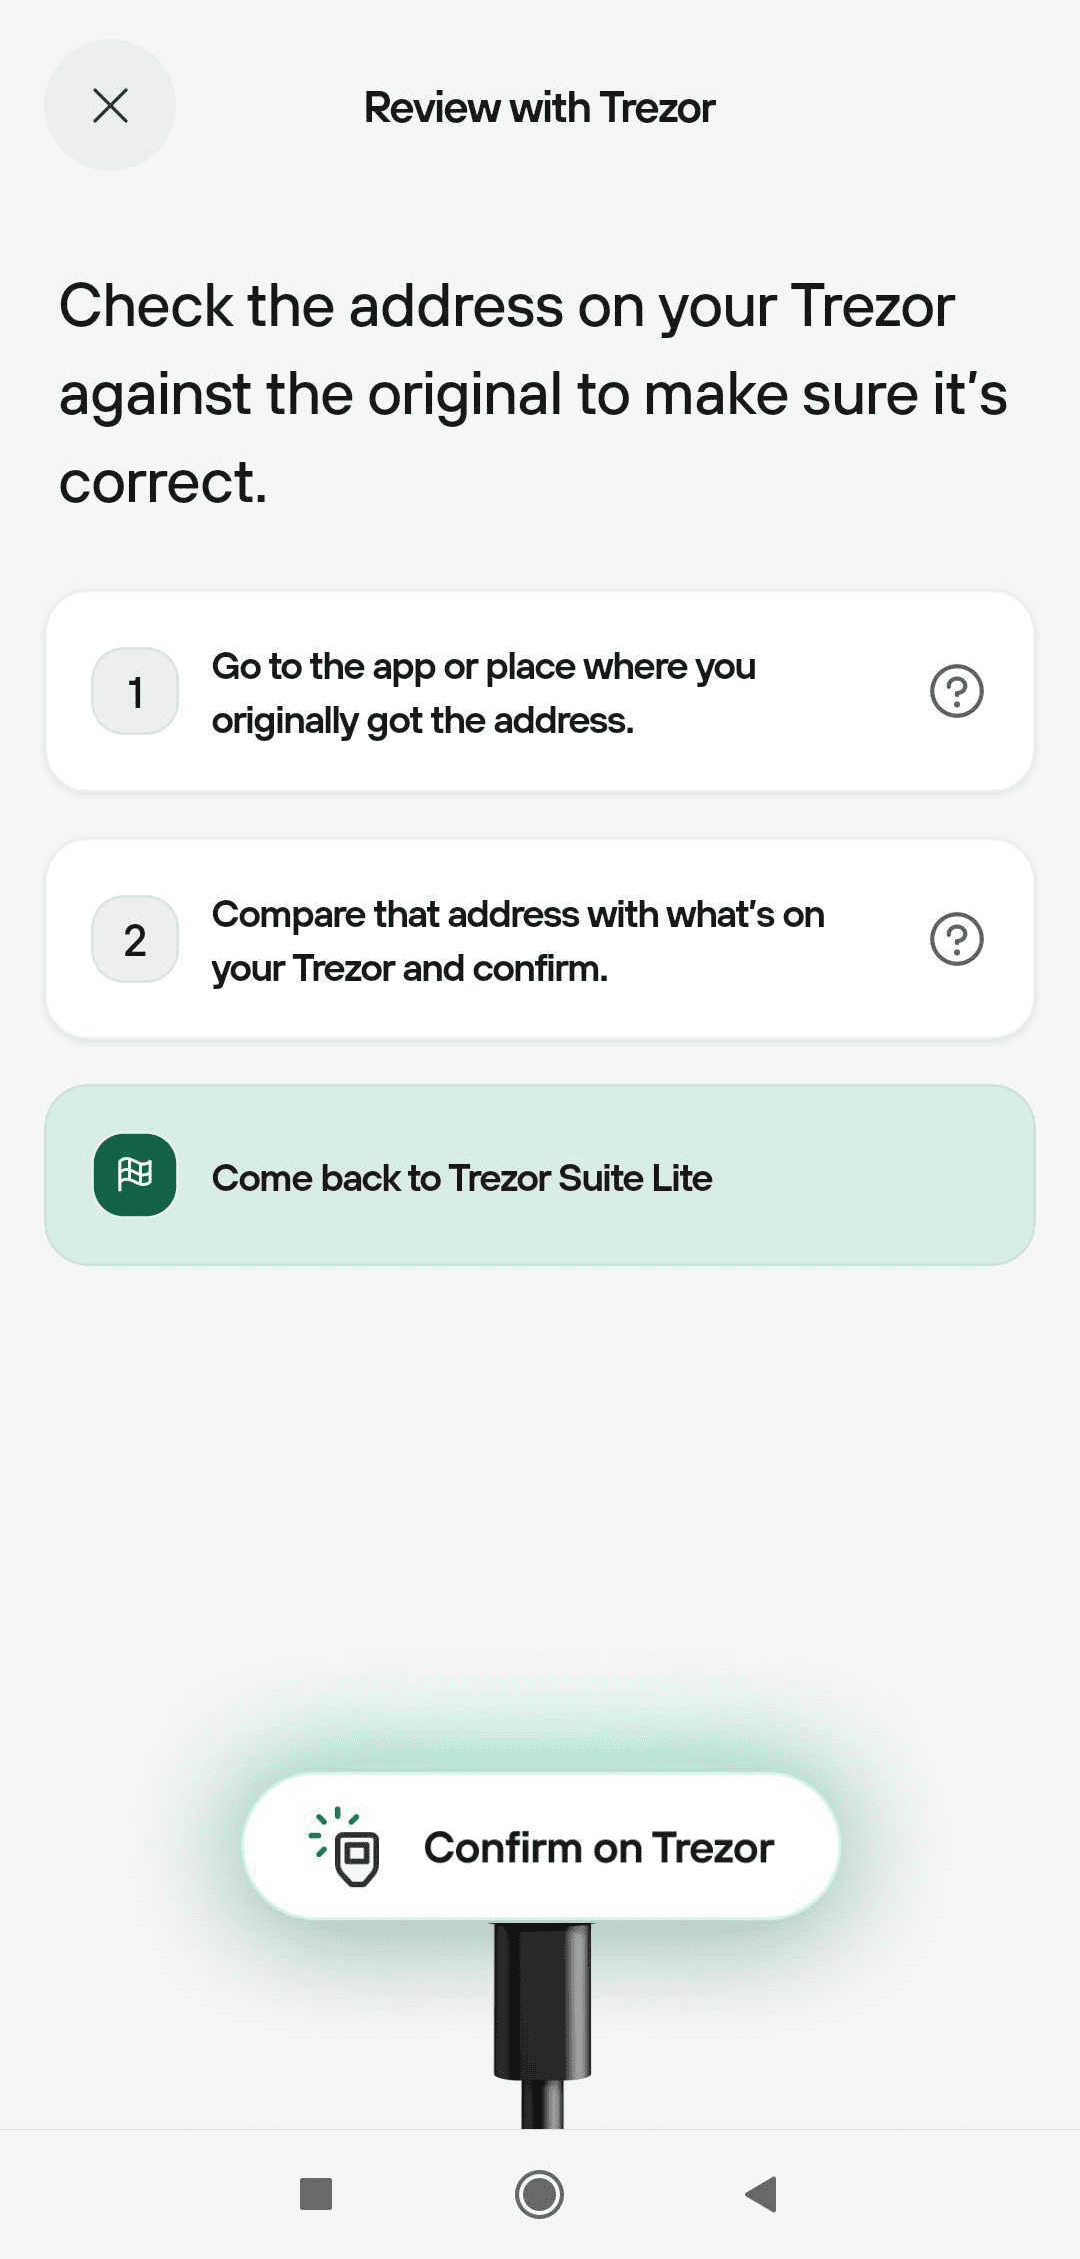
- You will then be prompted to check that the address shown on your Trezor matches the original:
- Then confirm the transaction amount(s):
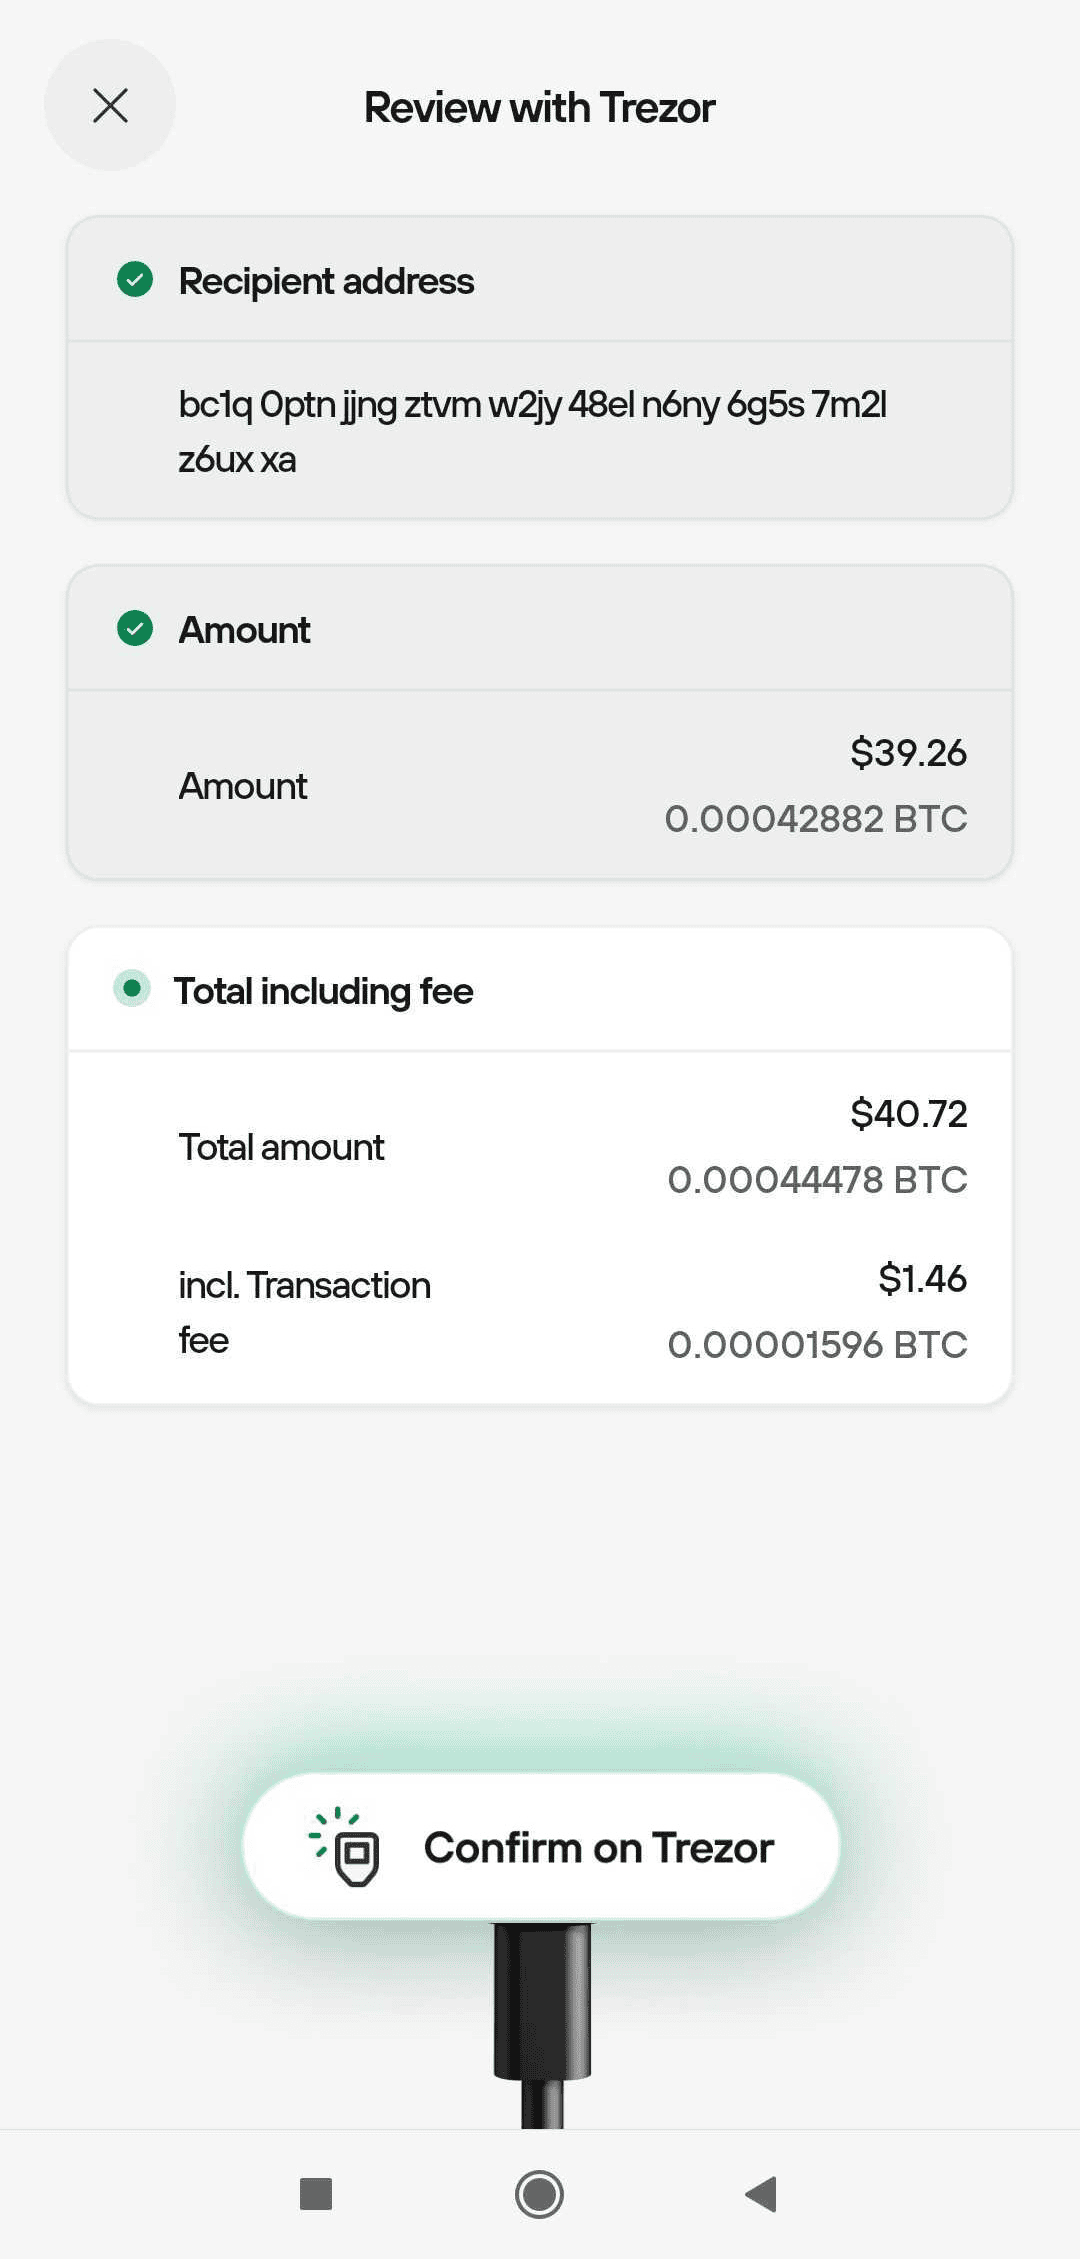
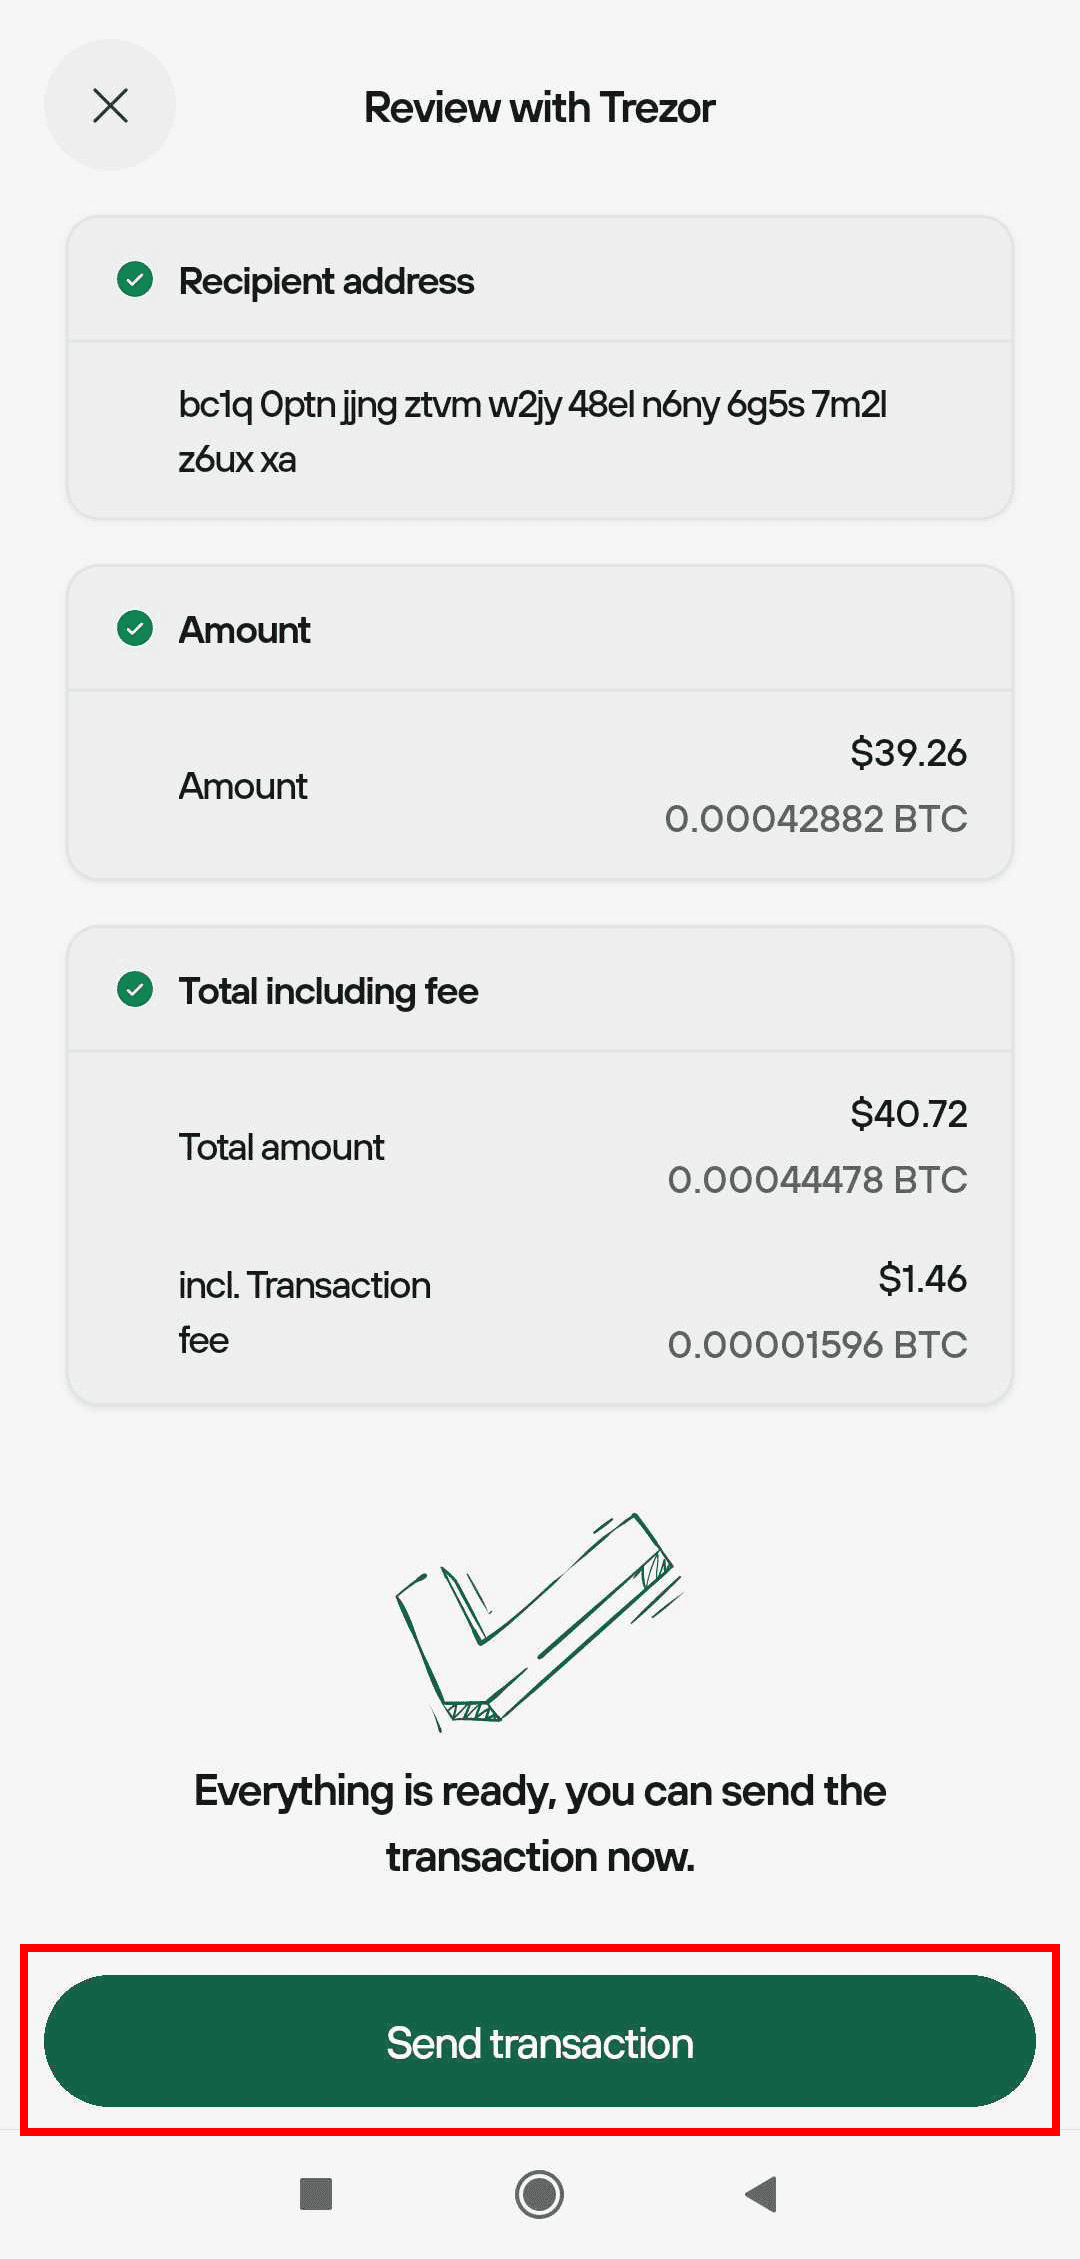
Once you’re happy that all transaction details are present and correct, press Send transaction to complete the process: