Labels in Trezor Suite
Labeling helps you stay organized in Trezor Suite. You can rename wallets, accounts, and addresses to keep track of your portfolio, categorize transactions, or add notes to specific payments.
Labels can be synced to Google Drive or Dropbox, or stored locally on your computer.
Turning on labeling in Trezor Suite
- Open Trezor Suite and navigate to ⚙️ Settings > Application
- Scroll down to Labeling and select On from the drop-down menu:

- Confirm the action on your Trezor.
- Choose where to store your labels in the Save labels window (Dropbox, Google Drive, or locally):
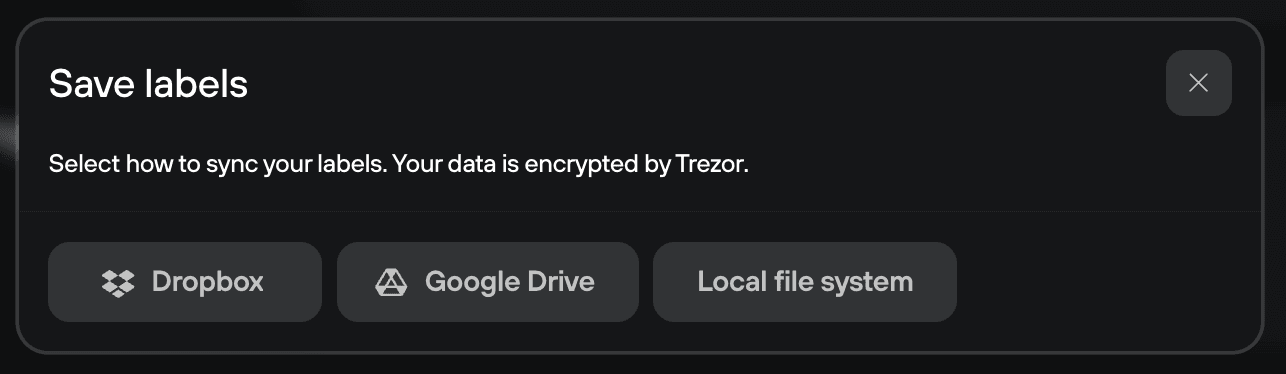
- Follow the on-screen instructions to link your cloud storage account if using Dropbox or Google Drive.
Using the labeling feature
- When labeling is off, Trezor Suite uses default account names, and transactions display as long strings of letters and numbers.
- When labeling is on, you can rename accounts, label receiving and outgoing addresses, and organize your transactions however you like.
Renaming accounts
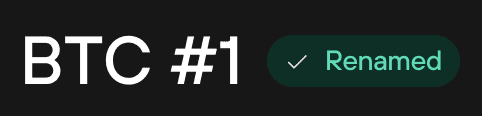
- Hover over the account name at the top of Trezor Suite.
- Click the Rename icon.

- Enter a new name and click the green checkmark to save.
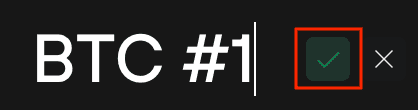
- You’ll see a confirmation that the address has been labeled.
Labeling receiving addresses
Labeling receiving addresses helps you track payments and assign them to specific purposes (e.g., personal, business, savings). You can label both new and previously used addresses.
- Hover over the receiving address and click "Add label".

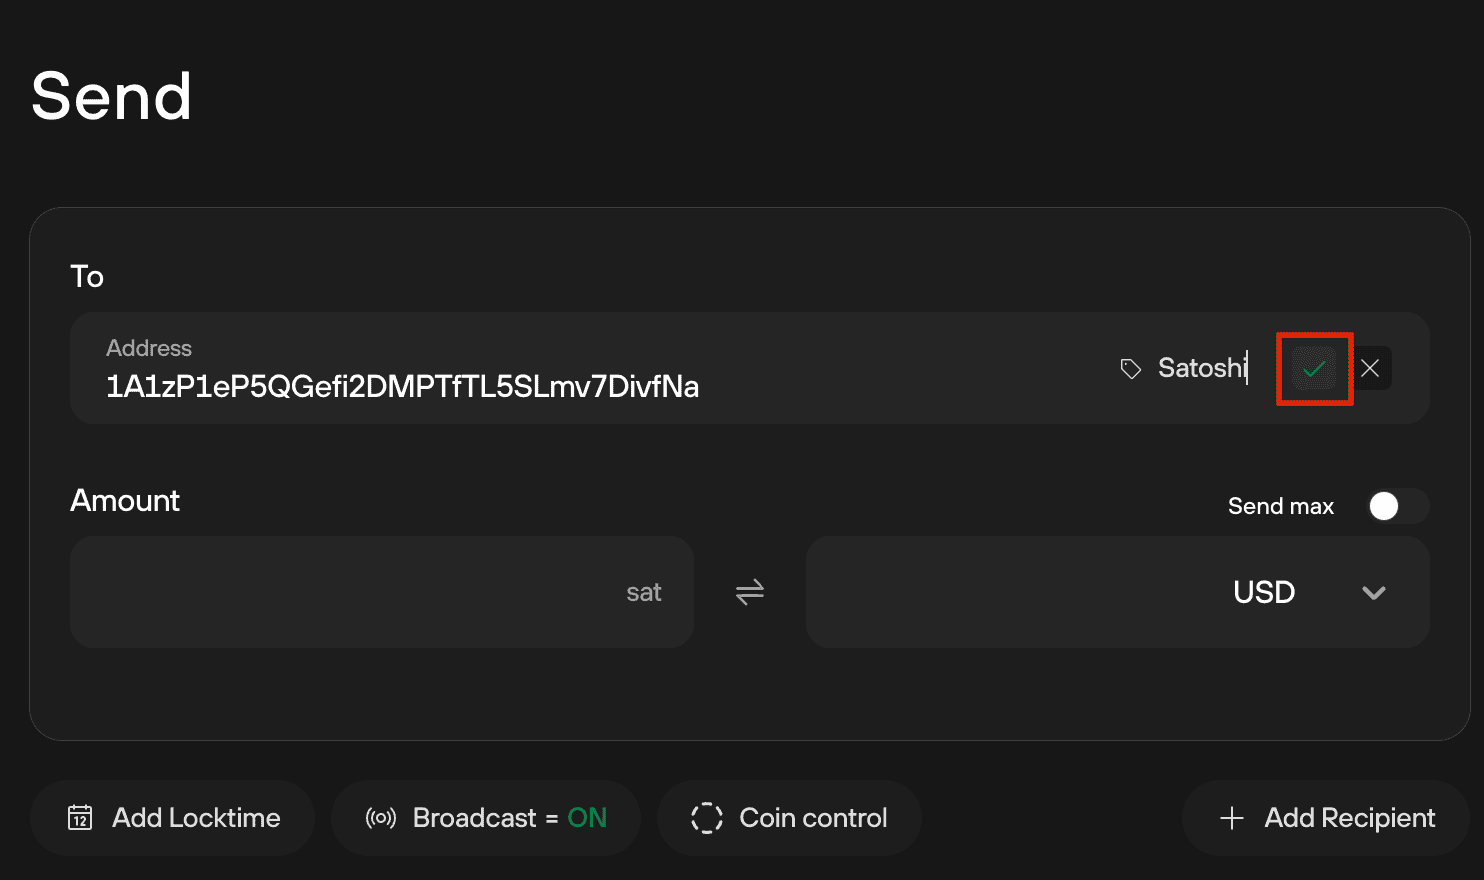
- Enter a label name and click the green checkmark to confirm.
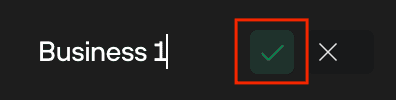
- You’ll see a confirmation that the address has been labeled.
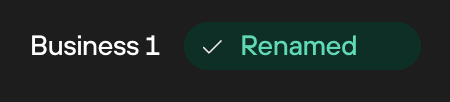
- When you receive funds at a labeled address (e.g., "Business 1"), the label will appear in your transaction history.
Labeling Outgoing Addresses
Adding labels to outgoing addresses helps you track expenses and organize payments.
- In the Send tab, locate the "Address" input field.
- Click "Add label".
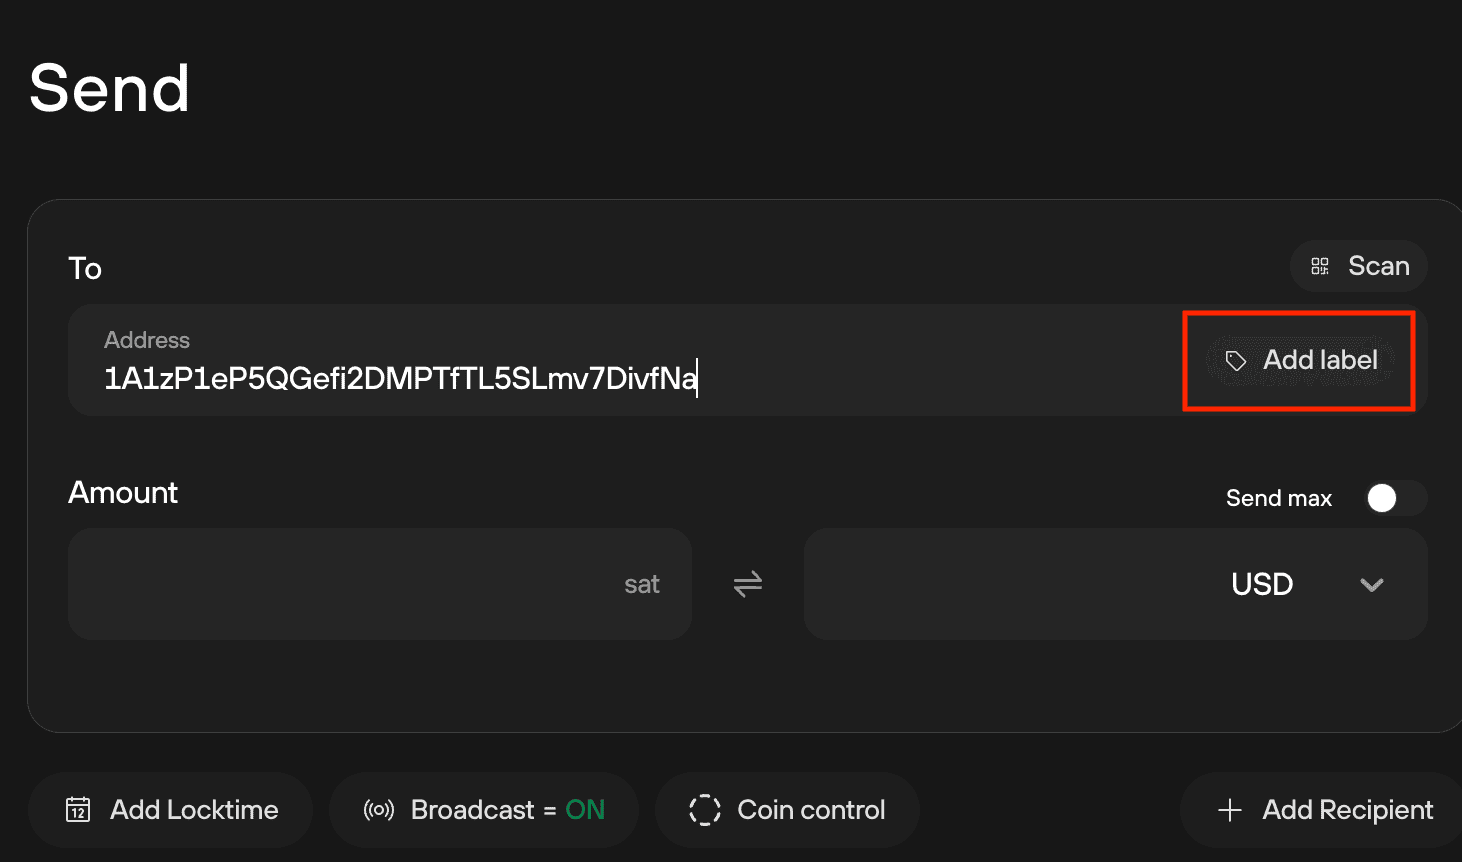
- Enter the label name and click the green checkmark to confirm.
- The label is now saved for this outgoing address.

Labeling outgoing addresses can also help you track multiple payments within a single transaction. You can add a comment to each payment (output) to keep your records organized. For more details on sending multiple payments, see Send crypto in Trezor Suite.
Storing labels on Dropbox or Google Drive
One way to store your labels is by using cloud storage services such as Google Drive or Dropbox. These platforms allow you to save your labels remotely and access them from different devices.
- Trezor Suite creates a folder "/Apps/TREZOR" in either Dropbox or Google Drive.
- Labels for each Trezor account are stored in separate files within this folder.
As a precaution, it is recommended that you back up these files in secure storage elsewhere to avoid losing access to your labels if you lose access to your cloud storage account.
All files are encrypted using a private key derived from your Trezor for this single purpose. It is not possible to use Dropbox to gain access to your payment history, to your actual account balance, or to your wallet backup (recovery seed)!
Once you choose where to store the information, many things can be labeled by clicking on them, allowing you to stay organized and know what coins came from where or what price you bought them at.
Finding and deleting "hidden" labeling files in Google Drive
In Google Drive, your Trezor Suite labeling data is stored in appDataFolder, which is not shown in the main Google Drive interface.
To delete these files, you will need to perform the following steps:
- Go to drive.google.com
- Click the gear icon and choose Settings
- Select Manage apps
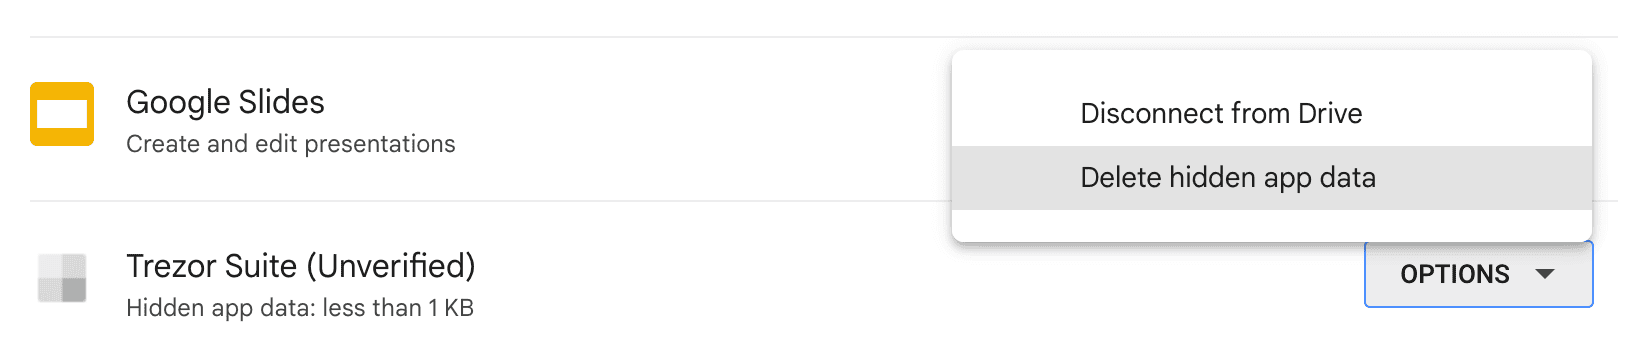
- The amount of "hidden data" is shown under the app name and description. To delete this data, click Options and then Delete hidden app data:
Storing Labels Locally
Another option for saving your labels is to store them locally on your computer. This method is ideal if you do not wish to use cloud storage services. However, keep in mind that storing labels locally means you won't be able to access them while using Trezor Suite on another device.
Depending on your operating system, the labels will be found in:
- MacOS: ~/Library/Application Support/@trezor/suite-desktop/metadata/
- Linux: ~/.config/@trezor/suite-desktop/metadata/
- Windows 11: C:\Users\YOURPCNAME\AppData\Roaming@trezor\suite-desktop\metadata
Make sure you create regular backups of these files and store them in a secure location to prevent data loss.
Exporting Labels (BIP329 standard)
You can export labels associated with your Bitcoin accounts by visiting the account Details tab, and clicking on Export:

By using a structured JSON format, BIP329 ensures that labeling data can be easily shared or backed up without revealing sensitive information like private keys.
Learn more in our article What is BIP329?