Earn stablecoin yield in Trezor Suite
Trezor Suite lets you earn yield on USDC and USDT (on Ethereum) directly in the app. Your stablecoins go into a , where they earn interest from lending. Every transaction is signed on your Trezor device, and you never need to leave the app.
To understand Morpho vaults and where yield comes from, see How stablecoin yield works with Morpho vaults.
Before You Start
You'll need:
- USDC or USDT on Ethereum in your Trezor Suite wallet
- A small amount of ETH in the same account to cover network (gas) fees
- Trezor Suite updated to version 26.5.2 or later, with your device running firmware version 2.12.0 or later (Trezor Safe 7, Safe 5, Safe 3, and Model T) or firmware 1.14.1 (Model One)
If you don't hold USDC or USDT yet, you can move them from an exchange or another wallet, or buy them in Trezor Suite. See Move crypto to Trezor or Buy crypto in Trezor Suite.
Depositing requires two on-chain transactions: an approval (allowance) and the deposit itself. You sign both on your device and pay gas on both. If you choose the unlimited approval option, future deposits of the same coin skip the approval step.
Deposit on desktop
1. Open the Earn tab
Click Earn in the Trezor Suite sidebar, then scroll to the Stablecoin yield section. This shows the stablecoins you can deposit.
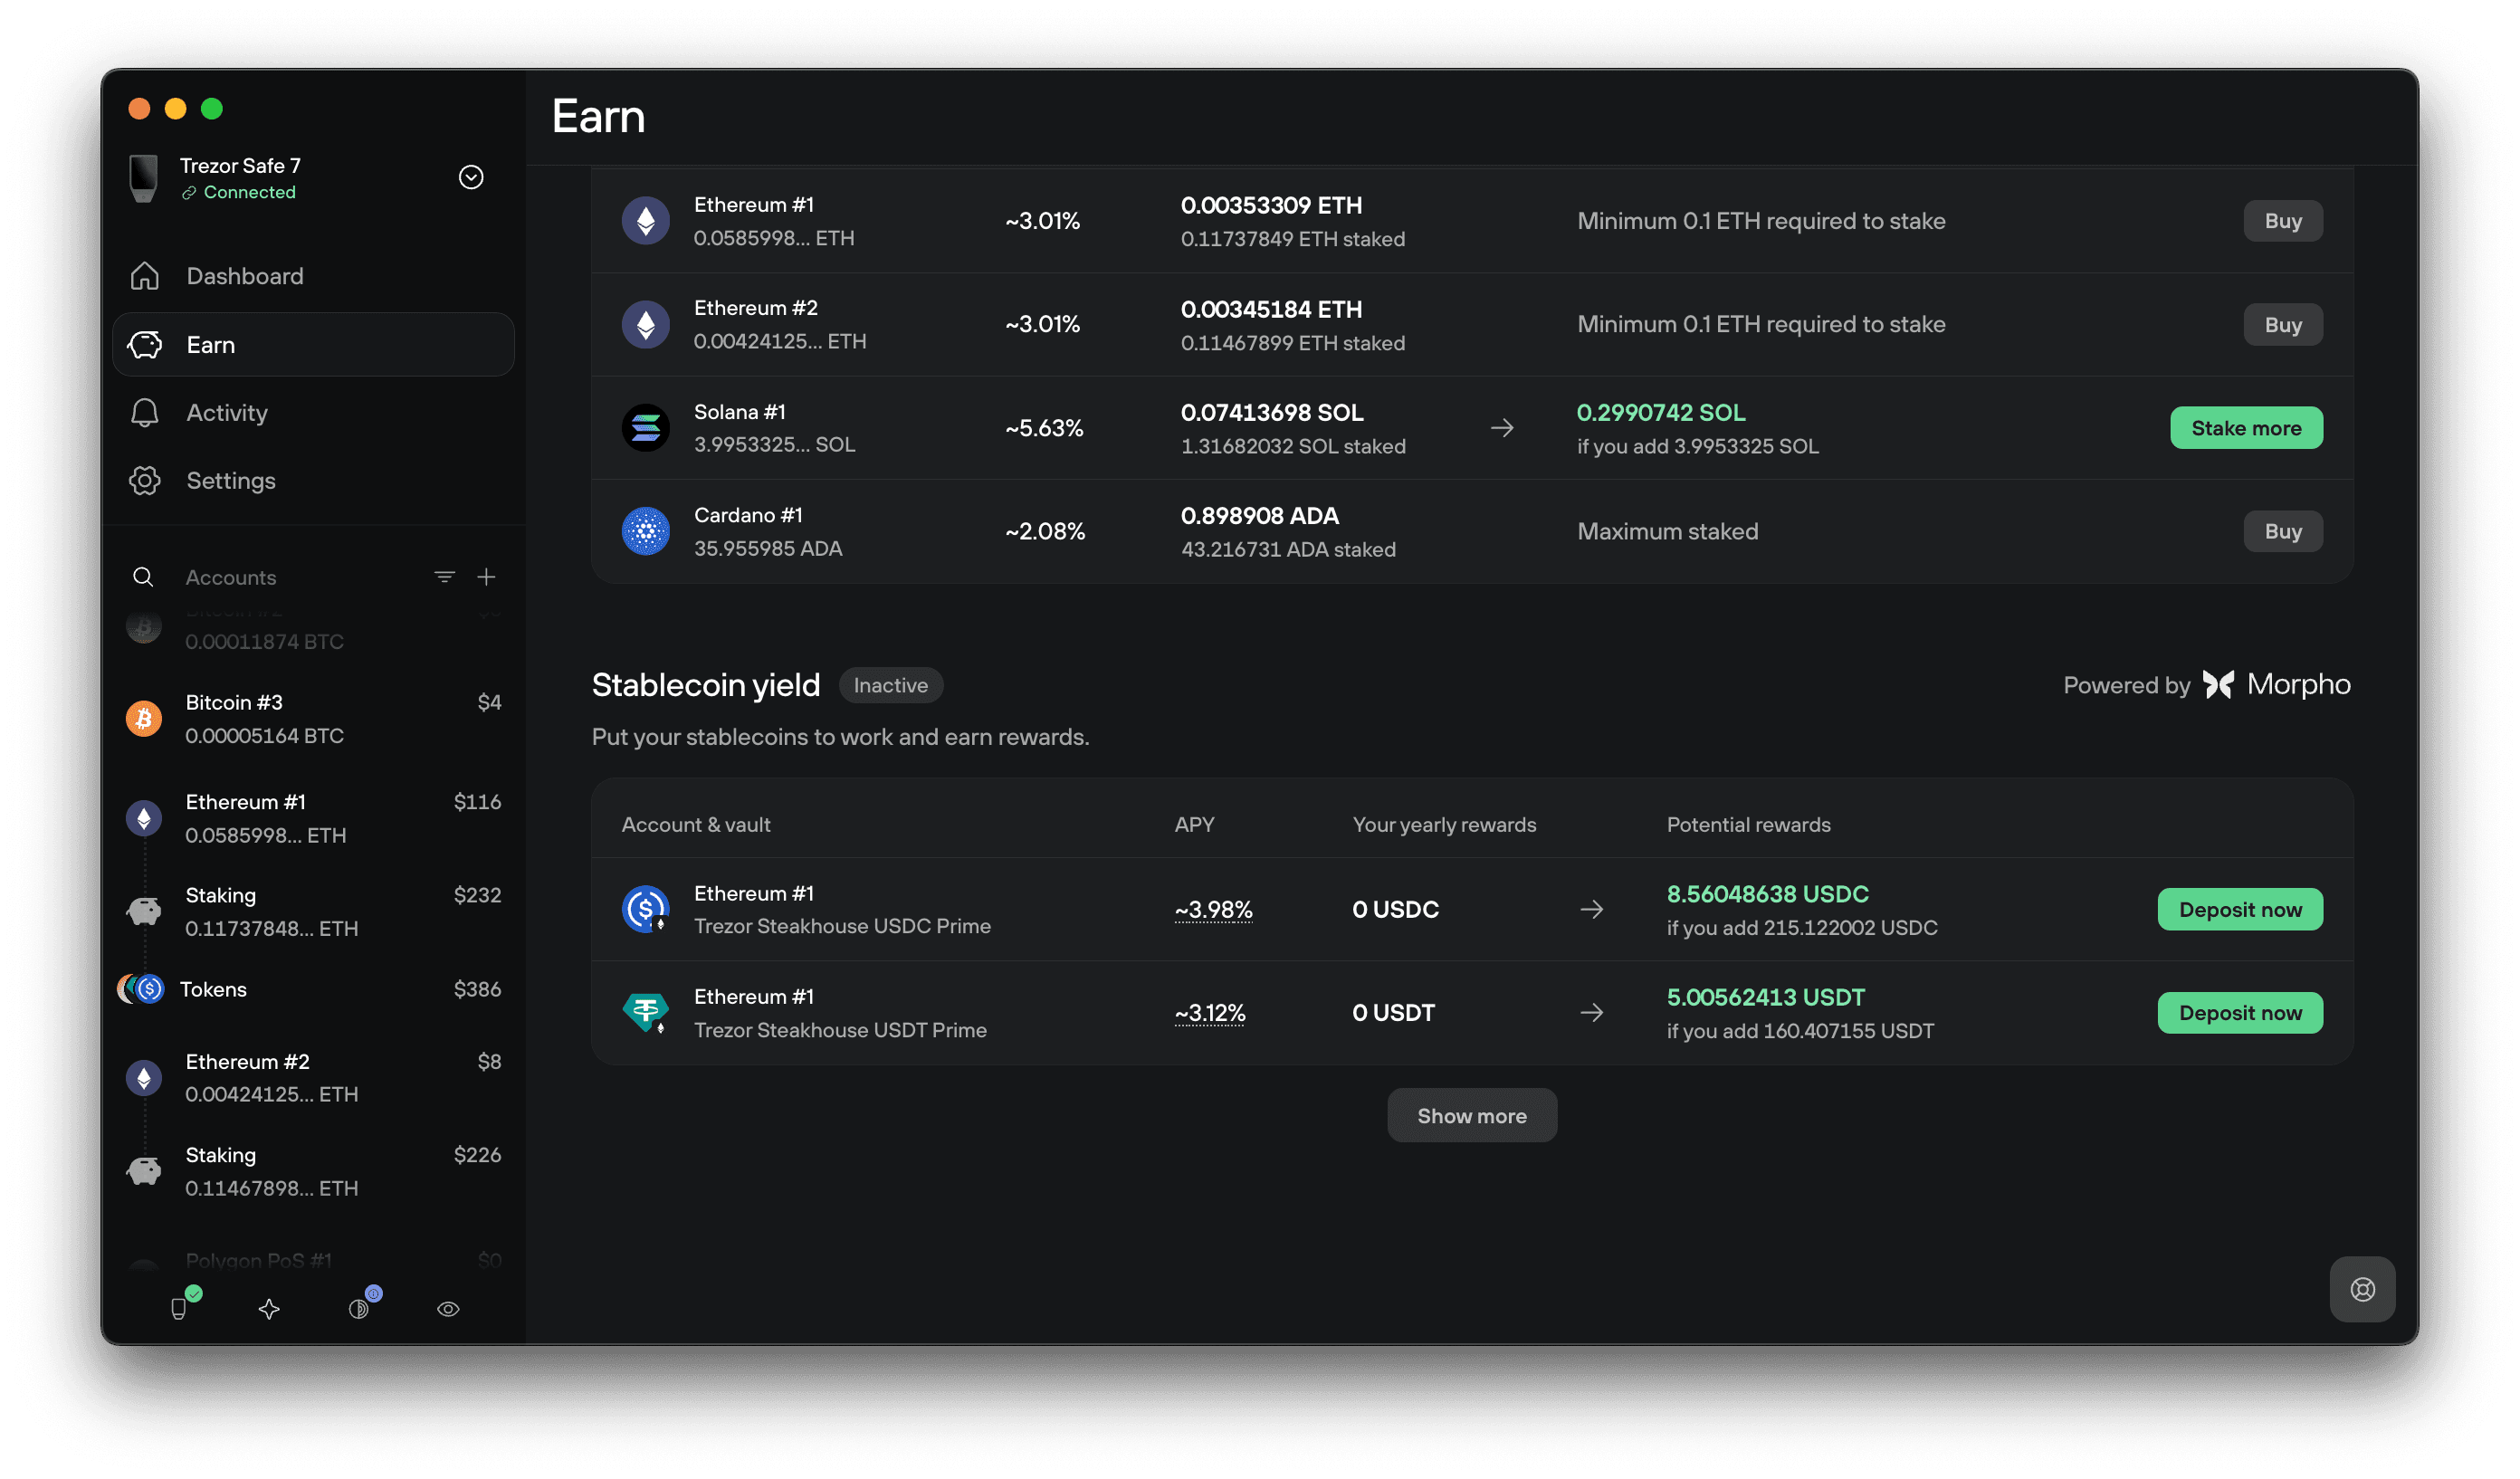
Find the vault you want and click Deposit now.
2. Read the explainer
The Stablecoin yield explained window summarizes how it works: your deposit stays available to withdraw, it earns yield that compounds, you receive a vault token representing your position, and any bonus token rewards can be claimed in the Earn tab.
You can expand the Deposit, Withdraw, and Claim rewards rows to see the steps and fees for each.
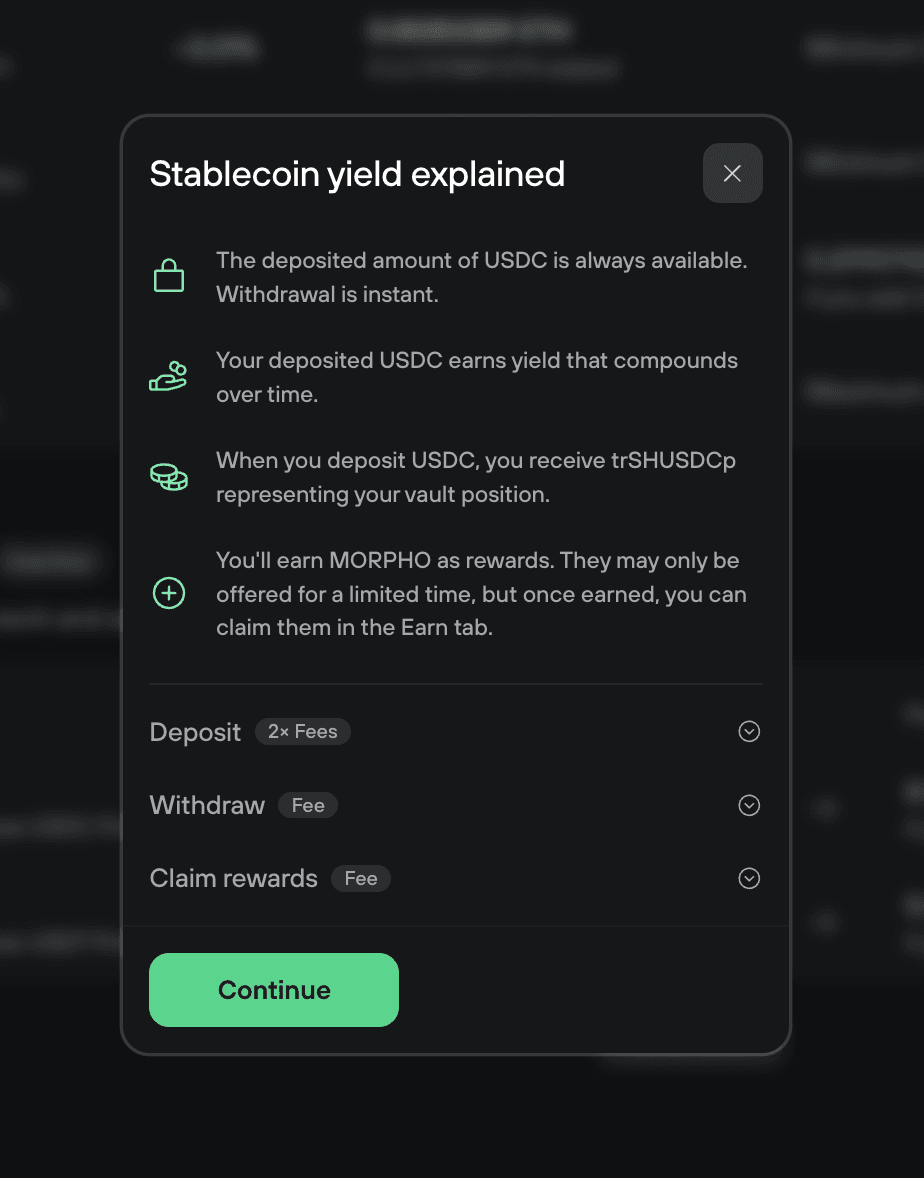
Click Continue.
3. Accept the terms
Check the box to confirm you accept Trezor's Terms of Use and acknowledge Morpho's Disclaimer.
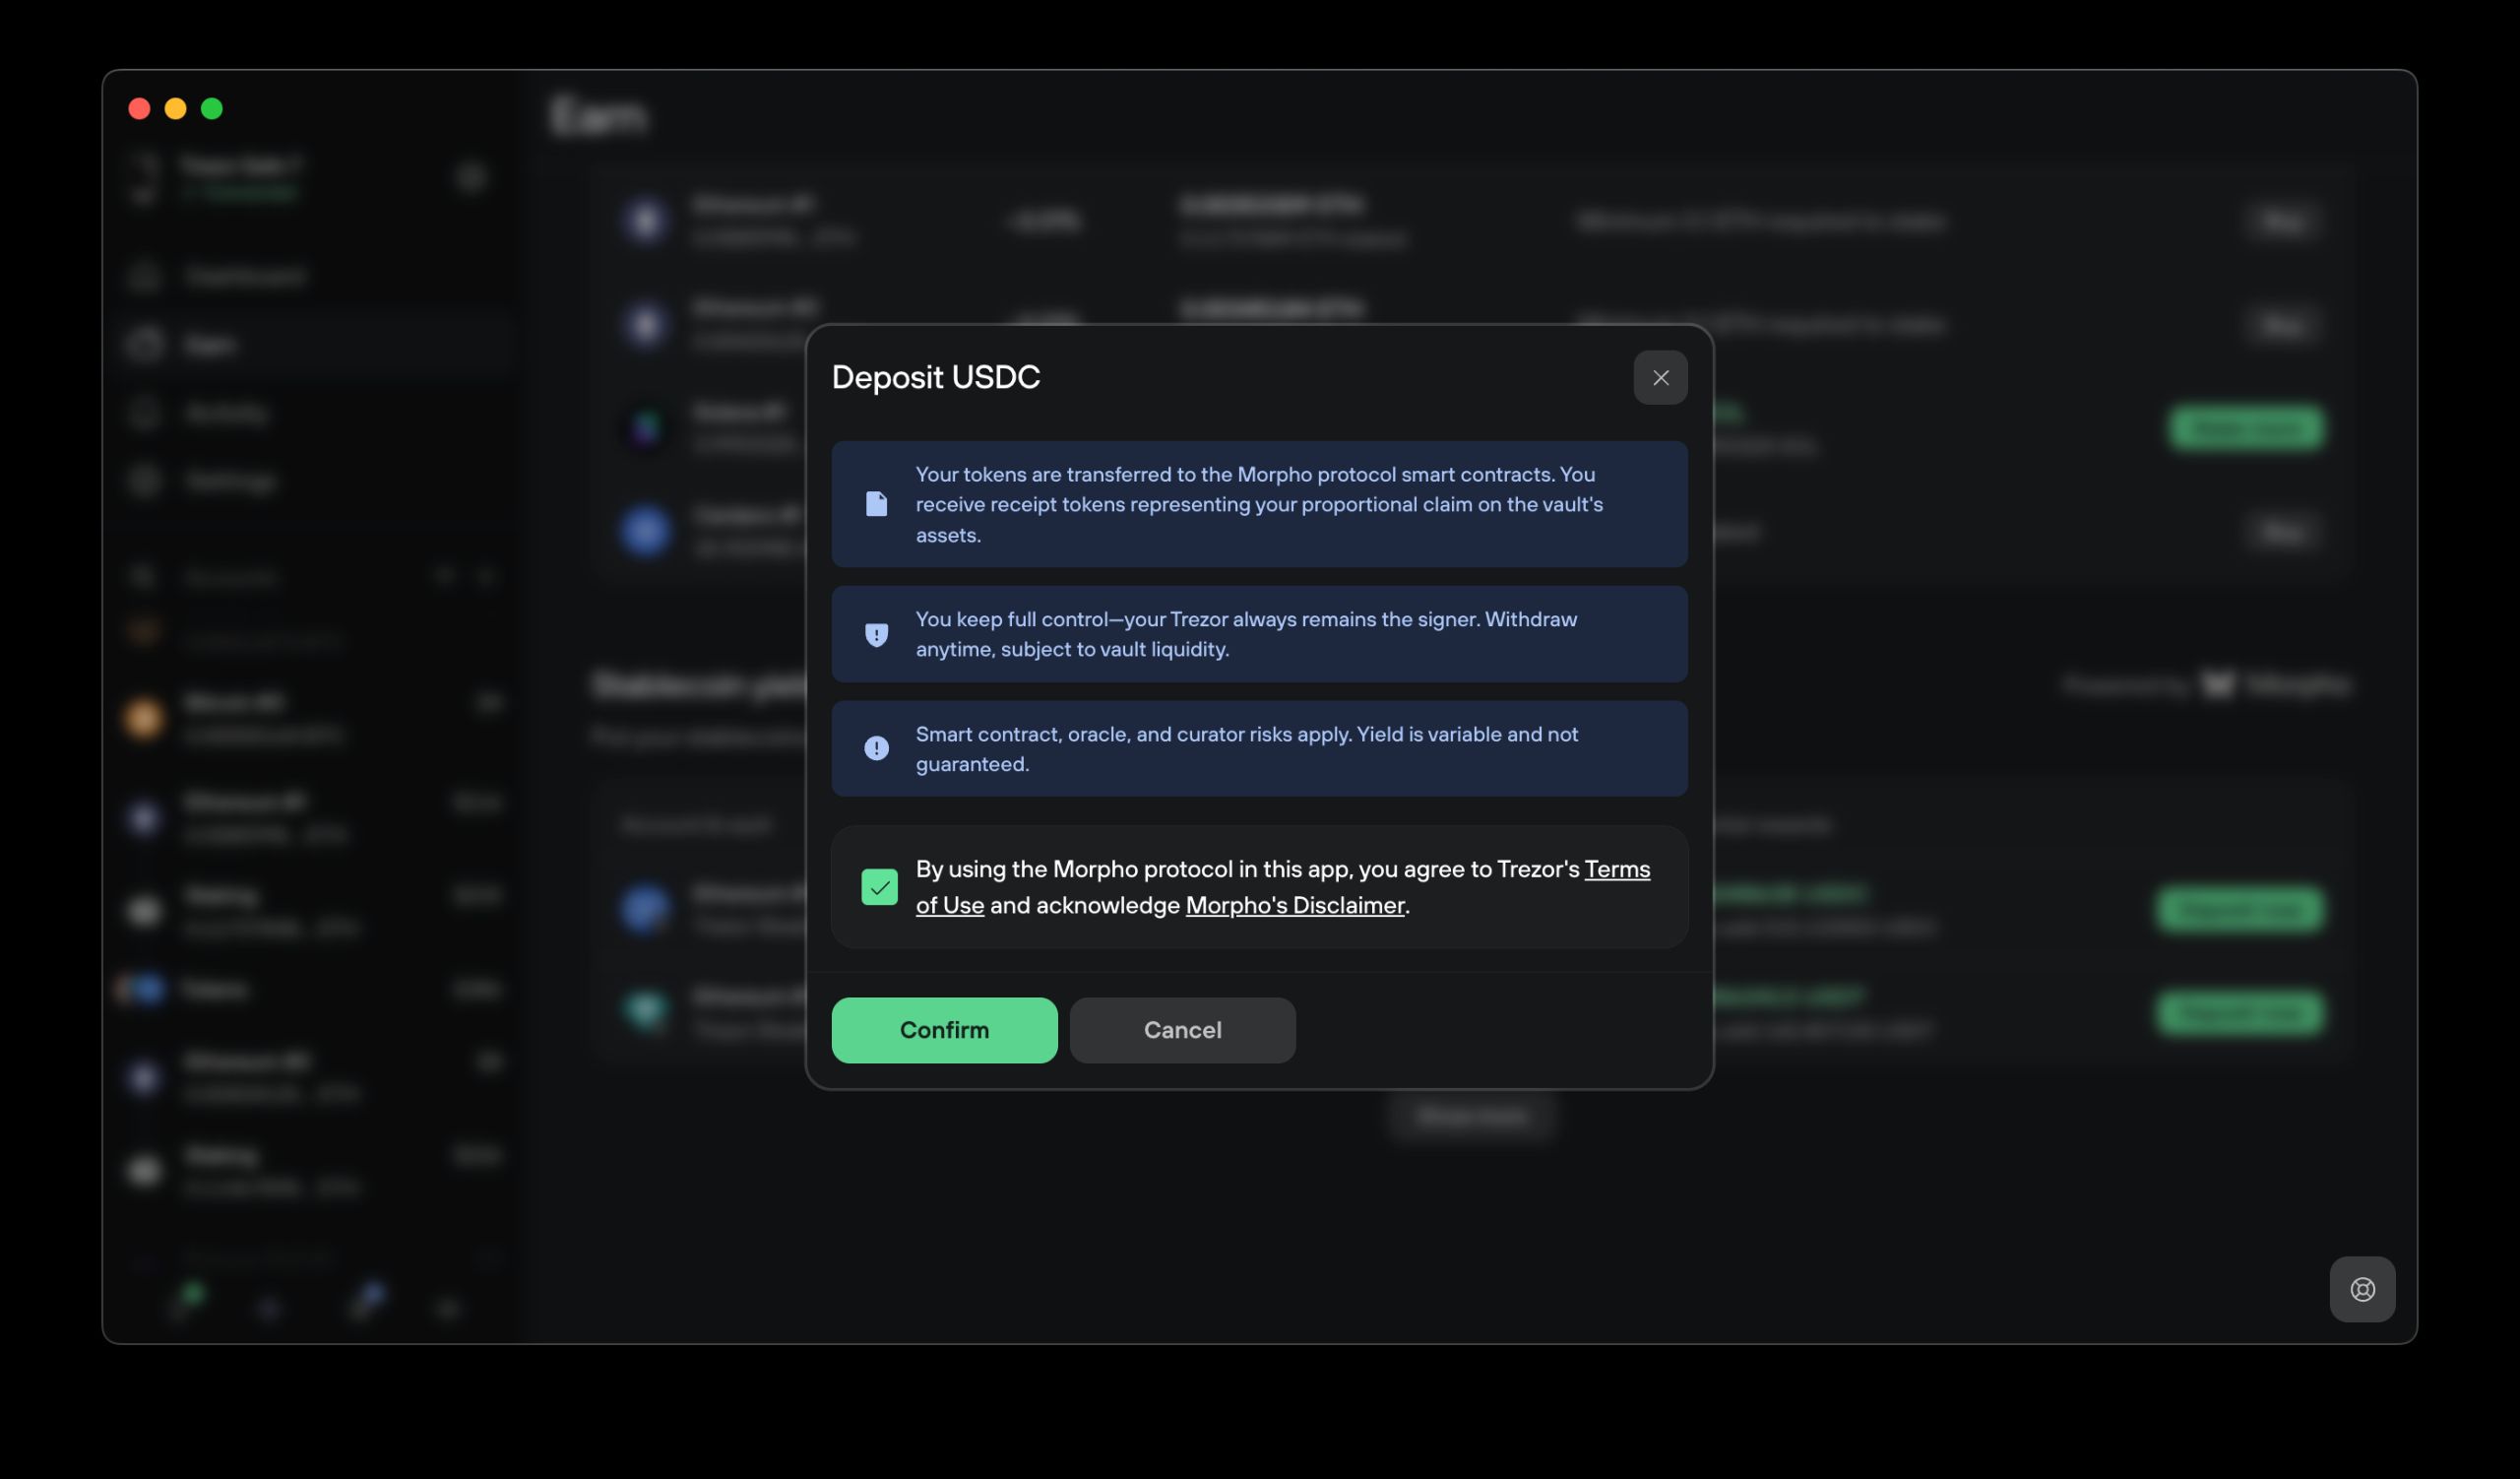
Click Confirm.
4. Enter the amount and approve
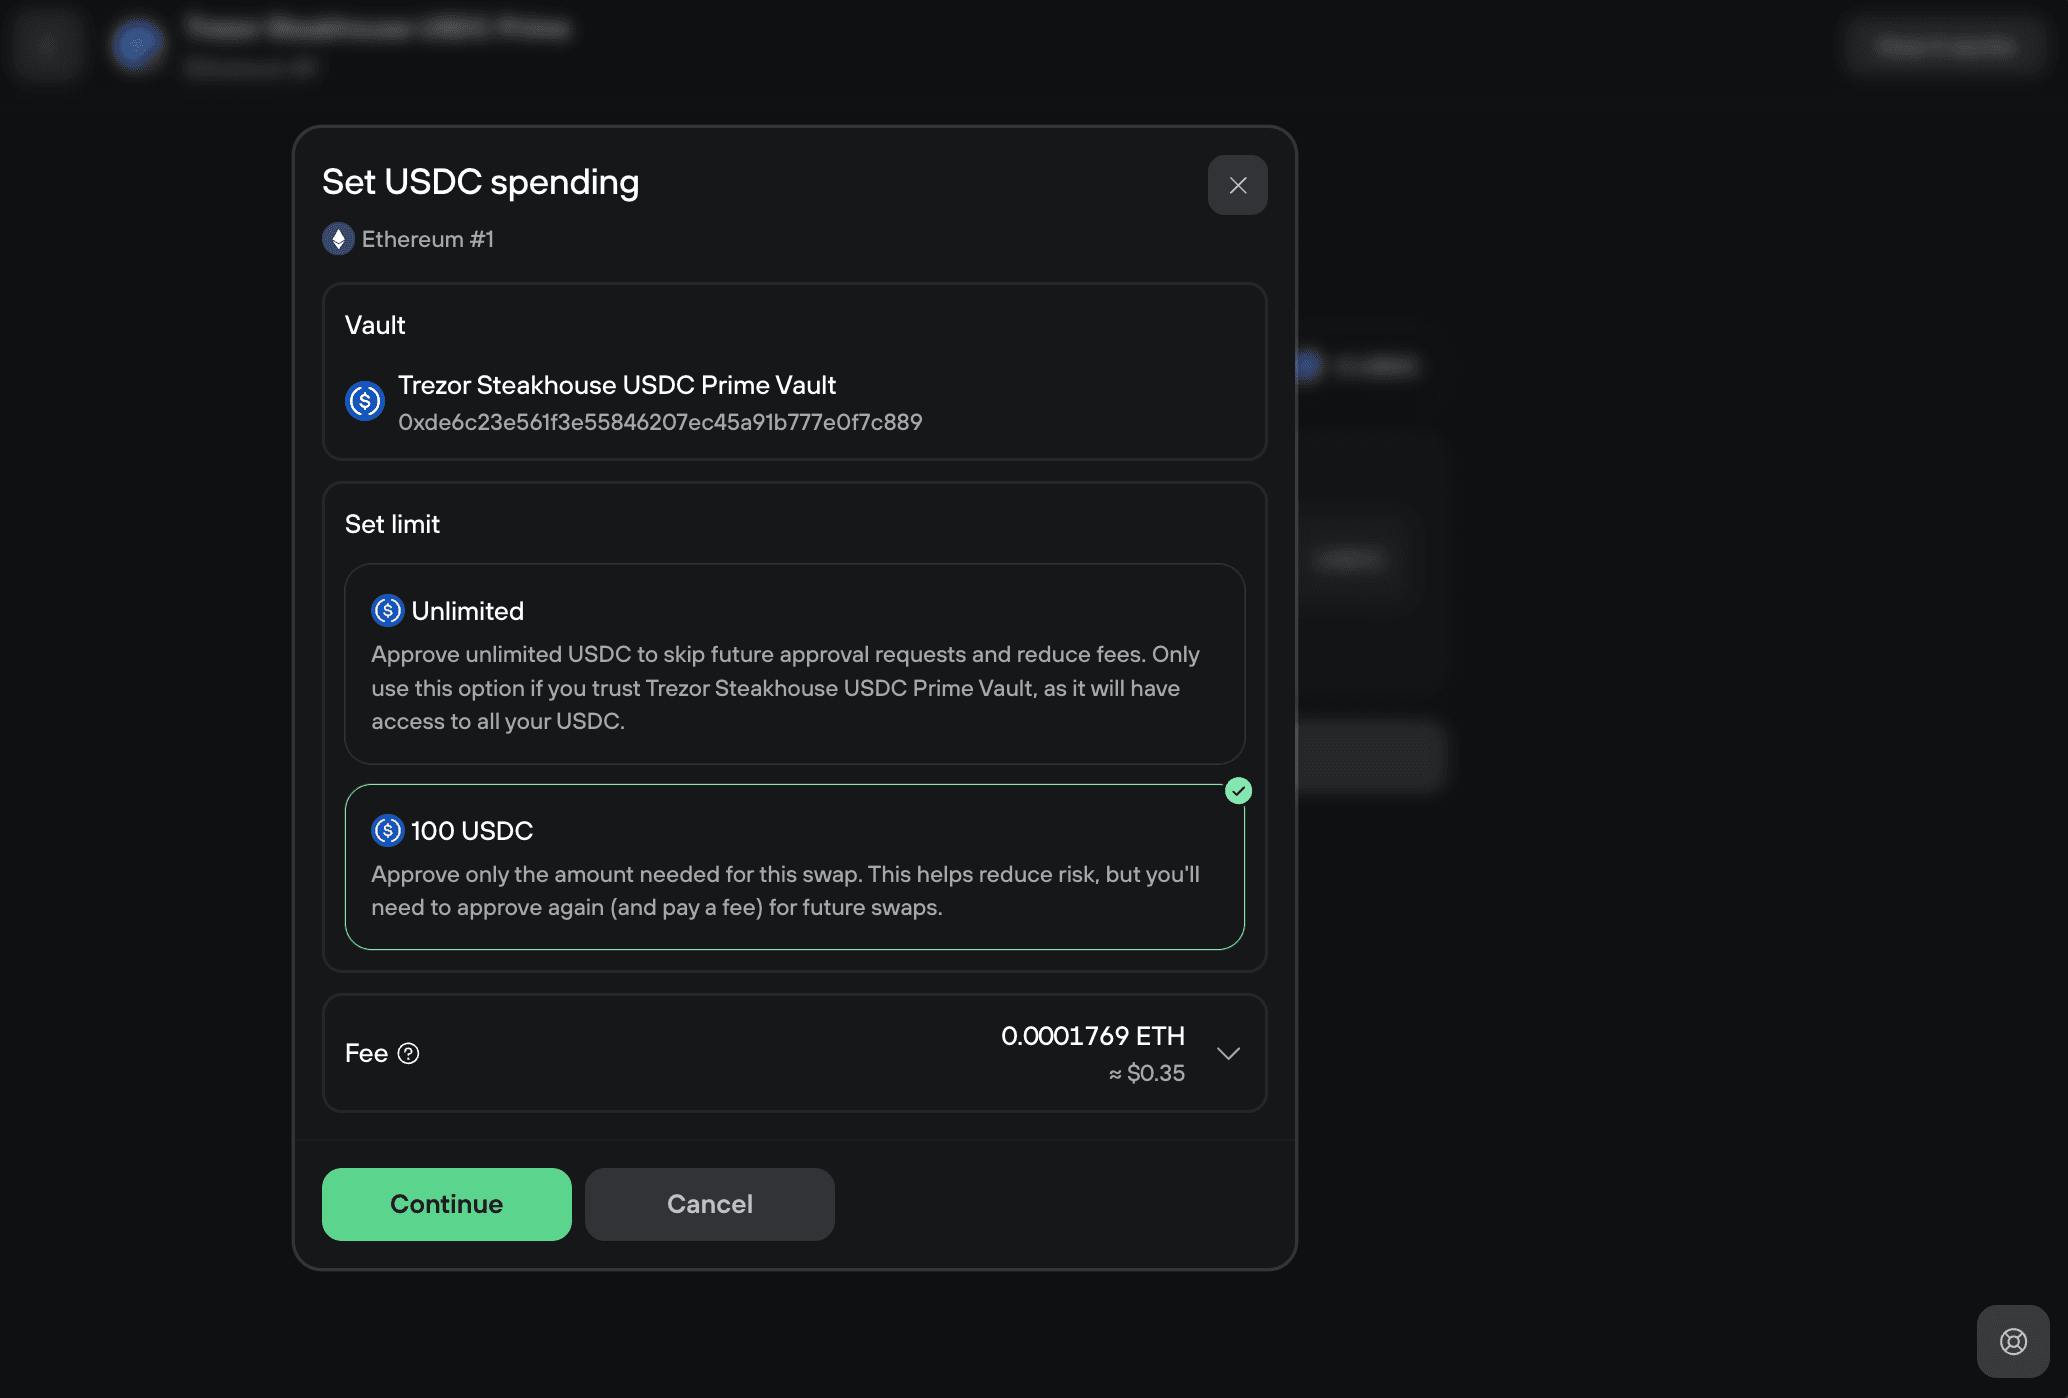
Enter the amount you want to deposit, then click Approve. This authorizes the vault to use that stablecoin. It doesn't move your funds yet.
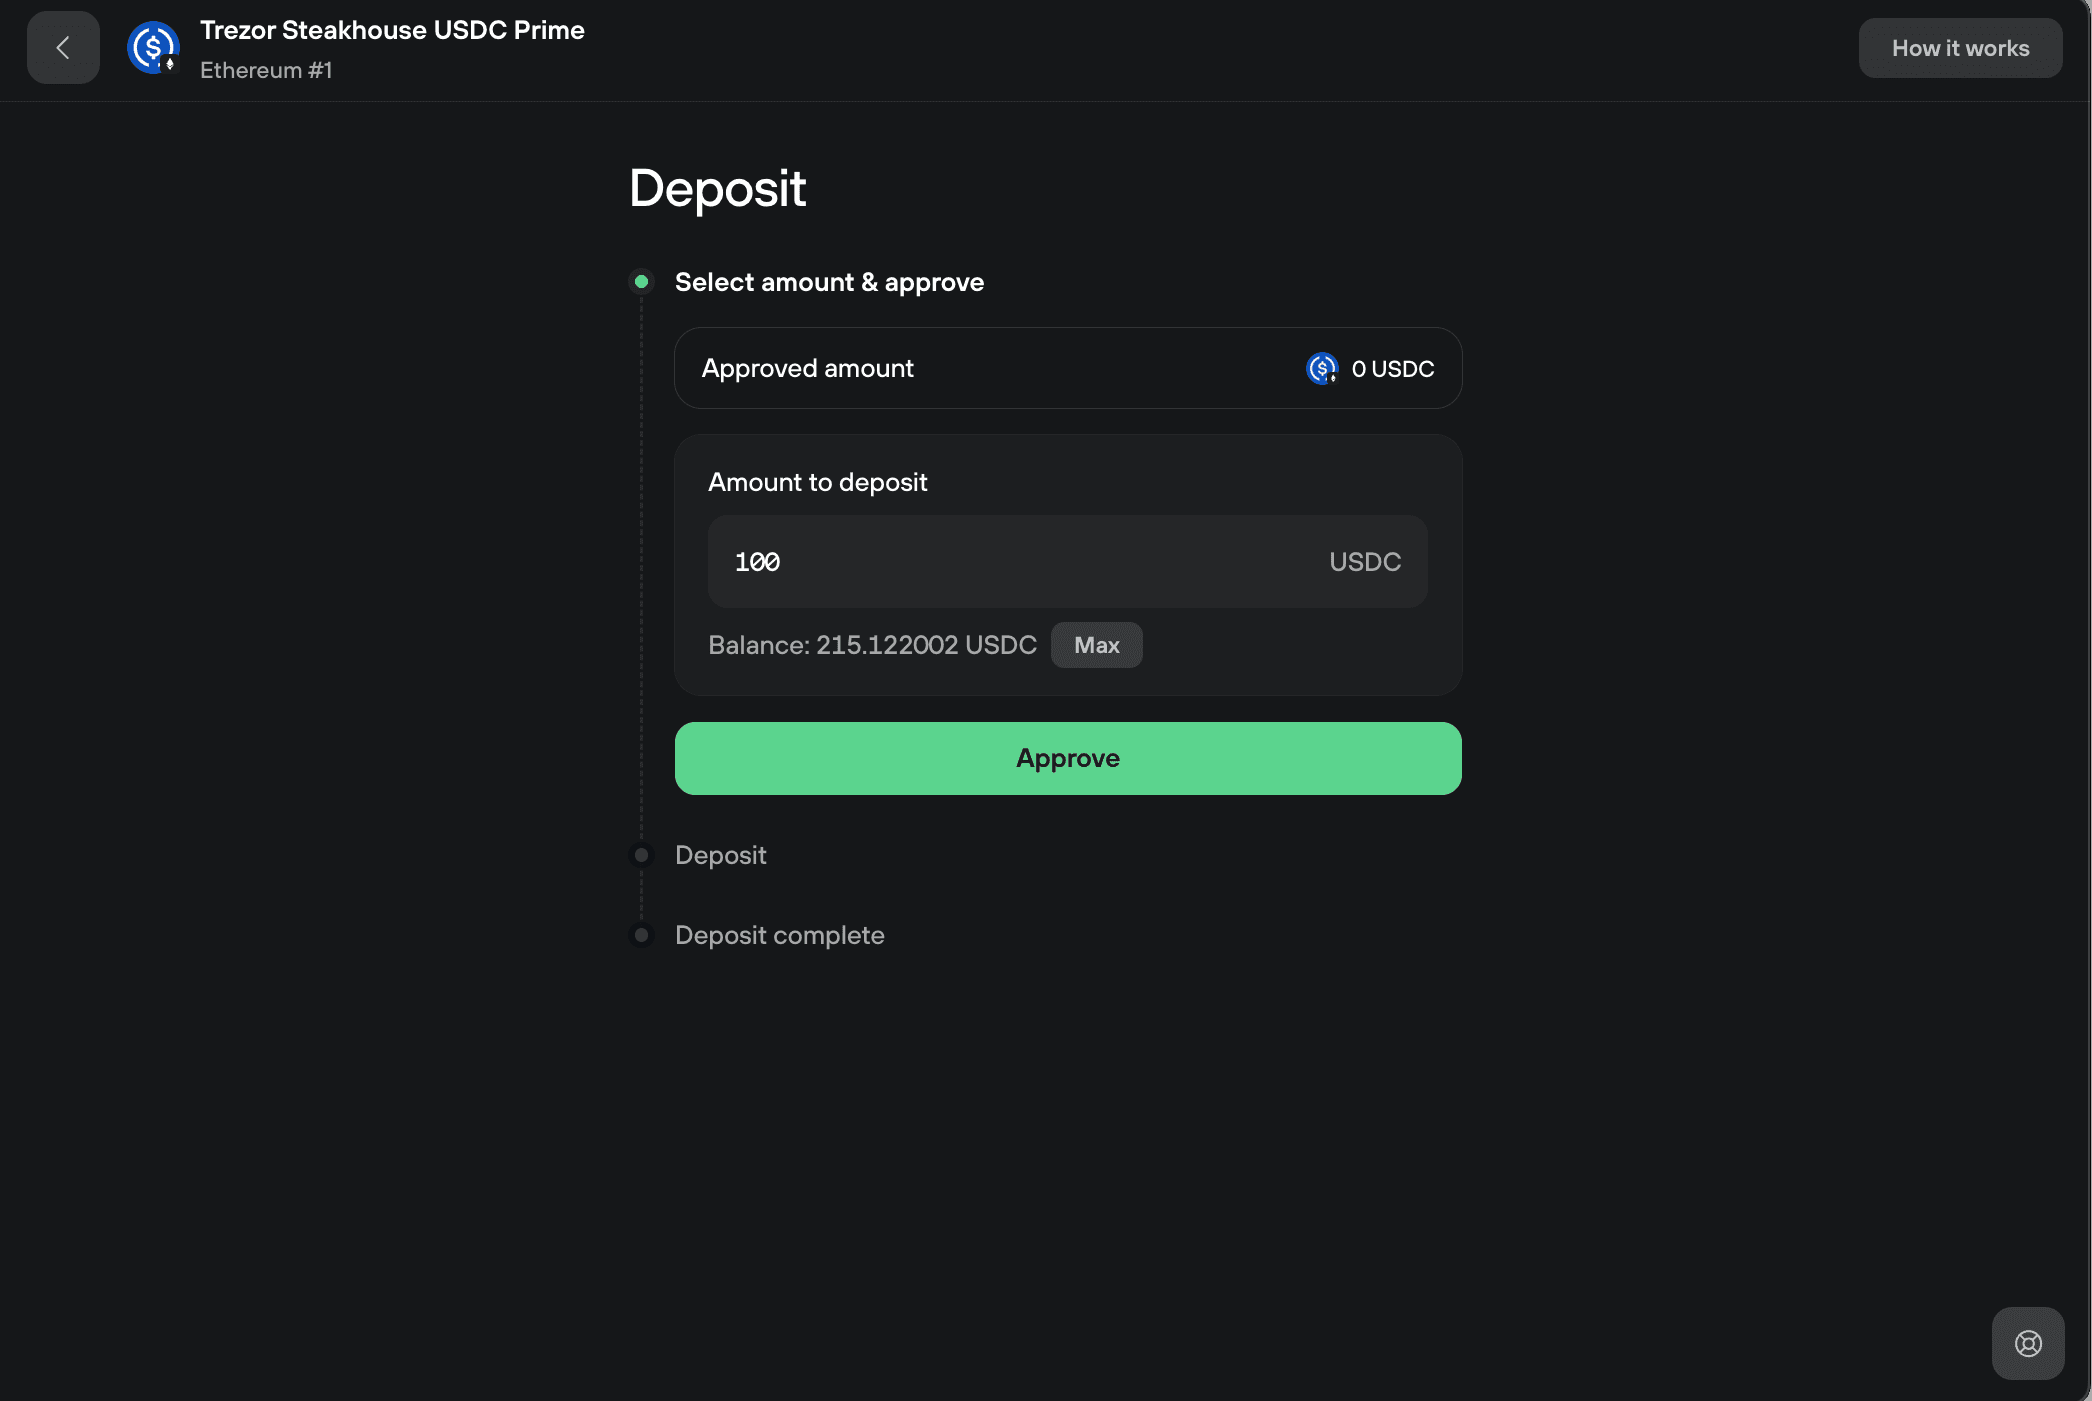
You'll be asked to set a spending limit:
- 100 USDC (exact): approves only the amount you're depositing now. More secure, and you'll approve again next time.
- Unlimited: approves the vault to use any amount of that coin in future, so you skip approval on later deposits. More convenient, but riskier if the contract were ever compromised.
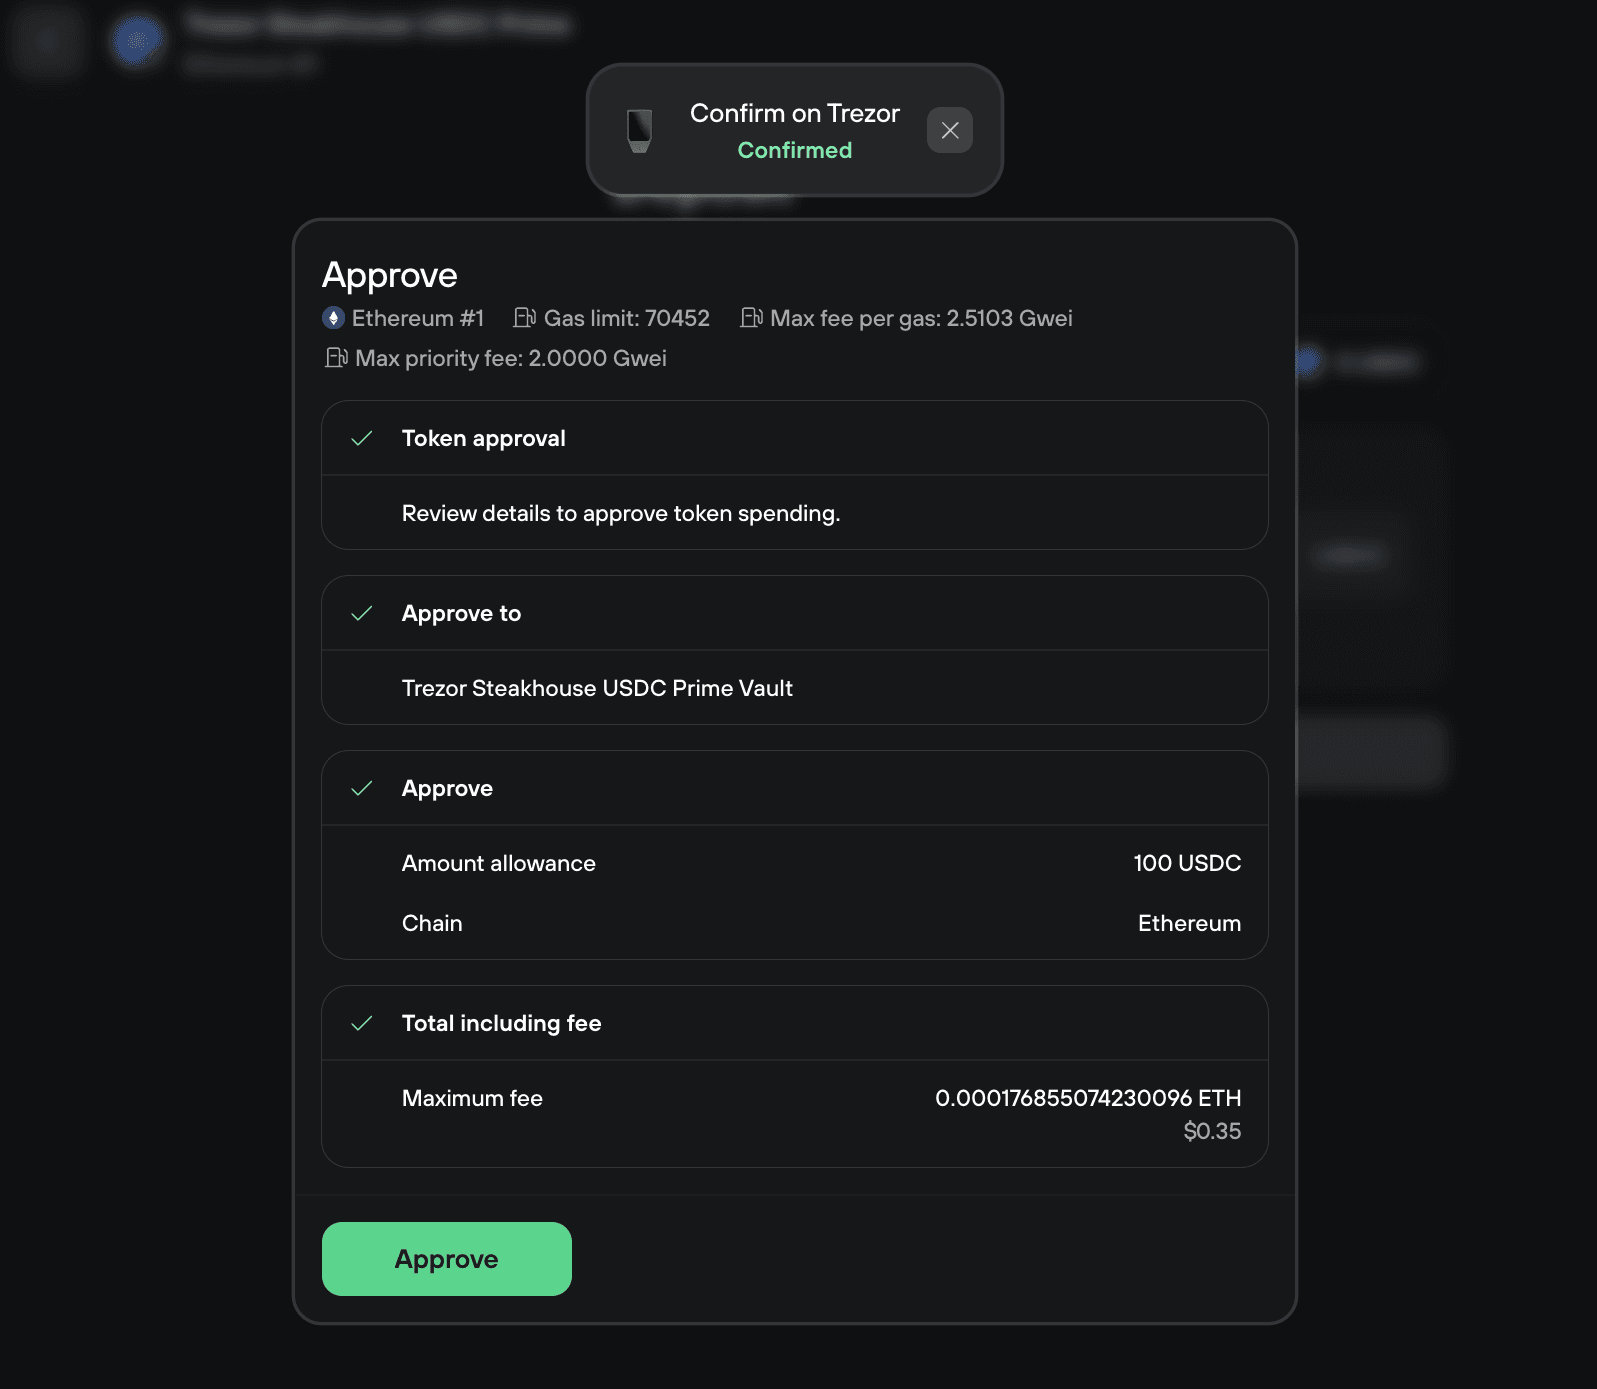
5. Confirm the approval on your Trezor
Review the approval on your device screen and confirm it there. Trezor Suite shows the approval being broadcast and waits for it to confirm on-chain.
6. Deposit
Once the approval confirms, the Deposit step unlocks. The amount carries over. Click Deposit.

7. Review and confirm the deposit
Trezor Suite shows a transaction simulation: the USDC leaving your account and the vault token (trSHUSDCp) you'll receive in return. You can expand Contract info to check the vault address and adjust the fee.
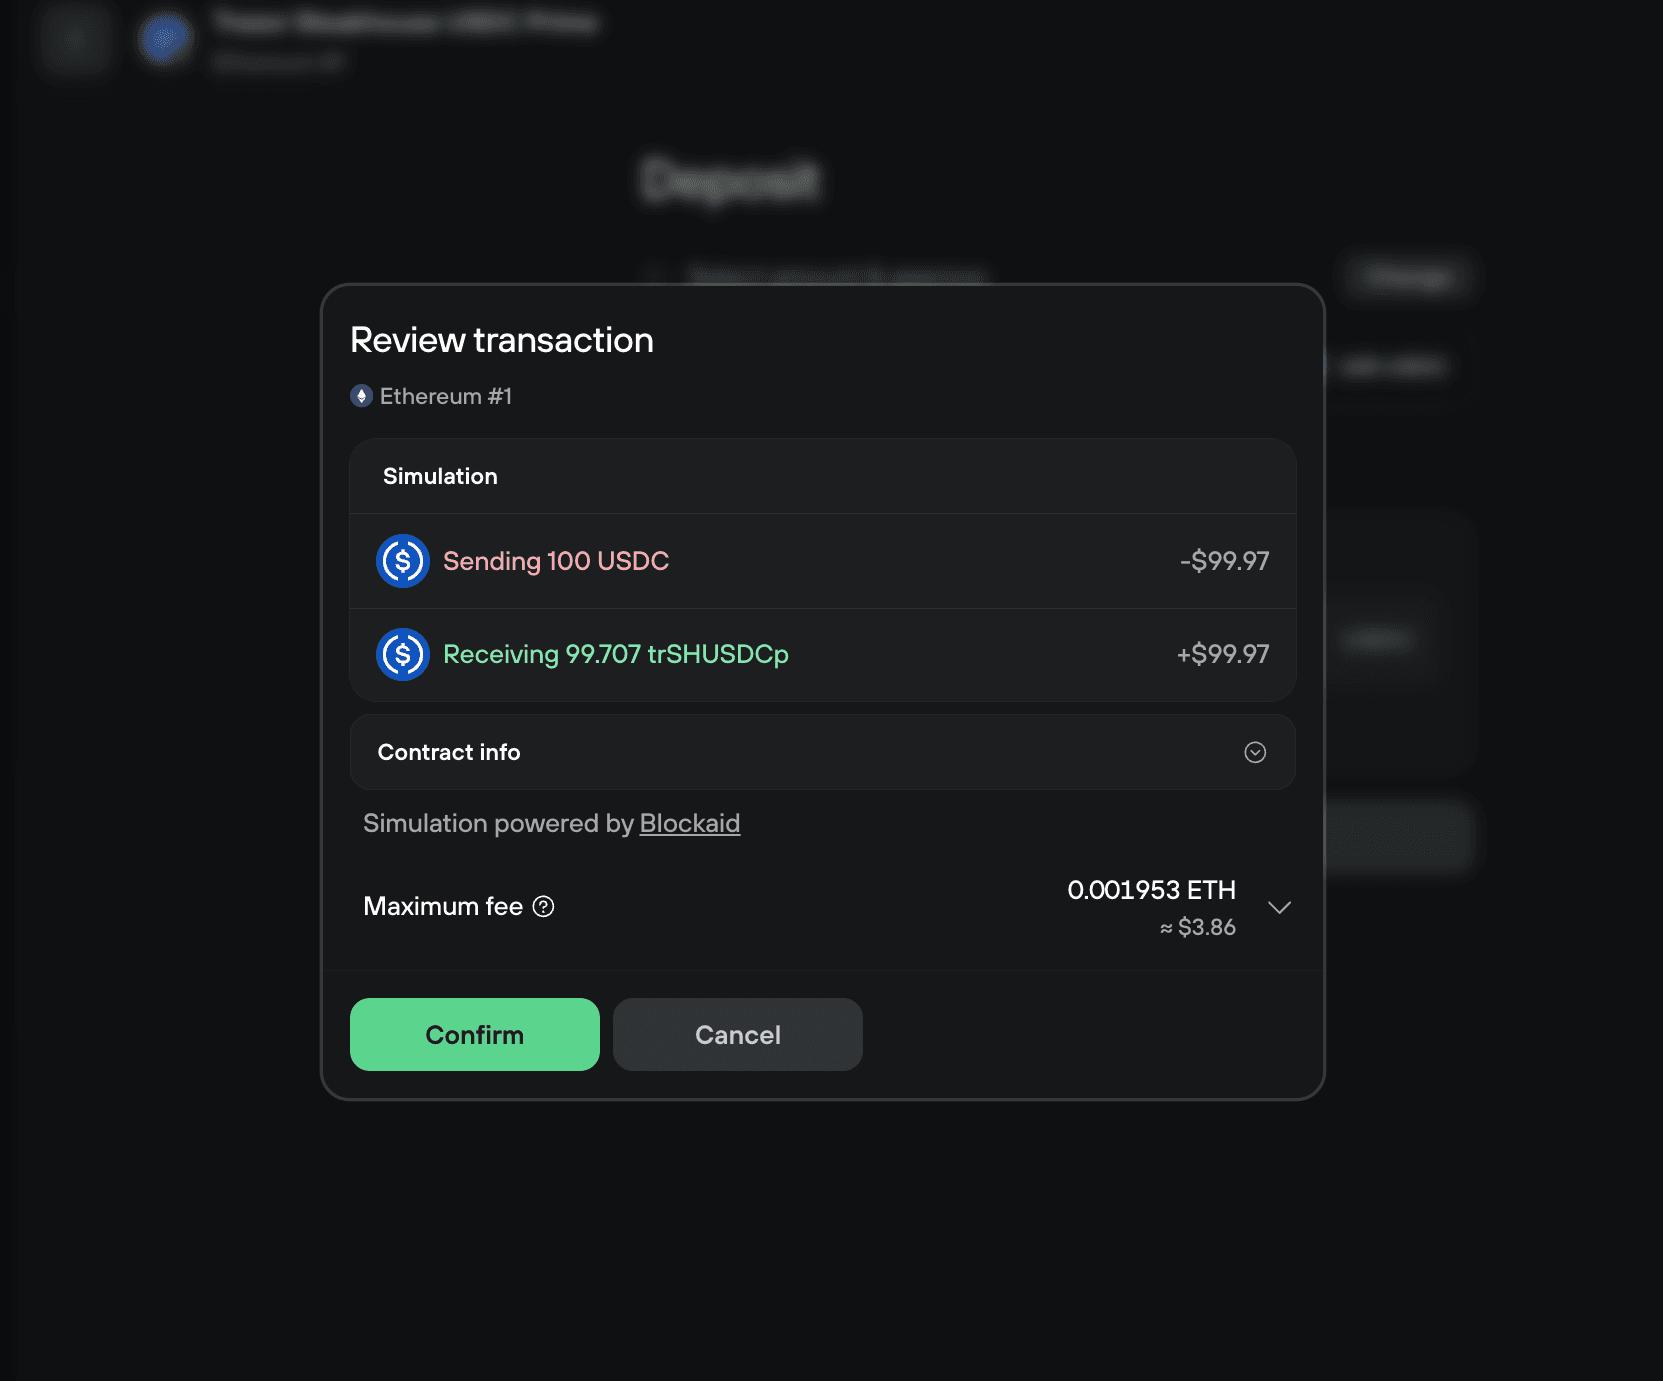
Click Confirm, then review and confirm the deposit on your Trezor device.
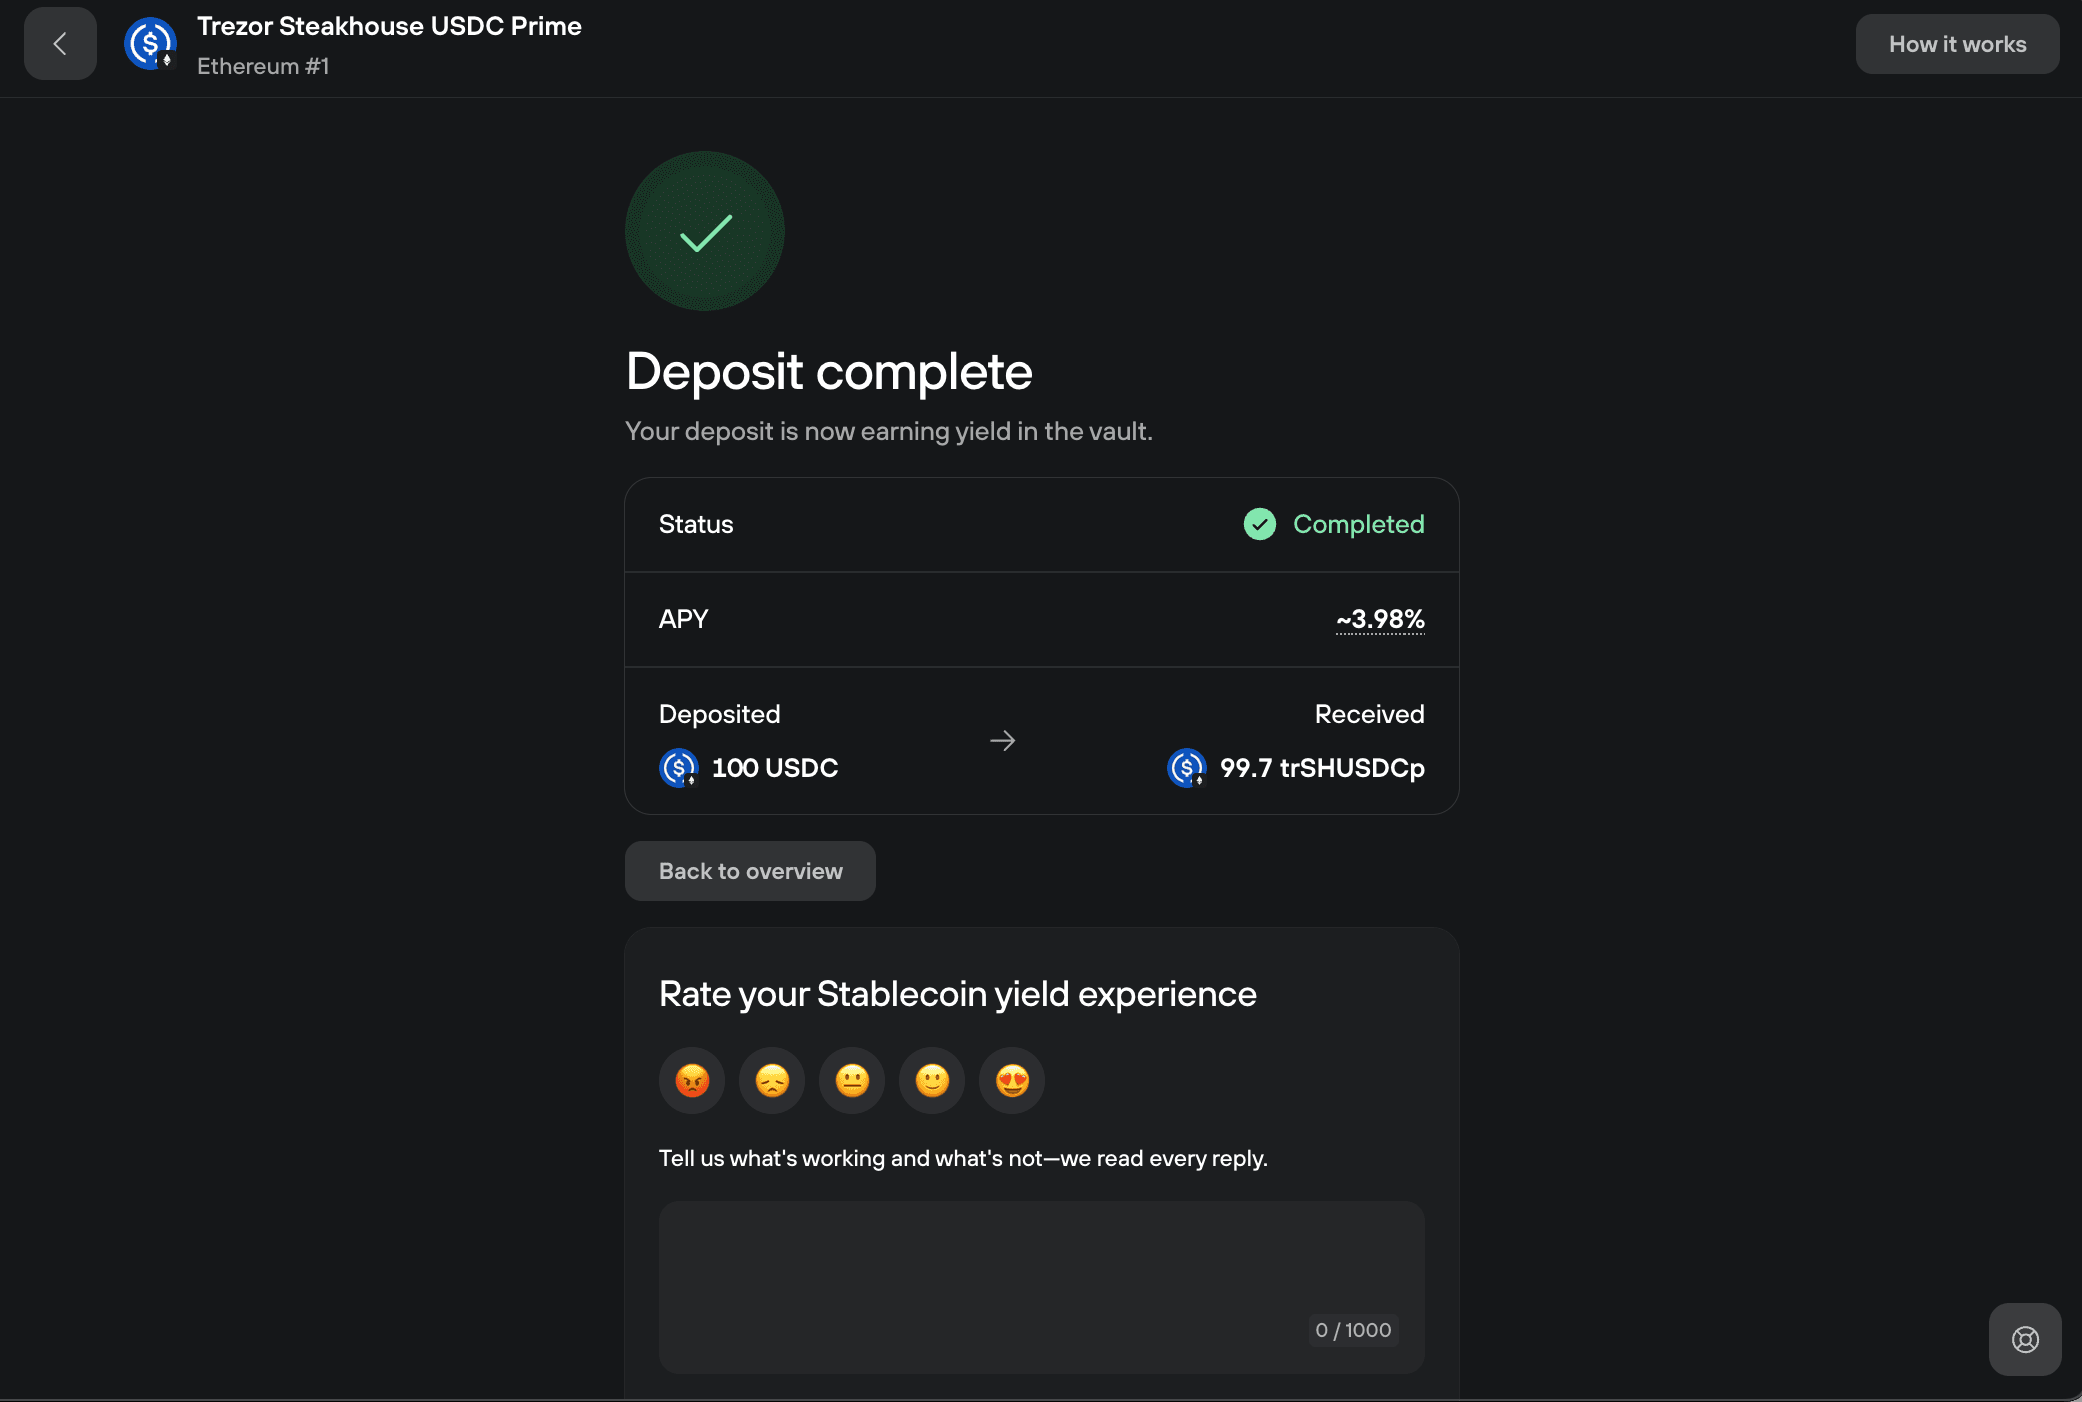
8. Done
You'll see a Deposit complete confirmation showing the amount deposited, the vault tokens received, and the current APY. Your stablecoins are now earning yield in the vault.
Withdraw on desktop
You can withdraw at any time. There's no lockup period and no withdrawal fee (only the Ethereum network fee applies).
1. Find your position
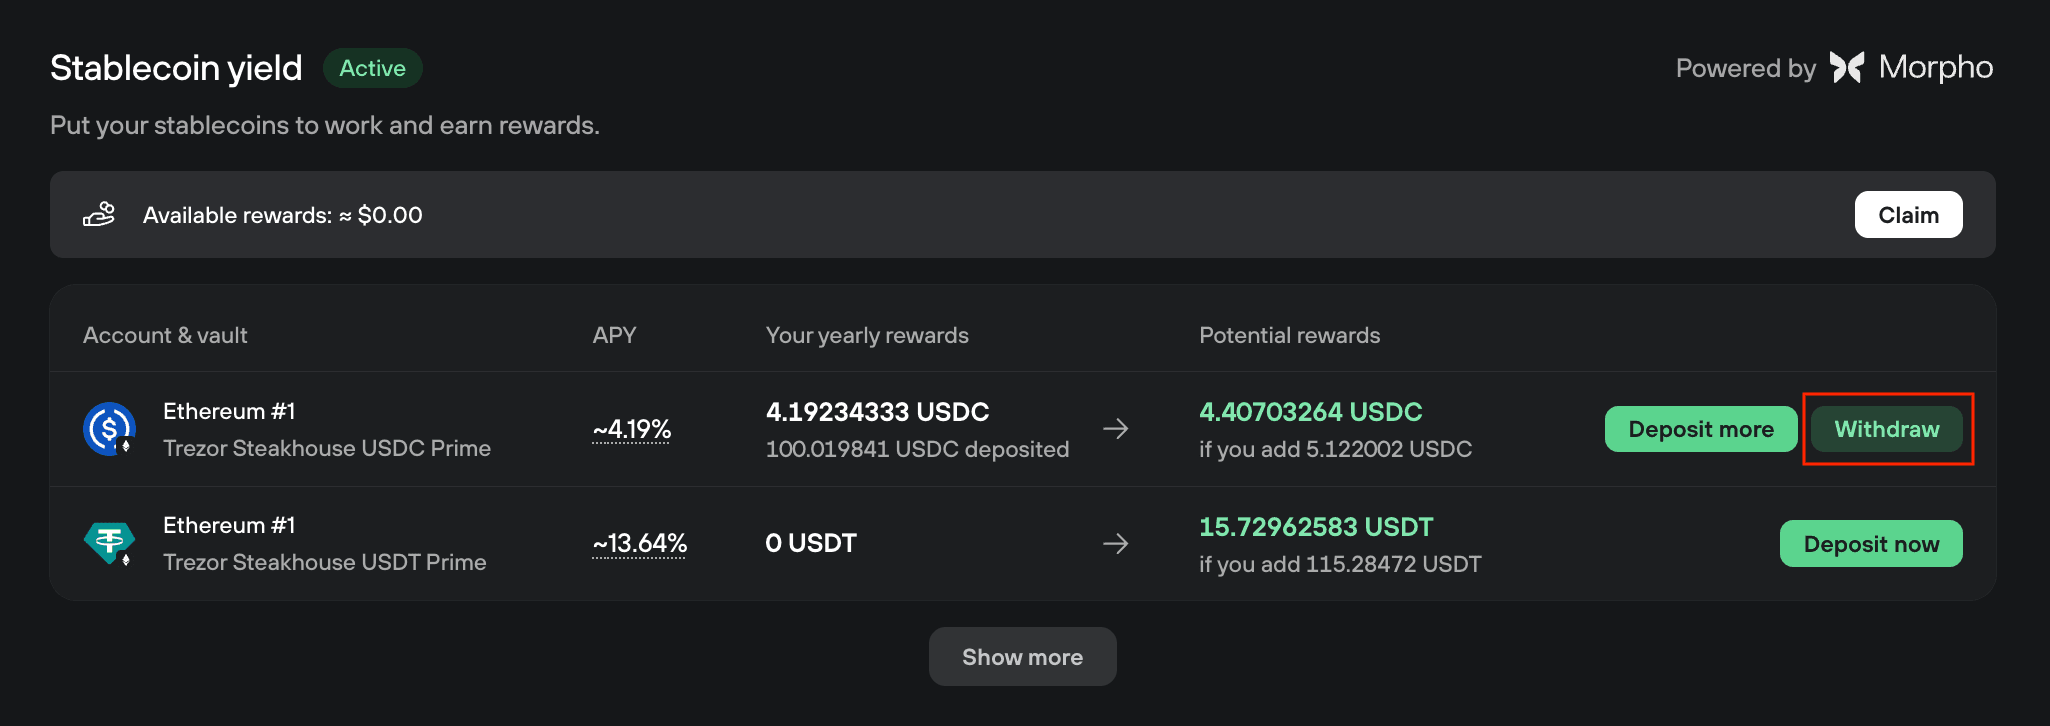
Open the Earn tab in Trezor Suite and scroll to Stablecoin yield. You'll see your active vaults with the current APY and your deposited amount. Click Withdraw next to the vault you want to exit.
2. Enter the amount and withdraw
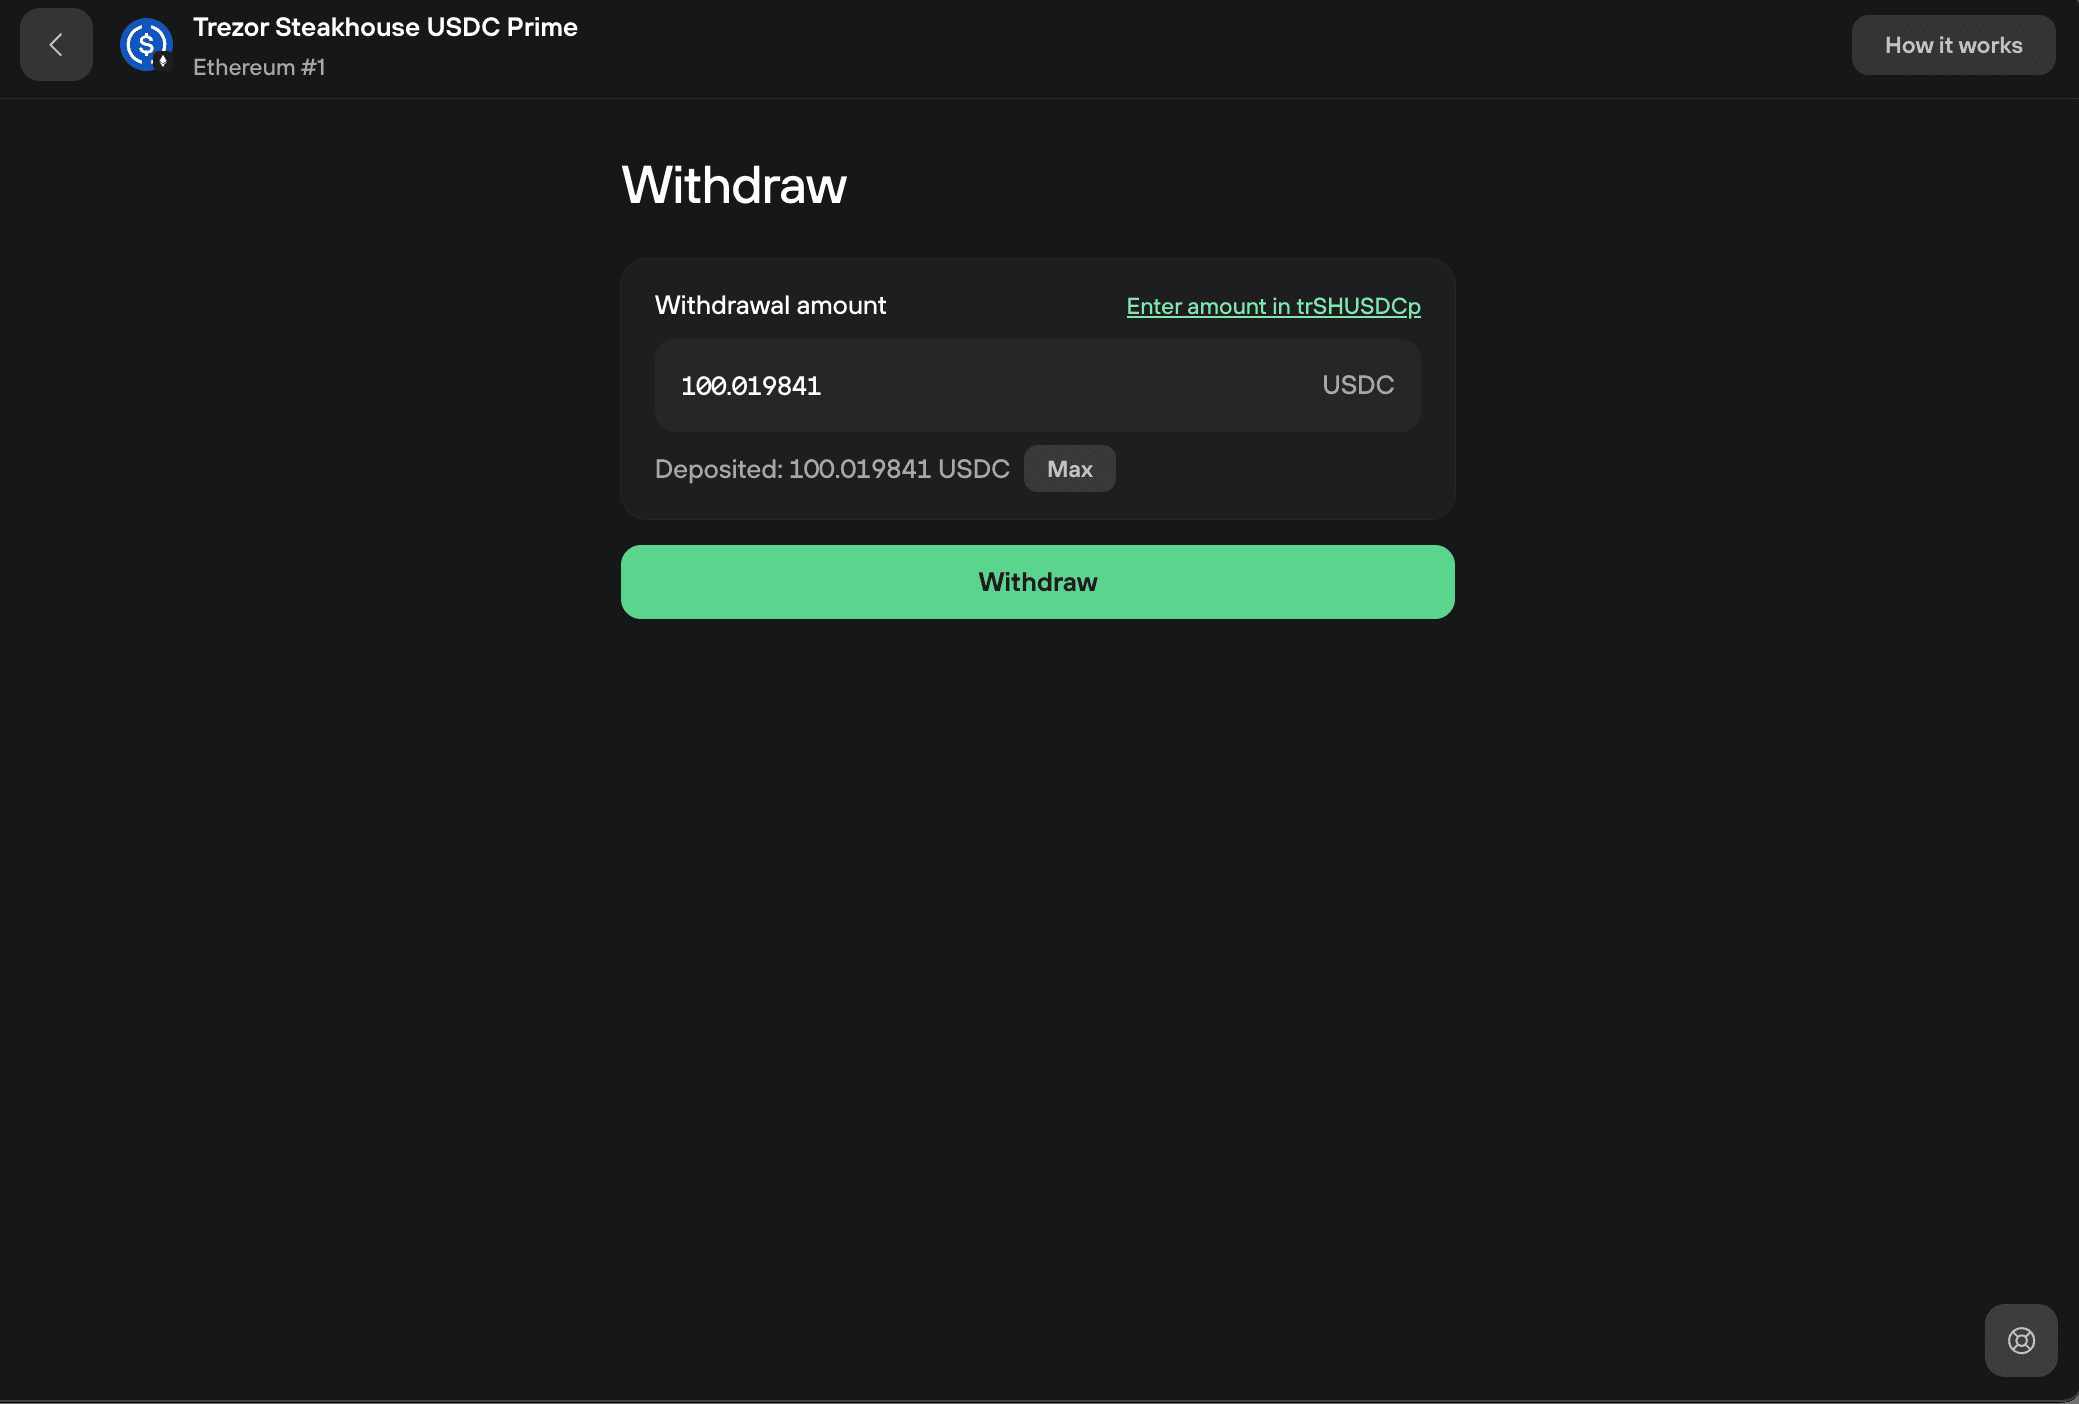
Enter the amount you want to withdraw, or click Max to withdraw the full amount. Then click Withdraw
3. Review and confirm on your Trezor
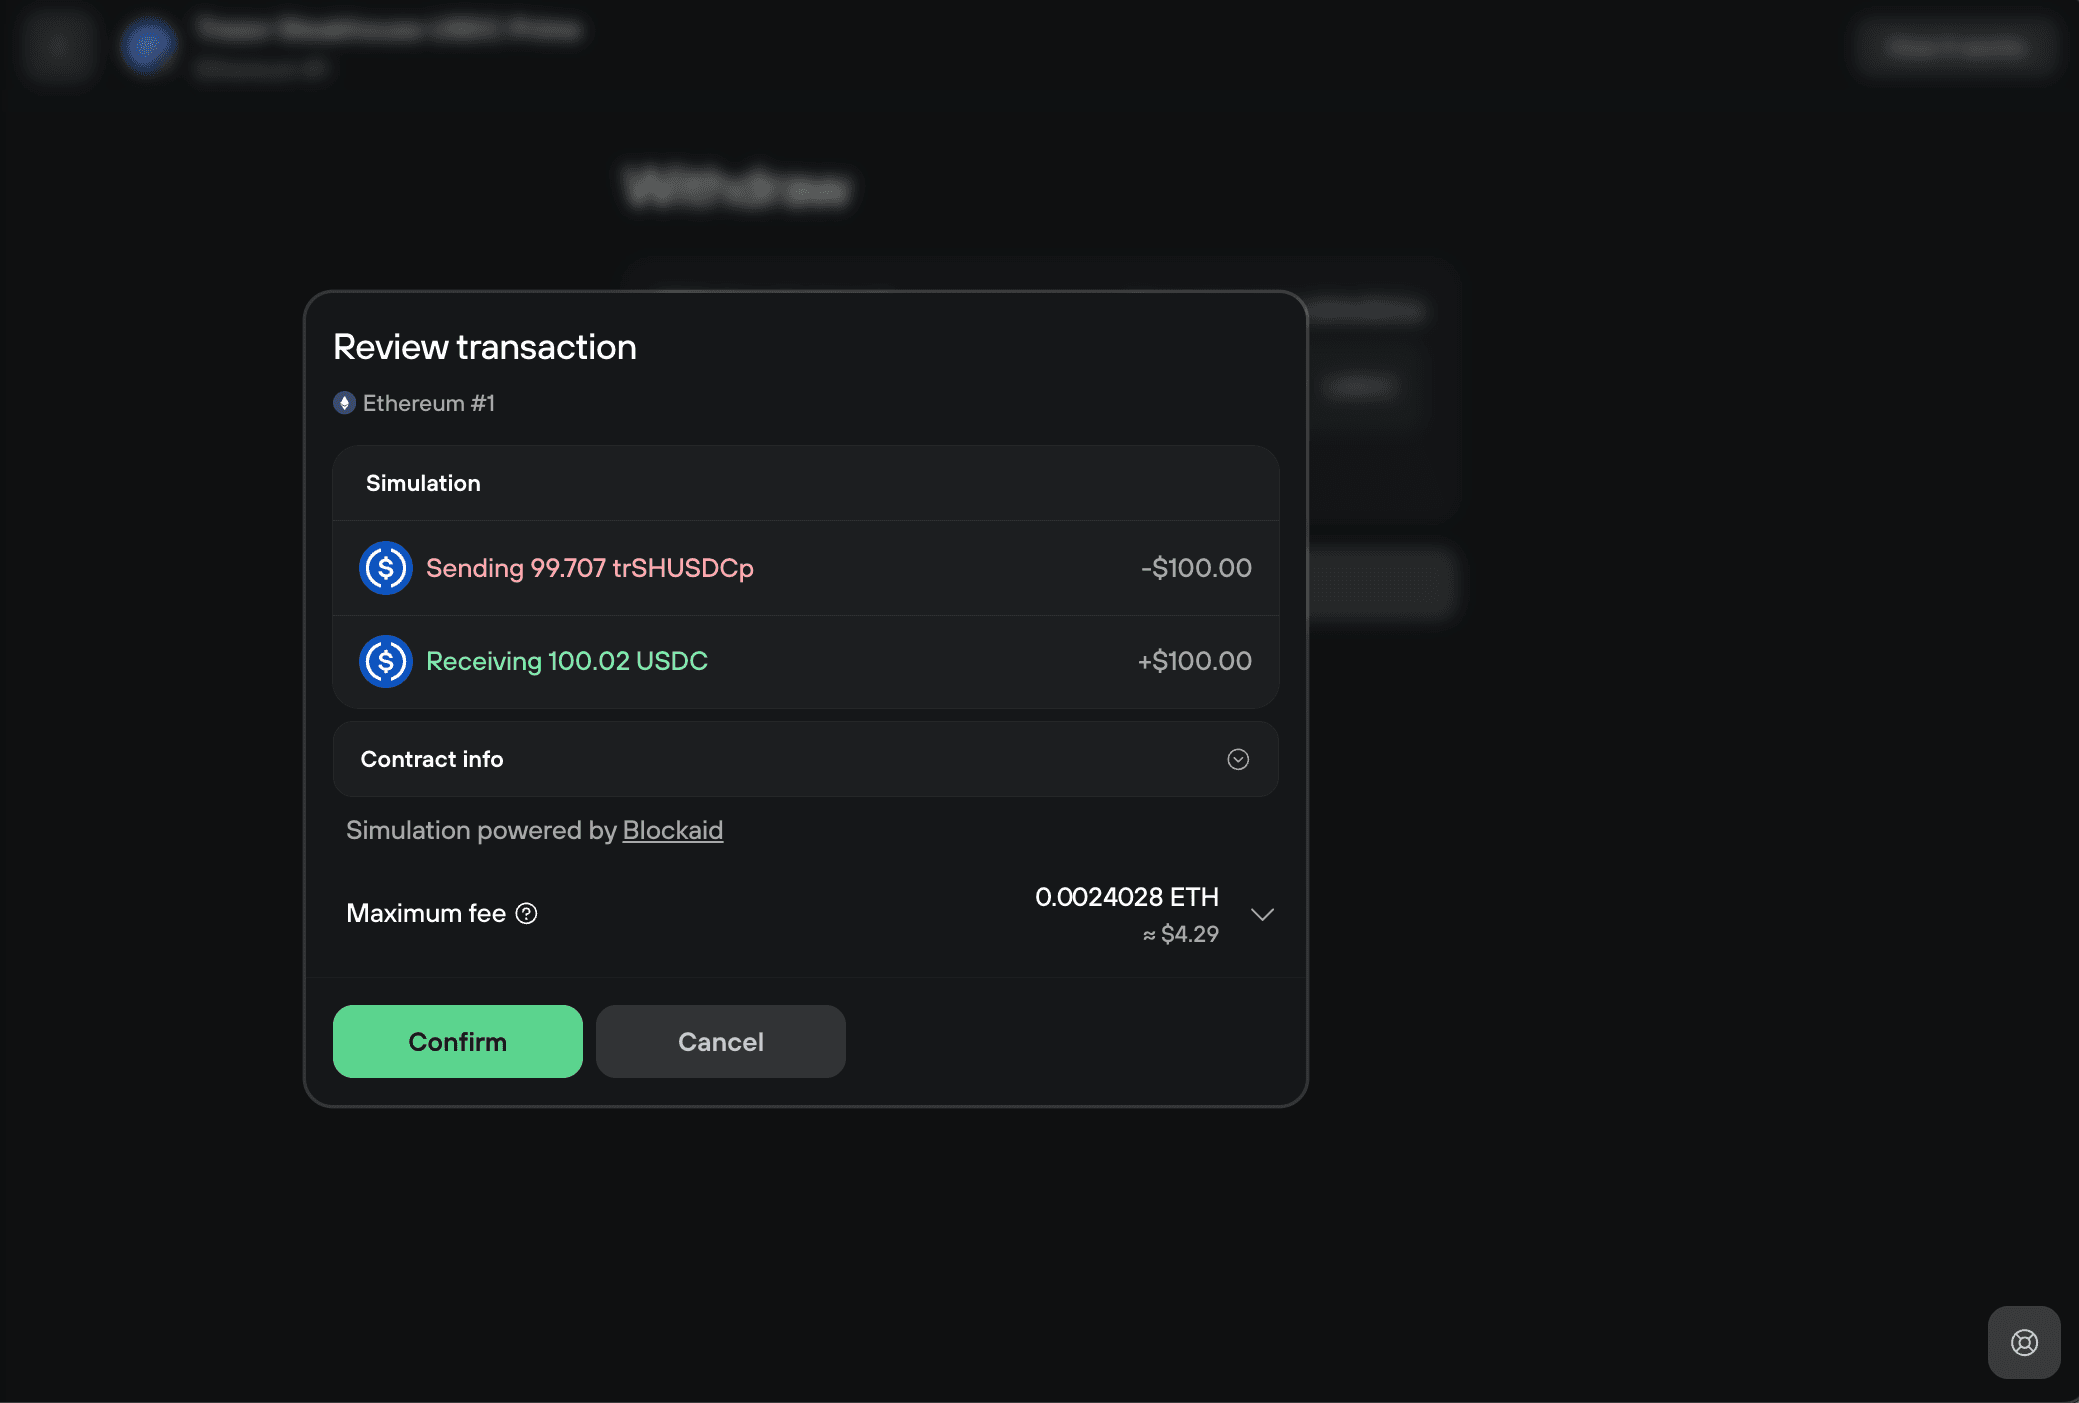
Trezor Suite shows a transaction simulation: the vault tokens leaving your account and the stablecoins you'll receive back. Review the amount, the network fee, and the vault details, then click Confirm
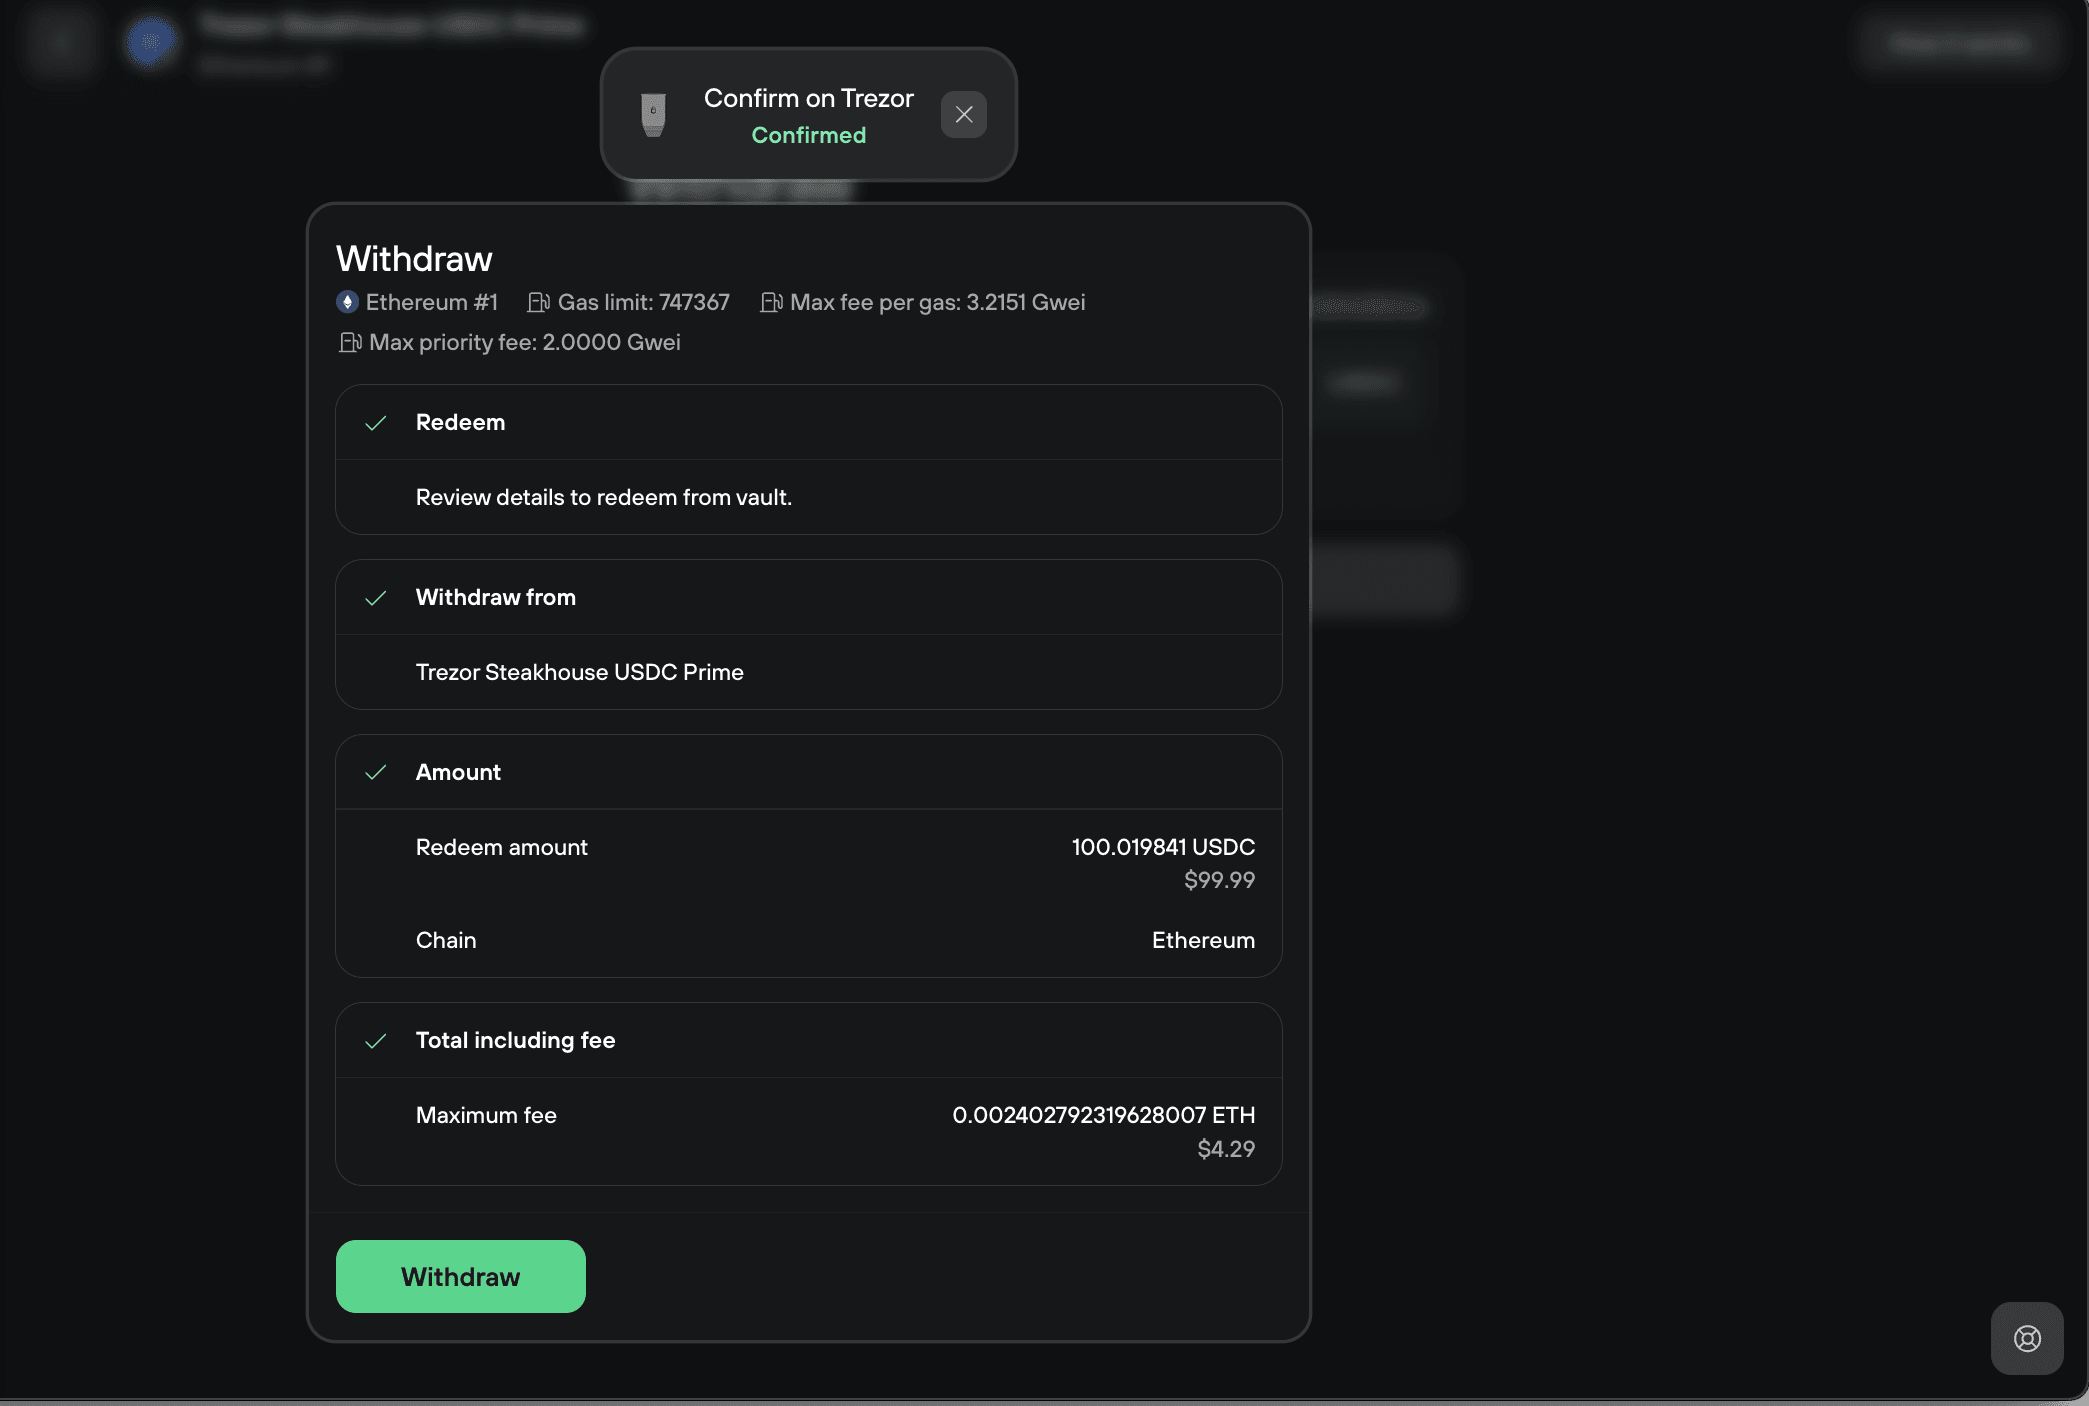
Confirm the withdrawal on your Trezor device. Once signed, click Withdraw to broadcast the transaction.
Your vault tokens are exchanged for your stablecoins plus the yield they earned. The funds arrive in your account once the transaction settles on-chain.
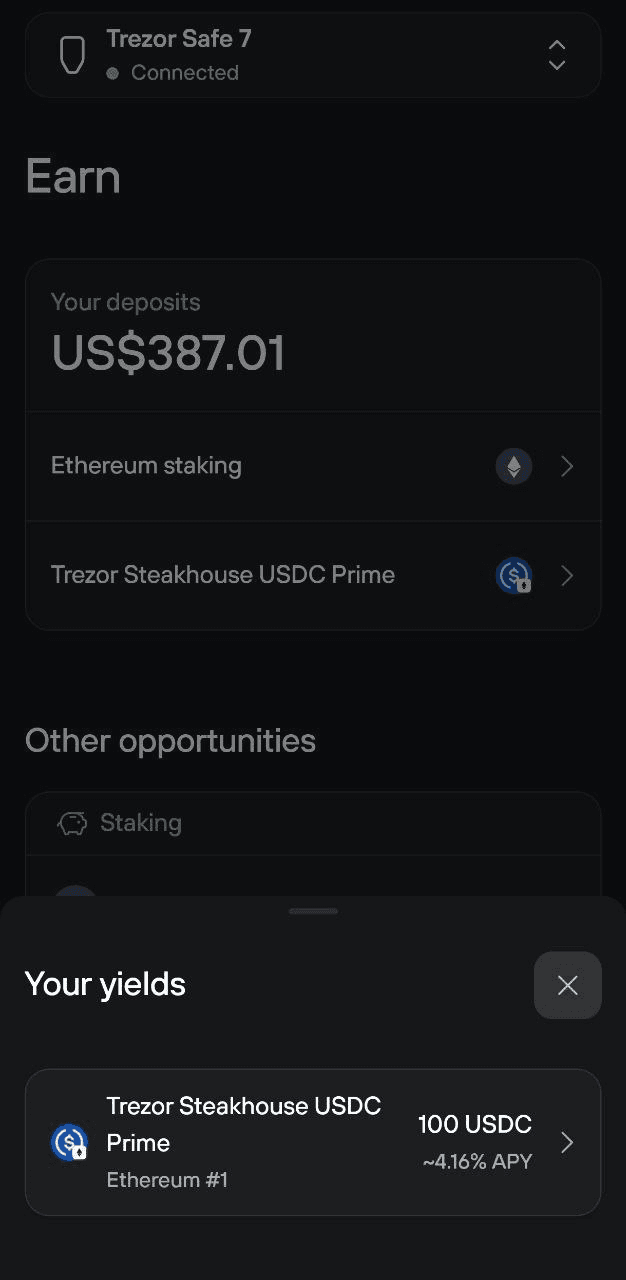
How to check your position
You can see what you've deposited in two places in Trezor Suite:
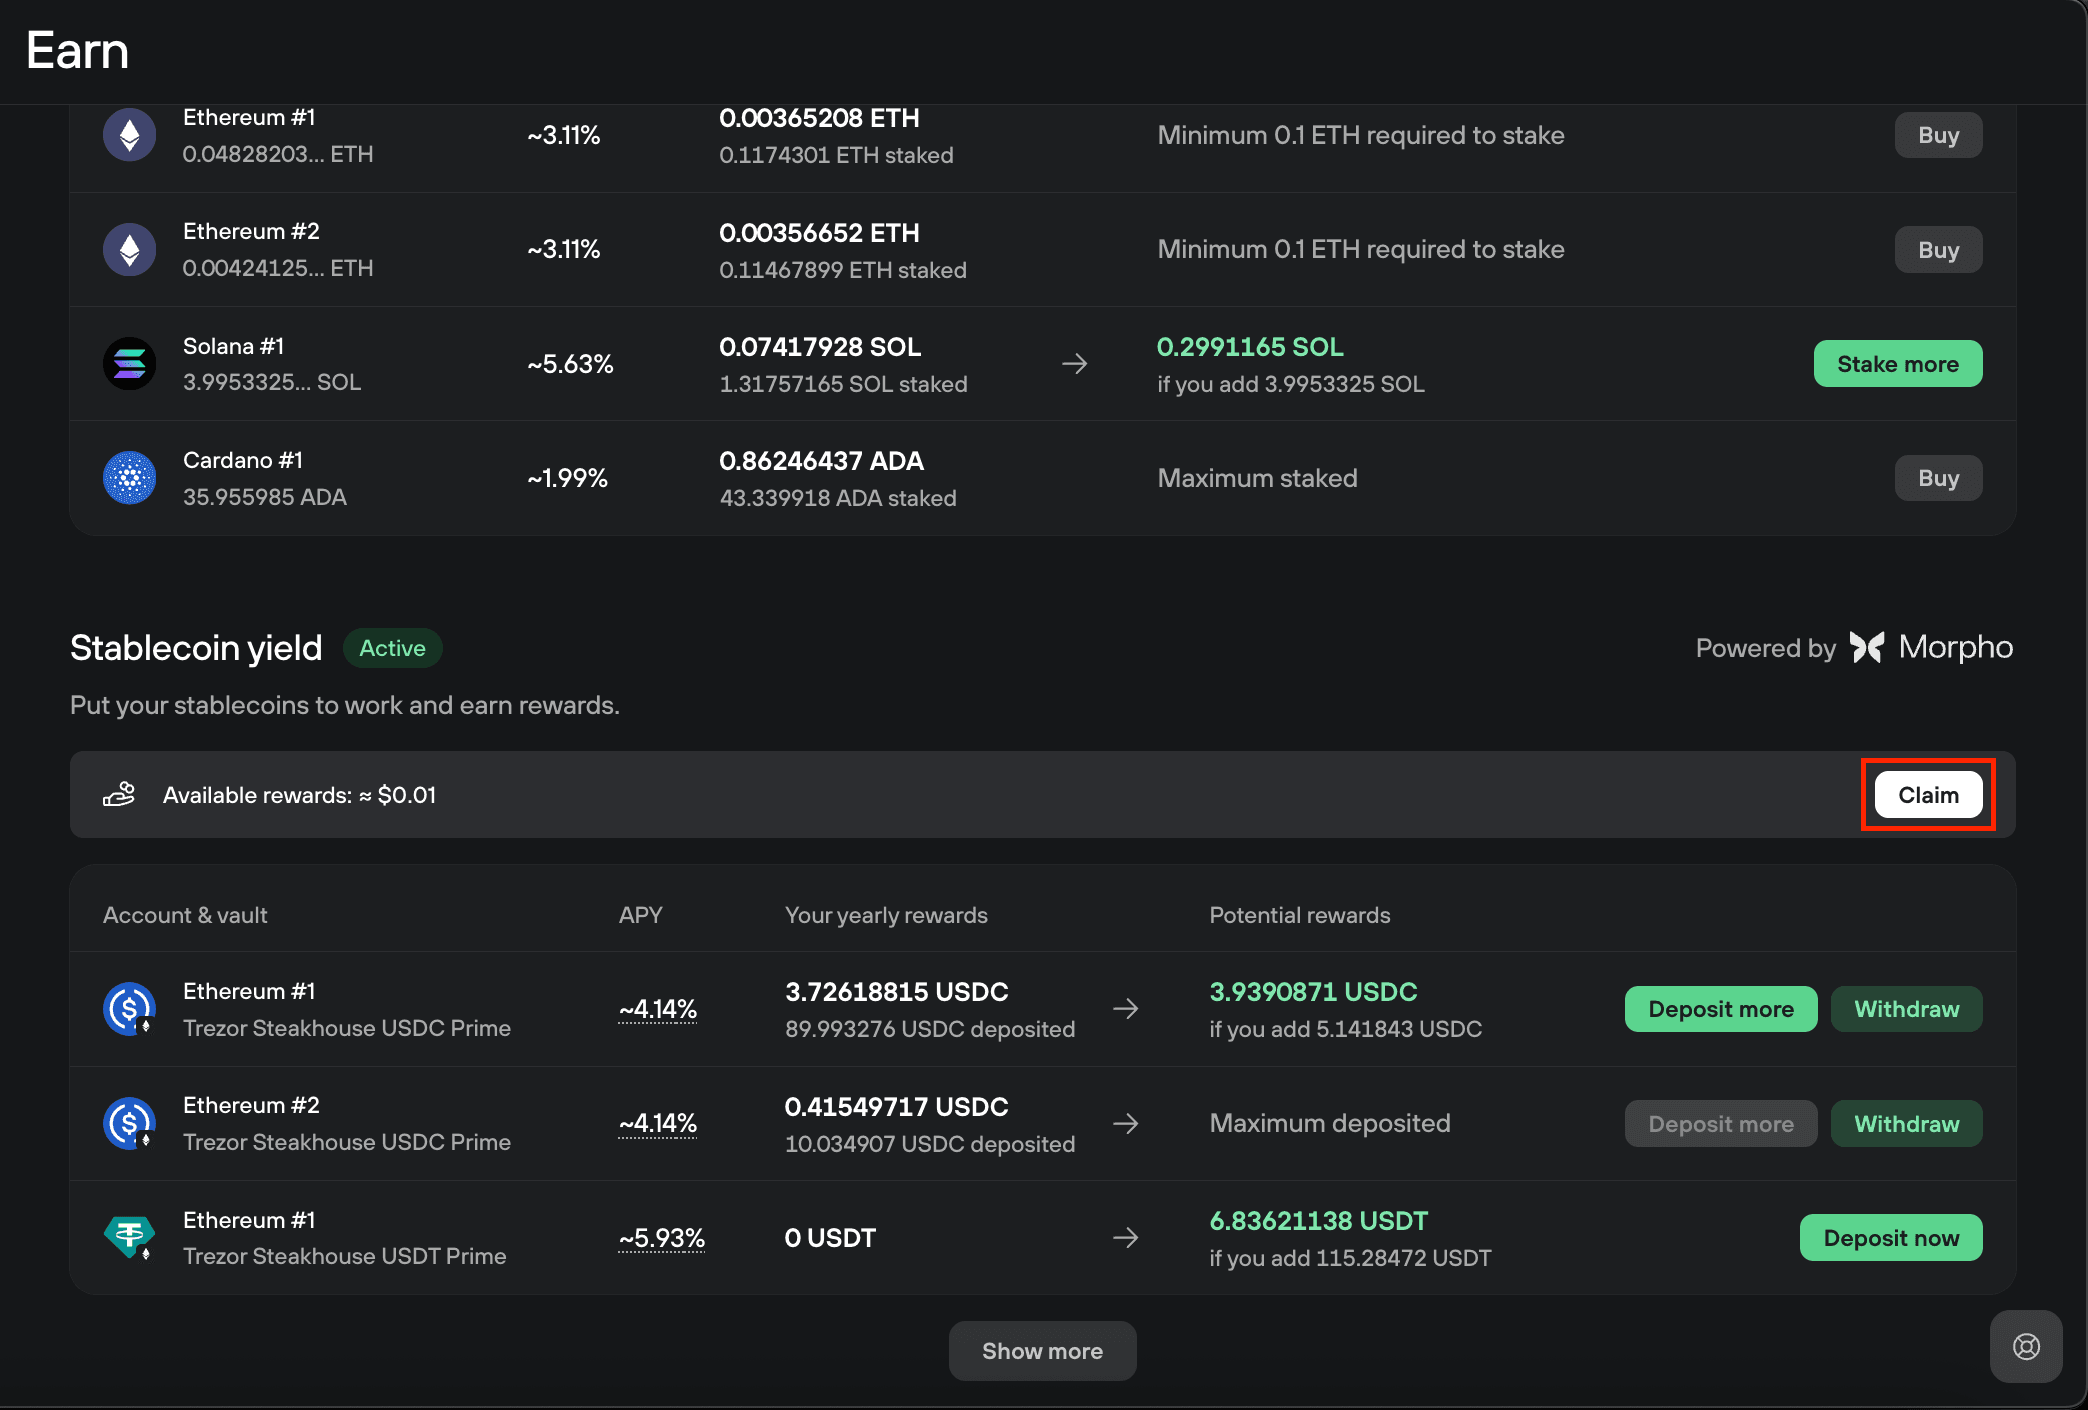
- In the Earn tab, under Stablecoin yield, next to the relevant vault.
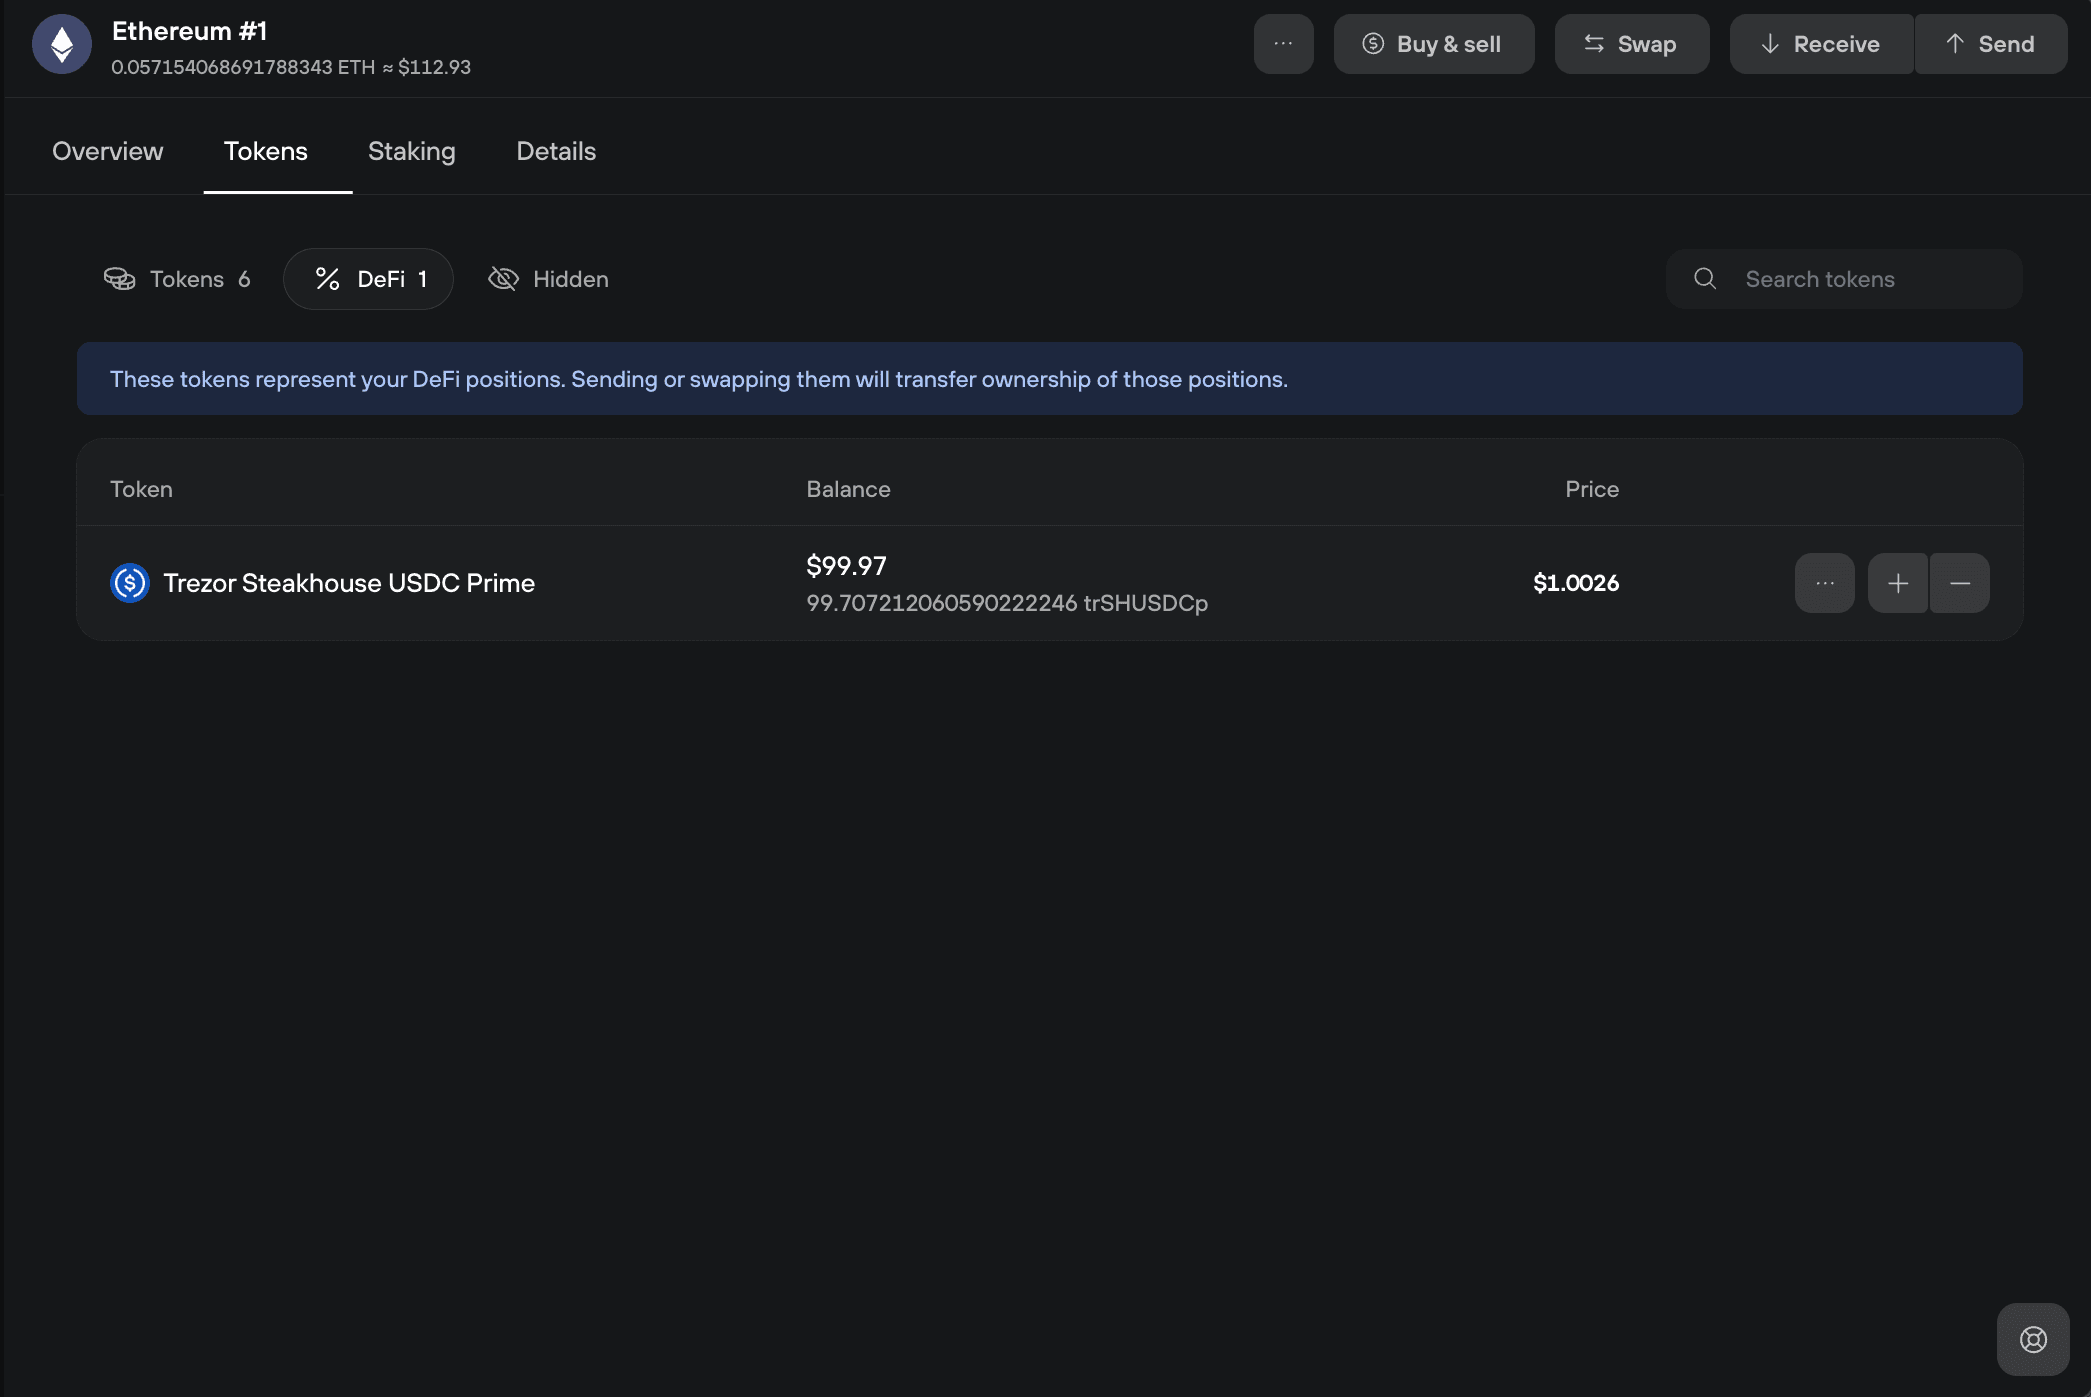
- In your Ethereum account under Tokens, in the DeFi section, where your vault token balance is listed.
How to claim bonus rewards
When you have MORPHO to claim, a Claim button appears in the Earn tab. One signed transaction on your Trezor collects your MORPHO together with any other pending rewards. Anything you've earned stays claimable even after a campaign ends.
See the section Bonus rewards campaigns below to learn more.
Bonus reward campaigns
On top of the regular vault yield, a vault may run a temporary bonus reward campaign that pays extra rewards in MORPHO tokens. These rewards come from Morpho's incentive programs and are distributed through Merkl, a rewards platform, on top of the yield the vault already earns.
Which Trezor devices are compatible?
Any device running universal firmware (version 2.12.0 or later for Trezor Safe family devices and Model T; version 1.14.1 or later for Model One). Devices with Bitcoin-only firmware won't see the Earn section.
Trezor Safe 3, Safe 5, Safe 7, and Model T show vault transactions in plain language on the device screen (clear signing). Model One does not support clear signing for these transactions, so you'll see raw transaction data instead.
What if Trezor Suite is unavailable?
Access to your funds doesn't depend on Trezor Suite. Your position is held as a vault token in your wallet. If Trezor Suite were ever unavailable, you could move the tokens or withdraw through any compatible DeFi wallet.