Send crypto in Trezor Suite
Sending crypto in Trezor Suite works the same way for almost every asset: pick the account you're sending from, enter the recipient's address and the amount, then check the details on your Trezor and sign.
This guide covers the general flow on desktop and mobile, plus the checks that make sure your funds go where you intend.
Before you send
A few things apply no matter which asset you're sending or which device you're on.
Choose the right account and network
Each account in Trezor Suite corresponds to one network, and it can only send on that network. To send an asset, pick the account that holds it.
Get the network right, because it can't be undone. The recipient's address has to be on the same network you're sending from. If you send to an address on a network that doesn't support the asset, the funds can be lost.
To learn more, please read How to choose the correct blockchain network when withdrawing from or sending to Trezor.
Where to get the recipient address
Take the address from the person or service you're paying: your payee, your own wallet, or the exchange's deposit screen.
Never copy an address from your transaction history. Attackers can plant lookalike addresses there hoping you'll reuse one, a trick known as address poisoning. The address you paste should always come from the original source.
To learn more, please read What are address poisoning attacks and how to avoid them.
Some assets need an extra detail alongside the address, like a destination tag for XRP and XLM. Missing it can mean the exchange can't credit the funds to your account. See Destination tags and memos explained for XRP, XLM, and more.
Checking the address on your Trezor
Malware on your computer or mobile can swap the recipient address after you paste it into Trezor Suite, so you sign a payment to an attacker instead of your intended recipient.
Your Trezor's screen shows the address the transaction will actually pay. Check that address against the one from your original source. If they match, the transaction is safe to sign.
Learn more about why the device screen can be trusted in What is a Trusted Display?.
Send on desktop
Open the Send form
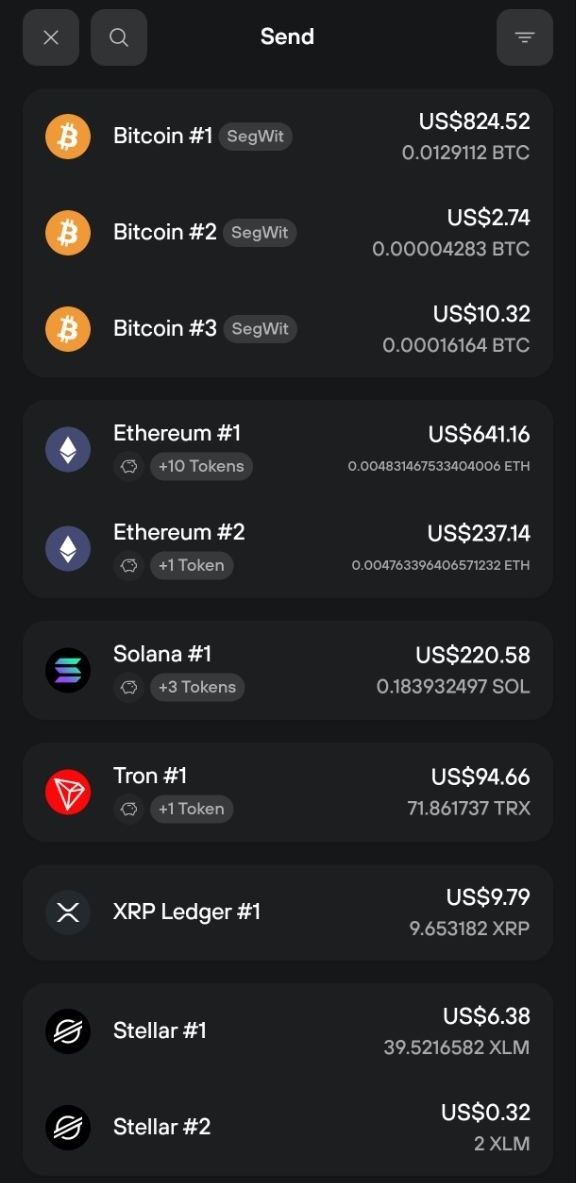
Connect and unlock your Trezor. From the Dashboard, click Send in the top right corner, then select the account and asset you want to send.
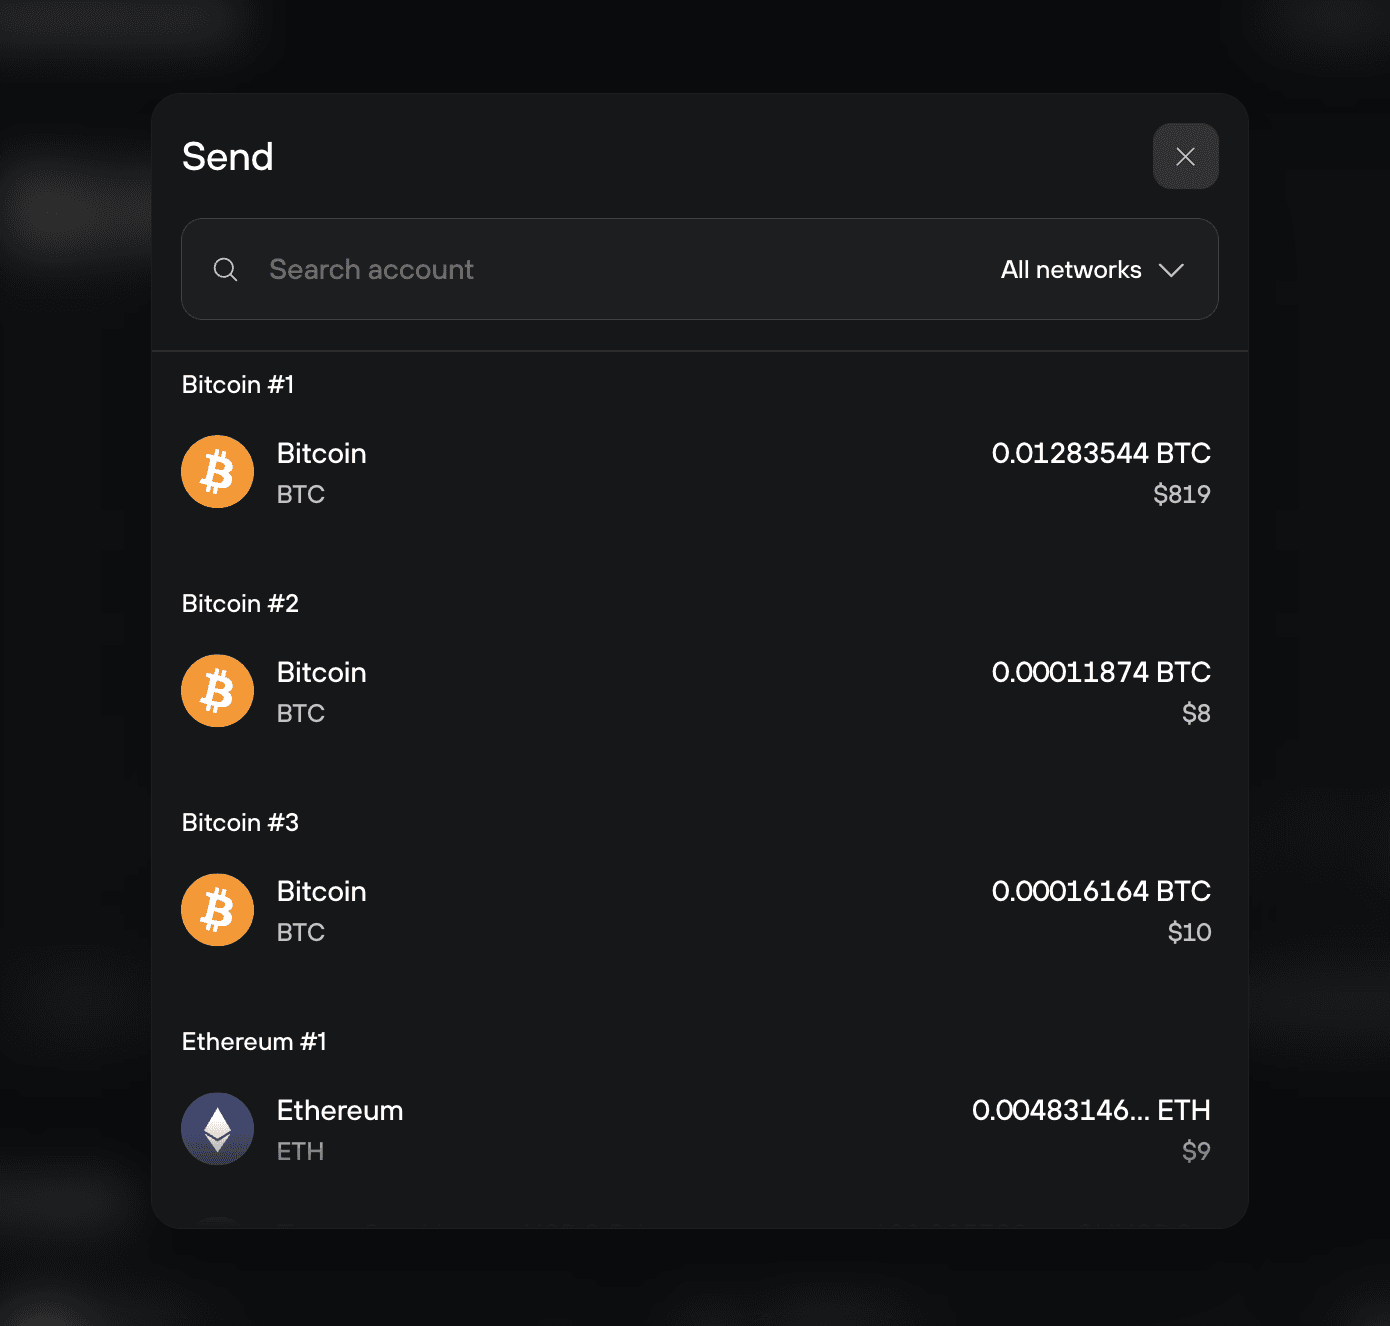
In the picker, use the search box and the network filter to find what you want. The picker only lists accounts on networks you've activated. If the network you want isn't there, activate it in Settings → Networks first.
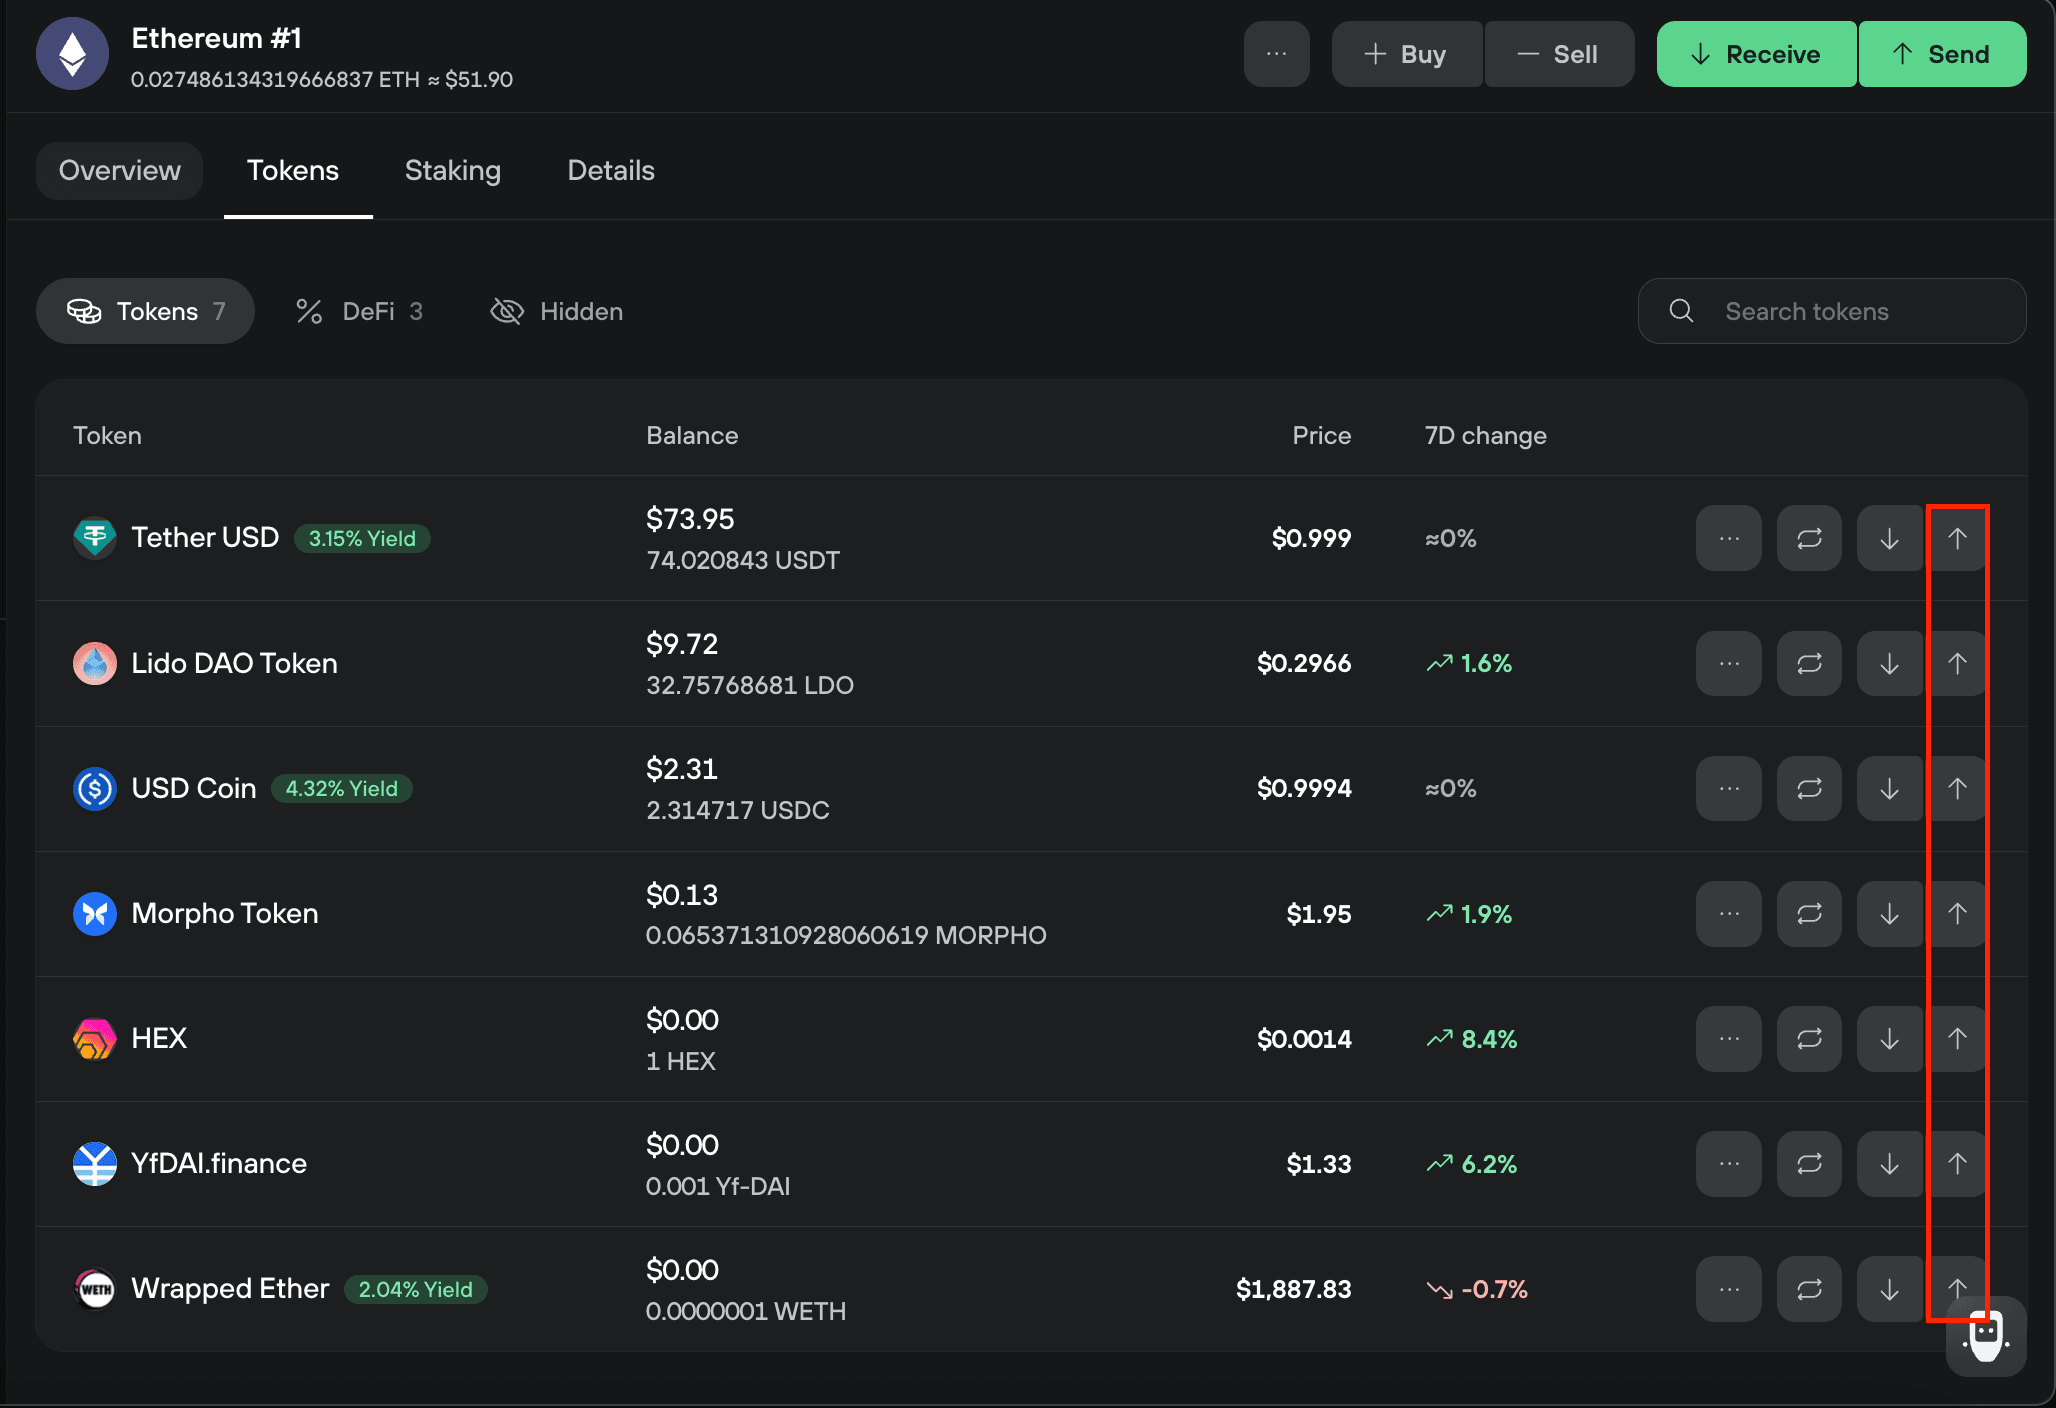
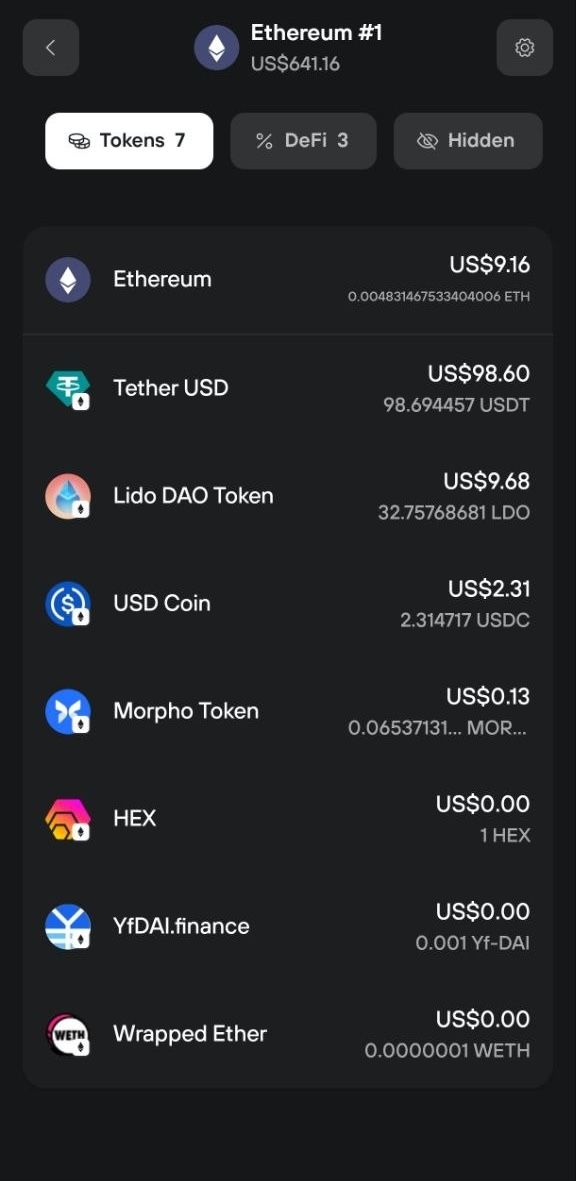
You can also open the Send form from an account. In the left panel, select the account, then click Send to send its coin. To send a token from that account, open its Tokens tab and click the Send arrow next to the token.
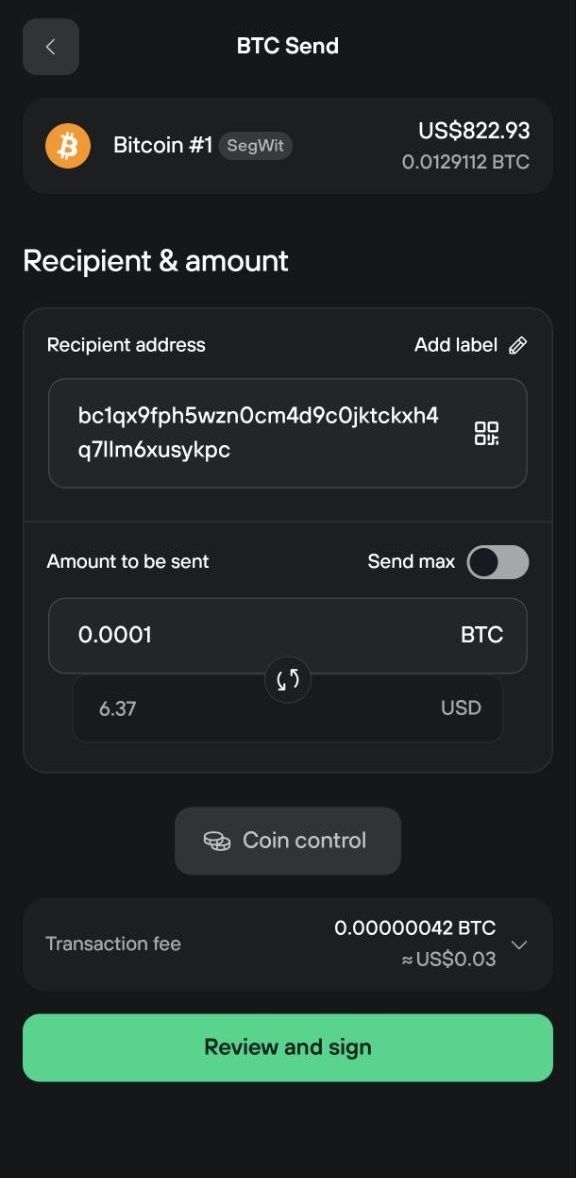
Fill in the Send form
This is where you enter who you're paying, how much, and what fee to pay.
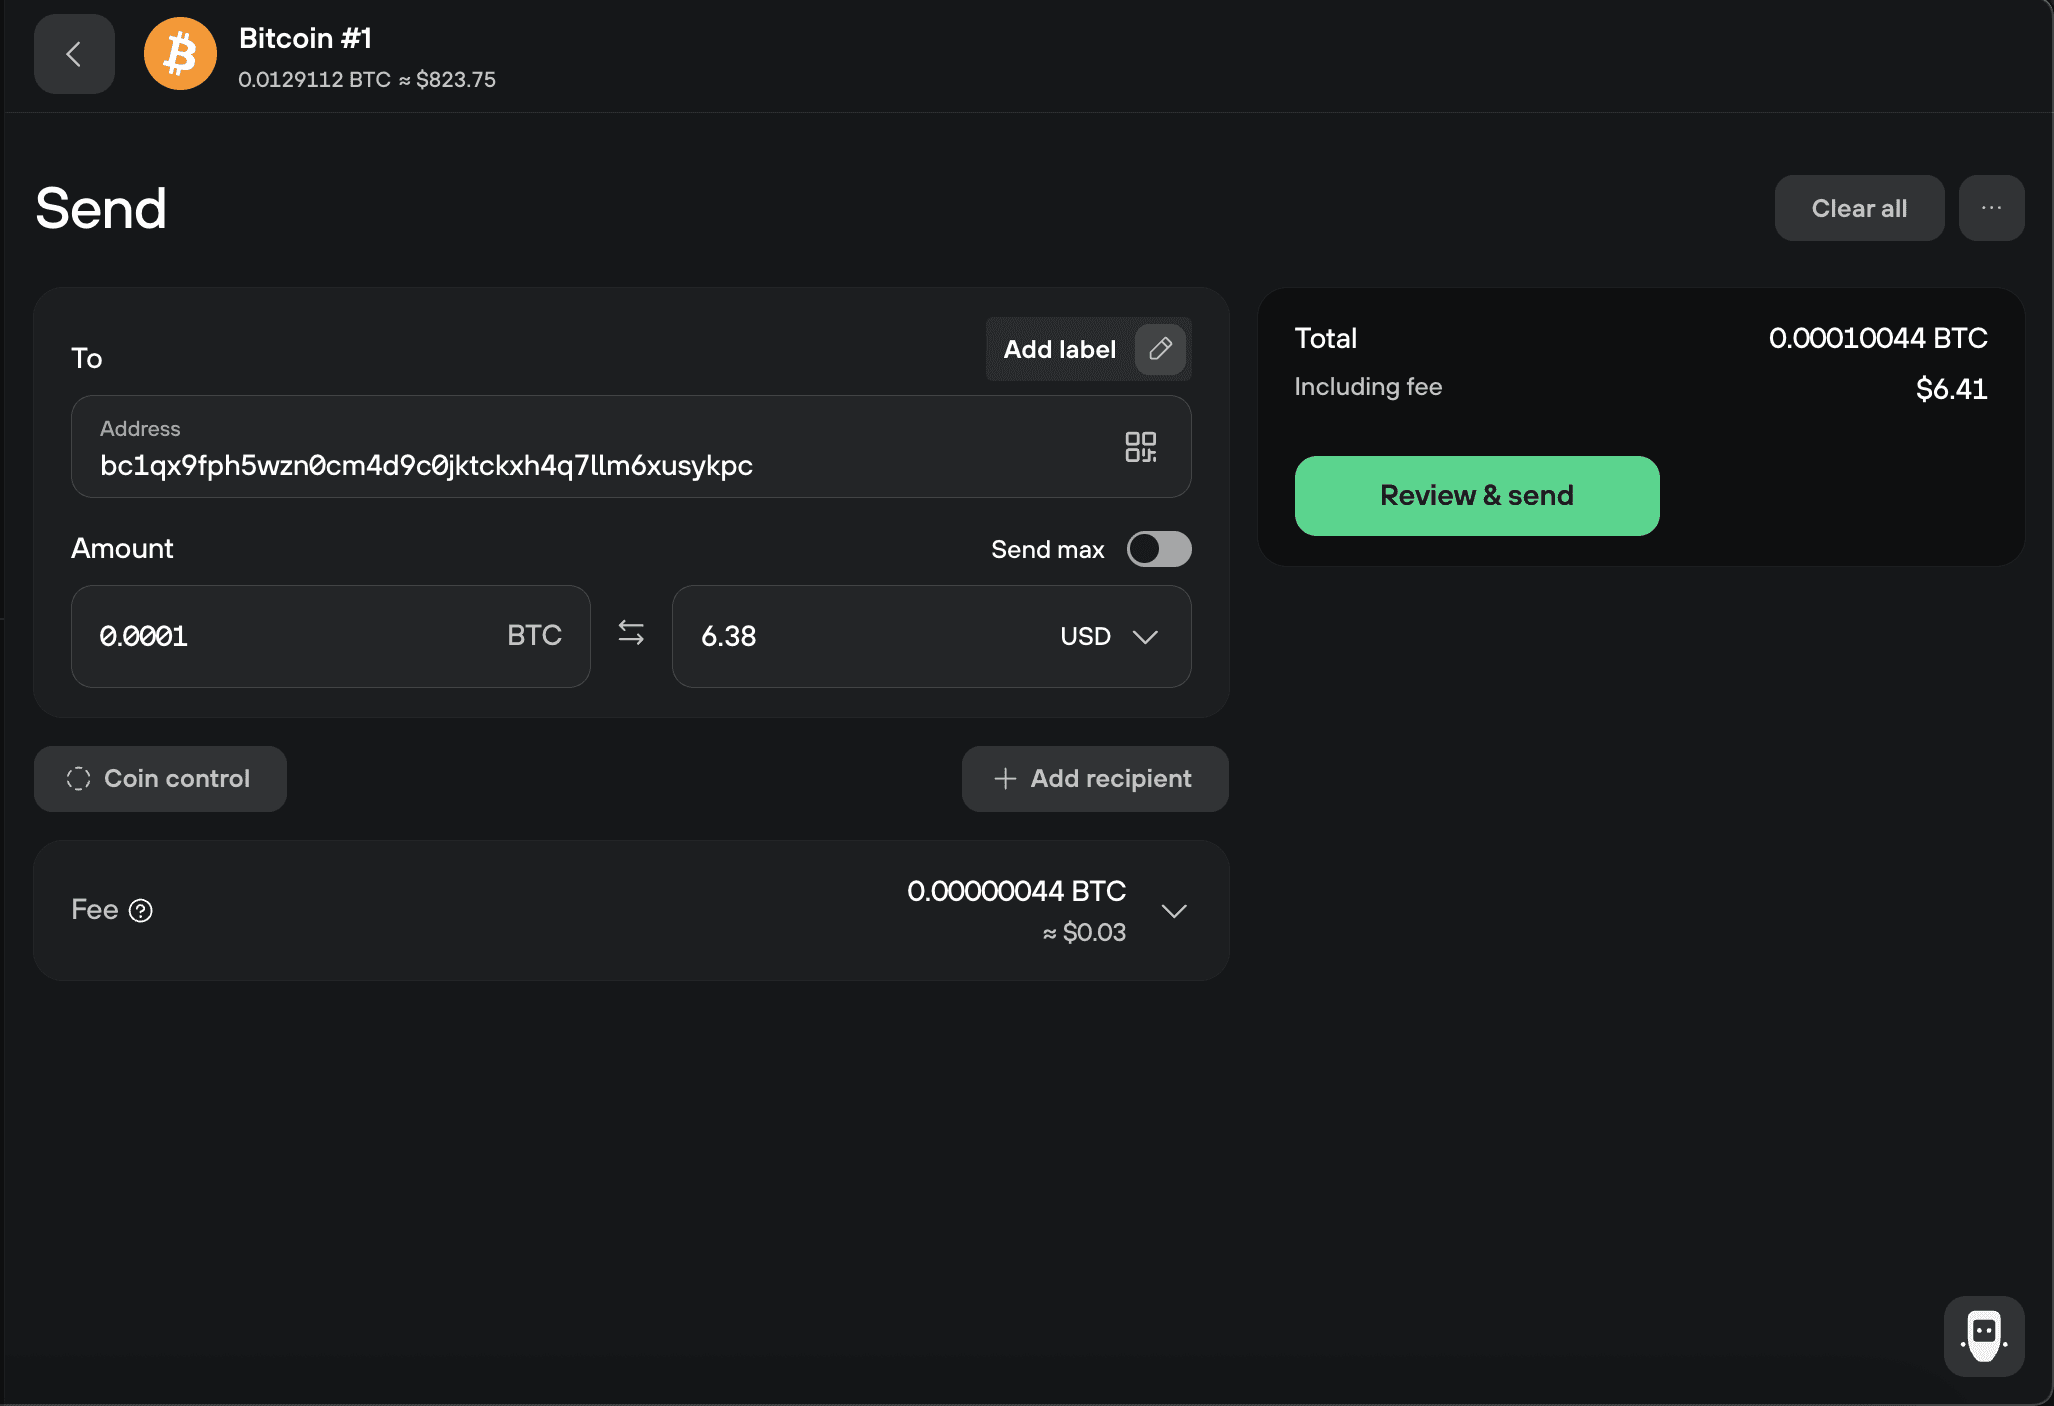
- Address: paste or type the recipient's address, or click the QR icon to scan it. Take it from the source, never from your transaction history.
- Amount: enter the amount in crypto, or switch to fiat using the arrows and enter it there. You can change which fiat currency you use.
- Fee: we recommend leaving this on the default.
To learn more about how fees work, please read Transaction fees in Trezor Suite.
For Bitcoin and other UTXO coins like Dogecoin, you can click Coin control to choose which UTXOs the transaction spends. See Coin control in Trezor Suite.
You can add a label to the transaction to keep your history organized. To pay more than one recipient in a single transaction, click Add recipient.
When everything looks right, click Review & send.
Check and sign on your Trezor
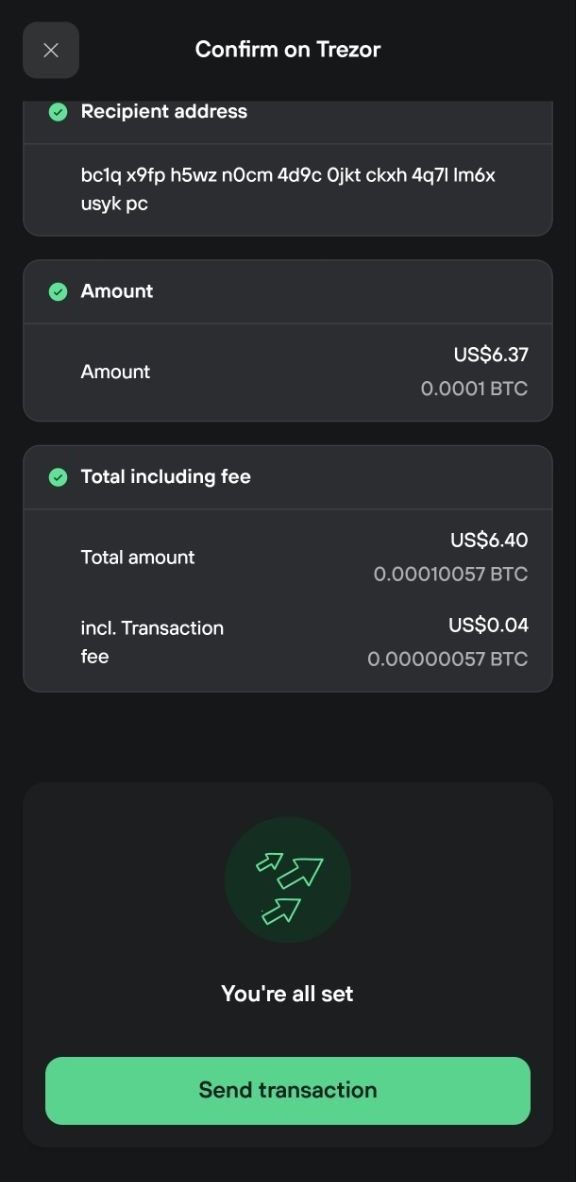
Your Trezor displays the transaction. Check that the recipient address matches the one from your original source, and that the amount and fee are what you entered.
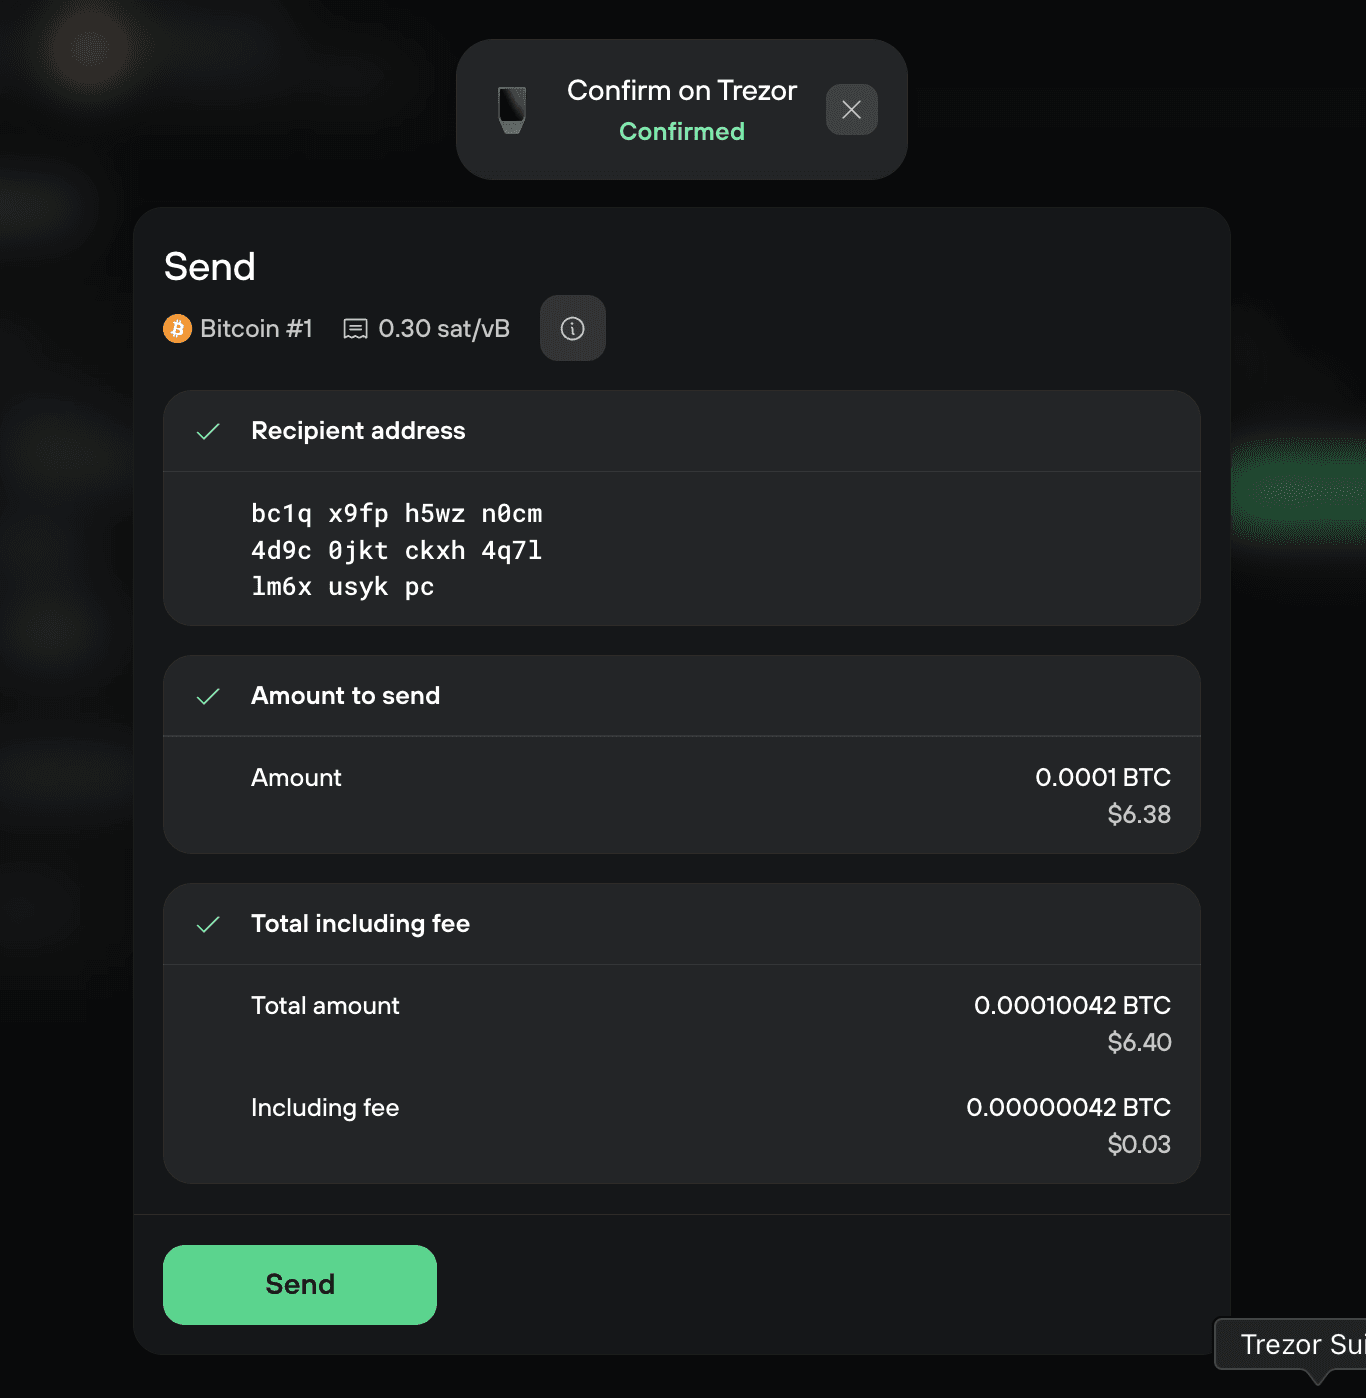
Sign on your device to approve, then click Send in Trezor Suite to broadcast the transaction.
Once signed, you can still cancel by clicking the cross in the top right, up until you broadcast. After you click Send, the transaction is on its way and can't be taken back.
Send to an ENS name on Ethereum
Ethereum Name Service (ENS) lets you replace long, hard-to-verify Ethereum addresses with a short, human-readable name like alice.eth. Trezor Suite resolves ENS names automatically when you Send funds on both Desktop and Mobile.
When you enter an ENS name, Suite looks up the address the name points to, shows it below the recipient field, and the rest of the Send flow continues as normal.
ENS names work on Ethereum only. When sending funds on other networks, the recipient field still requires an address.
Using ENS in Trezor Suite
- Type the full name (including the
.ethor.boxsuffix) in the To field on the Send form - Trezor Suite then displays the resolved address directly underneath it:
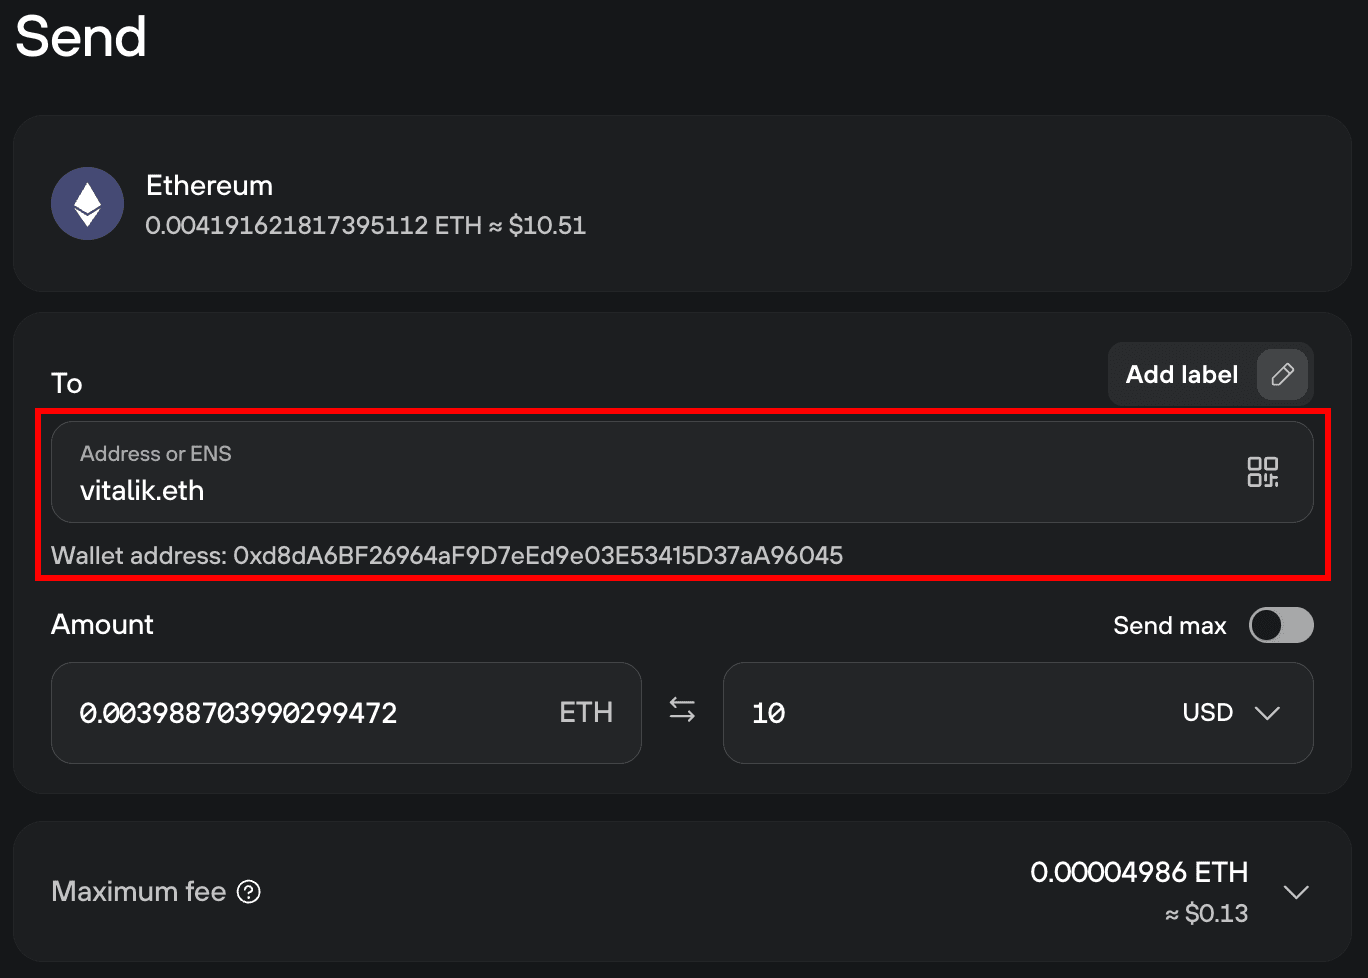
- As always, verify the resolved address on your Trezor device's screen before confirming the transaction
An ENS name is not a substitute for checking the recipient. Whoever controls the name can point it at a different address at any time. Your Trezor shows the resolved address, not the ENS name, so verify the address on your device screen before you confirm.
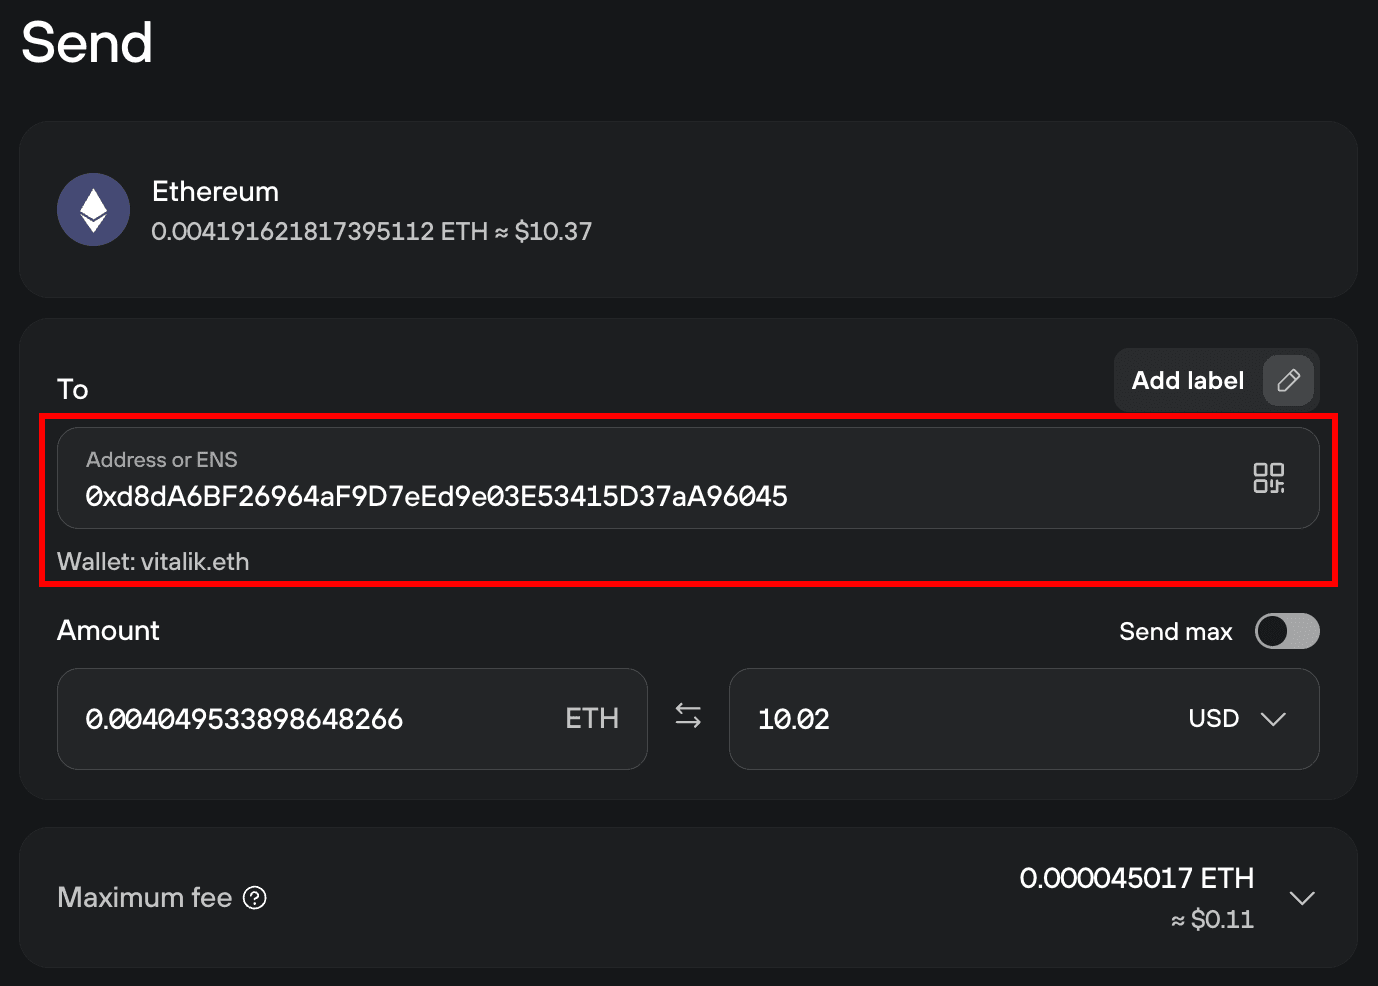
If you enter a valid address in the To field, the ENS name will also be resolved and displayed directly underneath:
If an ENS name cannot be resolved
Trezor Suite shows the warning message Could not resolve name. Check that the name is correct. and leaves the To field editable:
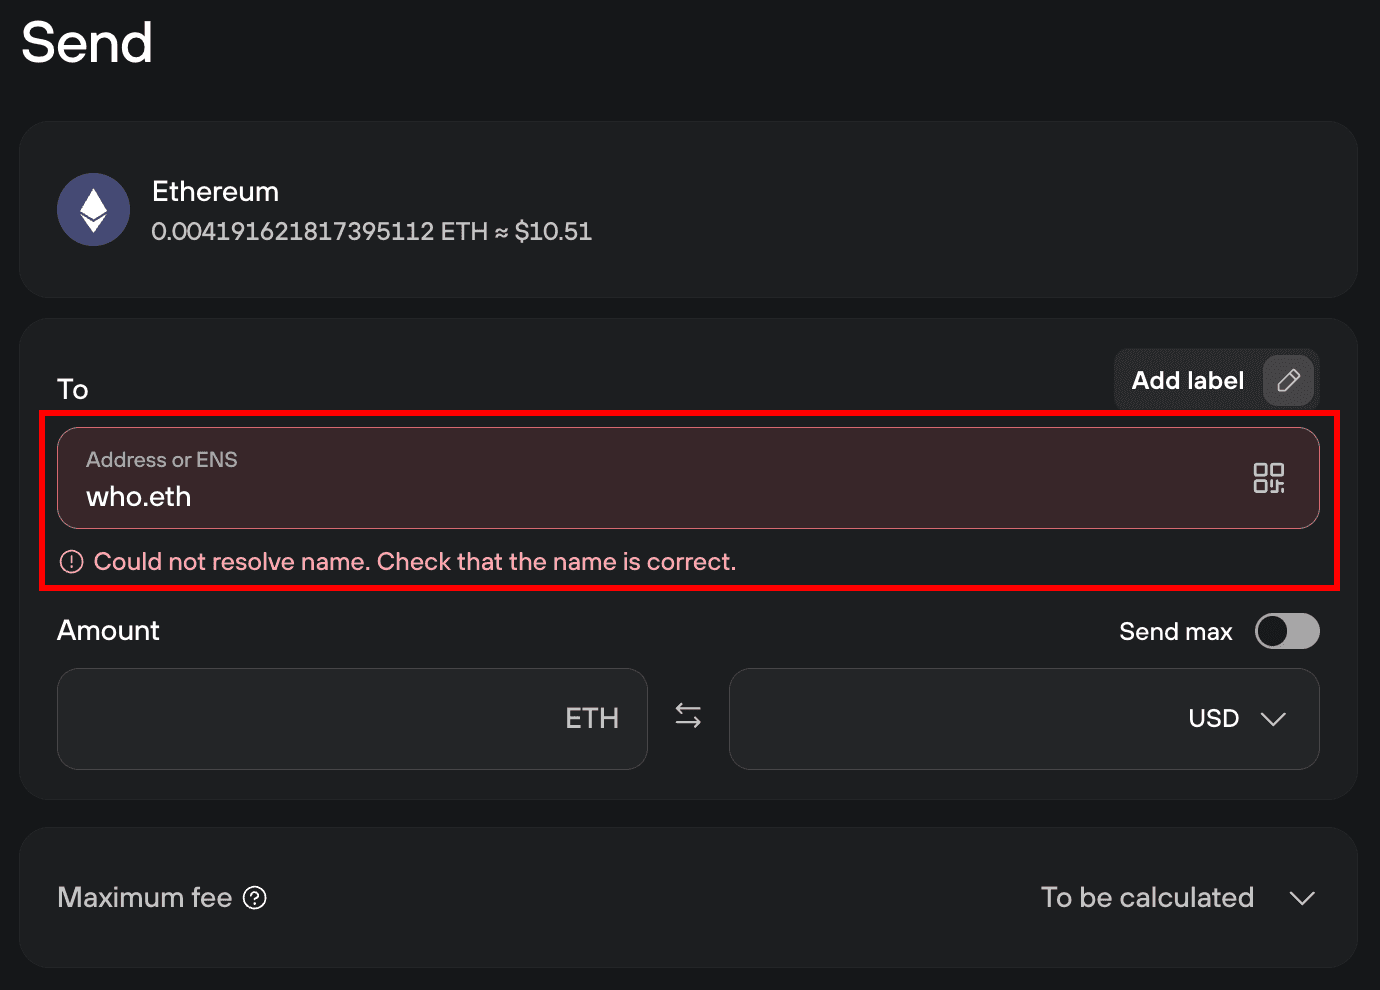
Suite never guesses an address or sends to a substitute. To fix the issues, check the following:
- The spelling of the name, including the
.ethending - That the name has an Ethereum address set. You can check this at app.ens.domains
- That you are sending from an Ethereum account, not from another network
If the name still doesn't resolve, ask the recipient for their address and use that instead. If sending still fails, ask our Chatbot Hal for further help.
After you send
Your transaction first appears as unconfirmed. Once the network includes it in a block, Trezor Suite shows the confirmation time next to it.
You can check the status any time in a block explorer by clicking the transaction in your history. Confirmation times vary with the fee you set and how busy the network is.