Swap crypto in Trezor Suite
Trezor Suite lets you swap one cryptocurrency for another directly within the app. This article explains the difference between centralized (CEX) and decentralized (DEX) exchanges, and how to swap crypto on desktop and mobile.
Swap services in Trezor Suite are subject to the Trezor Suite Terms of Use. Third-party exchange providers may have additional terms.
How to swap
Desktop
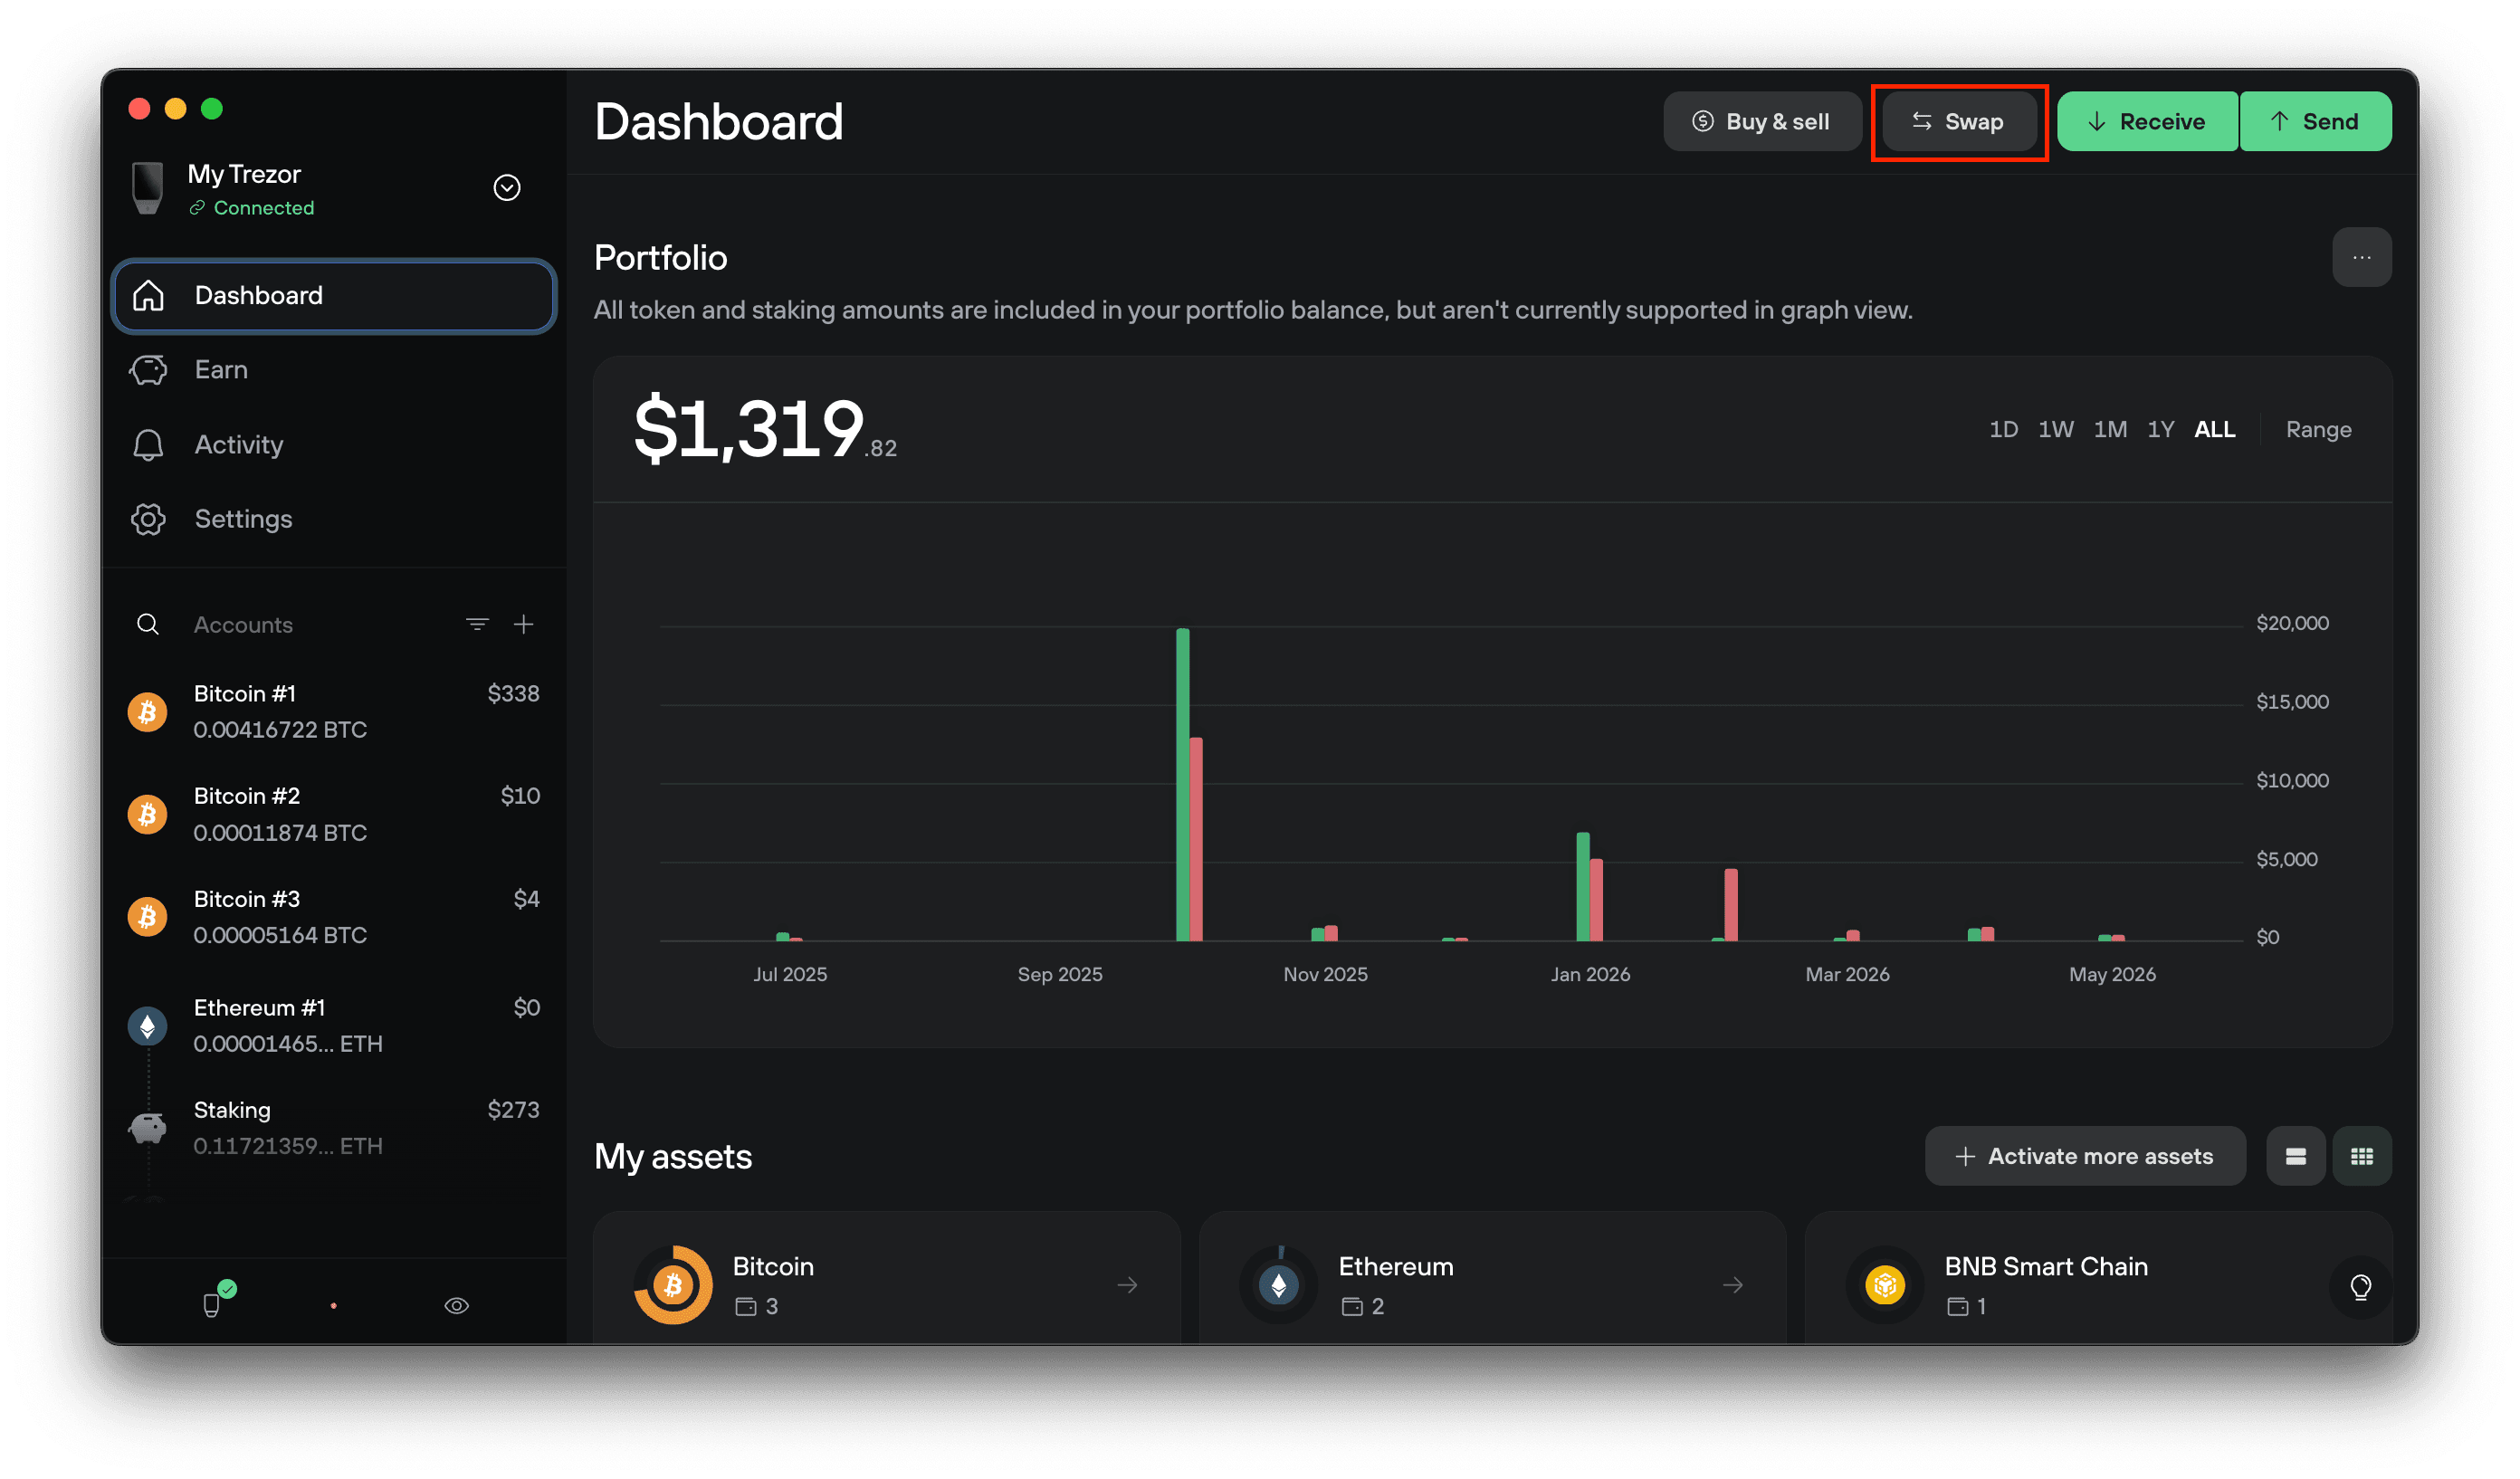
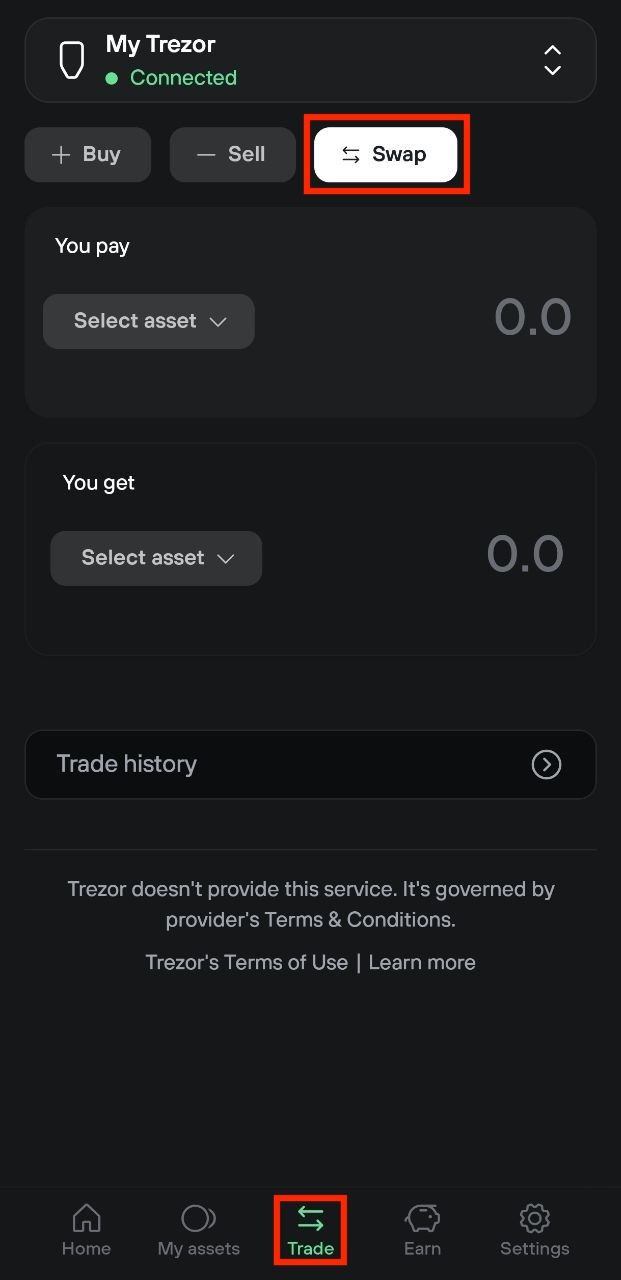
Opening the Swap feature
Click Swap in the top right corner of the Trezor Suite dashboard or any crypto account you want to swap from.
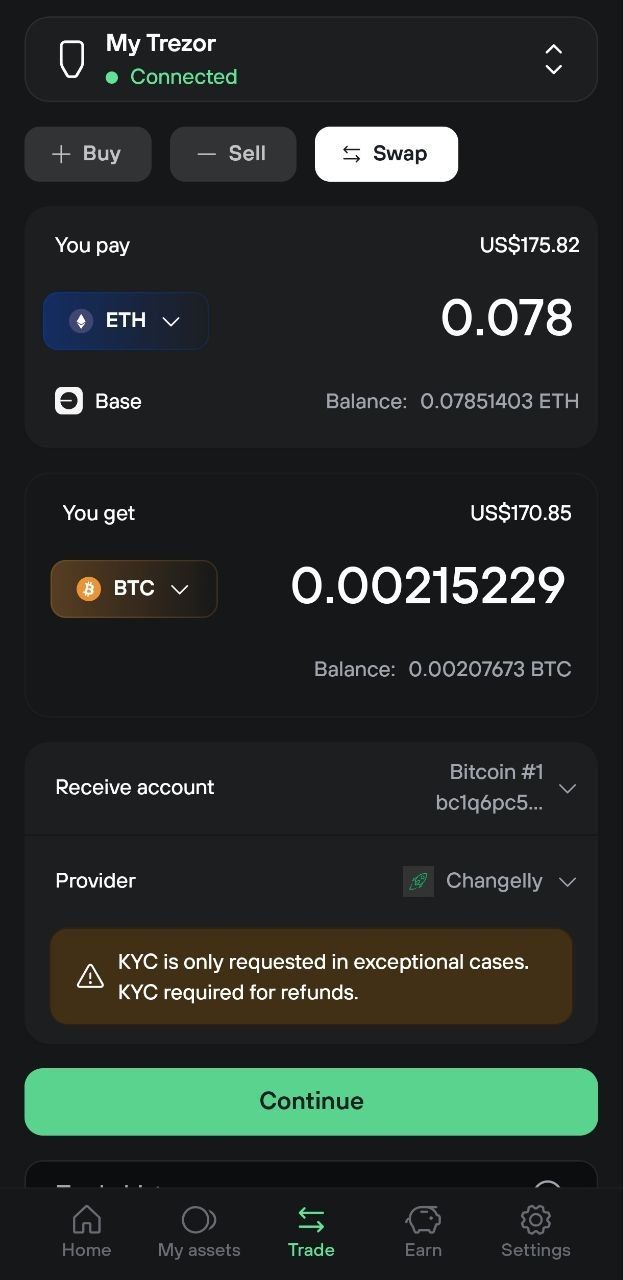
2. Setting up your swap
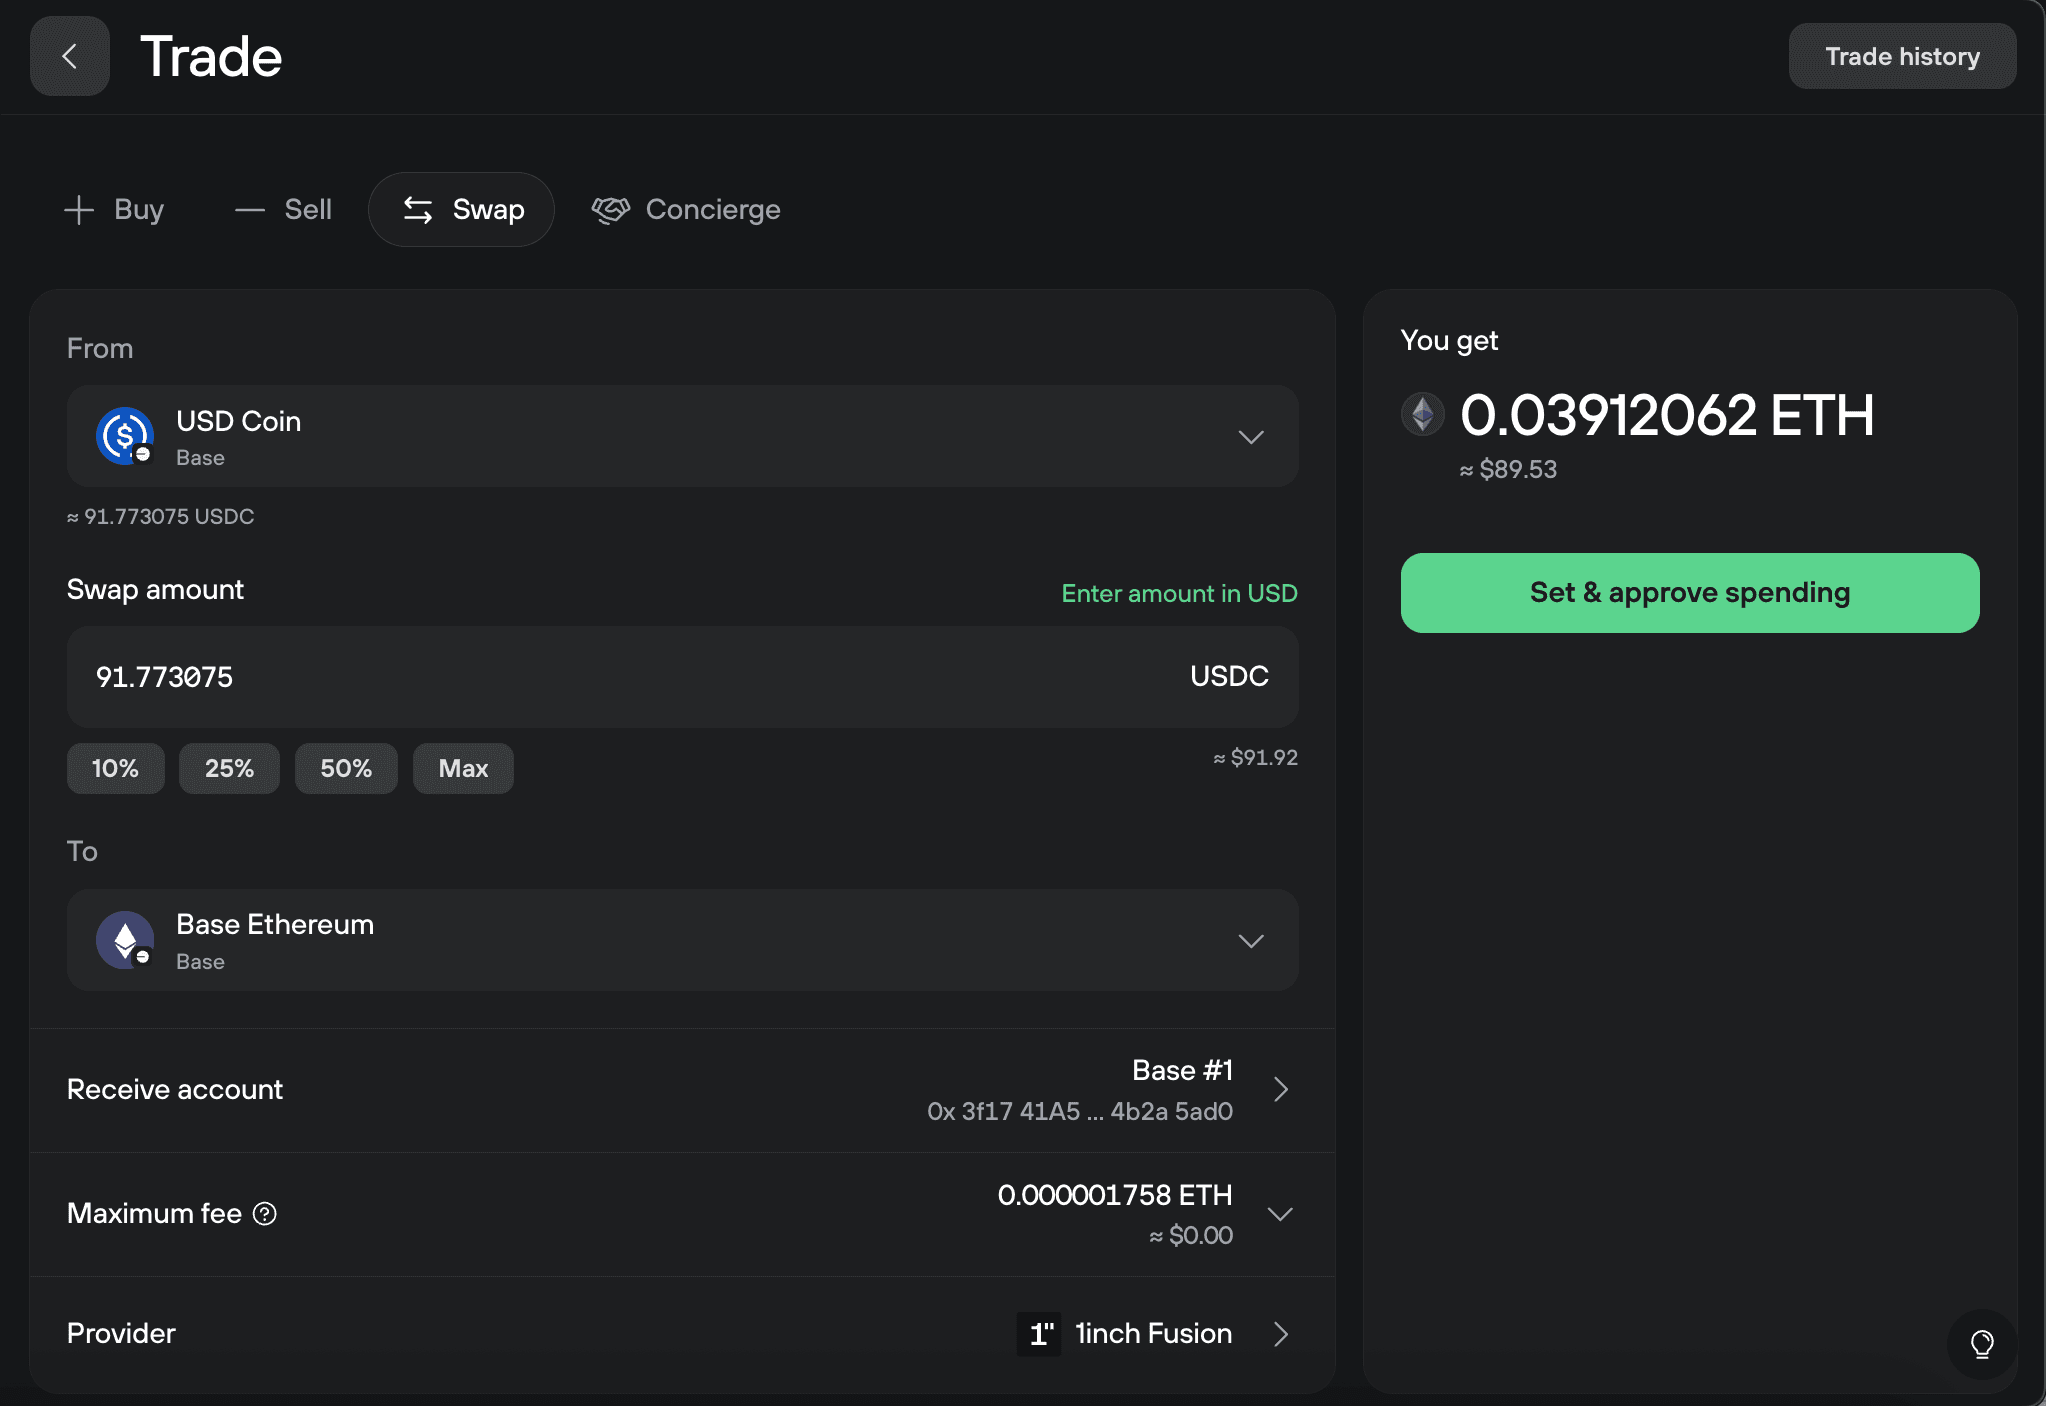
Fill in the swap form:
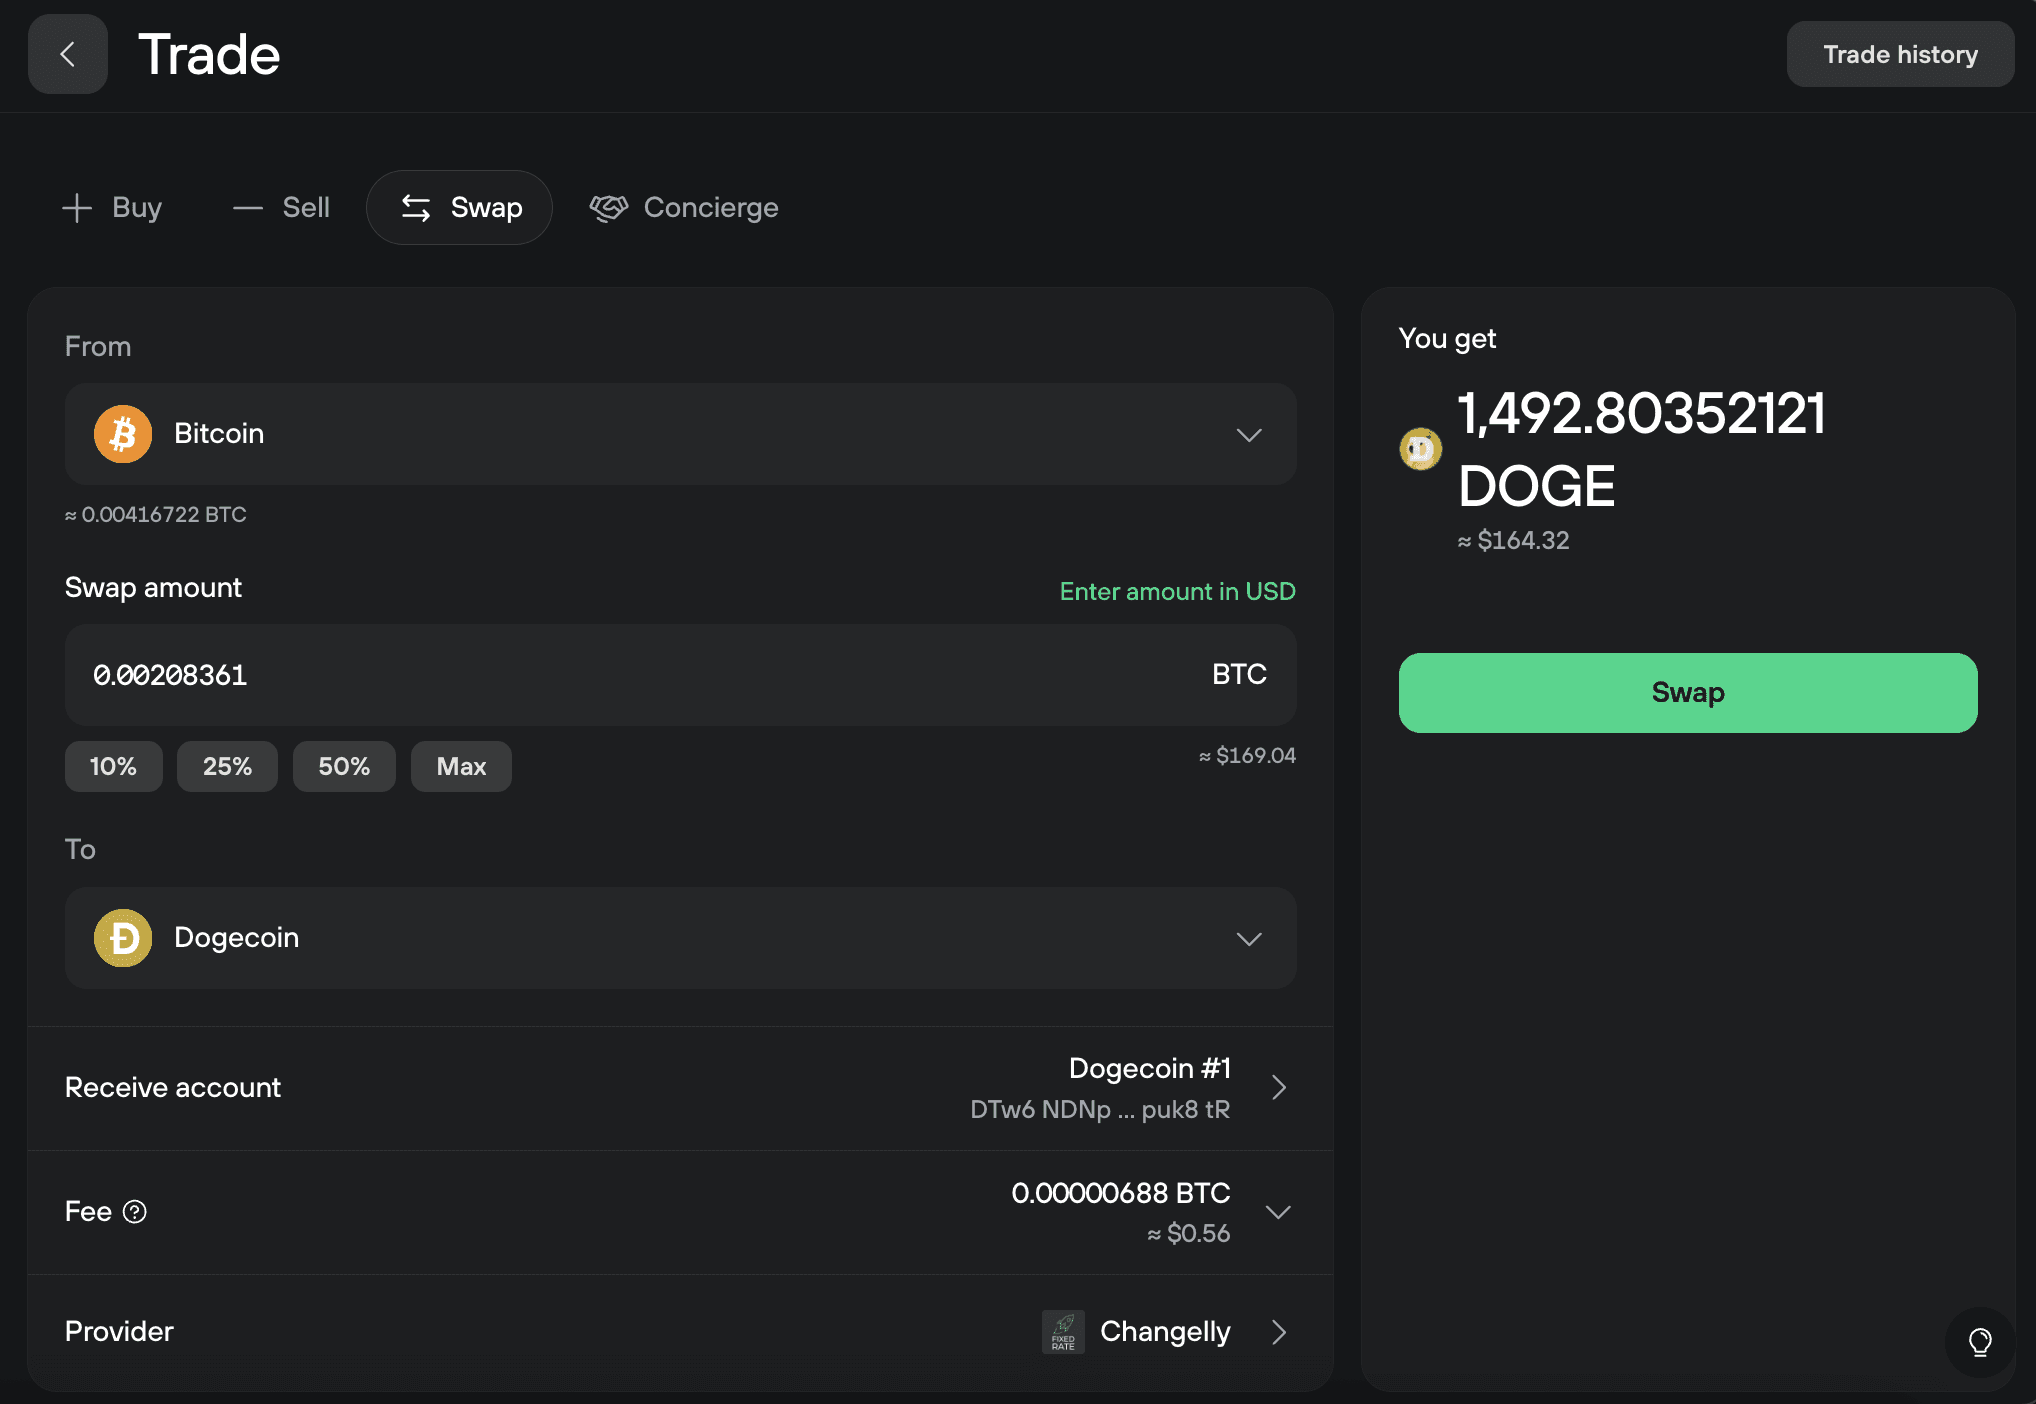
- From: the asset you want to swap from.
- Swap amount: the amount to swap. Use the 10% / 25% / 50% / Max shortcuts, or click Enter amount in USD (or your local currency).
- To: the asset you want to receive.
- Receive account: the Trezor account for the swapped assets.
- Maximum fee: the network fee. Normal is recommended.
- Provider: the matched provider. Click to compare alternatives.
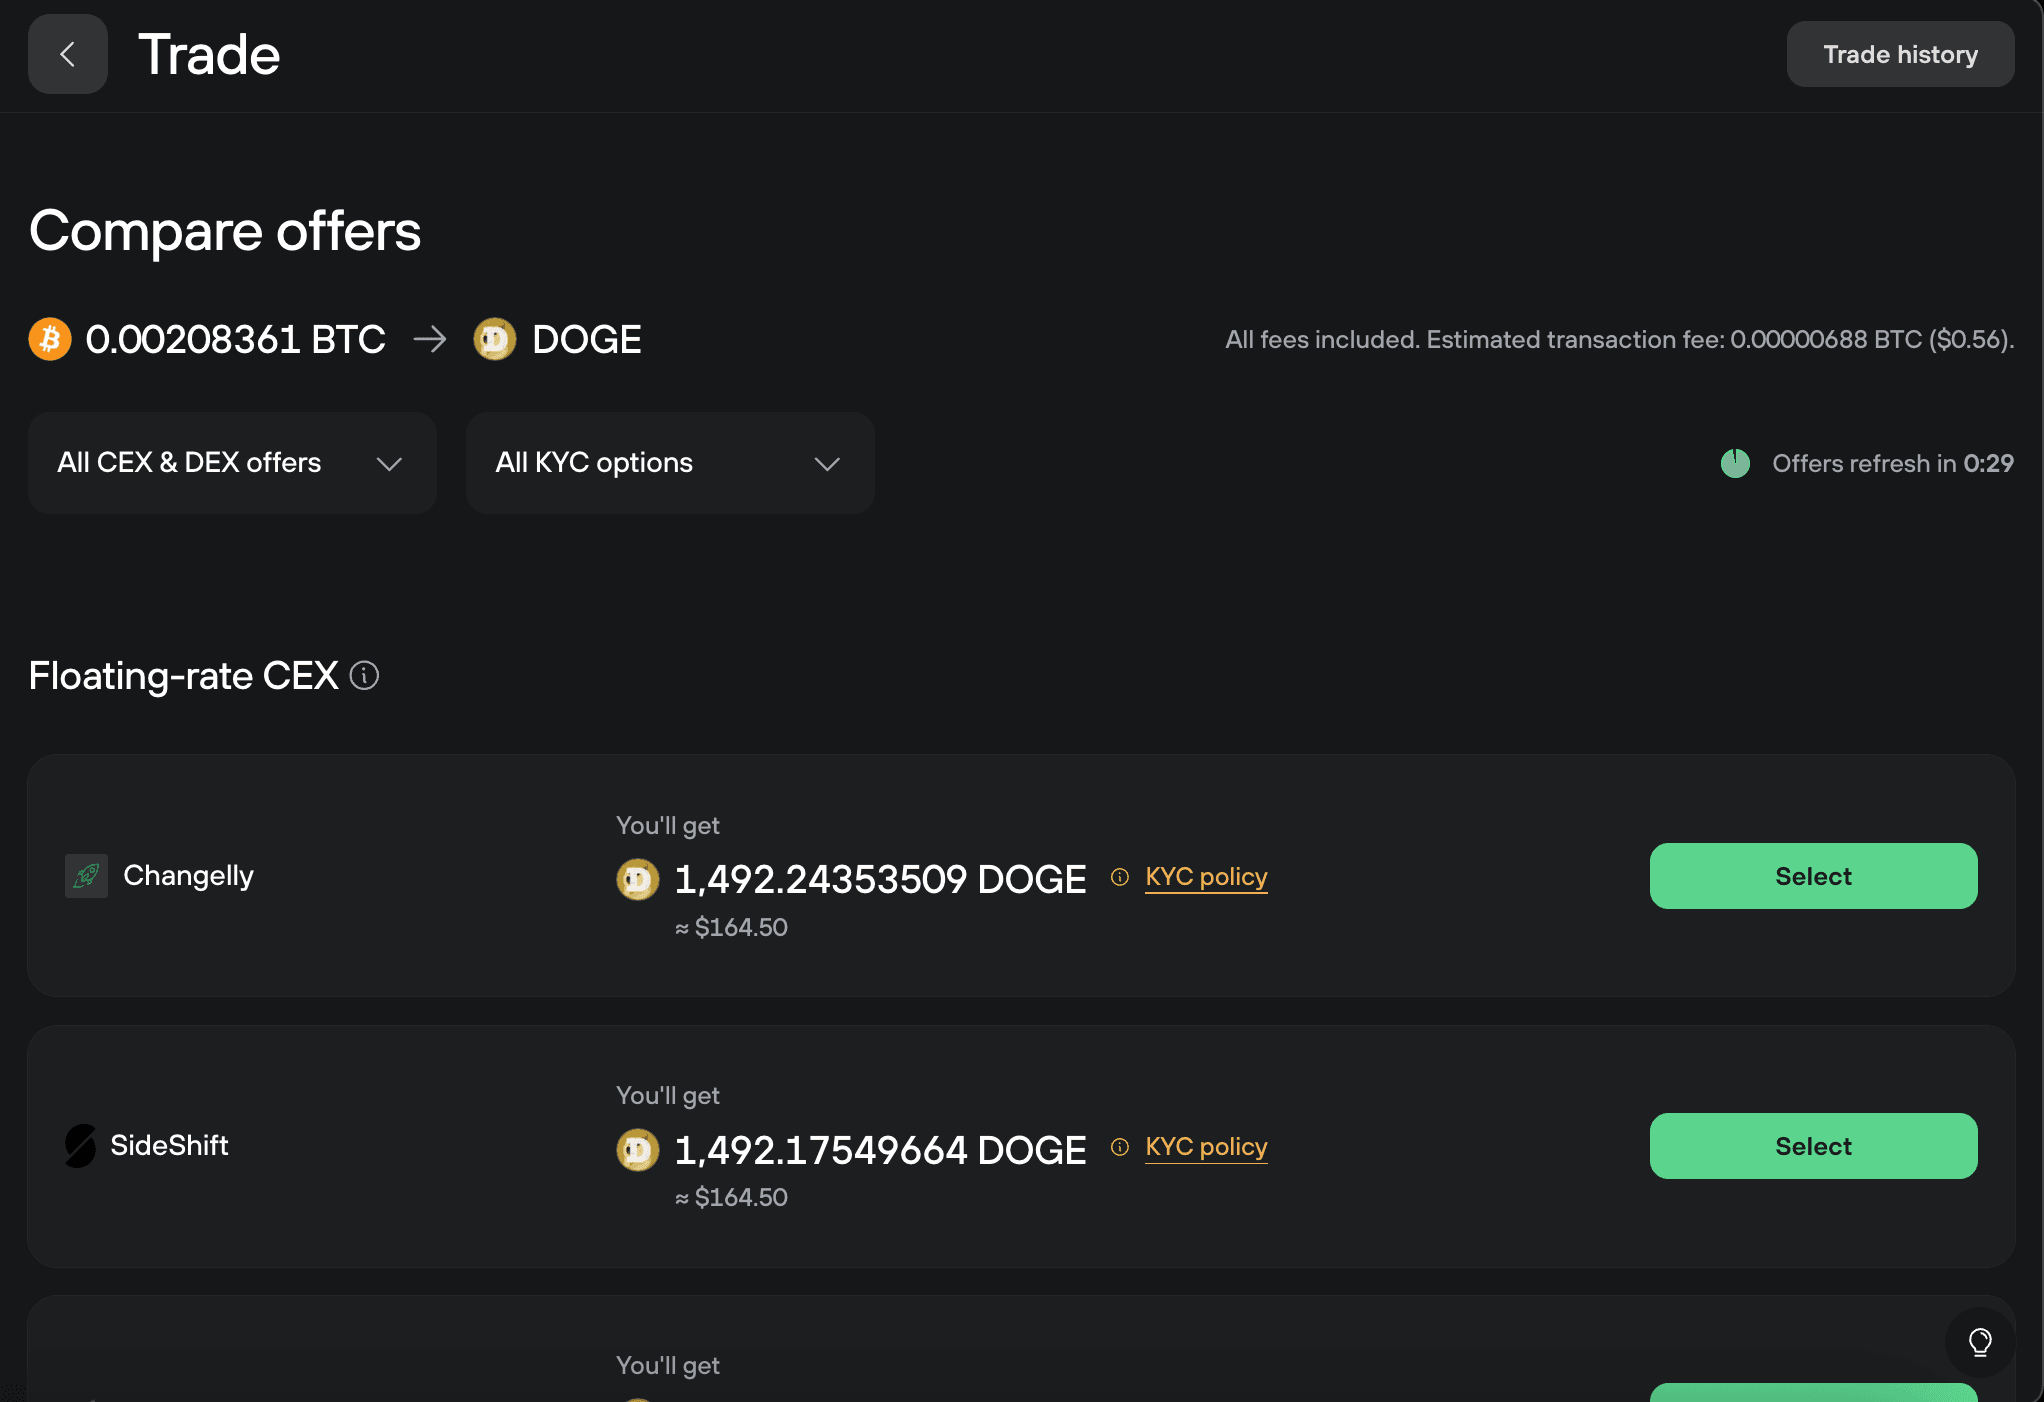
Comparing offers
When you compare offers on desktop, results are organized into three sections:
- Fixed-rate CEX: locks in your exchange rate for 15 minutes. Useful during price fluctuations but charges higher fees. You must complete the swap within 15 minutes or the rate expires.
- Floating-rate CEX: uses real-time market rates. More flexible timing but the final rate may differ slightly from the initial quote.
- DEX: decentralized exchanges on EVM networks. KYC is never required.
Completing the swap
Next steps depend on whether you picked a CEX or DEX provider.
Using a CEX provider
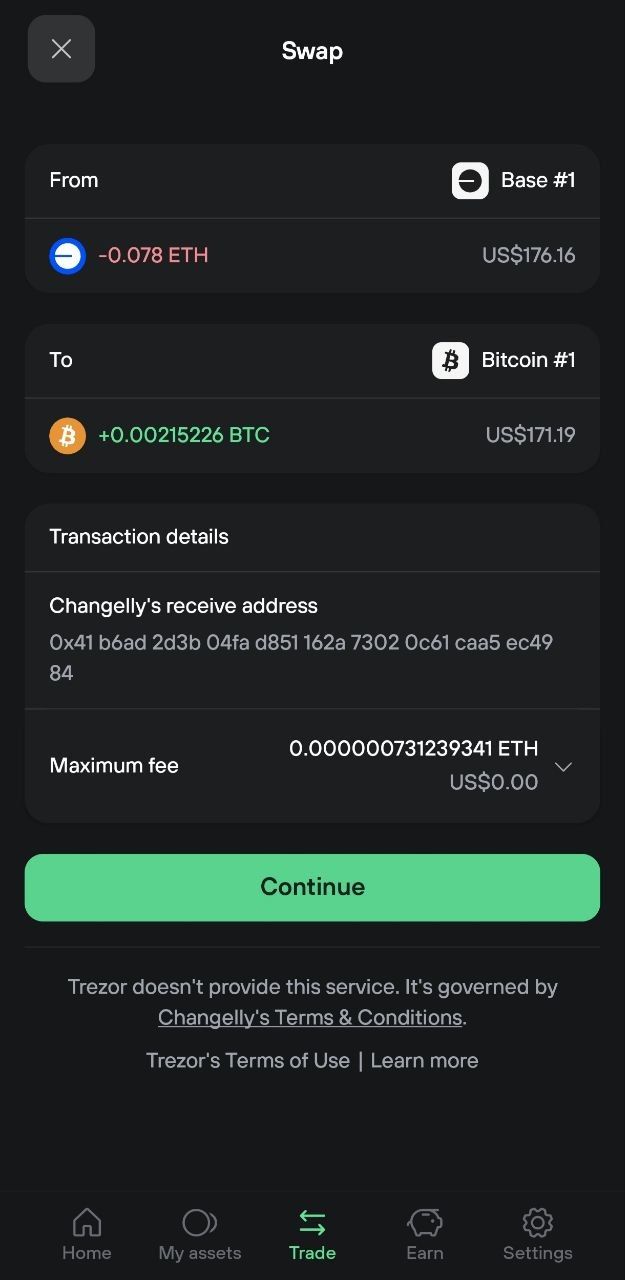
When you're ready, click Swap.
Review the swap summary, including the exchange rate, network fee, provider, and exchange type (CEX). KYC requirements (if any) are listed alongside the provider.
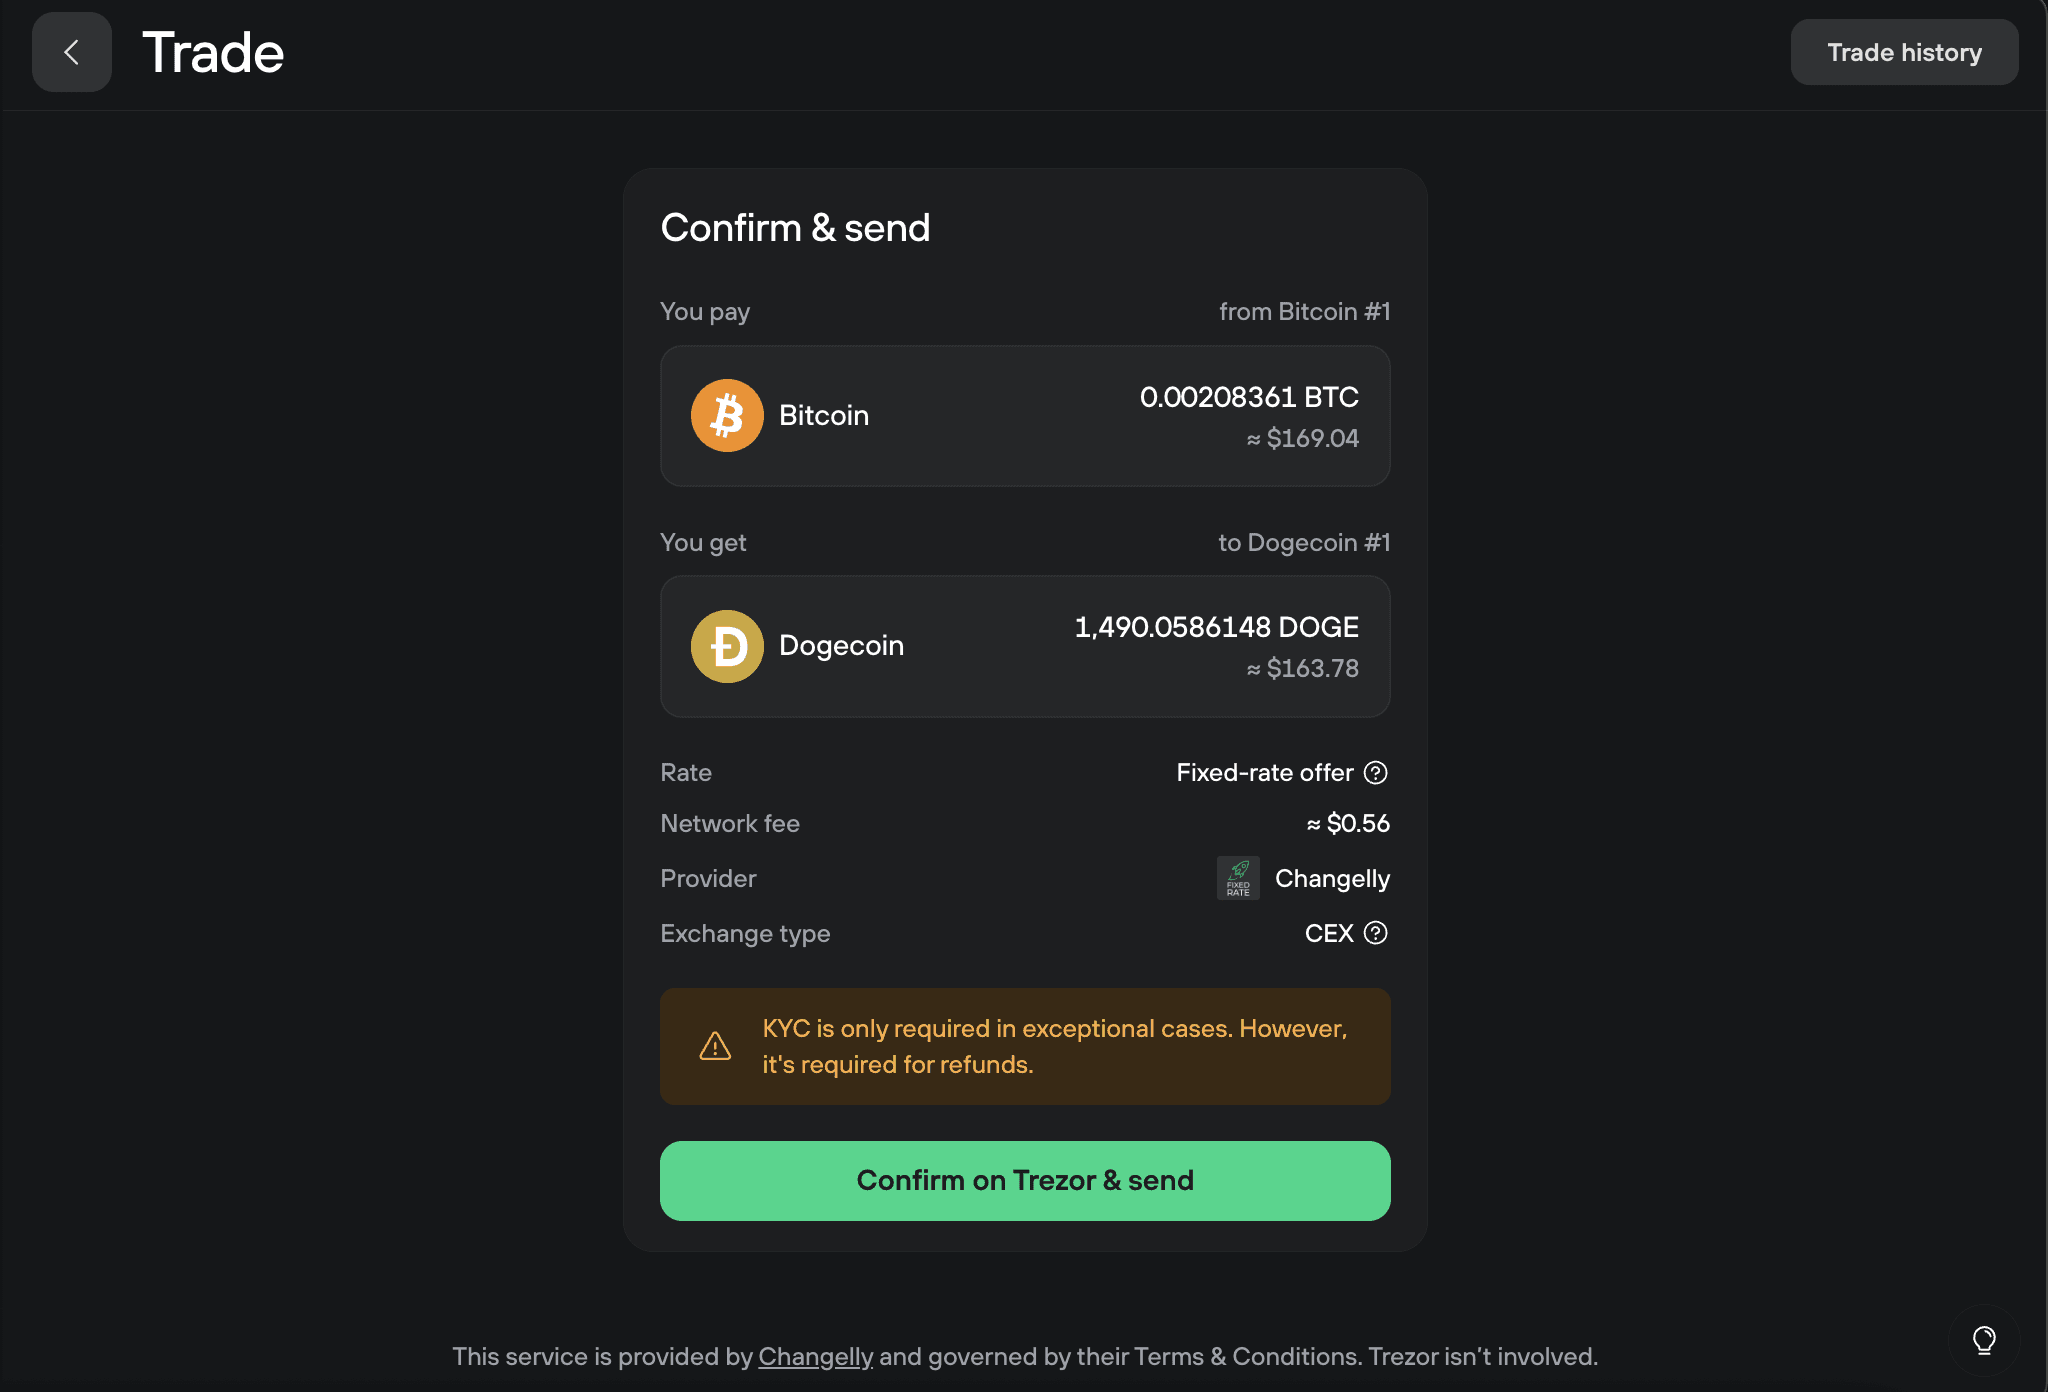
Check the transaction details, then click Confirm on Trezor & send.
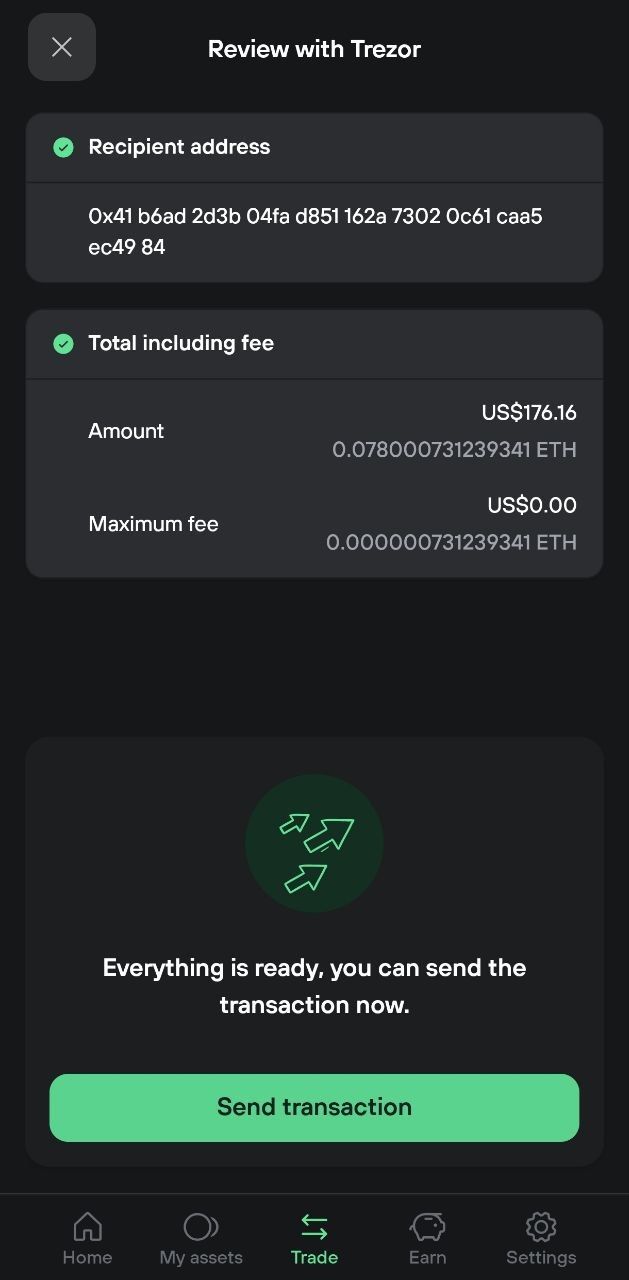
Confirm the transaction on your Trezor device. Make sure all details match what you see in Trezor Suite.
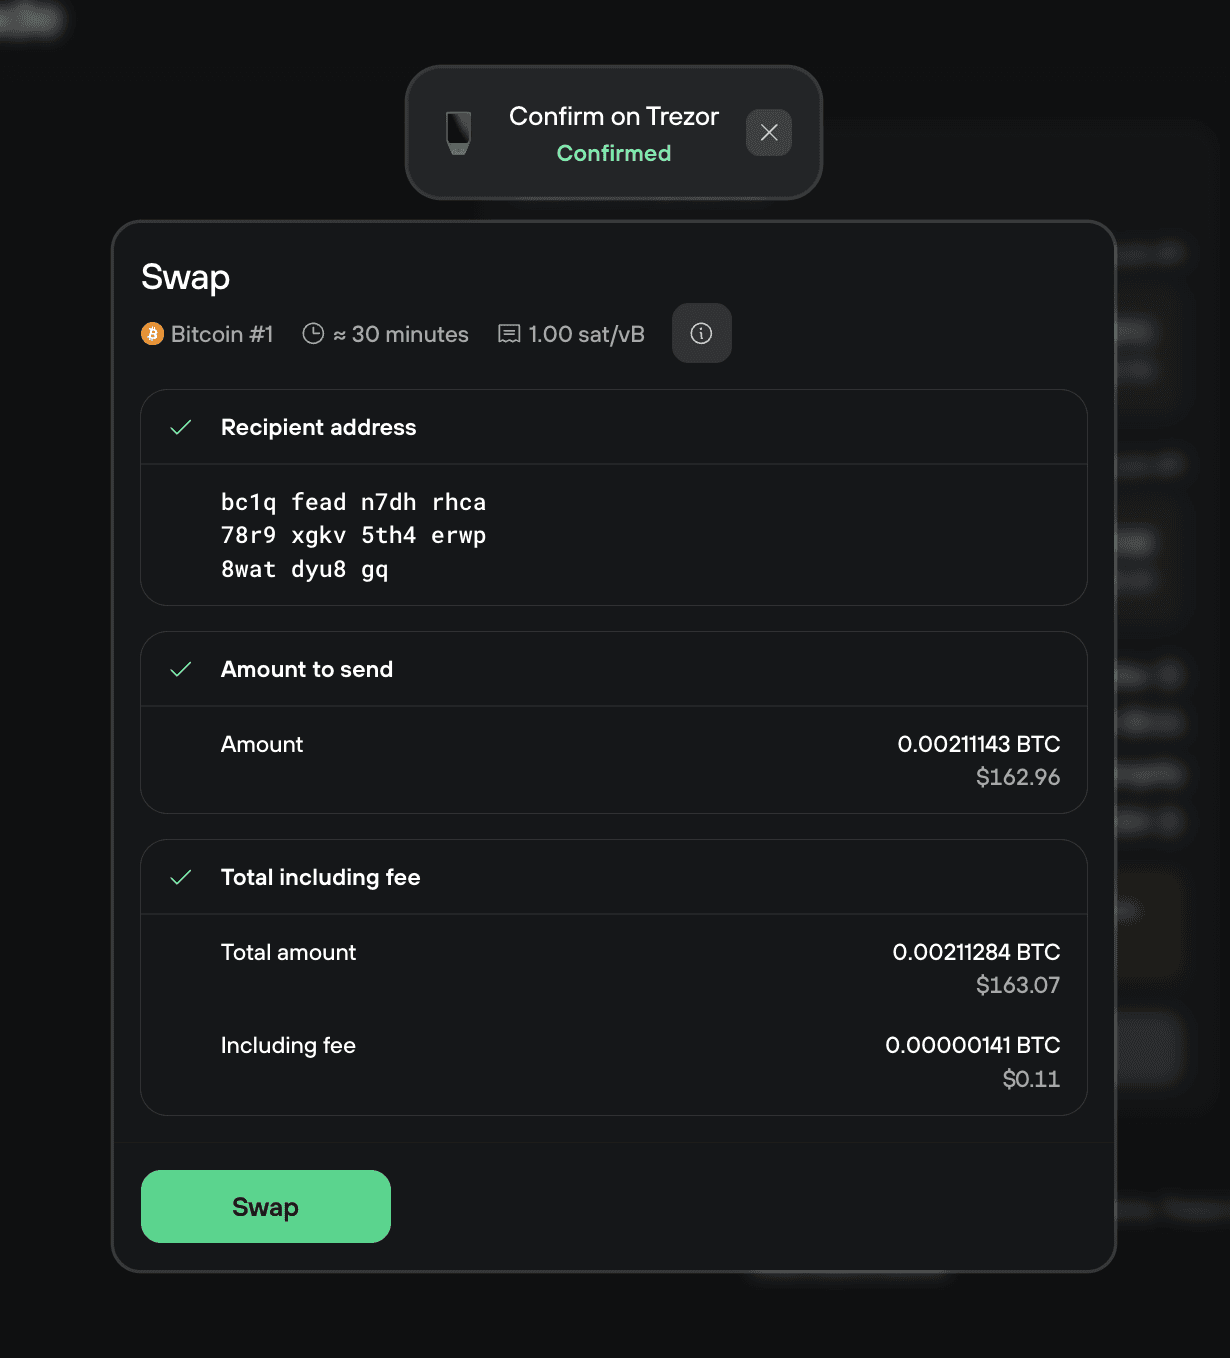
After confirming, you'll see a confirmation screen with transaction details. Click Swap to broadcast the transaction.
If a swap fails, you'll receive a refund of your original coins. In rare cases, the exchange may require identity verification to process the refund.
Using a DEX provider
DEX swaps with ERC-20 tokens take two transactions: first to approve the DEX provider to access your tokens, then to execute the swap itself. Smart contracts need this explicit permission to move tokens on your behalf.
Native assets (ETH, BNB, MATIC, and similar) don't require approval, because they're not ERC-20 tokens. Swapping a native asset using a DEX takes one transaction.
Approving token spending
If you're swapping an ERC-20 token, you'll see a Set & approve spending button. Click it.
If you're swapping a native asset (like ETH), you'll see a Swap button instead. Skip to "Completing the swap" below.
Choose your approval limit:
- Unlimited: allows the provider to access all your tokens of this type without future approvals. More convenient if you swap often, but more trust is involved in the DEX provider because the smart contract has ongoing access to your tokens.
- Specific amount: approves only the exact amount needed for this swap. Safer, but requires a new approval (and gas fee) for each future swap with this provider.
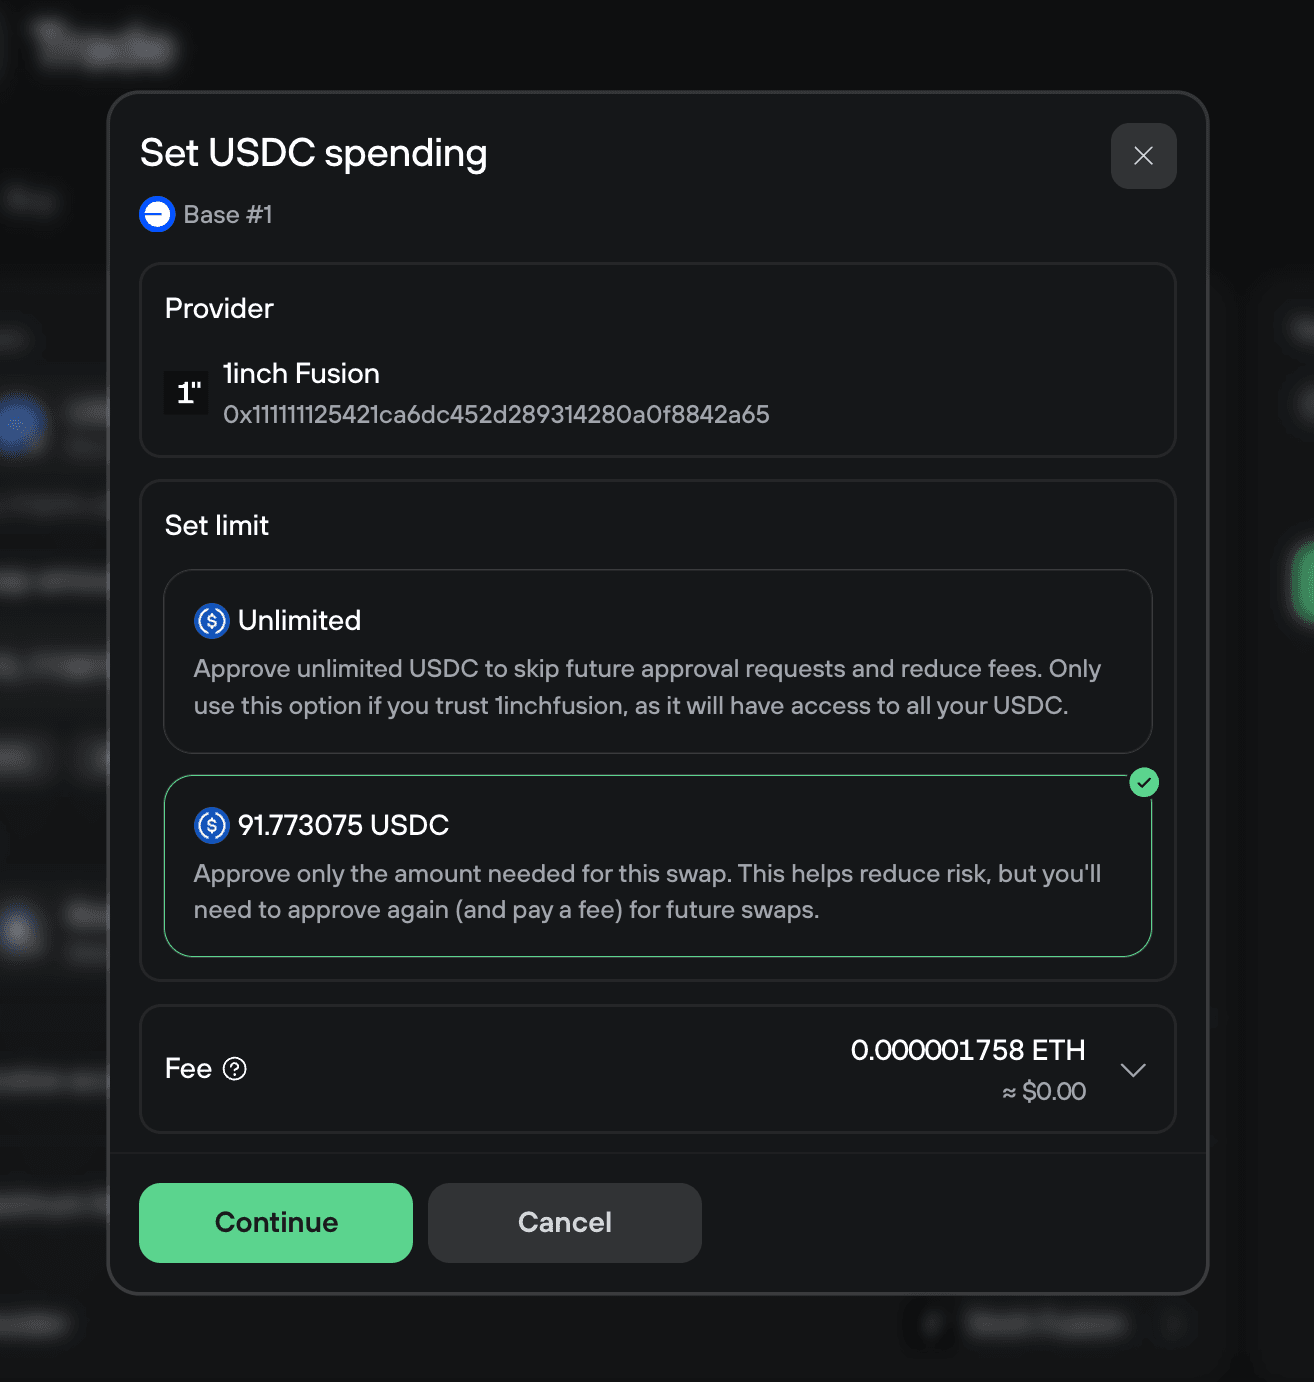
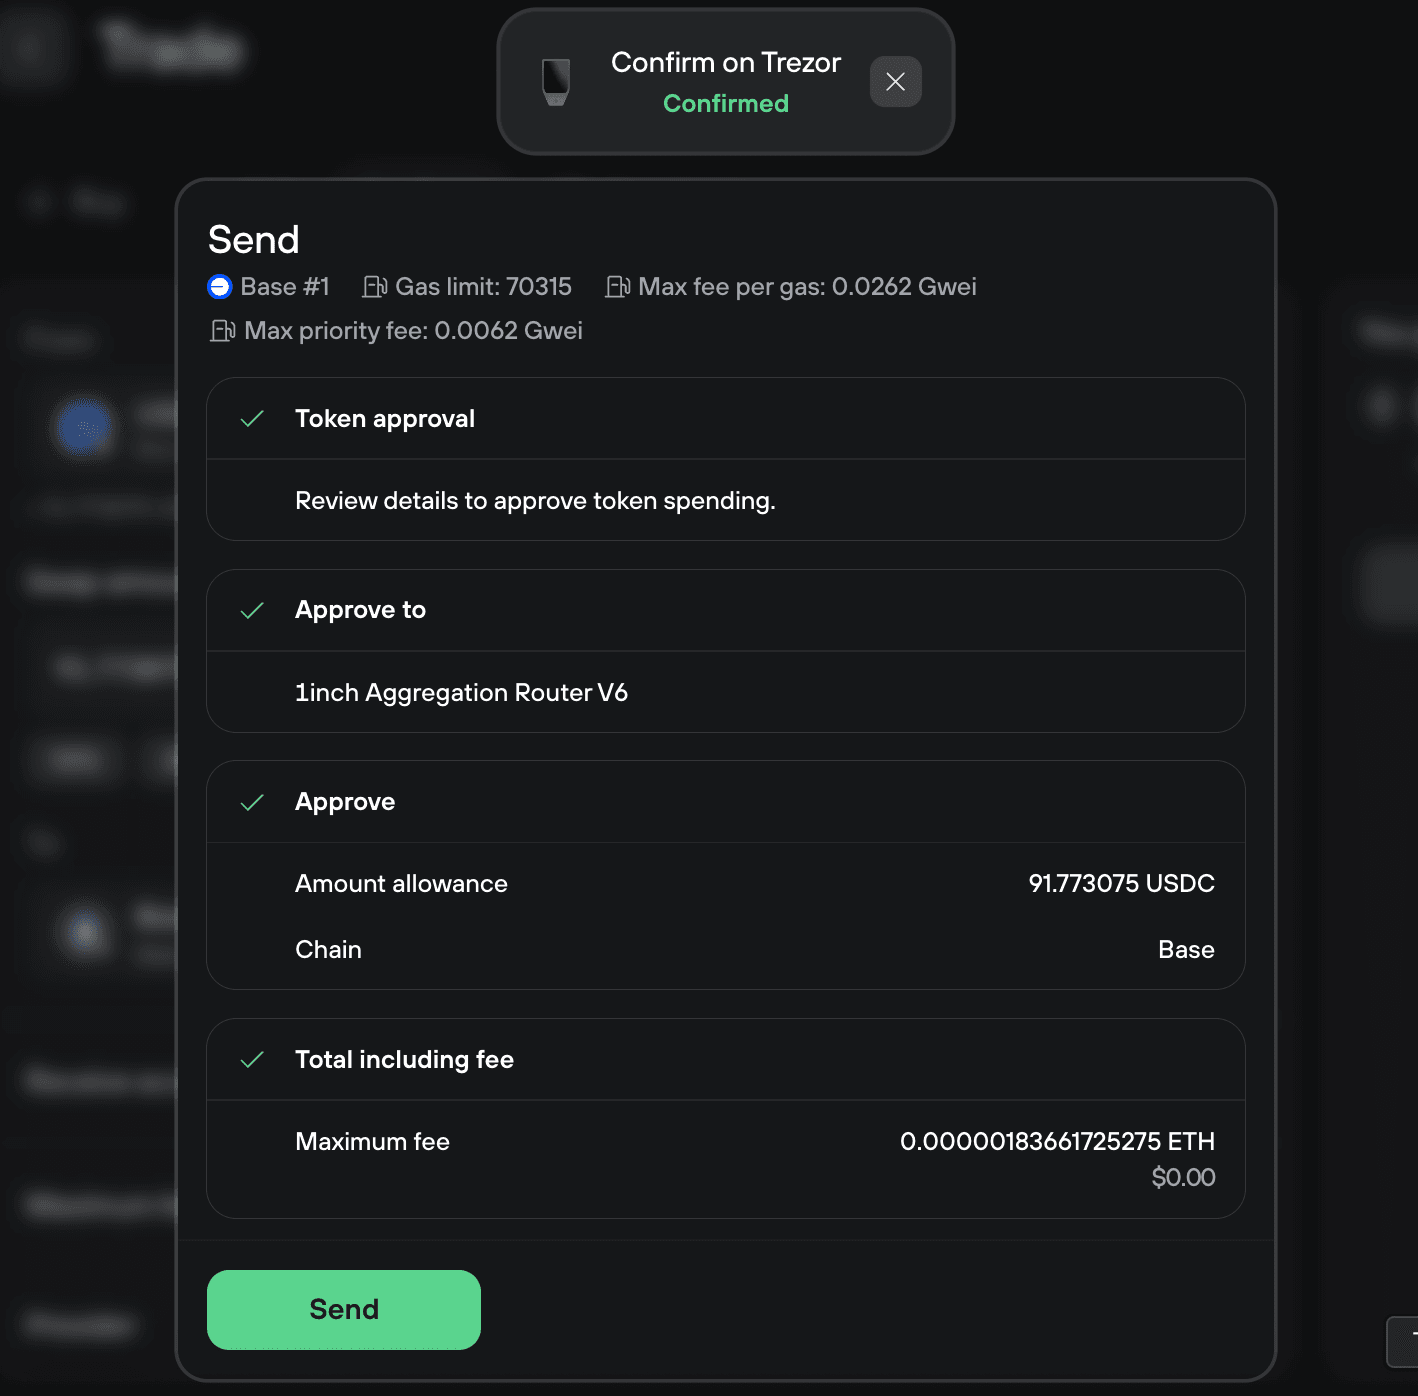
Review the approval details and sign on your Trezor device. Click Send in Trezor Suite to broadcast the transaction. The approval will appear as pending for a few seconds before it confirms.
Completing the swap
Once the approval is confirmed (or if you're swapping a native asset and didn't need approval), you're ready to complete the swap.
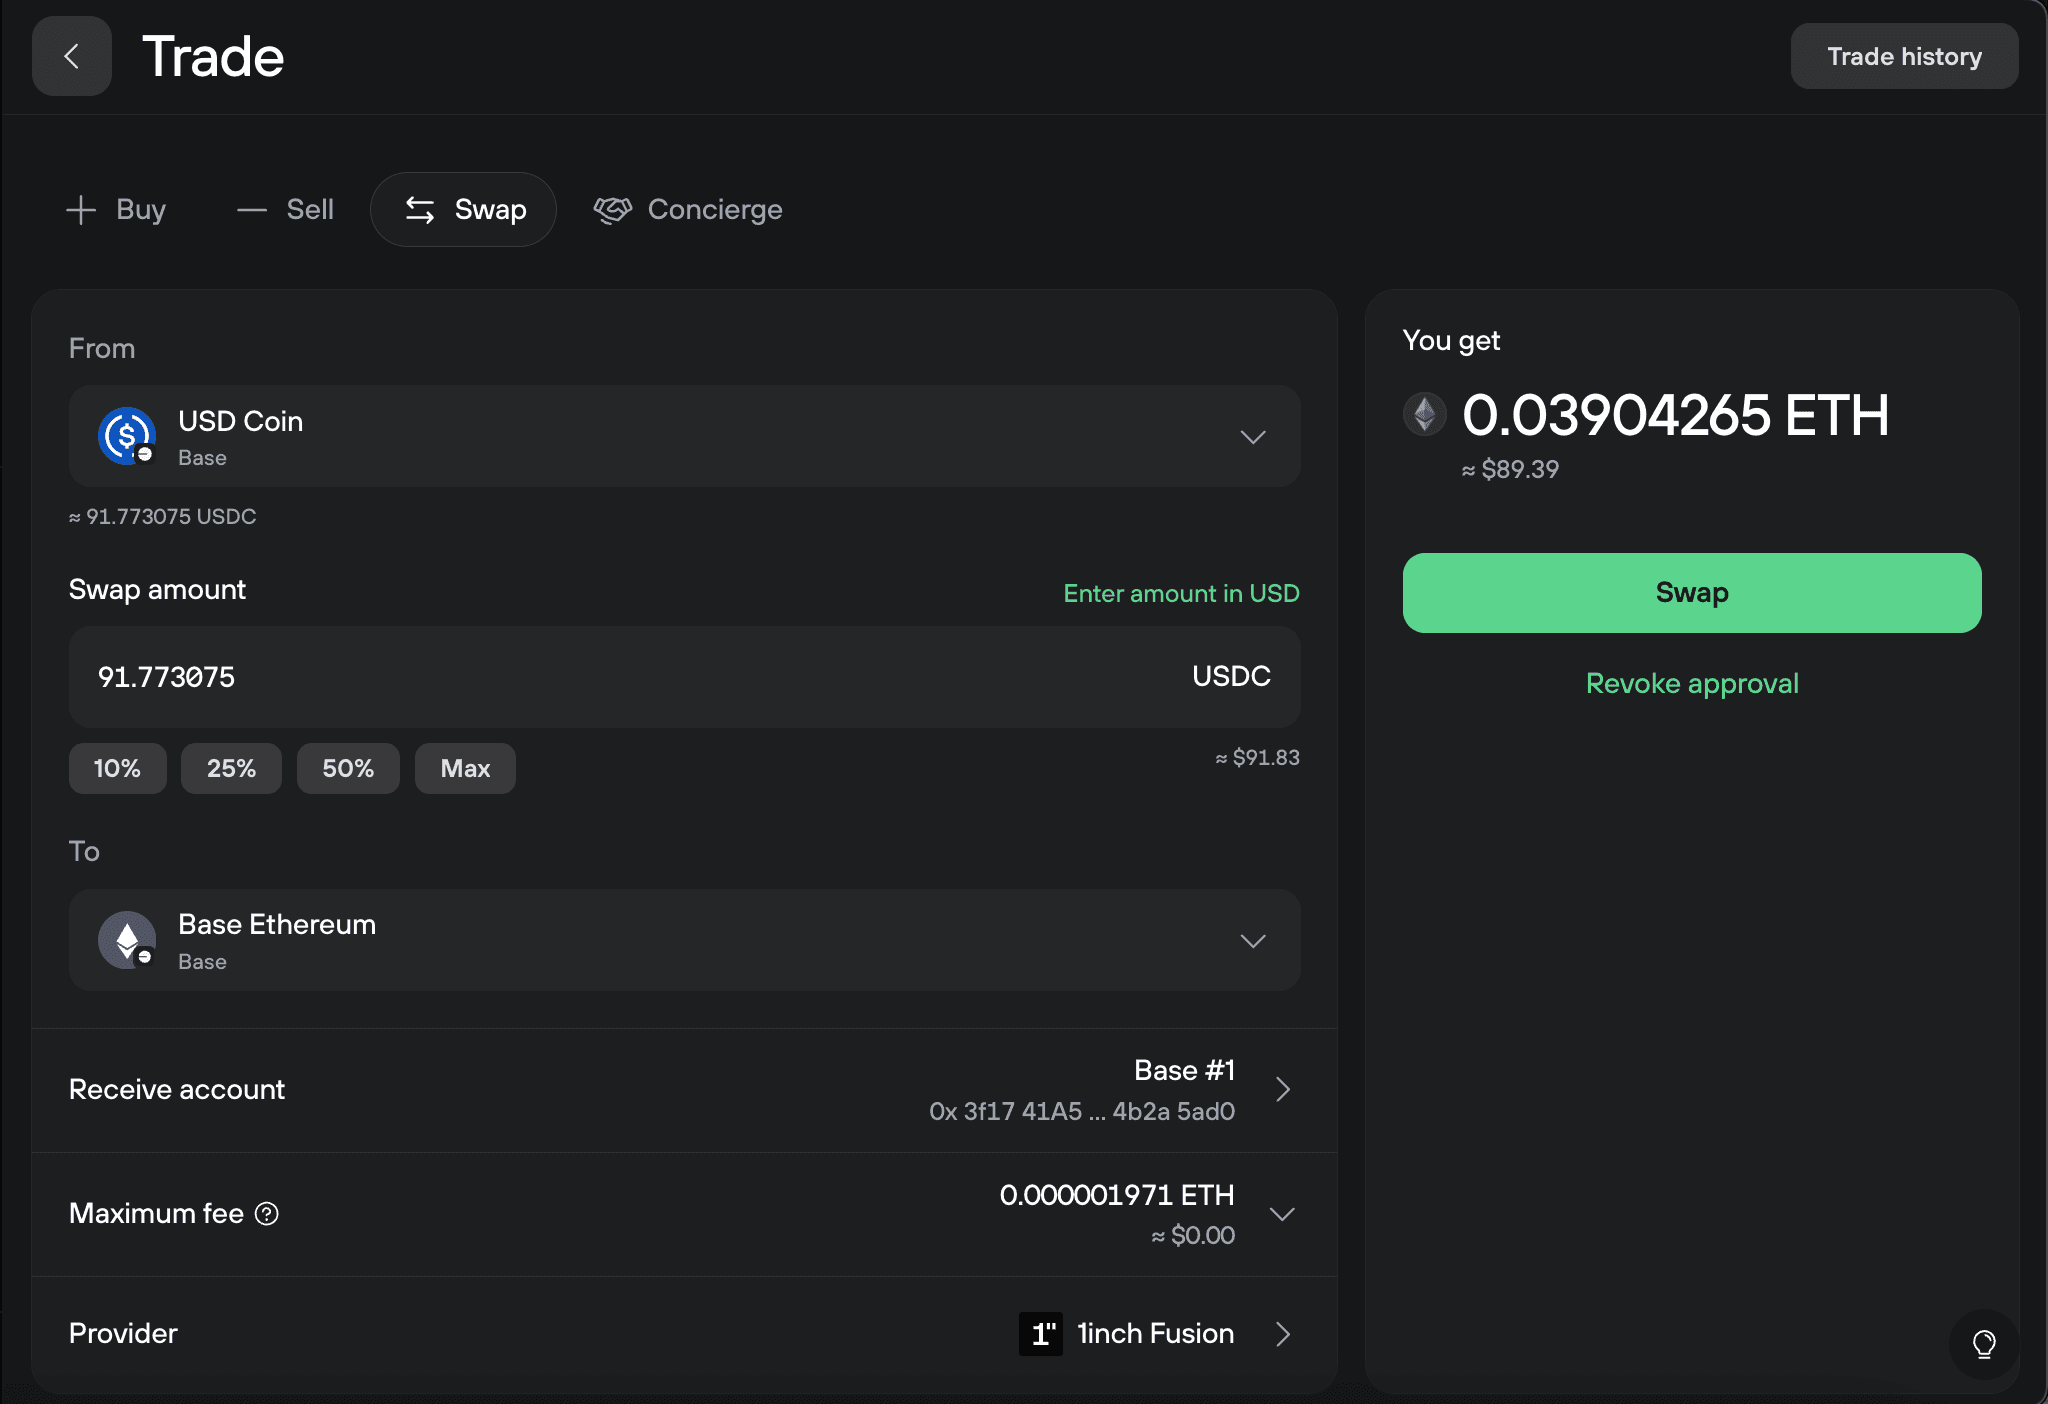
Click Swap. Review the swap summary, including the rate, network fee, provider, exchange type (DEX), and slippage. The default 1% slippage is appropriate for most swaps. To change it, click the pencil icon next to the slippage value.
Don't adjust slippage unless you have a specific reason. Changing it can significantly affect your final price. Find more information about slippage in our article What is a DEX?

Confirm the transaction on your Trezor device and click Send transaction to broadcast the transaction.
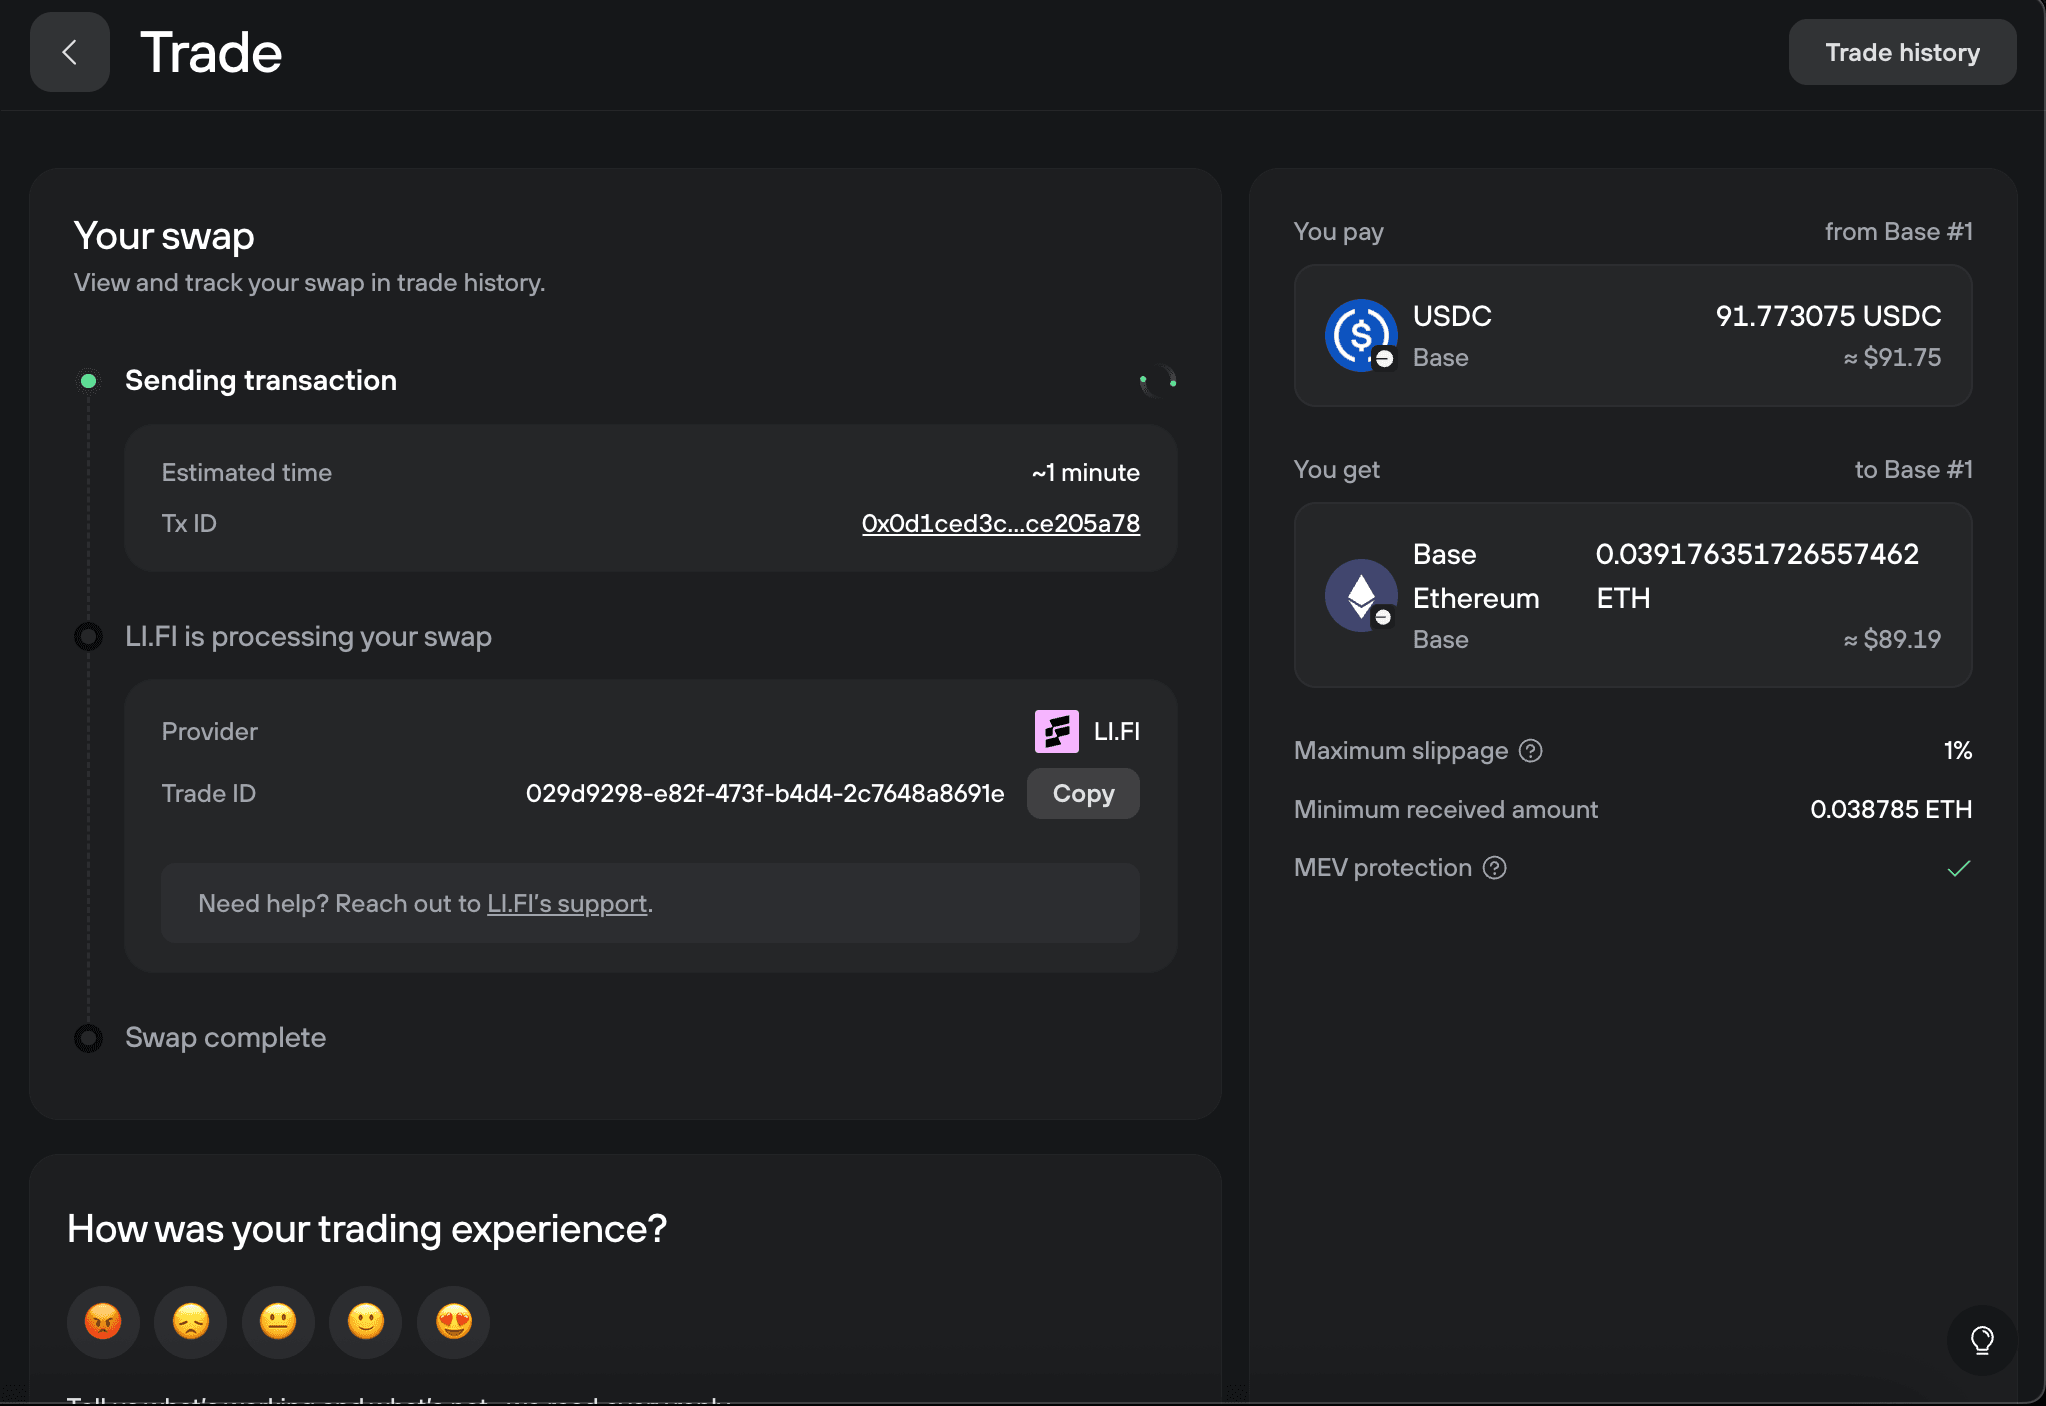
Tracking the swap
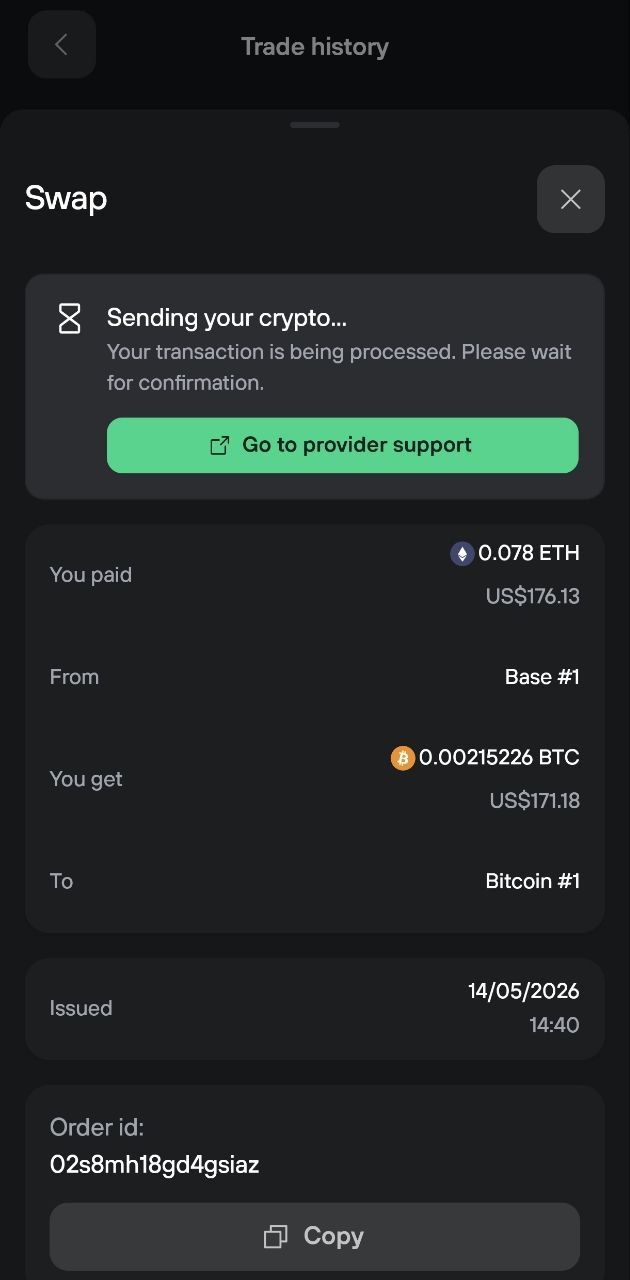
After you broadcast, Trezor Suite shows a tracking page with the status of your swap. You'll see:
- Estimated time and the on-chain transaction ID
- The provider and your Trade ID, with a Copy button
- A link to the provider's support if you need help
- A progress timeline: Sending transaction → Provider is processing → Swap complete Once the provider sends your swapped assets, they arrive in your receive account. You can return to this view any time from Trade history (see View your swap history below).
View your swap history
Here is where you can find information about your past swaps:
- Desktop: open the Swap tab in Trezor Suite, then click Trade history in the top right corner.
- Mobile: open the Trade tab, then tap Trade history at the bottom.
Frequently asked questions
Which Trezor devices can I use to swap crypto?
You can use any Trezor device to swap crypto, as long as the cryptocurrencies you want to swap are supported. Check supported coins at trezor.io/coins.
Can I swap between any cryptocurrencies?
With centralized exchanges, you can swap between any supported assets across different blockchains. With decentralized exchanges, you can only swap tokens on EVM-based networks.
Solana tokens cannot be swapped using DEX because Solana is not EVM-based. You can still swap Solana tokens using centralized exchanges.
Do I need to provide ID to swap?
It depends on which option you choose. Centralized exchanges may require KYC. Decentralized exchanges do not require any personal information or account creation.
What if my swap fails or gets stuck?
If your swap doesn't complete or stays pending, contact Trezor Support through Chatbot Hal. Have your Trade ID ready, which you'll find in Trade history.