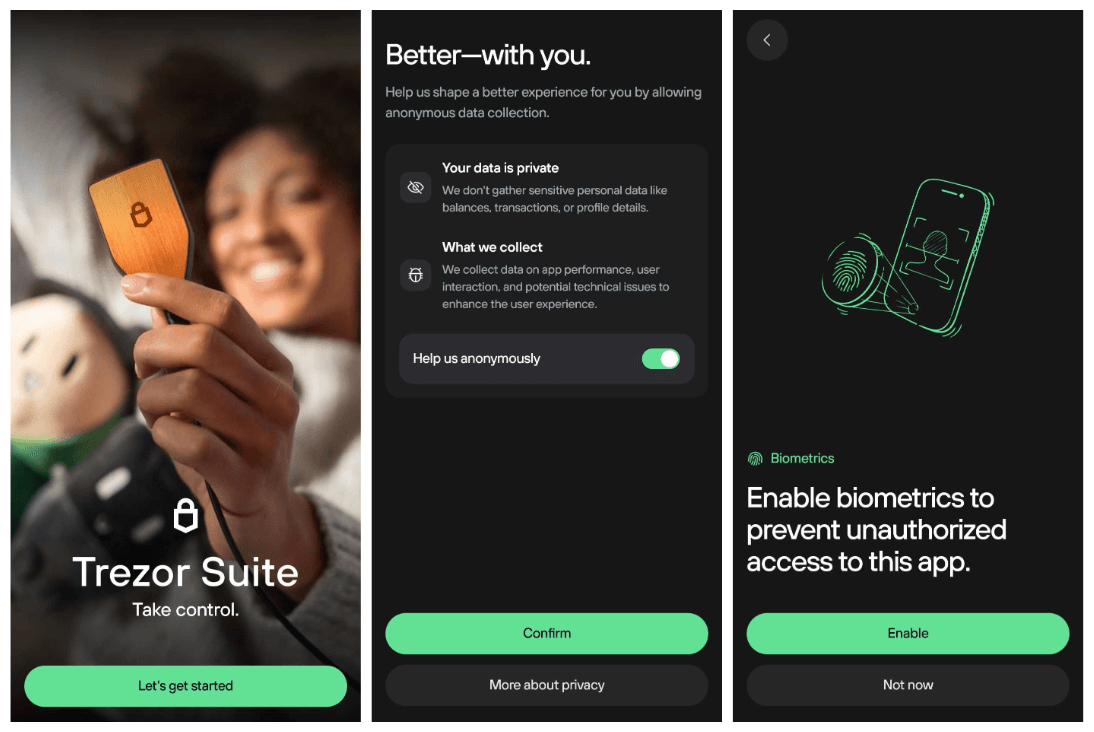
Get started with the Trezor Safe 7
This guide shows you how to unbox, connect, and set up your new Trezor Safe 7 in about 15 minutes.
Choose mobile or desktop setup below.
What you'll need
- Your Trezor Safe 7
- USB-C cable (optional): for charging, and for wired connection on Android devices that support it.
- The included wallet backup cards and a pen
- About 15 minutes
- For mobile setup: a phone (Android or iOS) with Bluetooth or USB-C support
- For desktop setup: a computer with Trezor Suite installed
1. Install and run Trezor Suite
If you don’t have Trezor Suite installed yet go to trezor.io/start and click Download for desktop.
Once the installation is finished, open Trezor Suite. You'll have the option to opt in or out of anonymous data collection. This helps us with bug fixes and performance improvements.
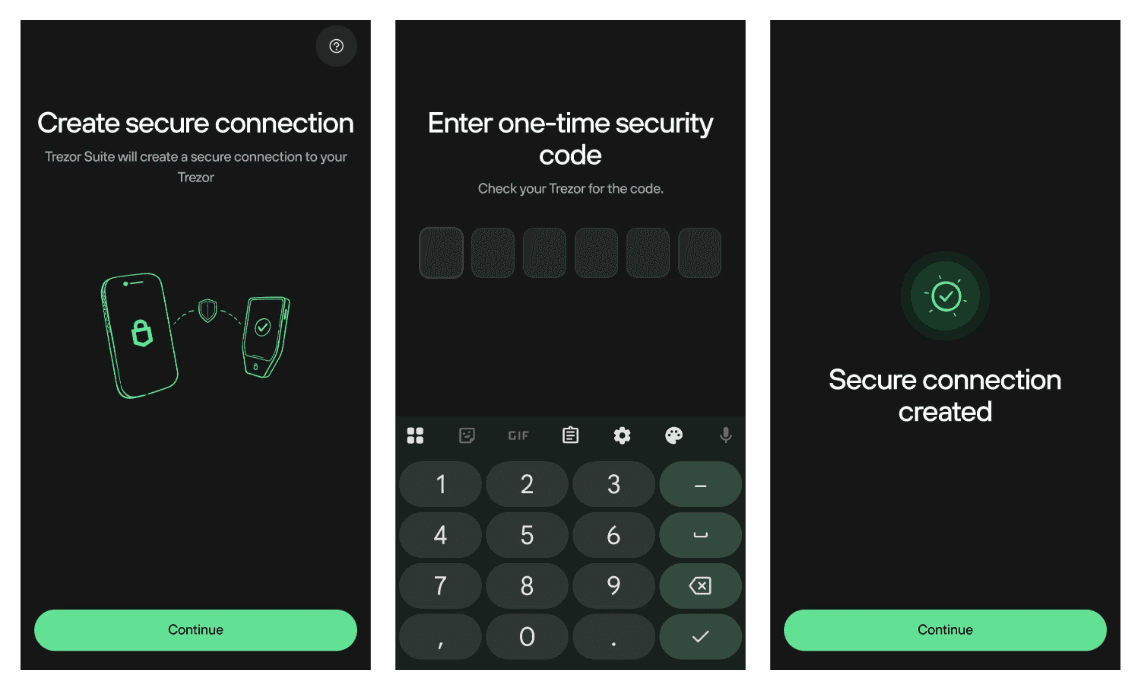
2. Connect and verify your Trezor
When Trezor Suite opens, you’ll see “Connect & unlock your Trezor.”
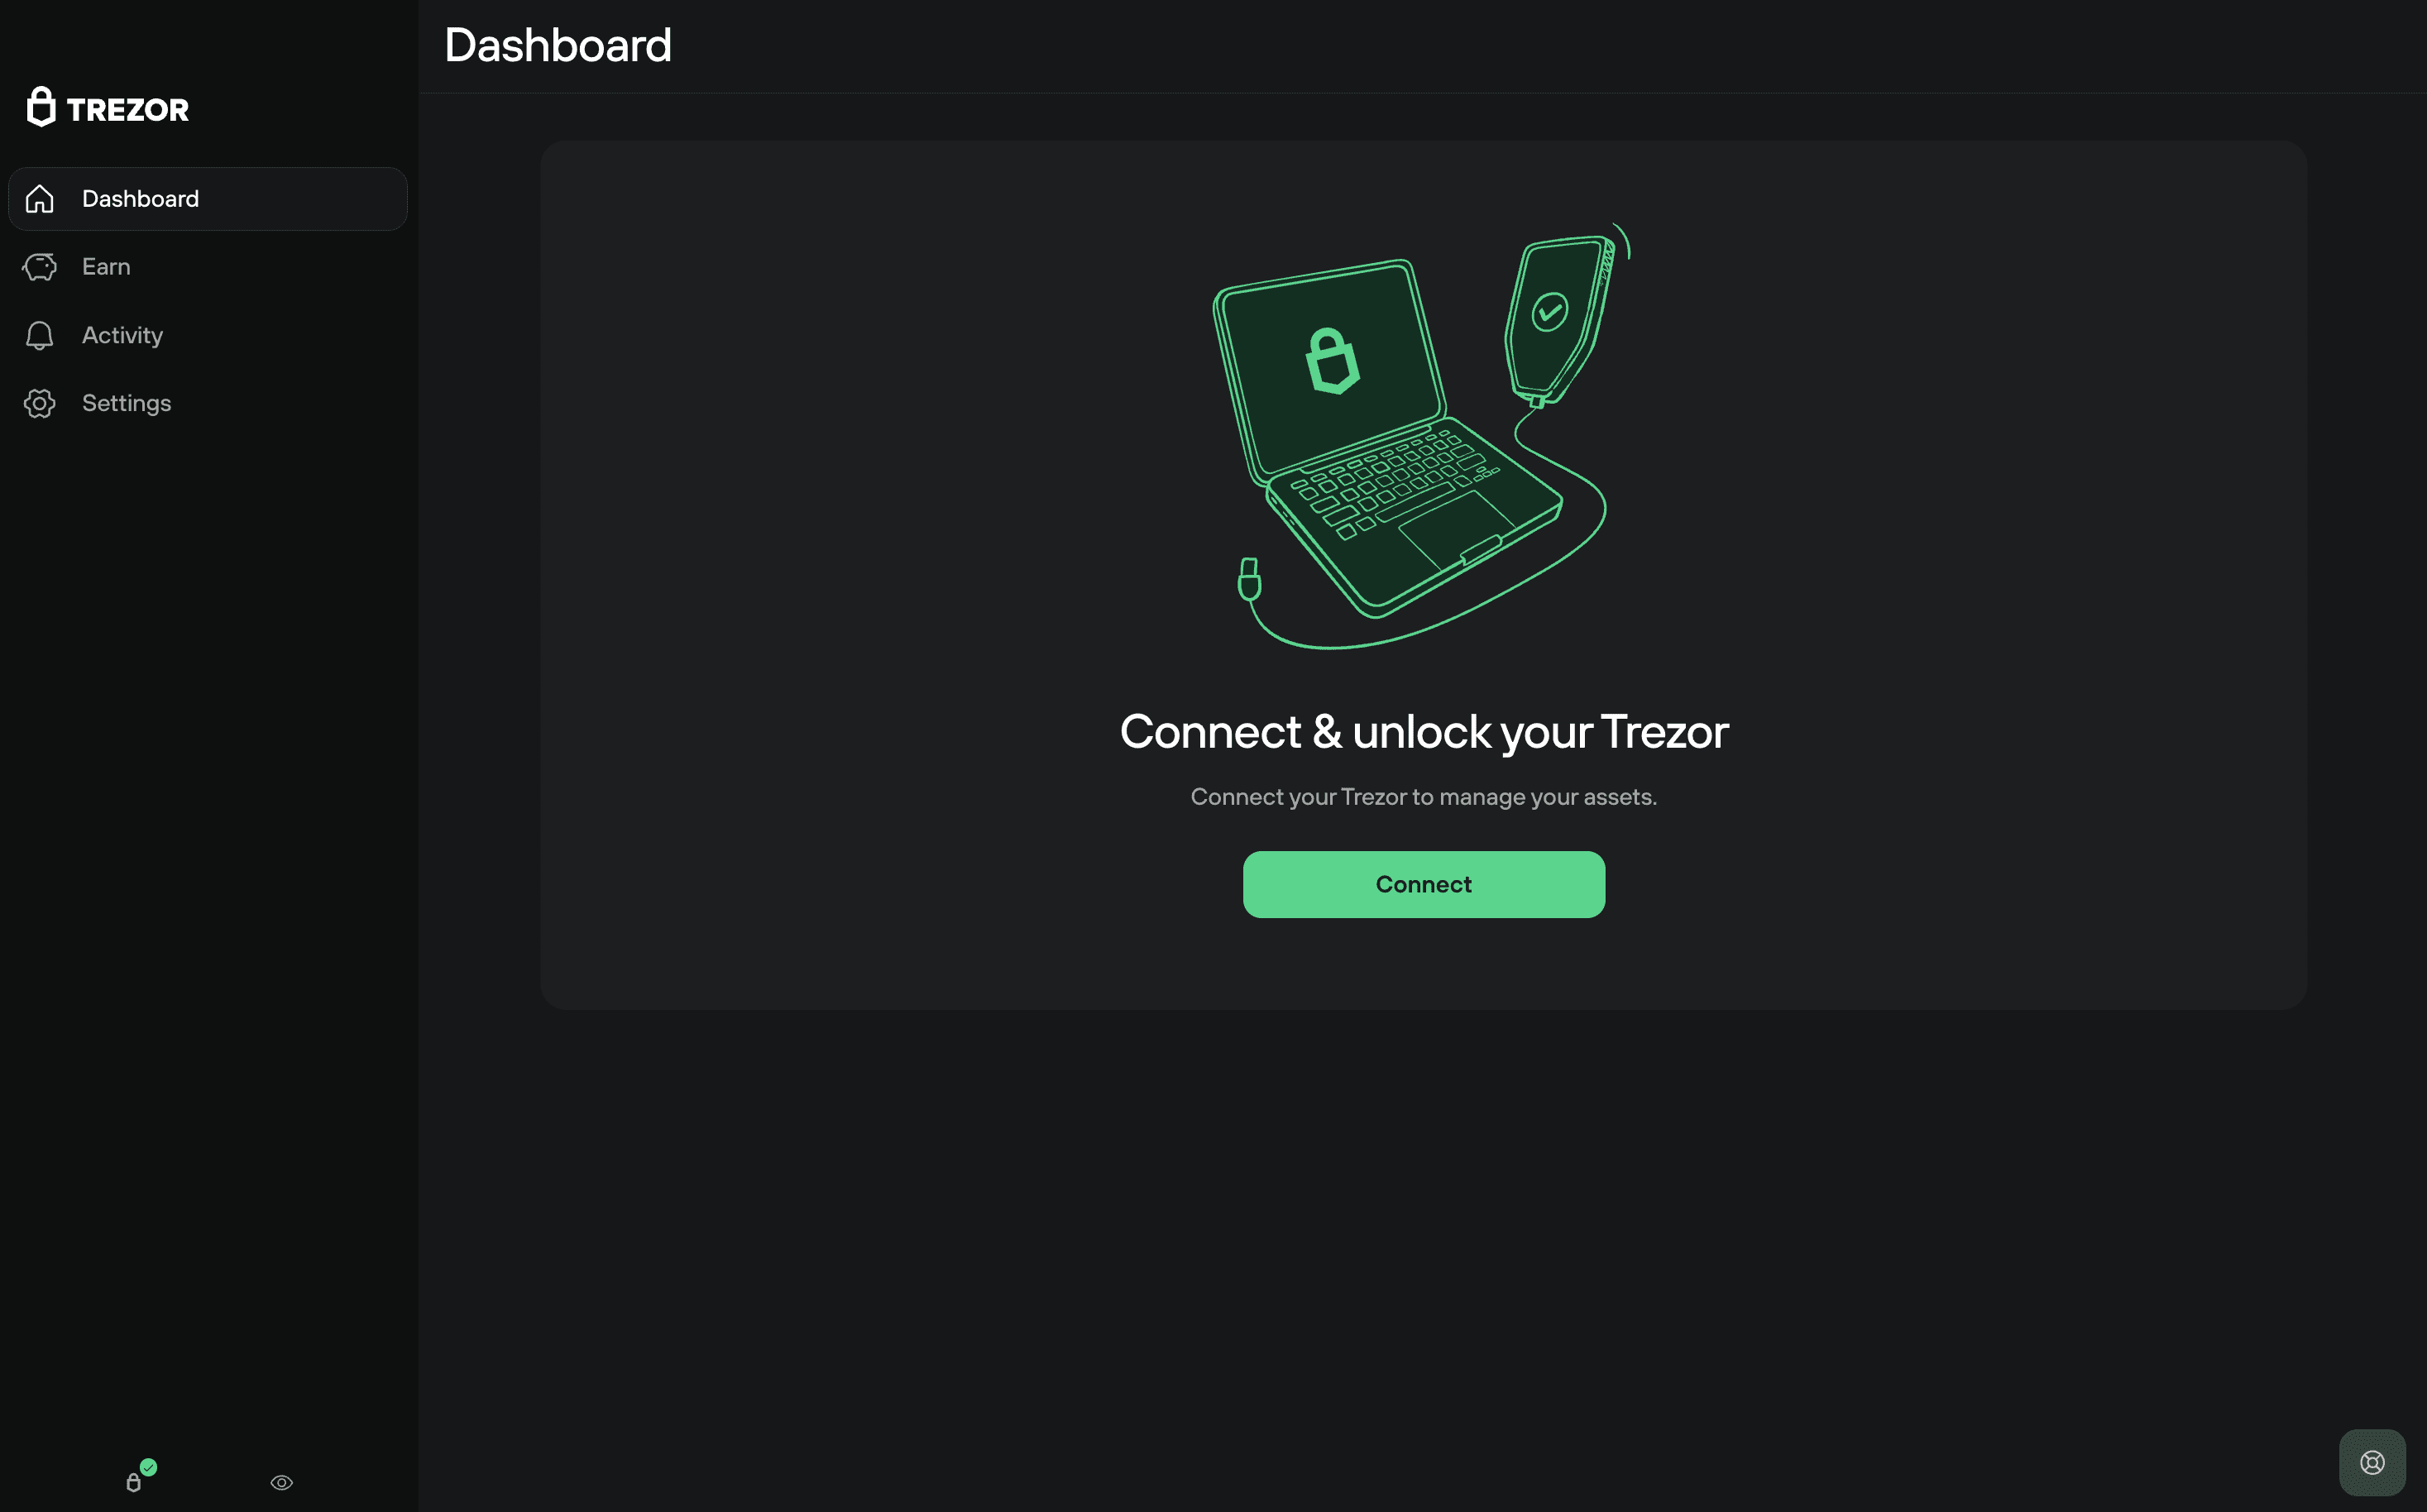
Click Connect.
A window will appear with connection options.
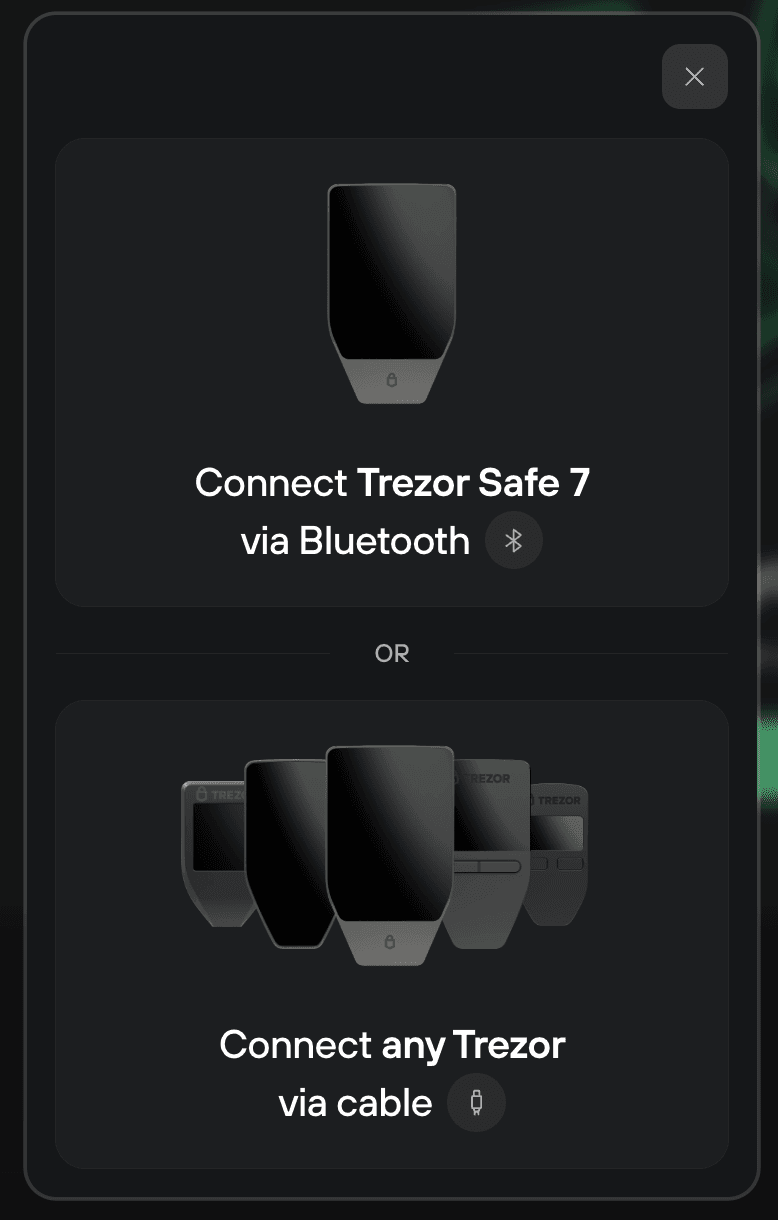
You can connect your Trezor Safe 7 in two ways:
- USB-C cable — plug in your device directly
- Bluetooth — choose Connect via Bluetooth and follow the on-screen pairing steps
Bluetooth connection
When your device appears — for example, Trezor Safe 7 (PBU) — click Connect to pair.

Verify that the pairing code shown on your computer matches the one on your Trezor screen, then click Connect to confirm.
You don’t need to grant contacts/call-history access for Bluetooth pairing.
If your Trezor isn’t detected: Toggle Bluetooth off and on, and forget and re-pair the devices in your computer’s Bluetooth settings. If it still doesn’t appear, see Bluetooth troubleshooting for detailed connection steps.
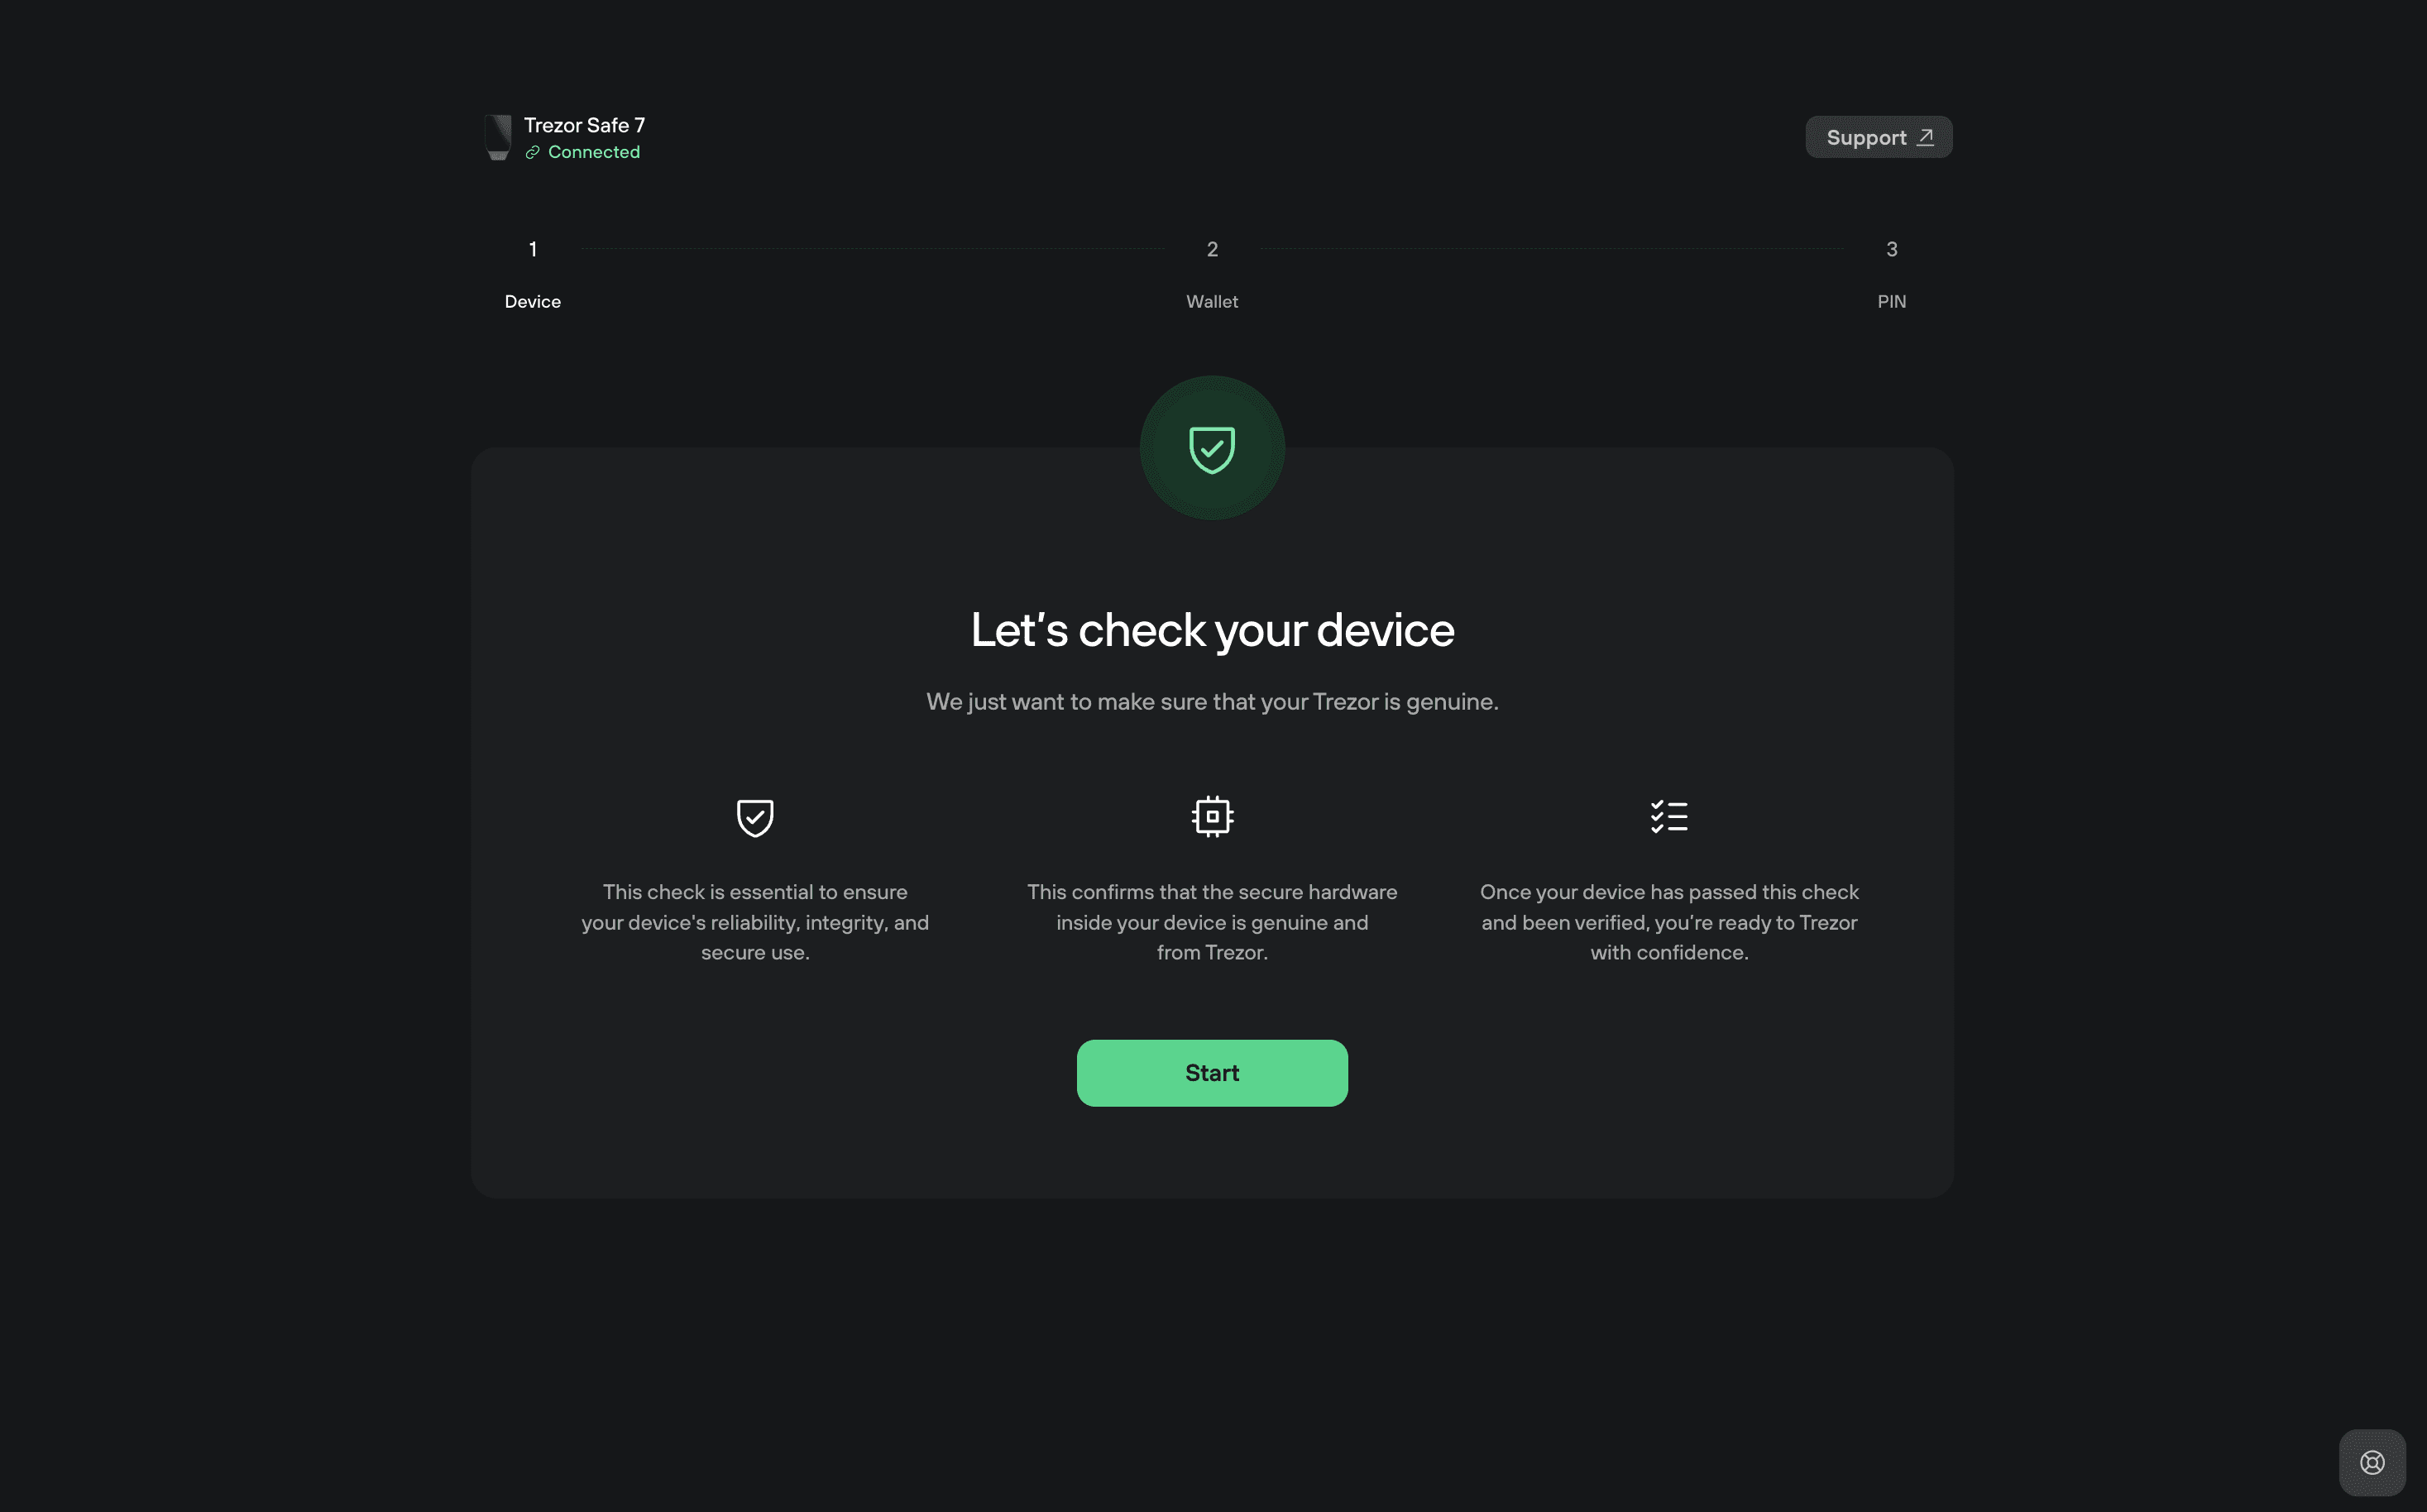
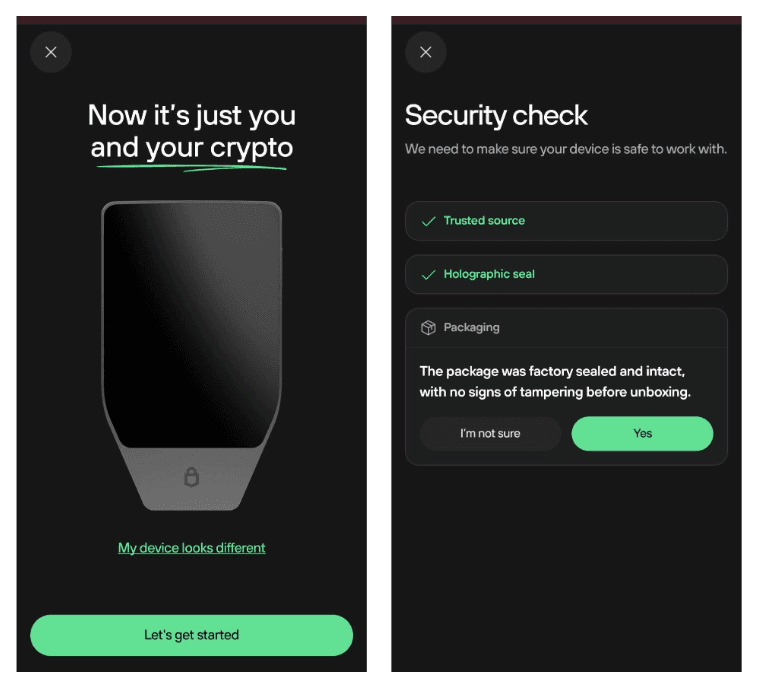
After connection, Suite will display the Device security check. When you're ready to proceed, click on Set up my Trezor:
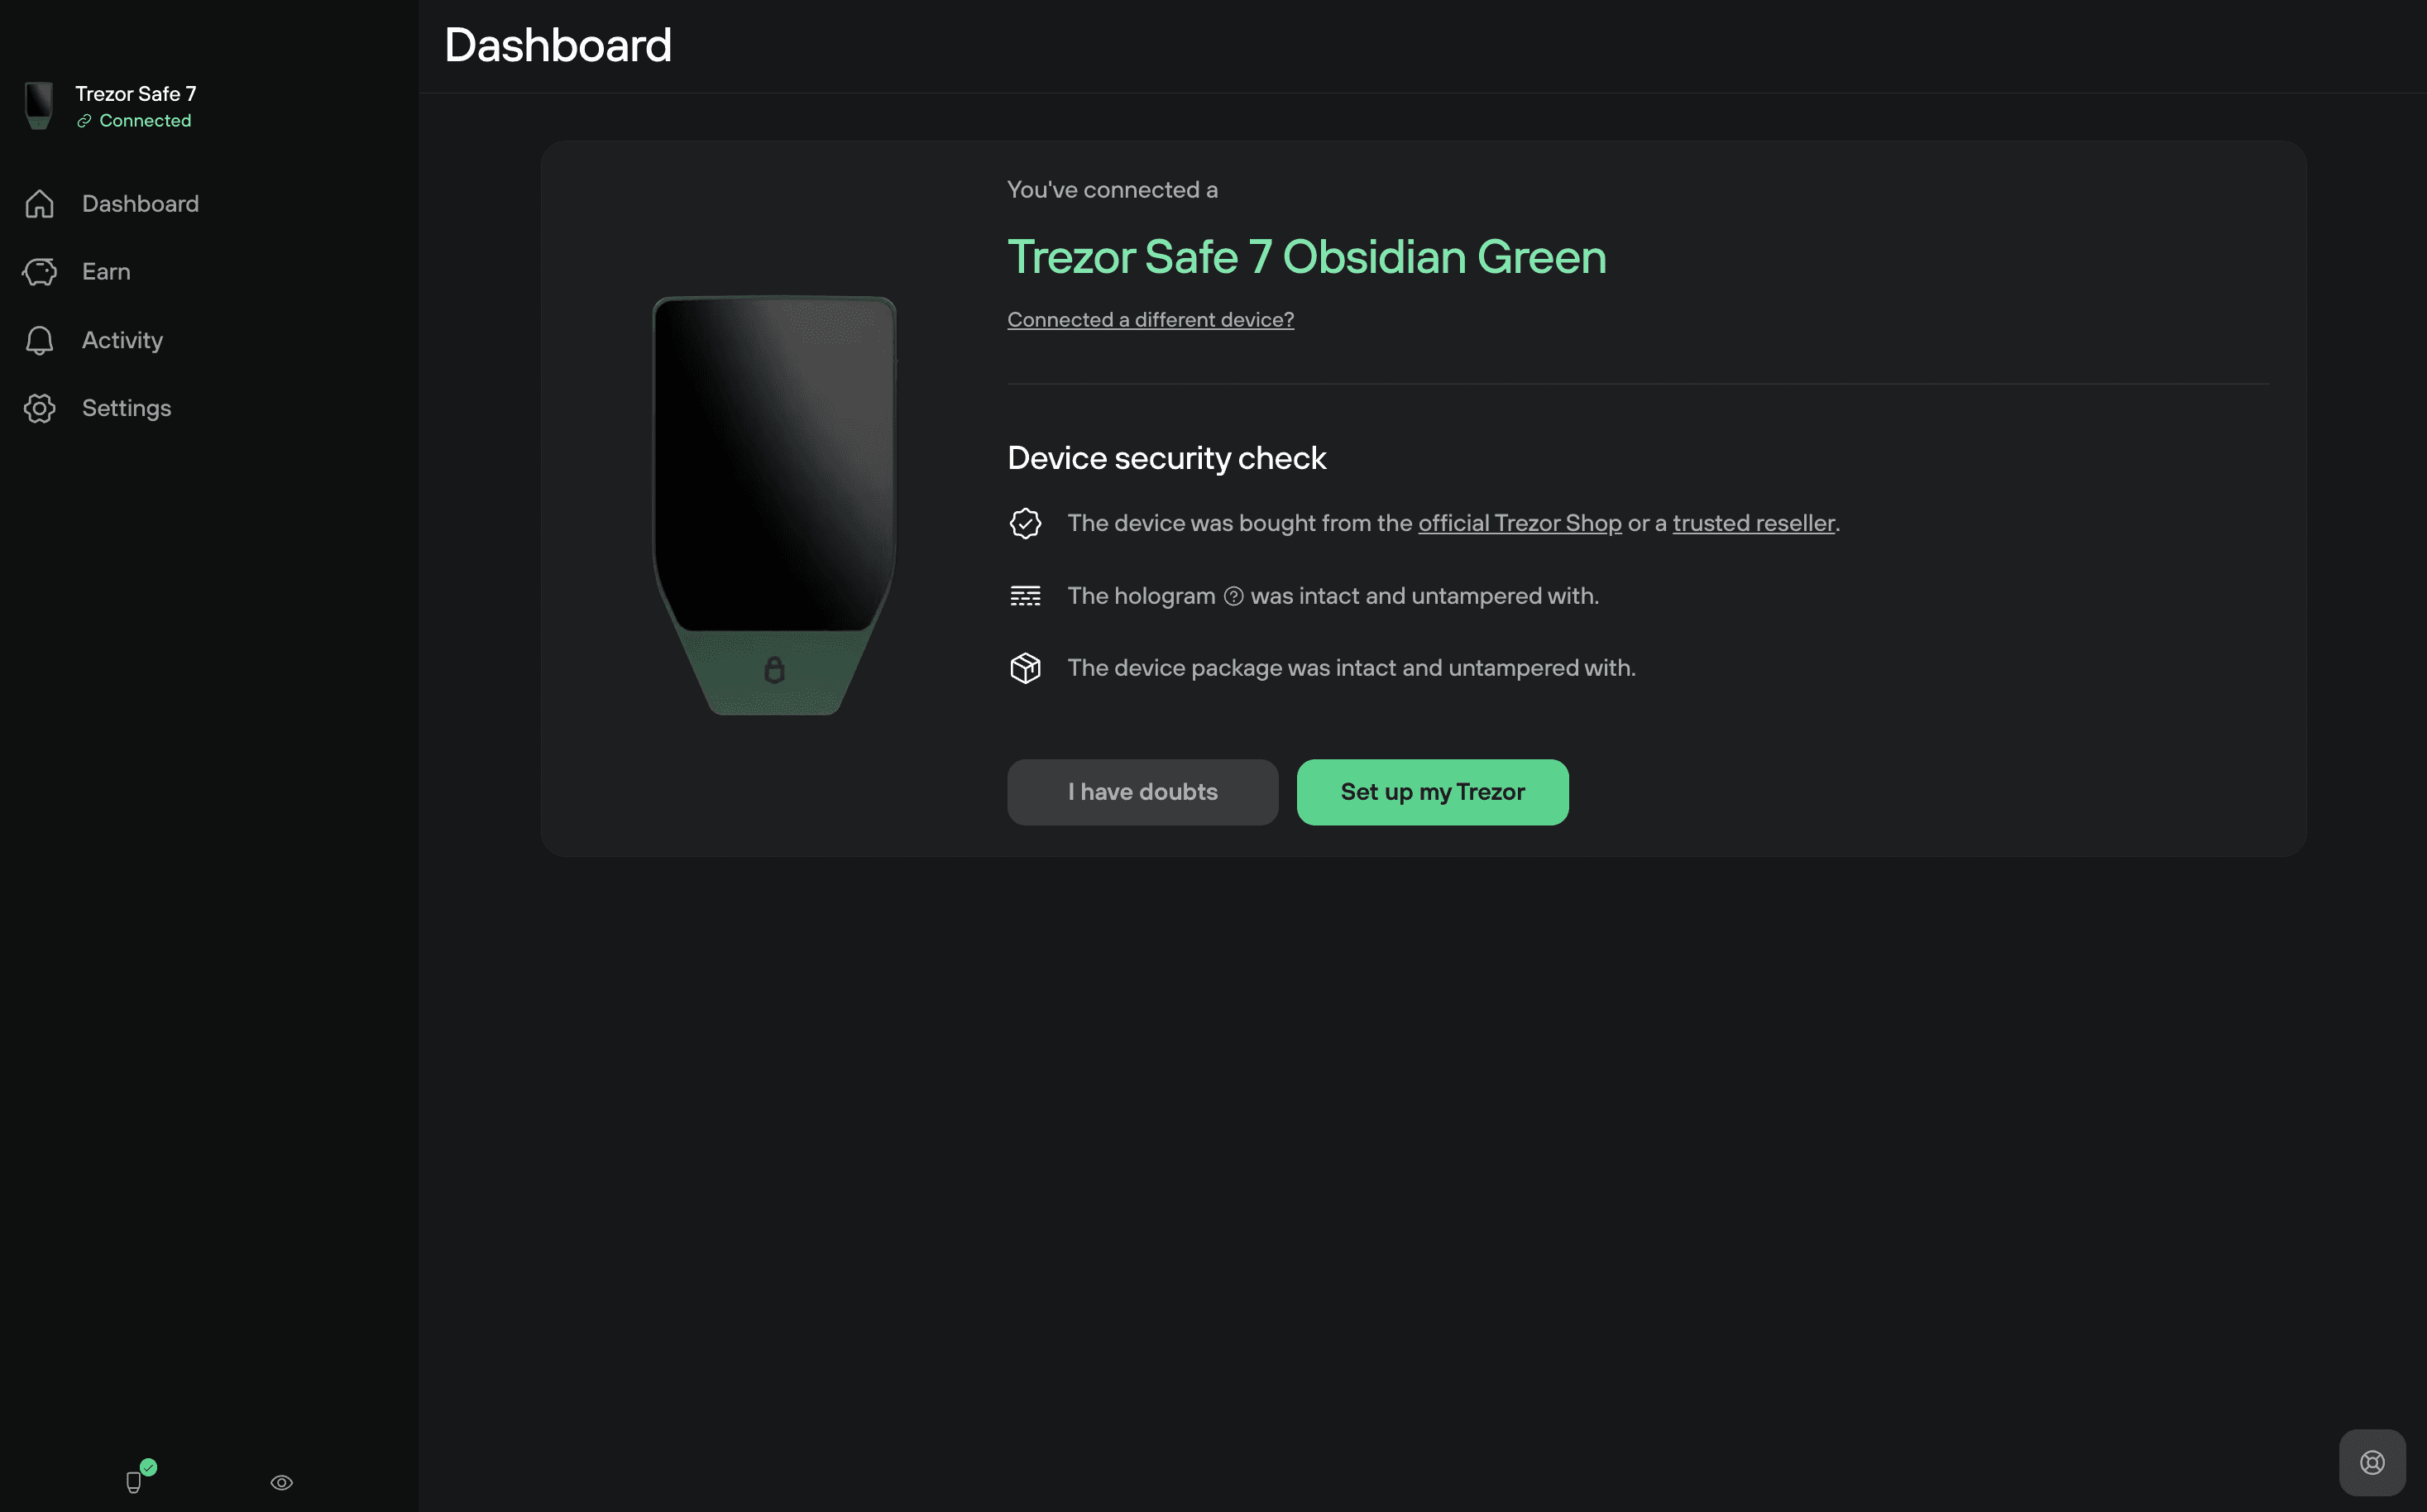
If anything looks unusual, see Authenticate your Trezor Safe 7 for guidance on verifying your device.
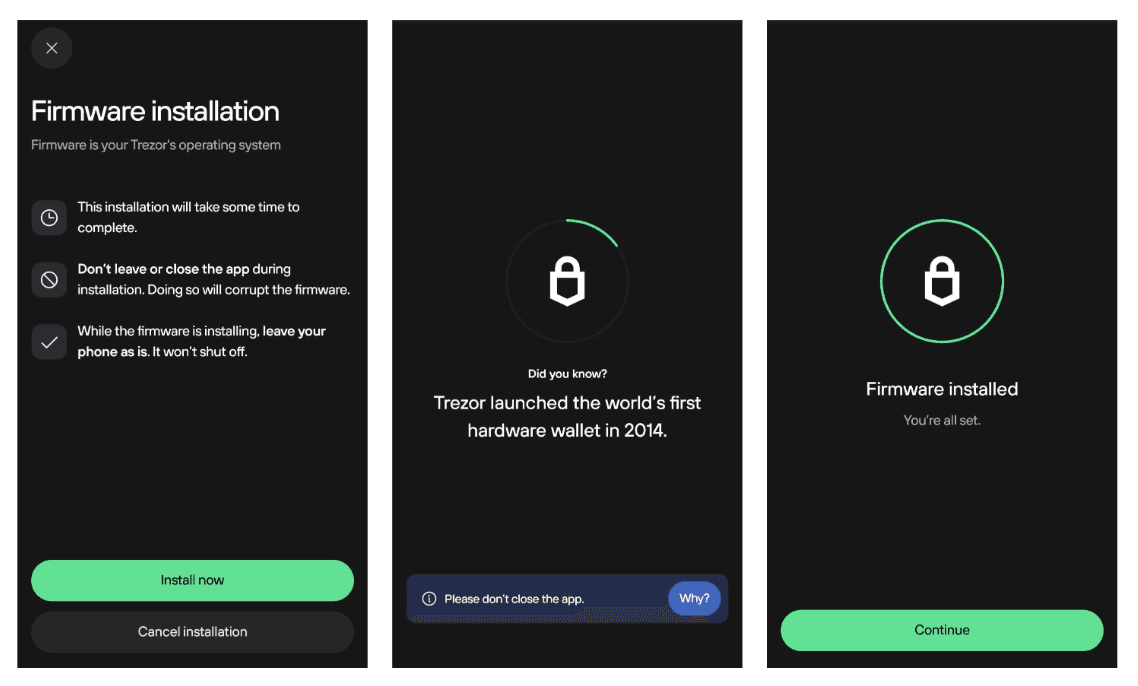
3. Install firmware
Your Trezor ships without firmware for security.
Trezor Suite will guide you to install the latest version of the firmware.
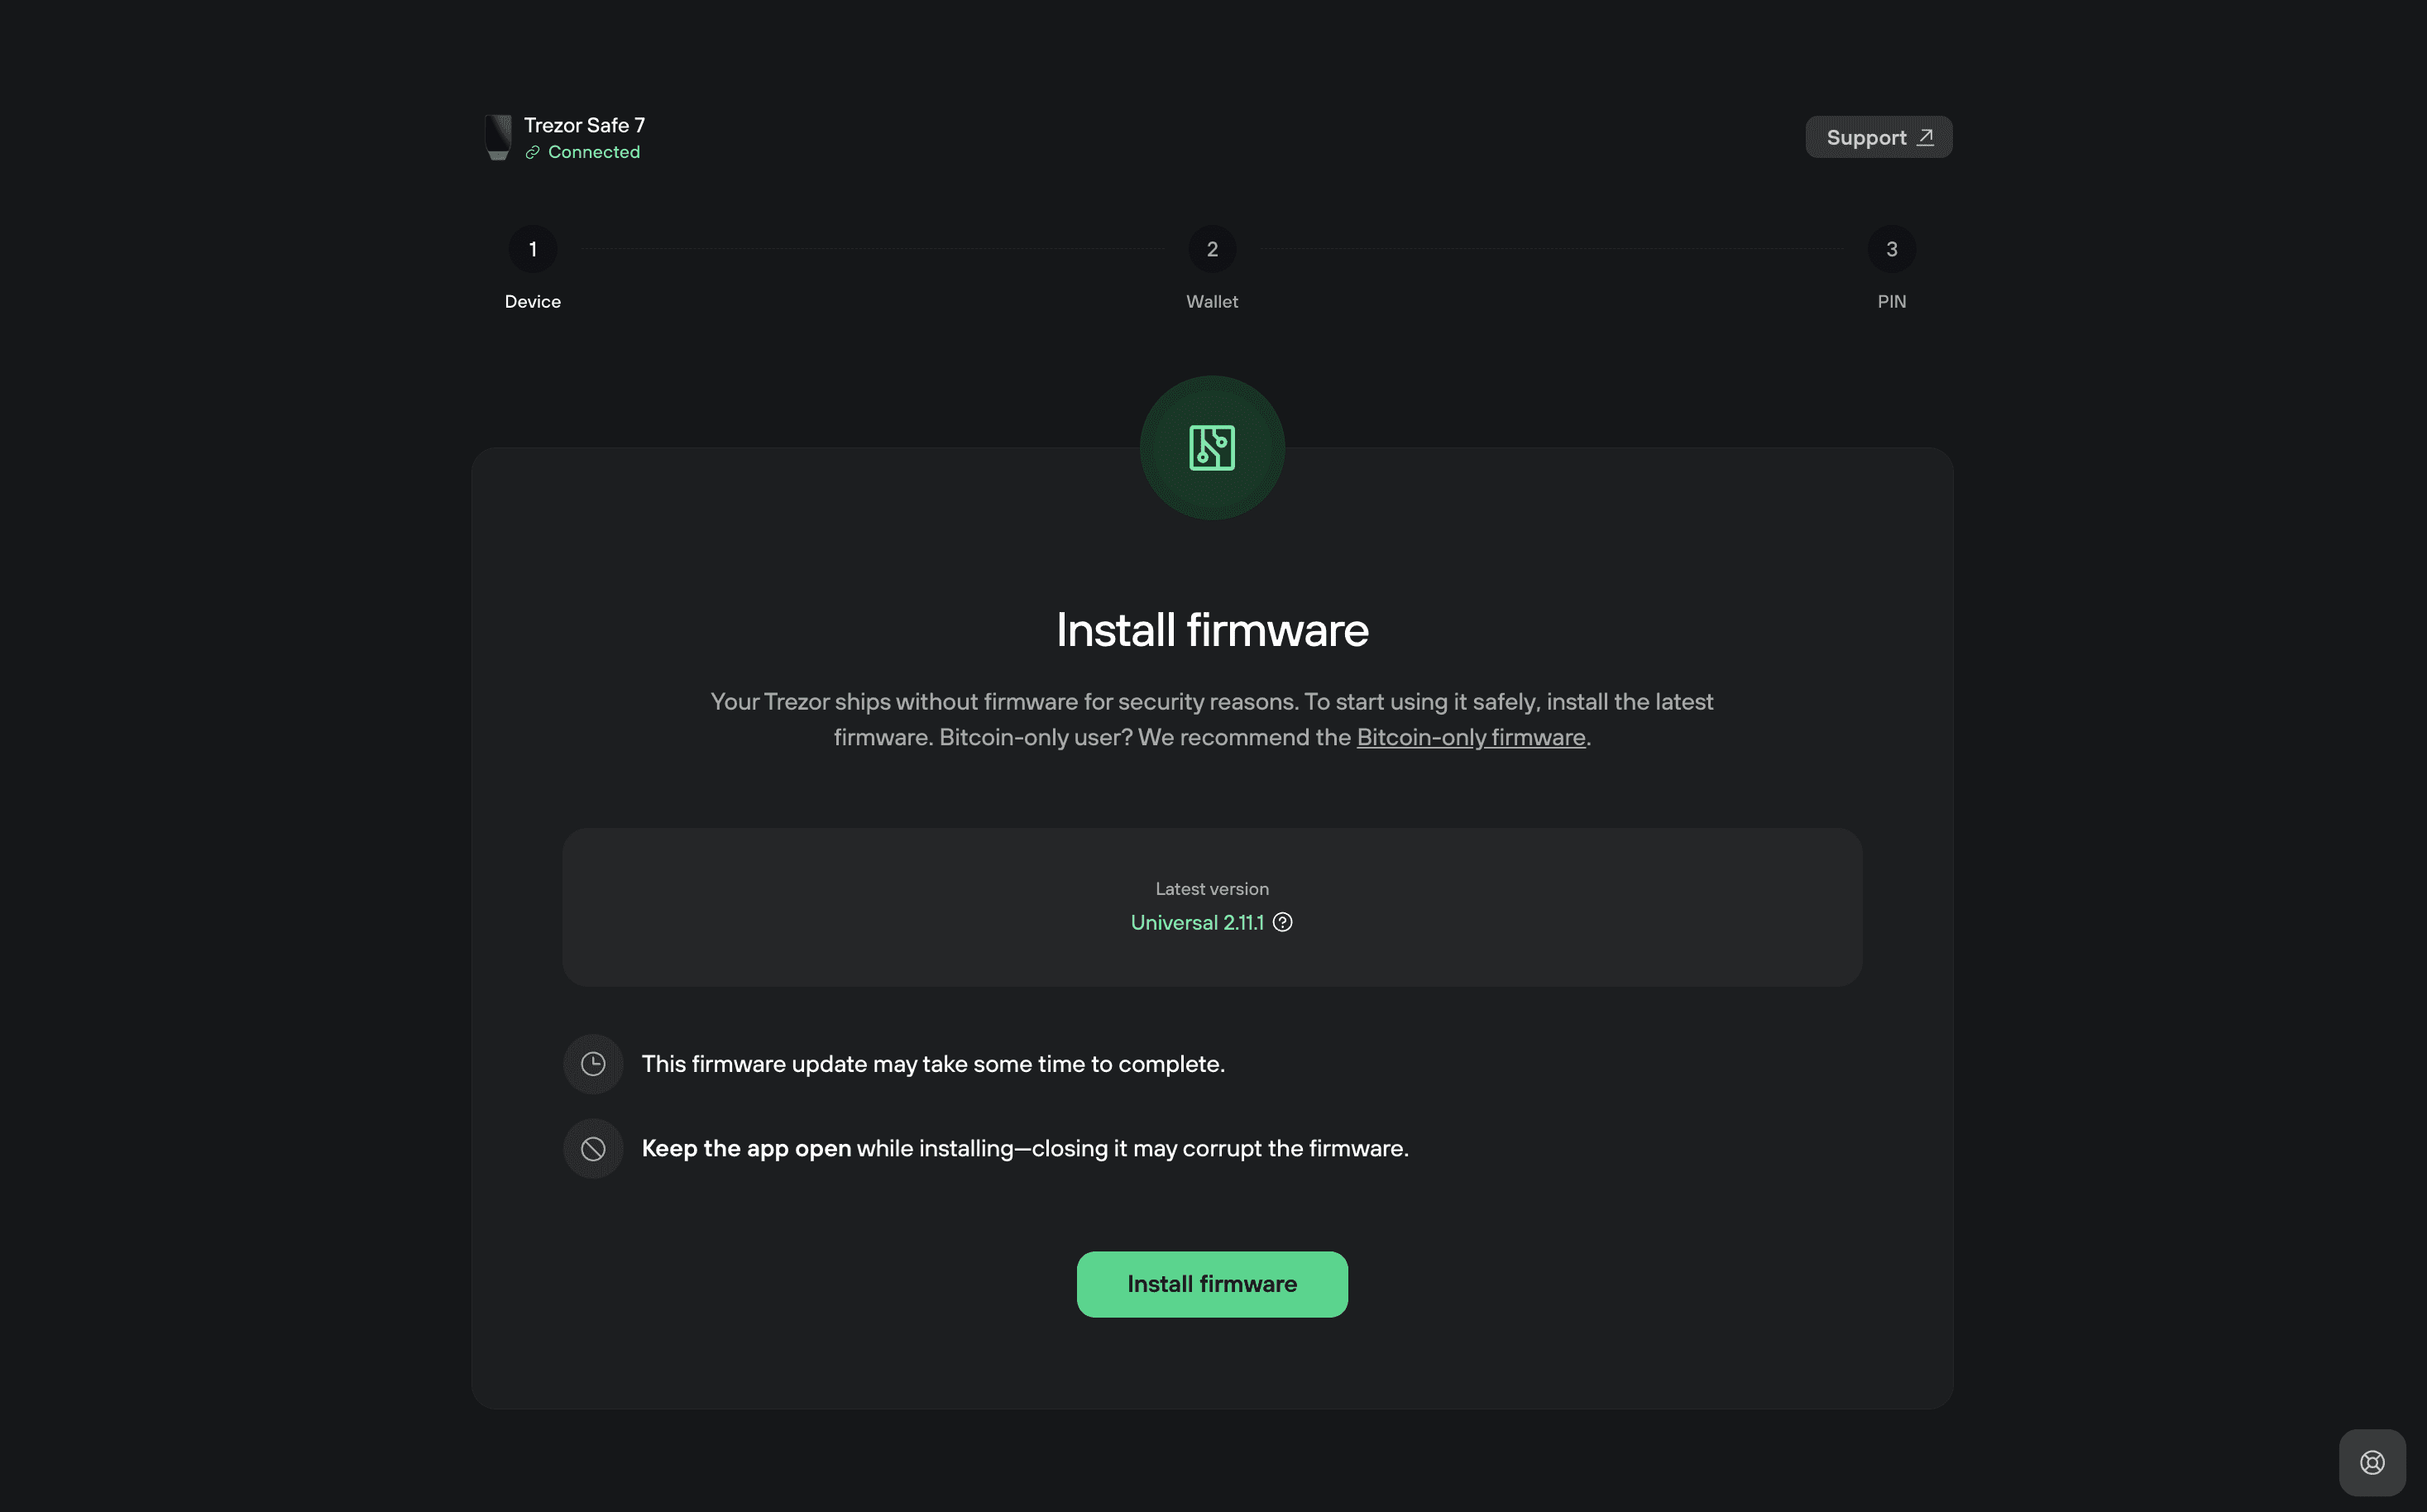
You can choose between Standard or Bitcoin-only firmware.
Click Install firmware and wait for the installation to complete.
Your Trezor will restart automatically.
4. Authenticate your device and learn the basics
After firmware installation, Trezor Suite will perform a Secure Element authenticity check.
This cryptographic check confirms your Trezor Safe 7 was genuinely made by Trezor and hasn’t been altered.
Click Start and follow the steps on the Trezor device to complete the check.
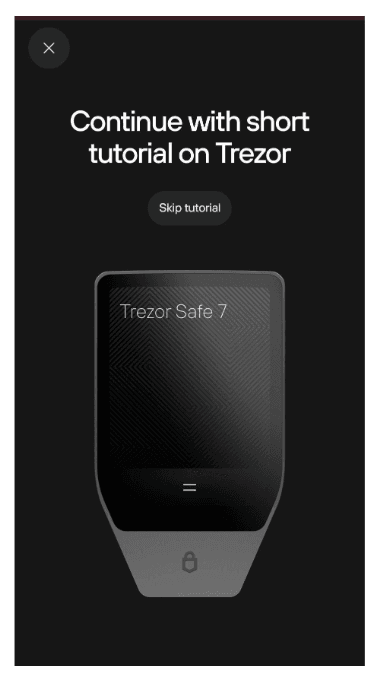
After the authenticity check, your device will offer a short tutorial "Know your Trezor."
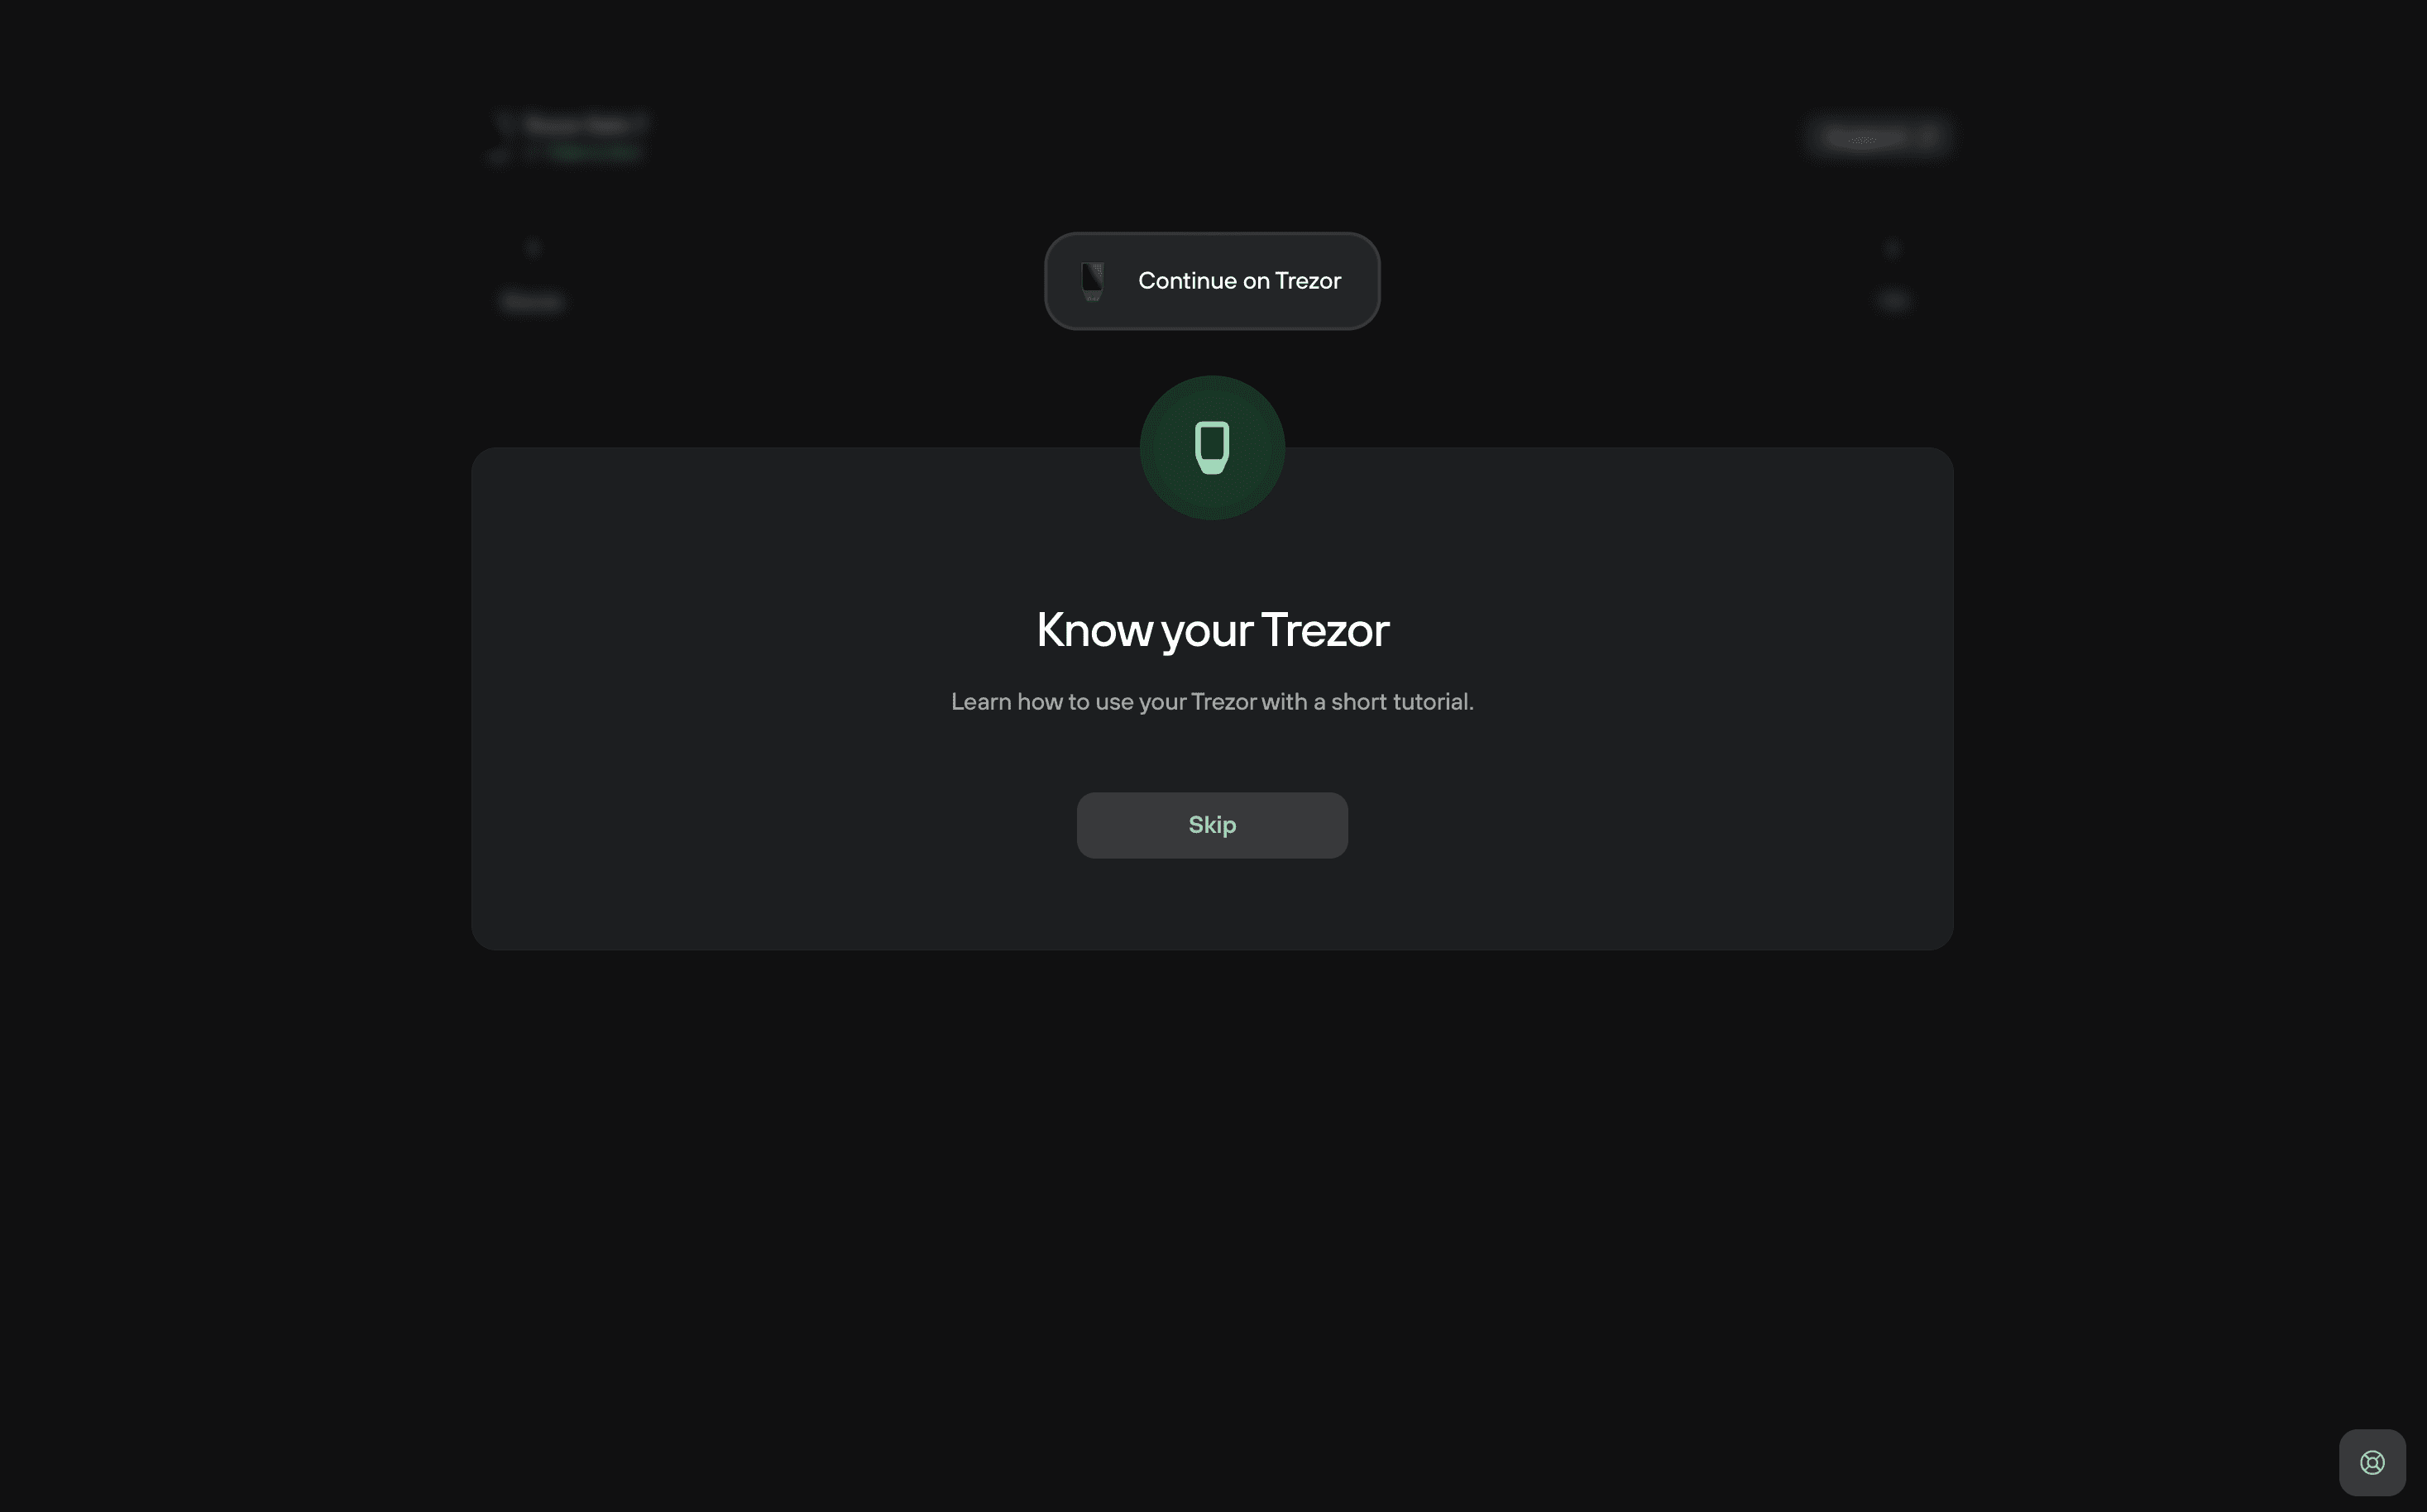
Follow the tutorial on your Trezor device, or click Skip. Once completed, click on Continue:
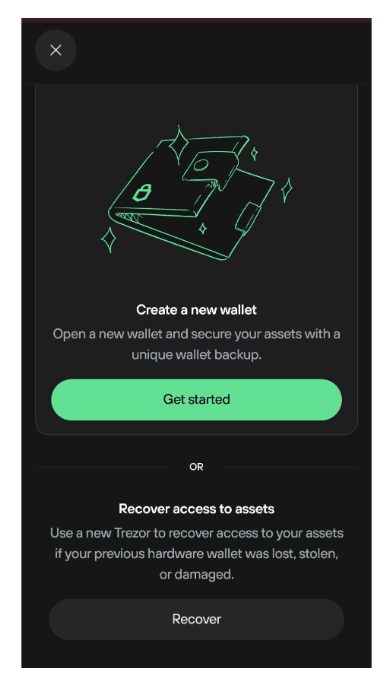
5. Create your wallet and make a backup
Trezor Suite now guides you through creating your wallet and your wallet backup.
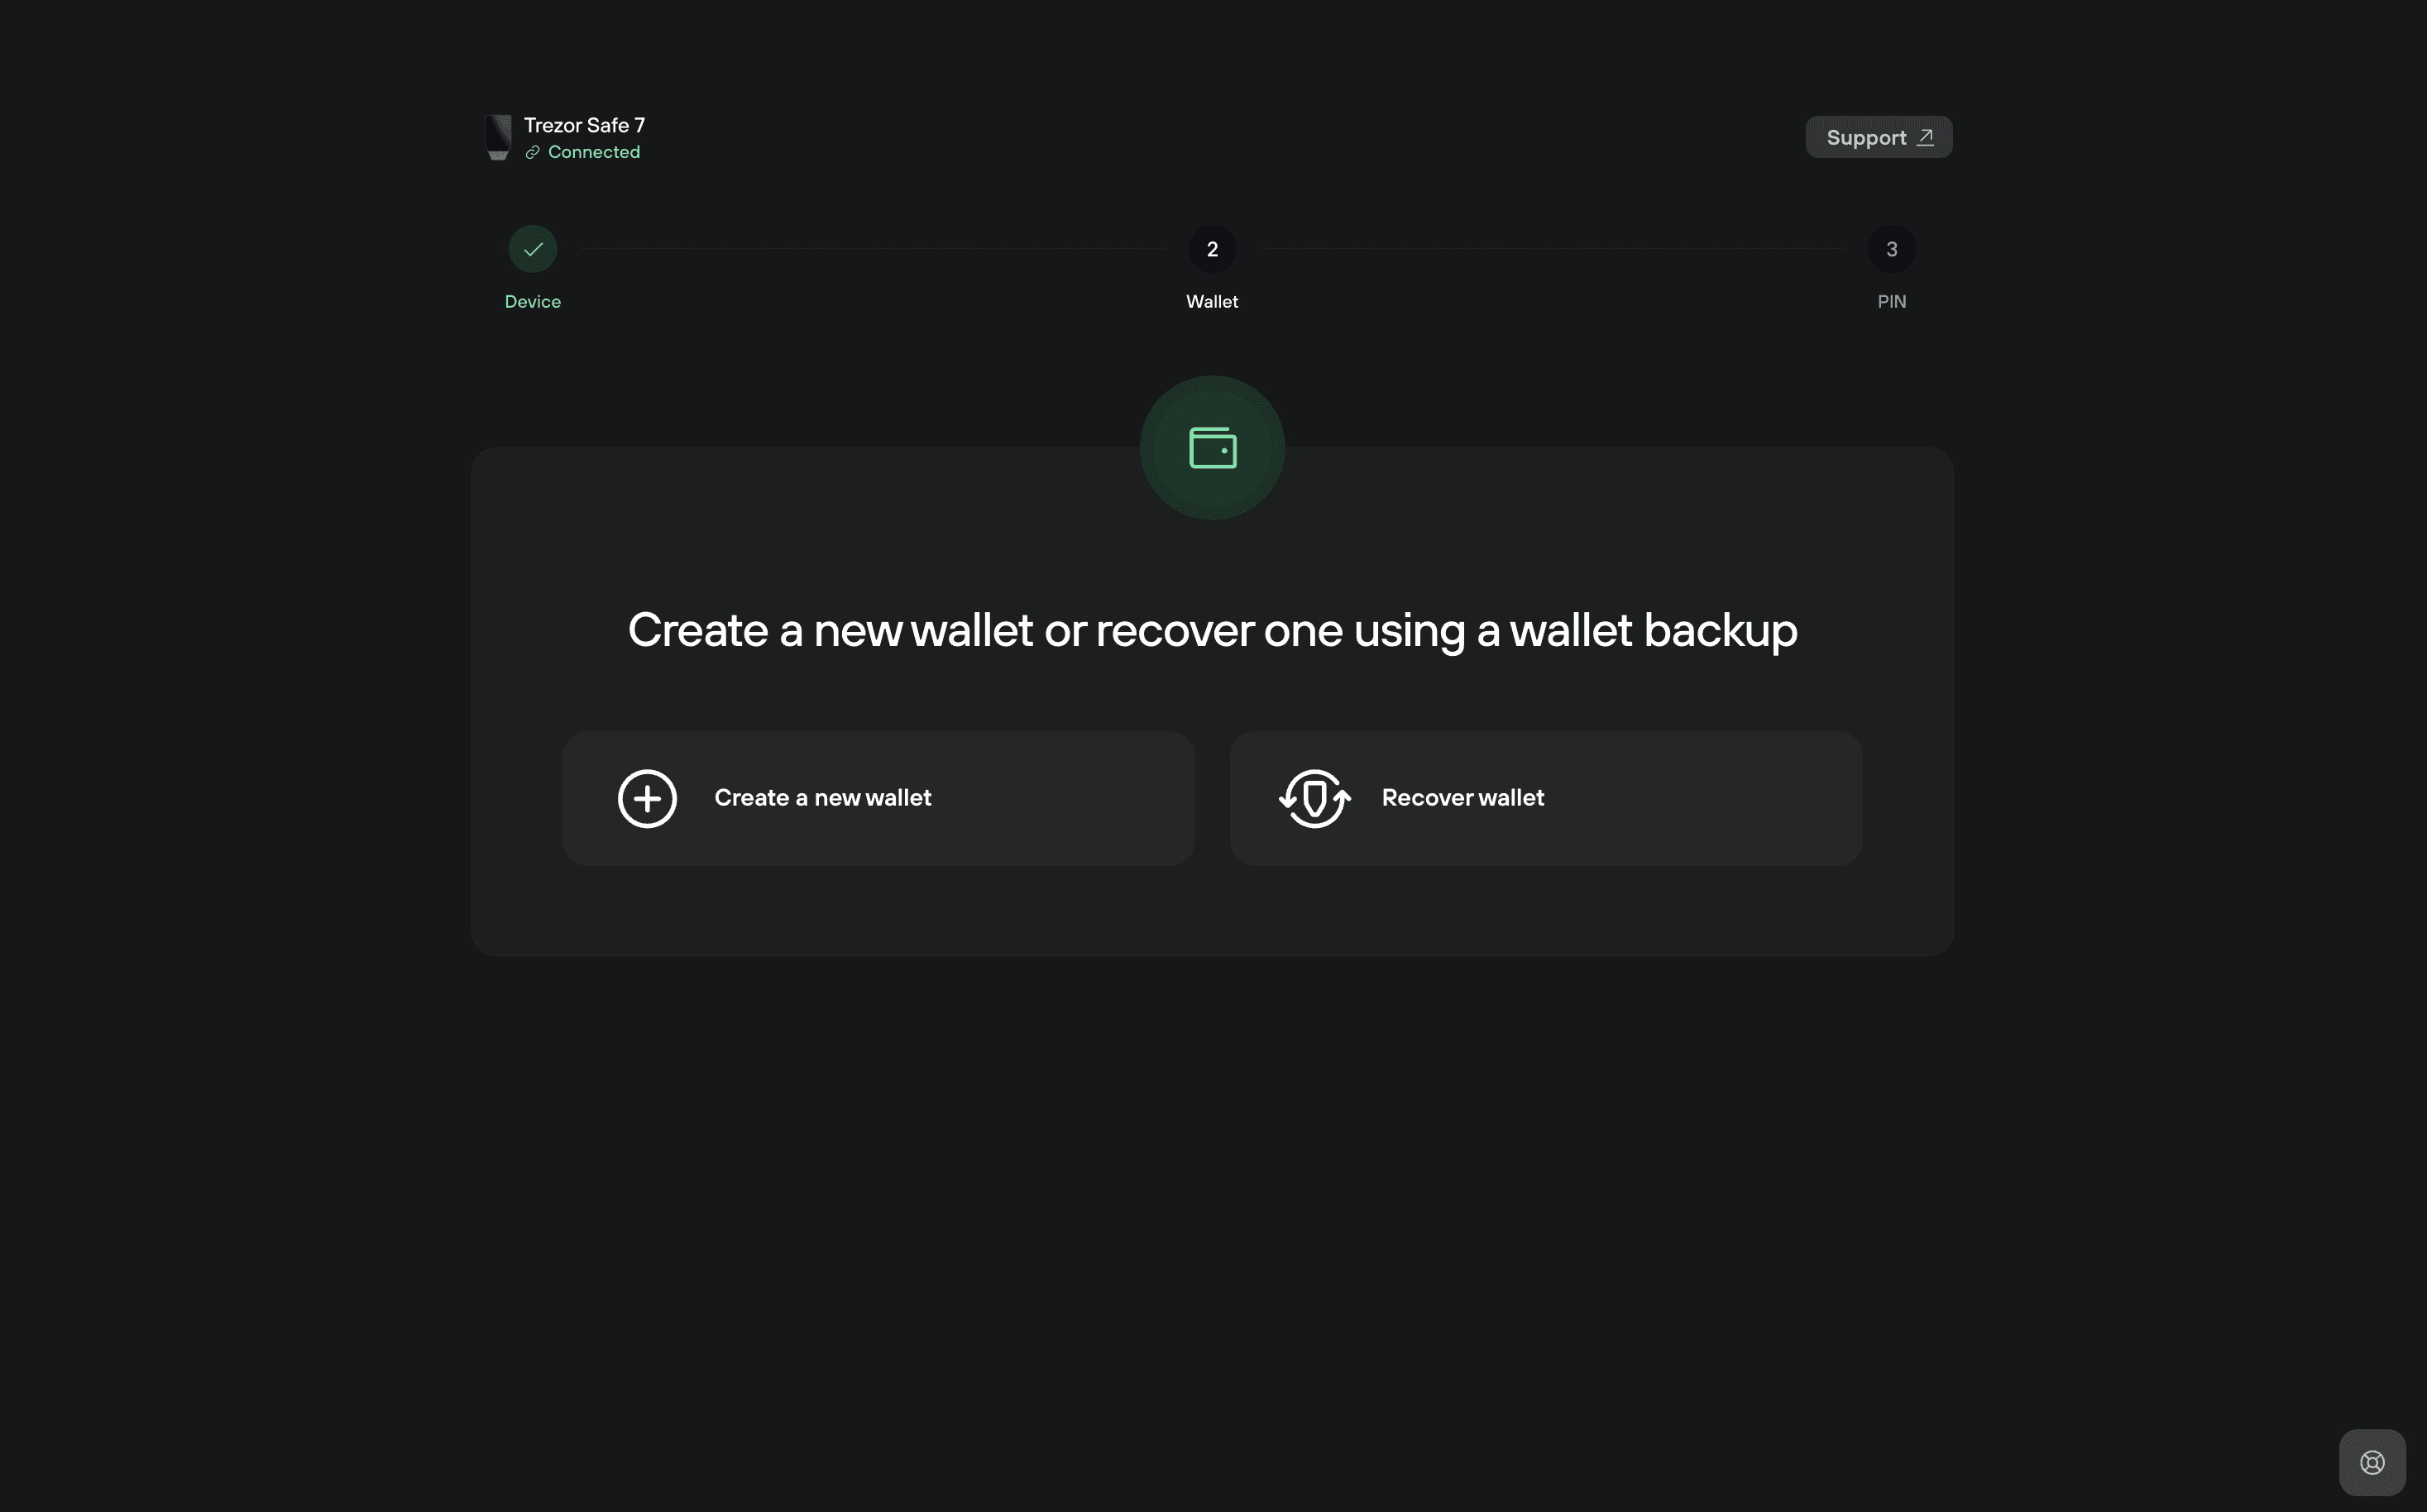
Click Create a new wallet if this is your first setup, or Recover if you’re restoring one from an existing backup.
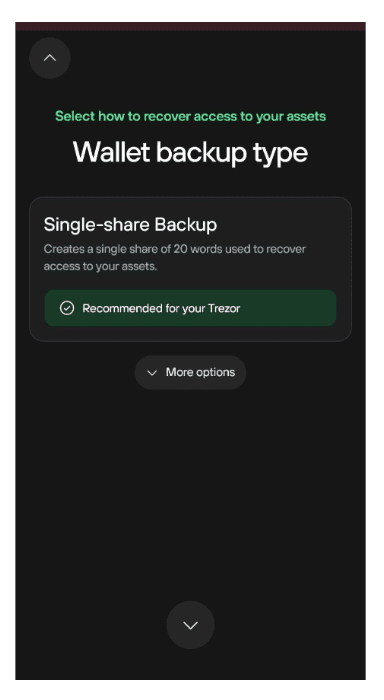
After selecting Create a new wallet, you’ll see a screen where you can choose your wallet backup type.
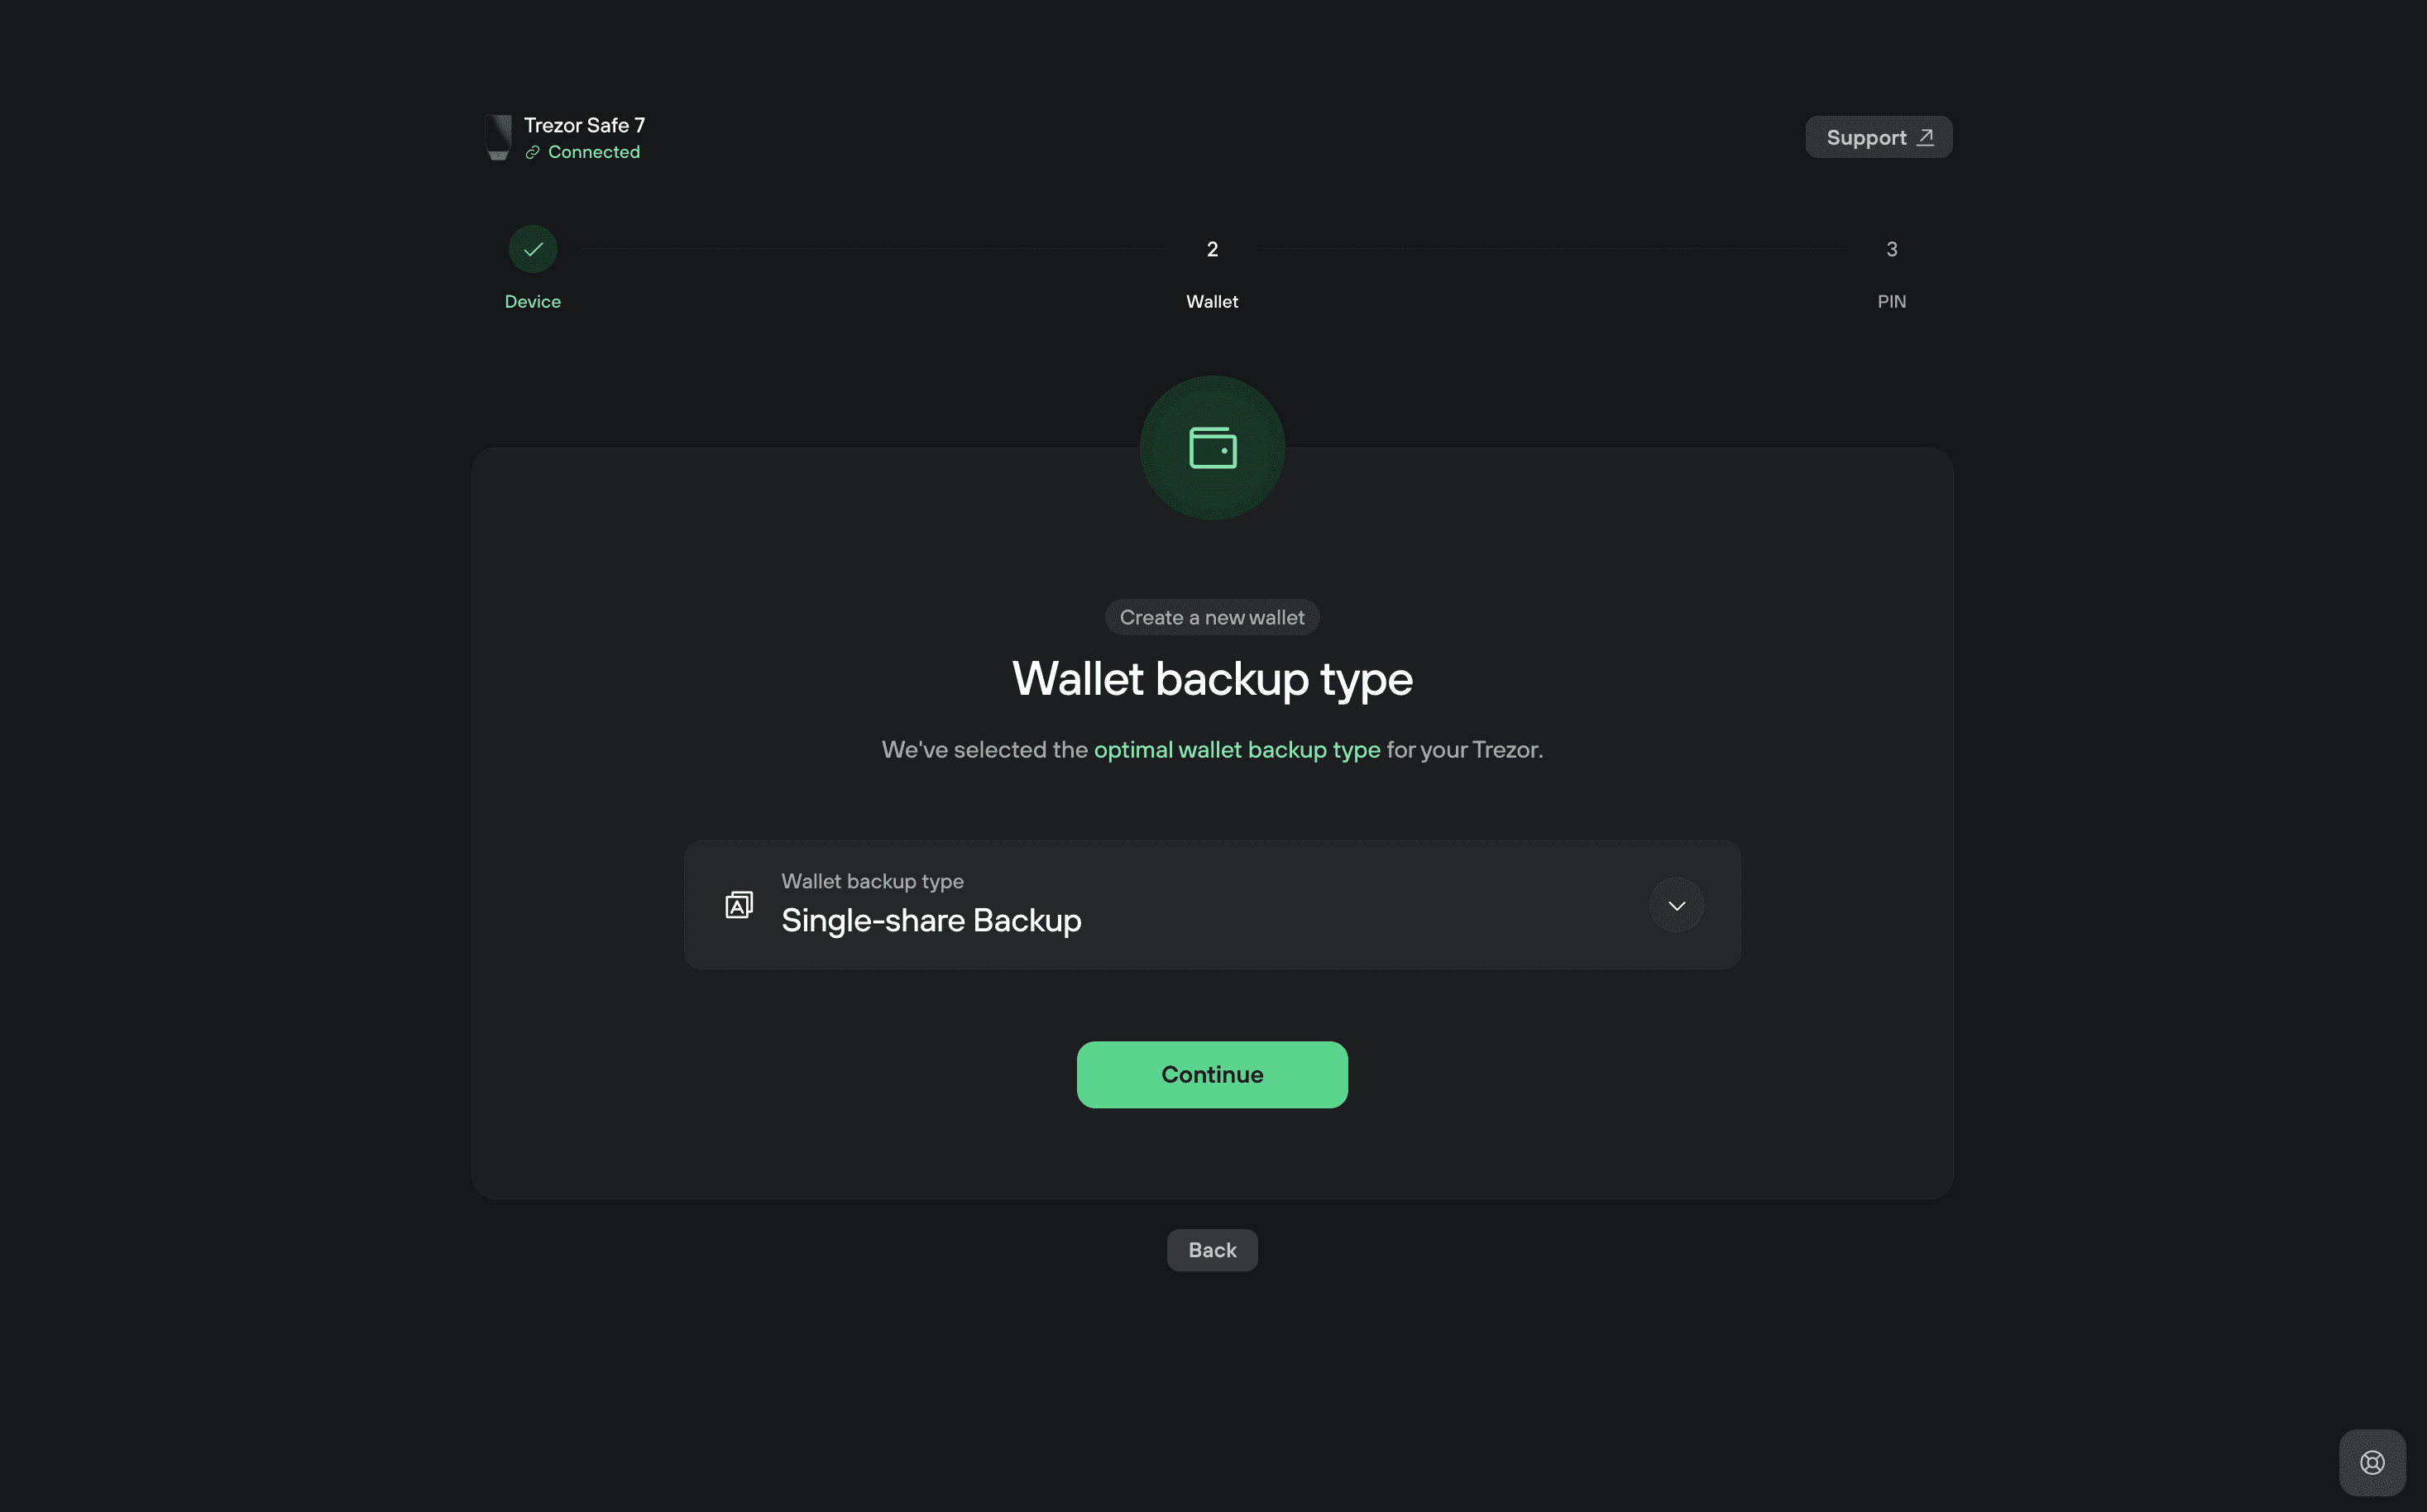
By default, Trezor Suite recommends the Single-share Backup, which uses 20 words.
For a detailed explanation of backup standards and number of words, see Understanding Trezor wallet backups
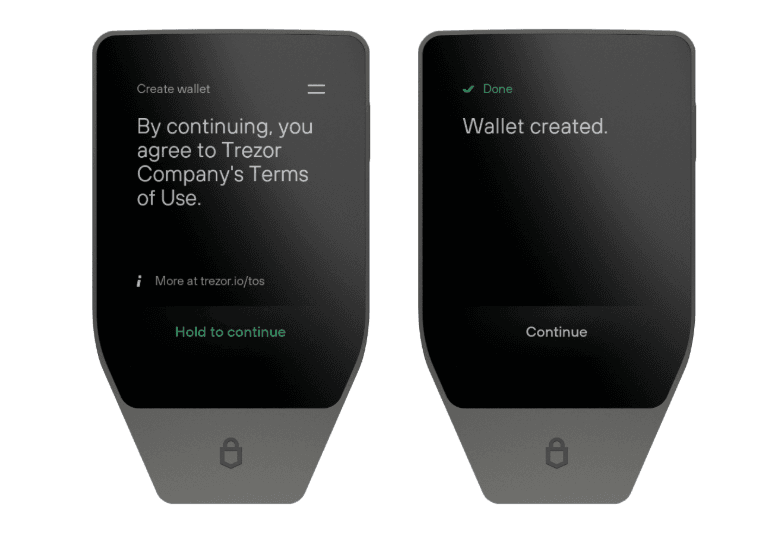
Click Create wallet. Your Trezor will ask you to agree to the Terms of Use. Press and hold to create your wallet.
Once your wallet is created, tap Continue.
Then on Trezor Suite, click Continue to wallet backup.
Trezor Suite will first show you backup instructions. Read them carefully and confirm you understand by checking the boxes.
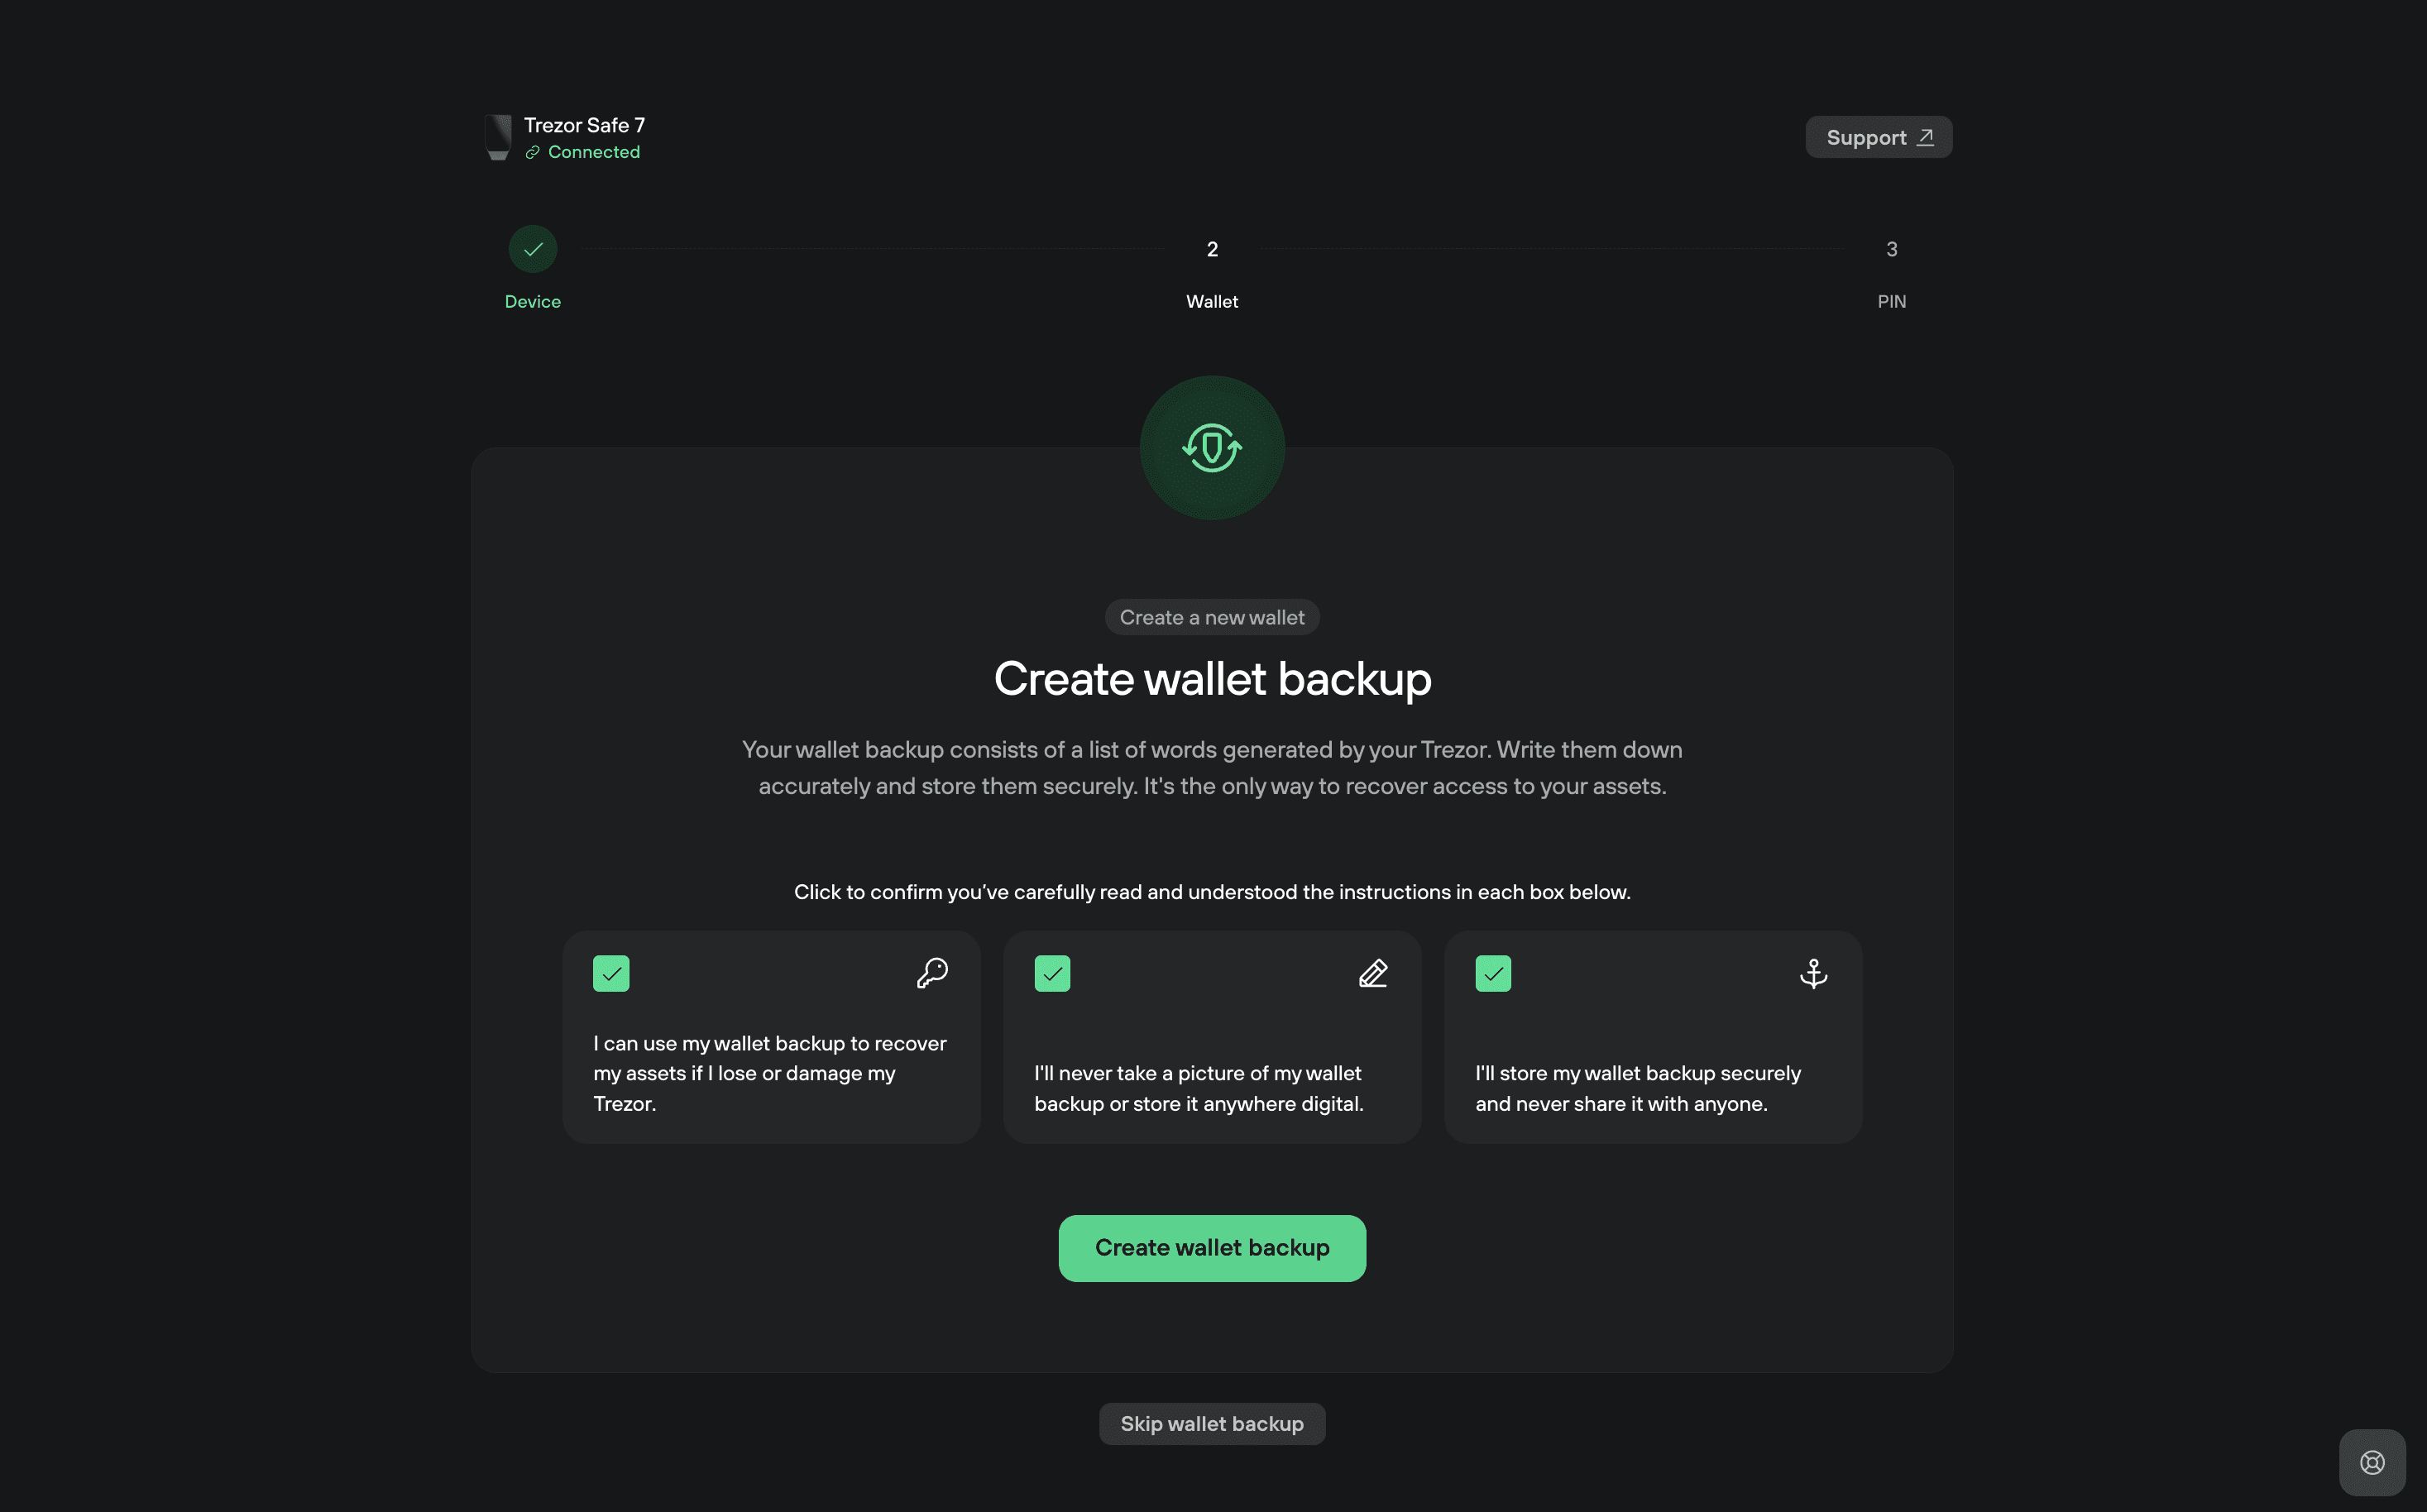
Once you have reviewed those messages, click Create wallet backup.
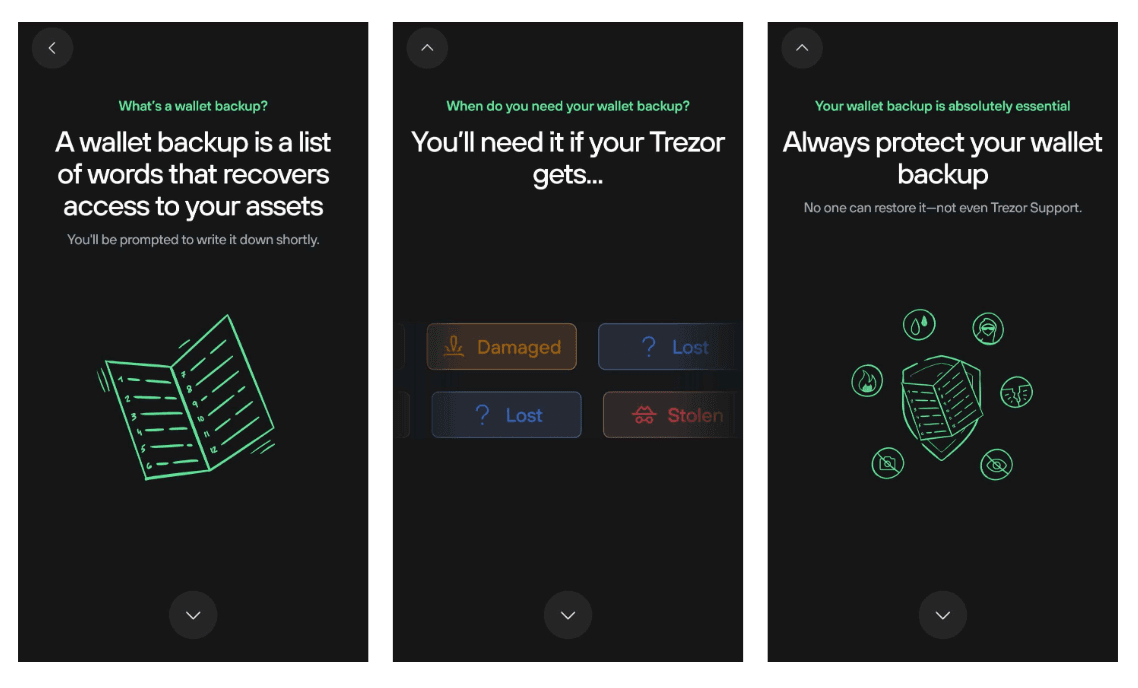
Your Trezor device will instruct you to write down the words and keep them private.
Write down your 20 words:
Your Trezor Safe 7 will display 20 words, one by one. These words form your wallet backup and are the key to restoring access to your wallet.
Your backup is the only way to recover your wallet. Write all 20 words in the exact order on one of the provided backup cards. If the words are lost or written incorrectly, your wallet cannot be recovered.
Navigate using the up and down arrows on the device. You can go backwards to review your words order and spelling. When you are finished, tap Continue.
Your Trezor will then ask you to select specific words from your backup to verify you've written them down correctly.
Never enter your backup anywhere other than directly on your Trezor device. Fake apps and websites may try to trick you into typing your words. If you do, your funds can be stolen. Keep your backup written on paper or metal and stored safely offline.
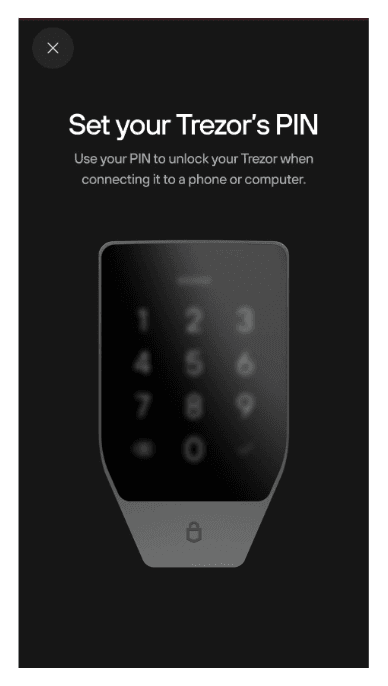
6. Set a PIN
After your wallet backup is created, Trezor Suite will ask you to set a PIN.
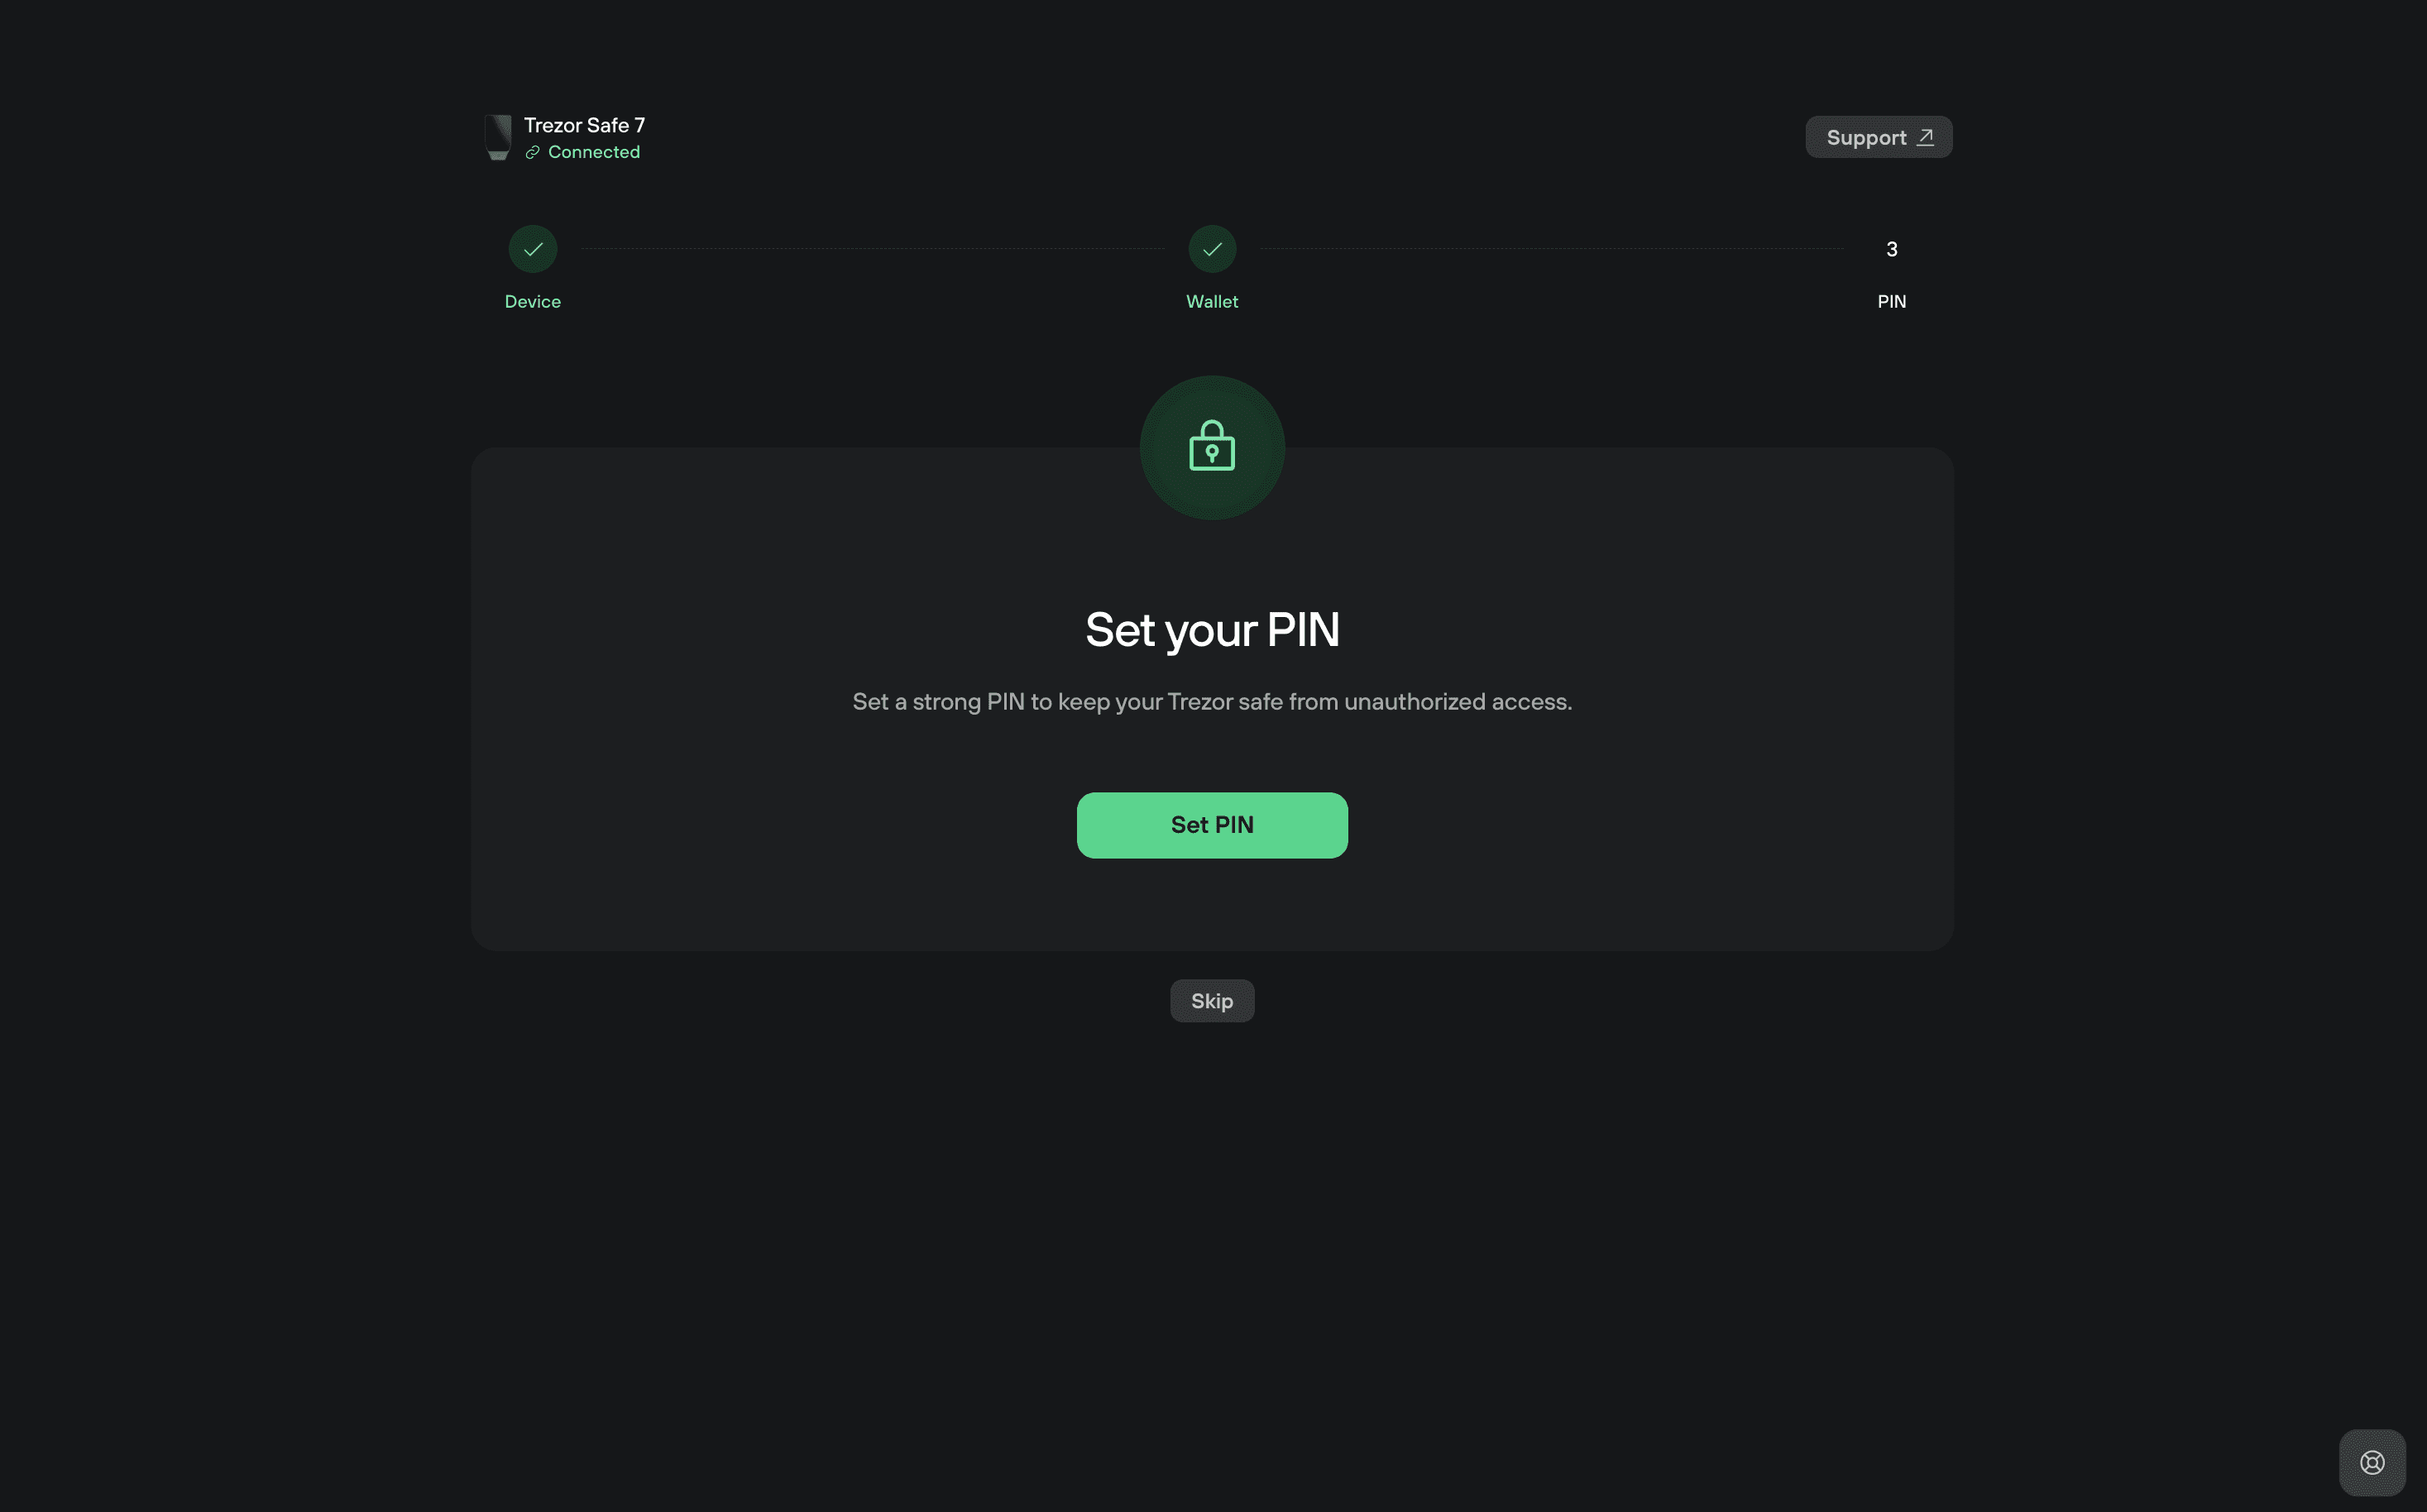
Your PIN protects your device from unauthorized access.
Click Set PIN and follow the on-screen instructions.
Your Trezor Safe 7 will prompt you to enter the PIN directly on the device’s touchscreen.
- Use a PIN of at least 4 digits. You can use up to 50 digits.
- Avoid simple sequences (for example, ‘12345’) and numbers that are personally meaningful (birthdays, etc.).
- You can change the PIN later in Settings → Device.
- The device allows 10 incorrect PIN attempts.
- After 10 incorrect PIN attempts, the wallet will be erased from the Trezor device. You can only restore your wallet with the wallet backup.
To learn more about creating and managing your PIN, see PIN protection on Trezor devices.
You can use the space provided on your wallet backup card if you want to write down your PIN. Always keep your wallet backup private and offline.
Curious about how PIN protection works technically? See How Trezor Safe 7's three hardware layers protect your wallet.
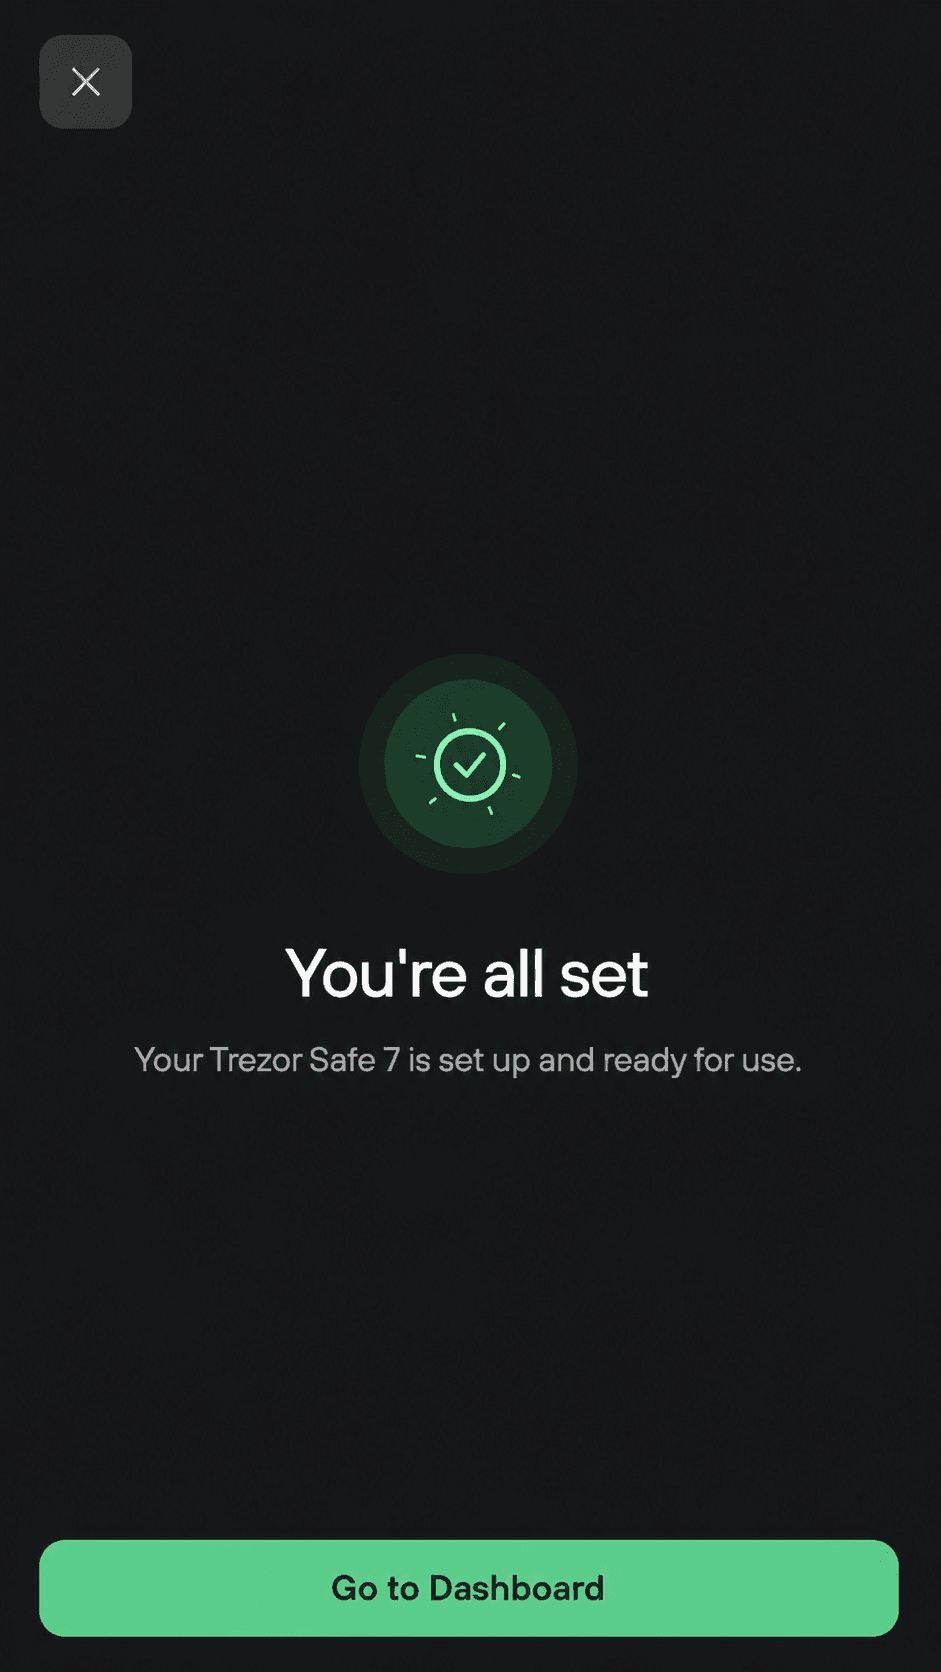
7. Setup complete
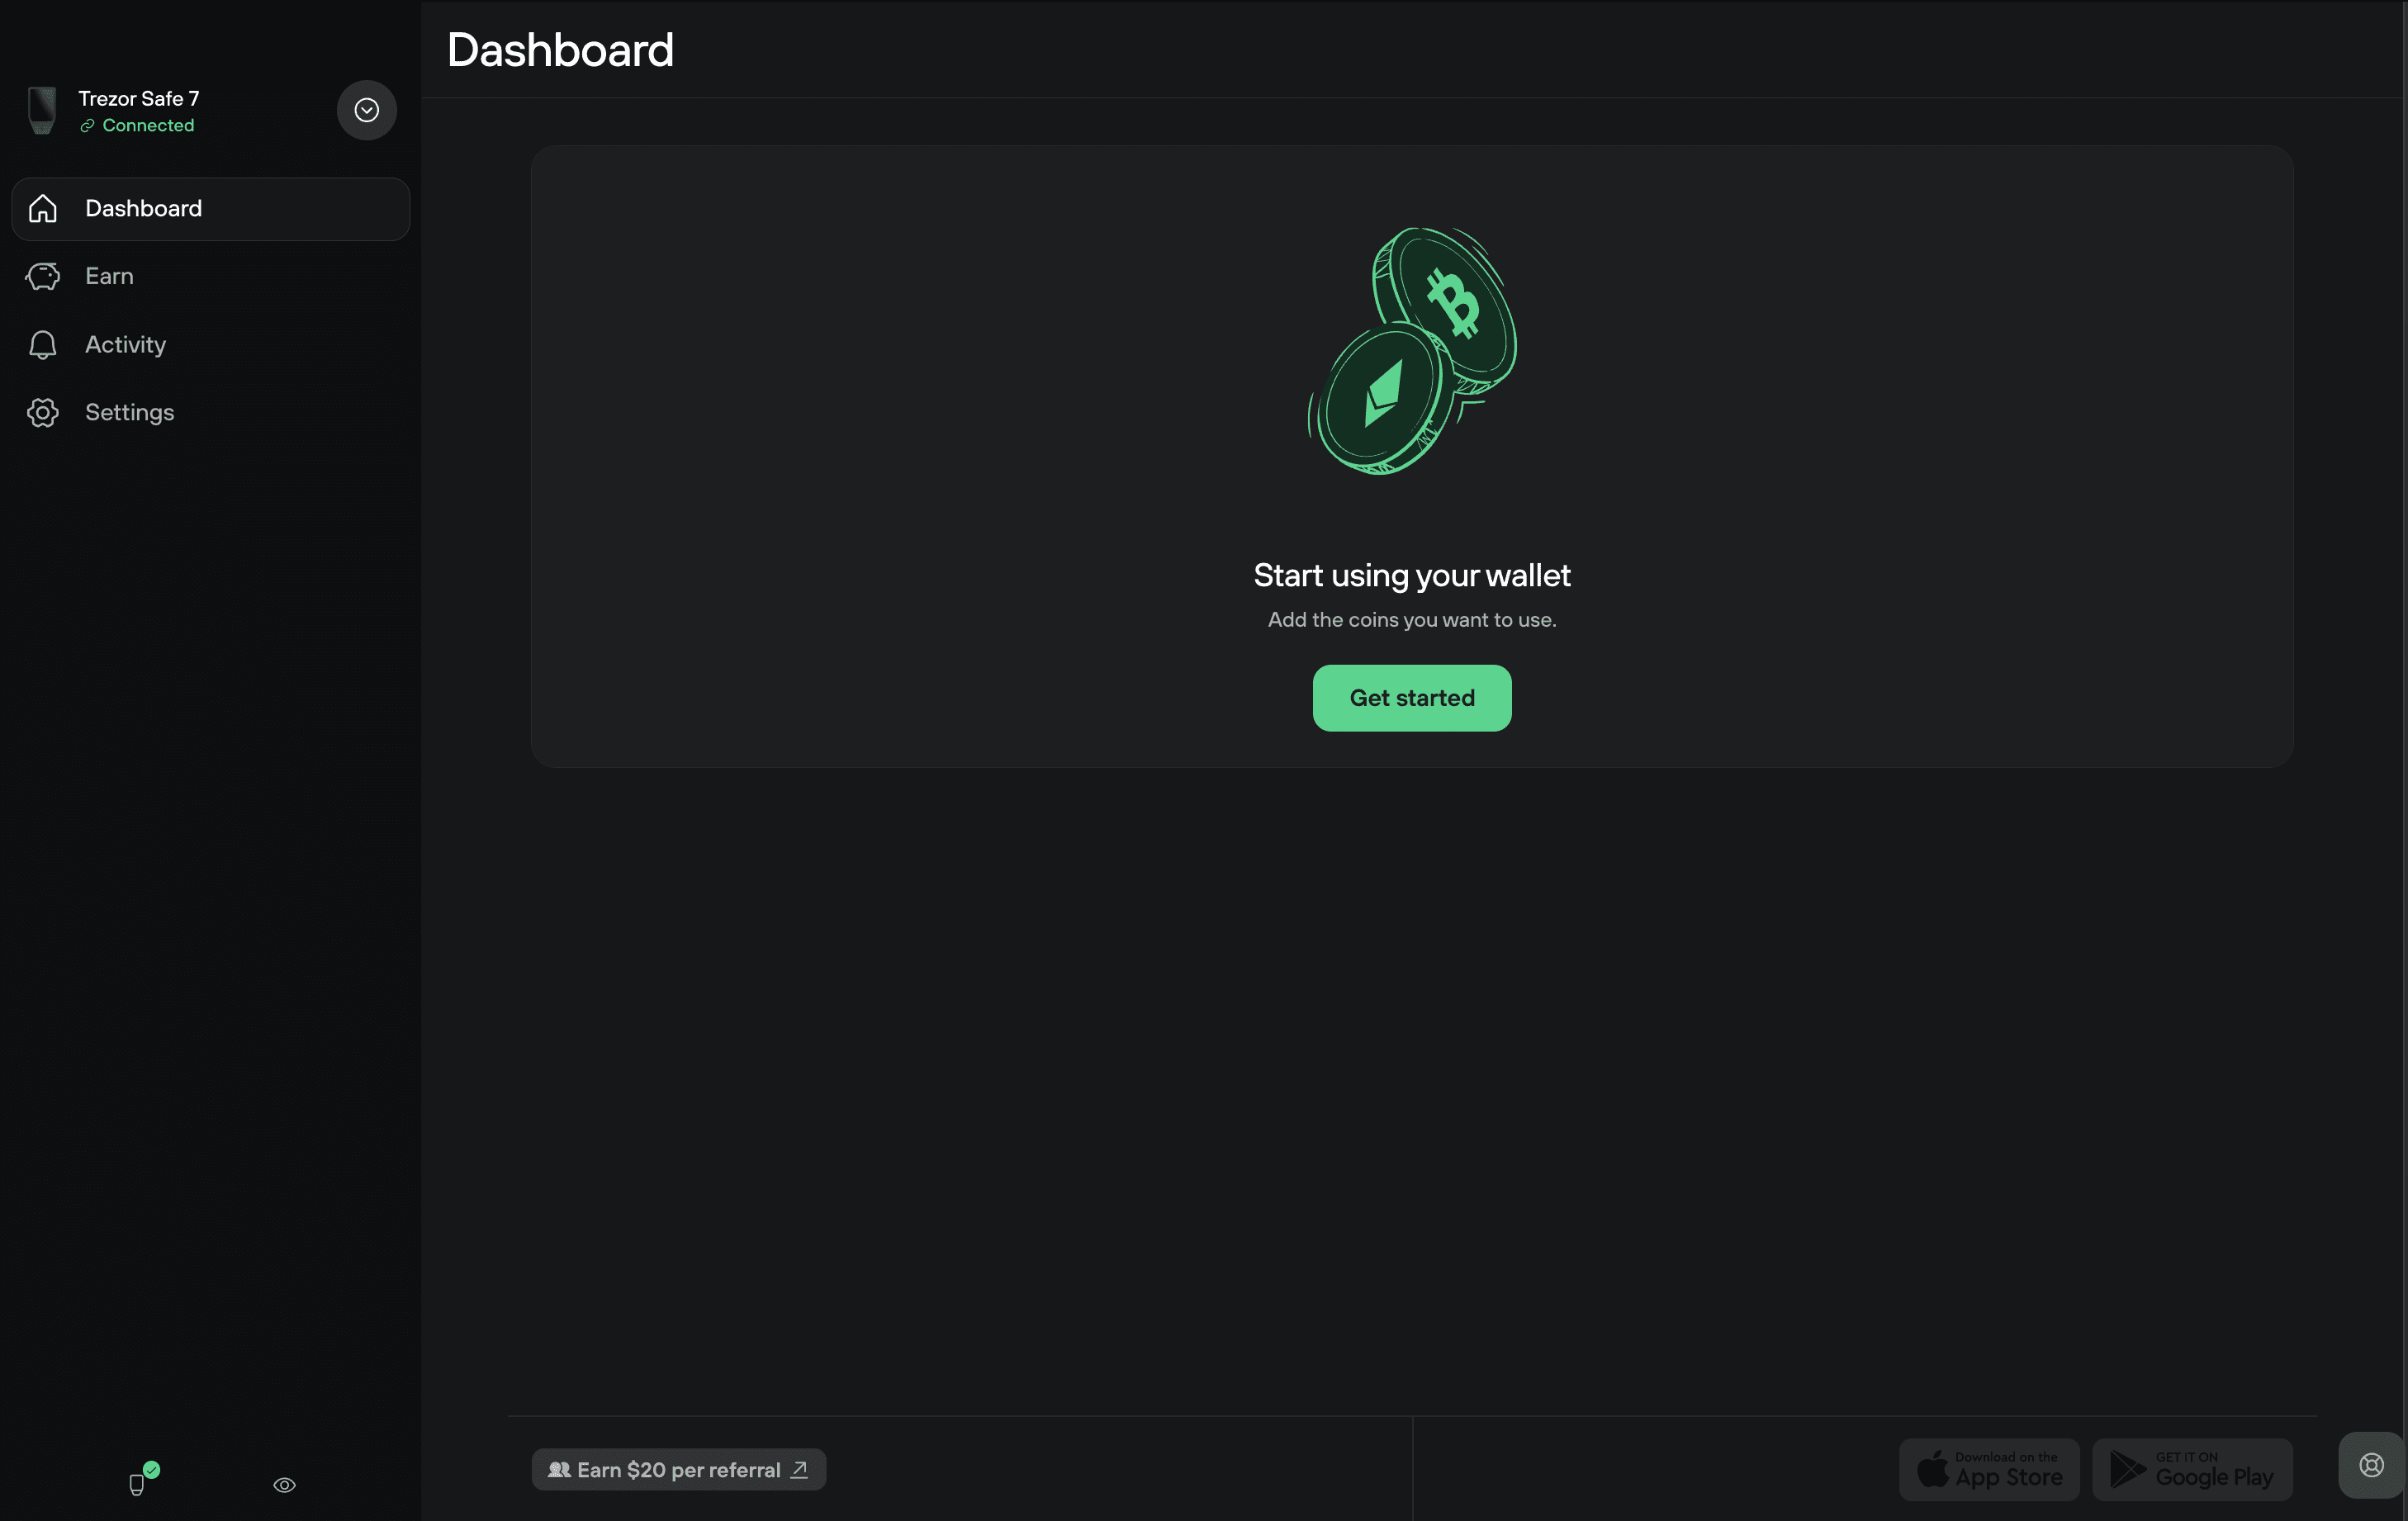
You’ve successfully set up your Trezor Safe 7.
You’re now ready to send, receive, and manage your crypto securely. Activate the assets you want to trade by clicking on Get started on the Trezor Suite Dashboard:


Next steps after setup
- Verify your wallet backup using the recovery check feature in Trezor Suite. This lets you enter your backup words on the device to verify that they are correct. This ensures you recorded your backup accurately. For detailed steps, visit Check backup on Trezor Safe 7.
- Receive crypto into your wallet
- Buy crypto directly in Trezor Suite