Authenticate Trezor Safe 3
Use this guide to confirm your Trezor Safe 3 is genuine and safe to set up.
Before continuing, make sure your Trezor’s packaging and holographic seal looked intact when unboxed. If something seems off, reach out to Trezor support for guidance.
Unboxing your Trezor Safe 3
Your Trezor's box may be wrapped in either a clear or watermarked plastic foil.

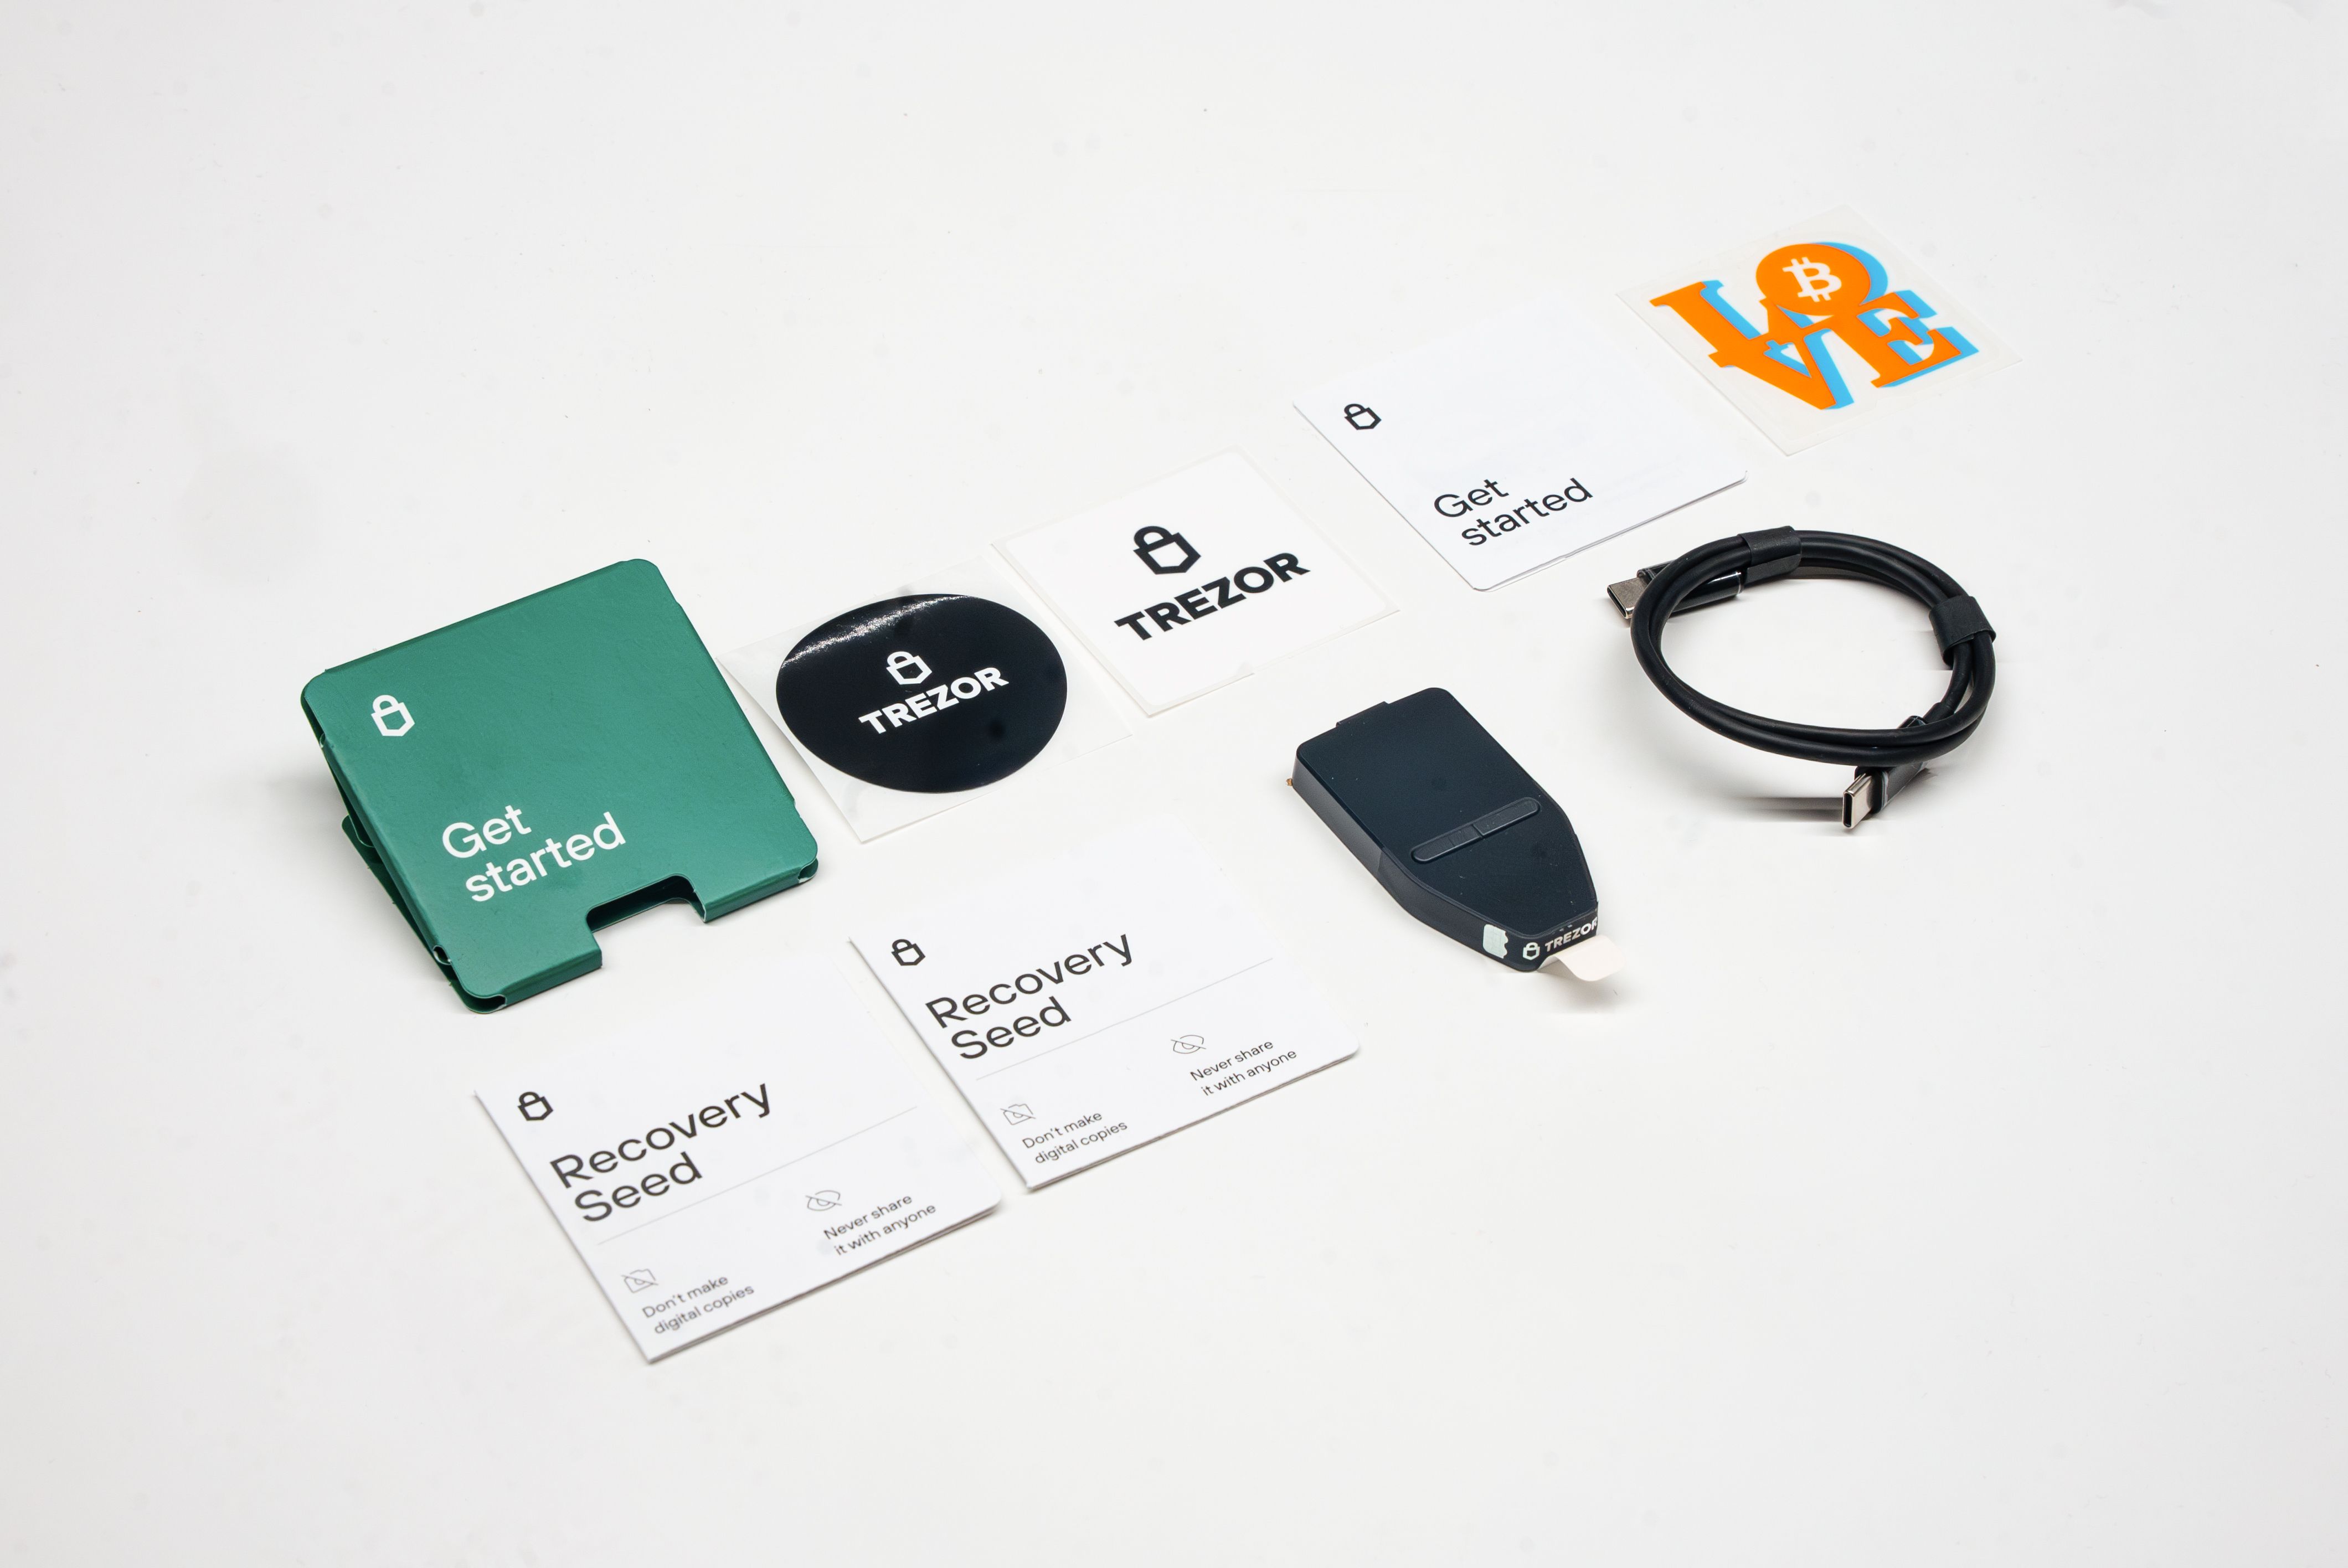
When you open the box, you should see all these items neatly packed. A complete package includes:
- Trezor Safe 3 device with tamper-evident holographic seal over the USB-C port and black wrap-around sticker covering the front and back of the device (remove before setup).
-
- “Get started” pack containing: two wallet backup cards, a “Get started” guide, a device safety leaflet, and stickers (quantity of stickers may vary)
- USB-C to USB-C cable
The Trezor Safe 3 comes in two versions. The 2023 version includes 12-word cards labeled "recovery seed." The 2024 version includes 20-word cards labeled "wallet backup." The device itself is the same. You can use a 12, 20, or 24-word backup regardless of which cards came in your box.
Learn more: Understanding Trezor wallet backups: 12, 20 or 24 words.
Checking the holographic seal
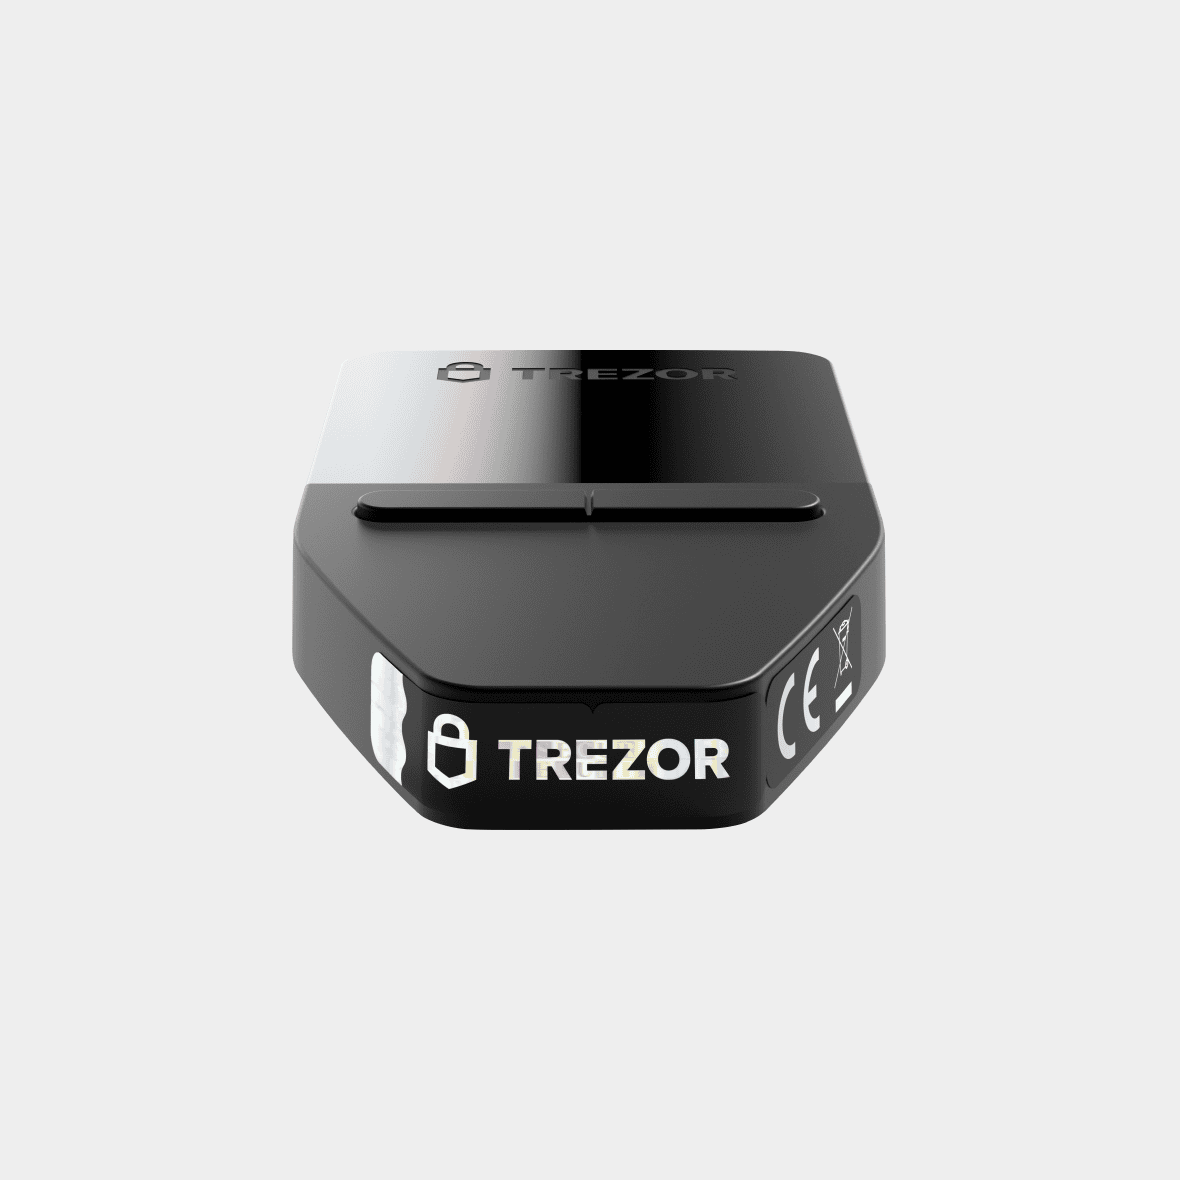
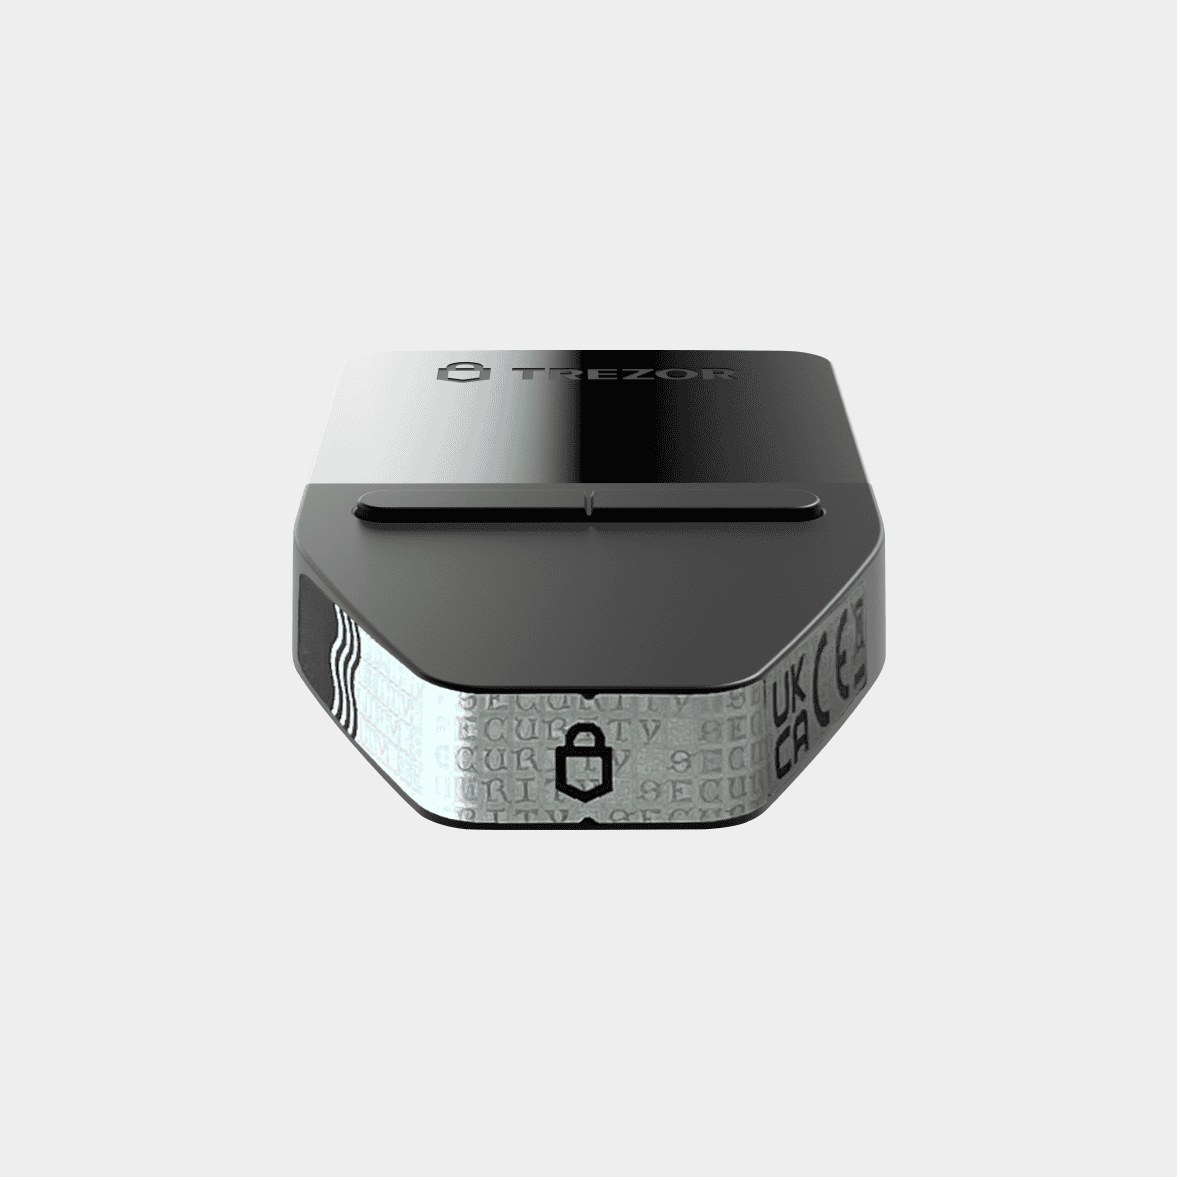
Your Trezor Safe 3 comes with a holographic seal over the USB-C connector. The seal should be clean, firmly attached, and free from tears or residue. If the seal was damaged or missing when you received the device, pause setup and contact Trezor support for guidance.
When you peel off the seal, it will leave a "VOID" residue on the device. This is normal and expected. The residue is part of the tamper-evident design.
The seal design depends on when your device was manufactured:
Original holographic seal design
Updated holographic seal design (from April 2024)
A new seal was introduced for devices produced from April 2024 onward. The updated design includes the UK CA regulatory mark and improved adhesion.
Both seal designs are genuine. The important thing is that the seal is intact and undamaged.
Wallet backup cards
Your package includes two blank wallet backup cards (also known as recovery seed cards on 2023 models). These cards should be completely empty. You fill them in yourself during setup when your Trezor generates a new wallet. If your wallet backup cards have words already written or printed on them, do not use the device and contact Trezor support.
Read more: Understanding wallet backups.
Firmware installation during setup
Every Trezor Safe 3 leaves the factory without firmware installed. During setup, Trezor Suite guides you to install the latest signed firmware.
Secure Element authentication
Trezor Safe 3 uses a Secure Element (OPTIGA Trust M) to verify that your device is genuine and unmodified.
When you first connect your Trezor, both chips take part in a hardware-level authenticity check. This verification confirms your device is genuine and unmodified.
Learn more in Trezor Safe device authentication check.
Firmware signature verification
Each time you connect your Trezor, the bootloader checks the firmware signature. Trezor Suite will only work with firmware officially signed by SatoshiLabs. If the signature is invalid, your device and Suite will warn you. Learn more: Firmware revision check.
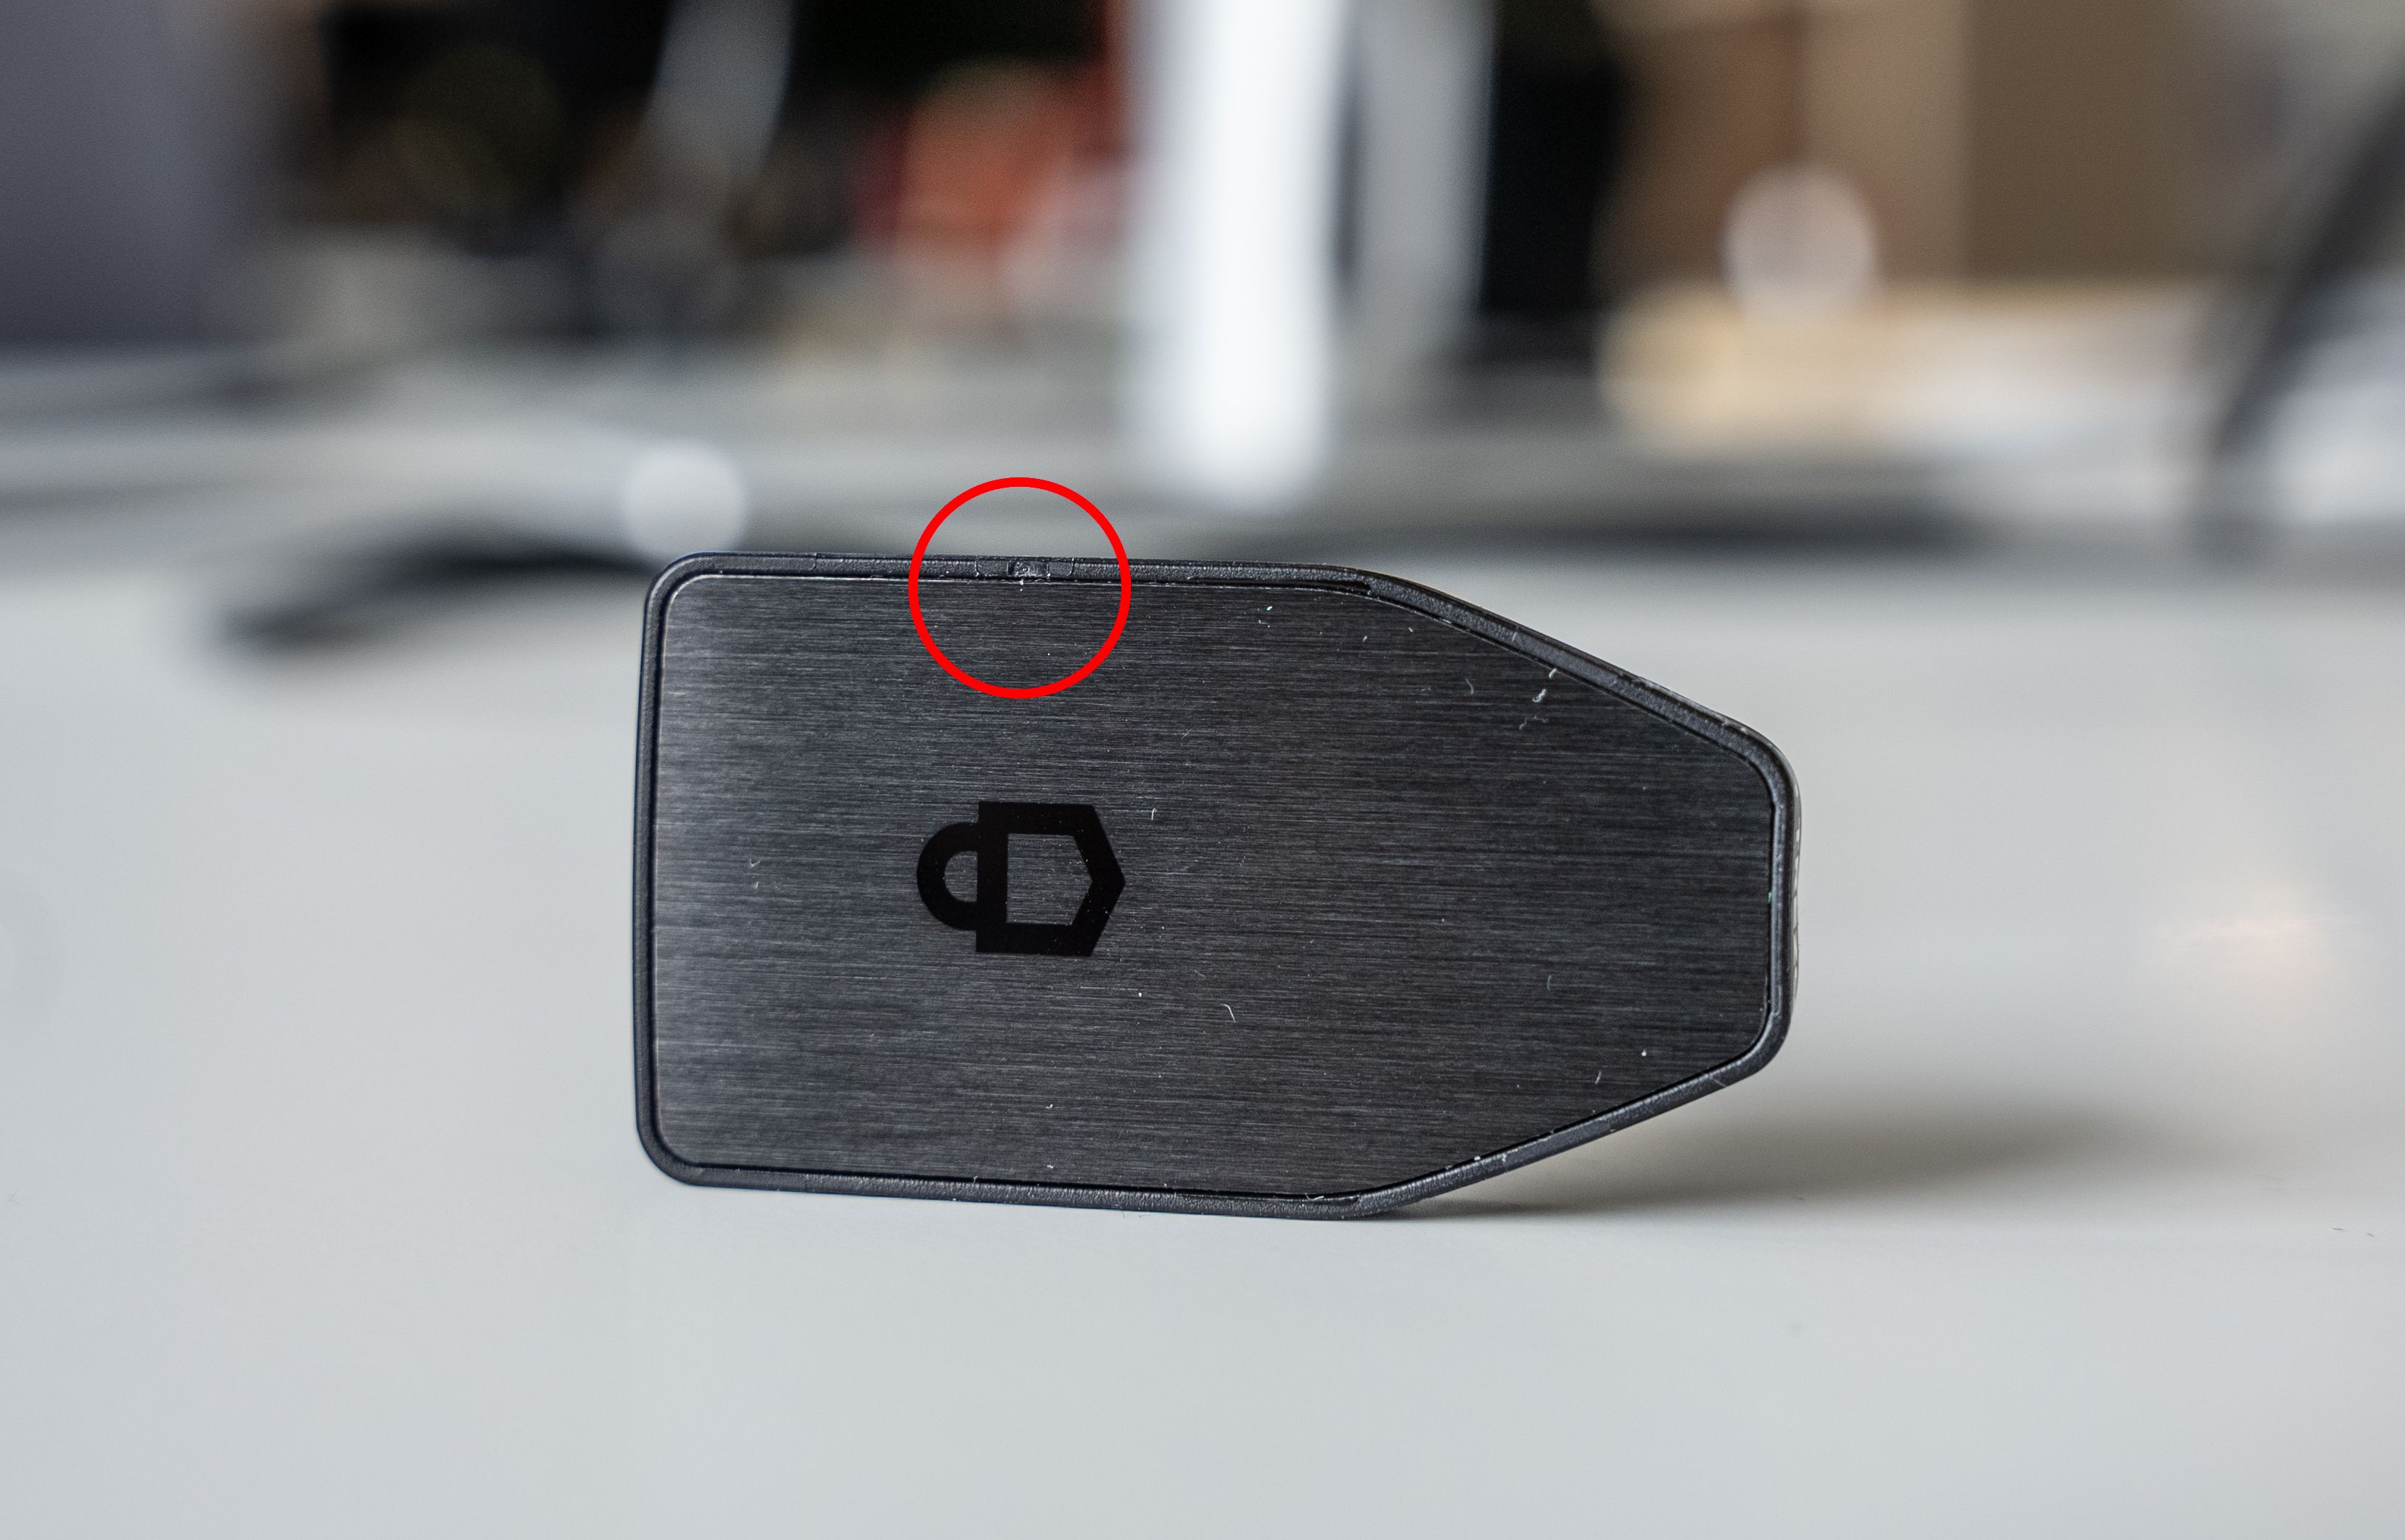
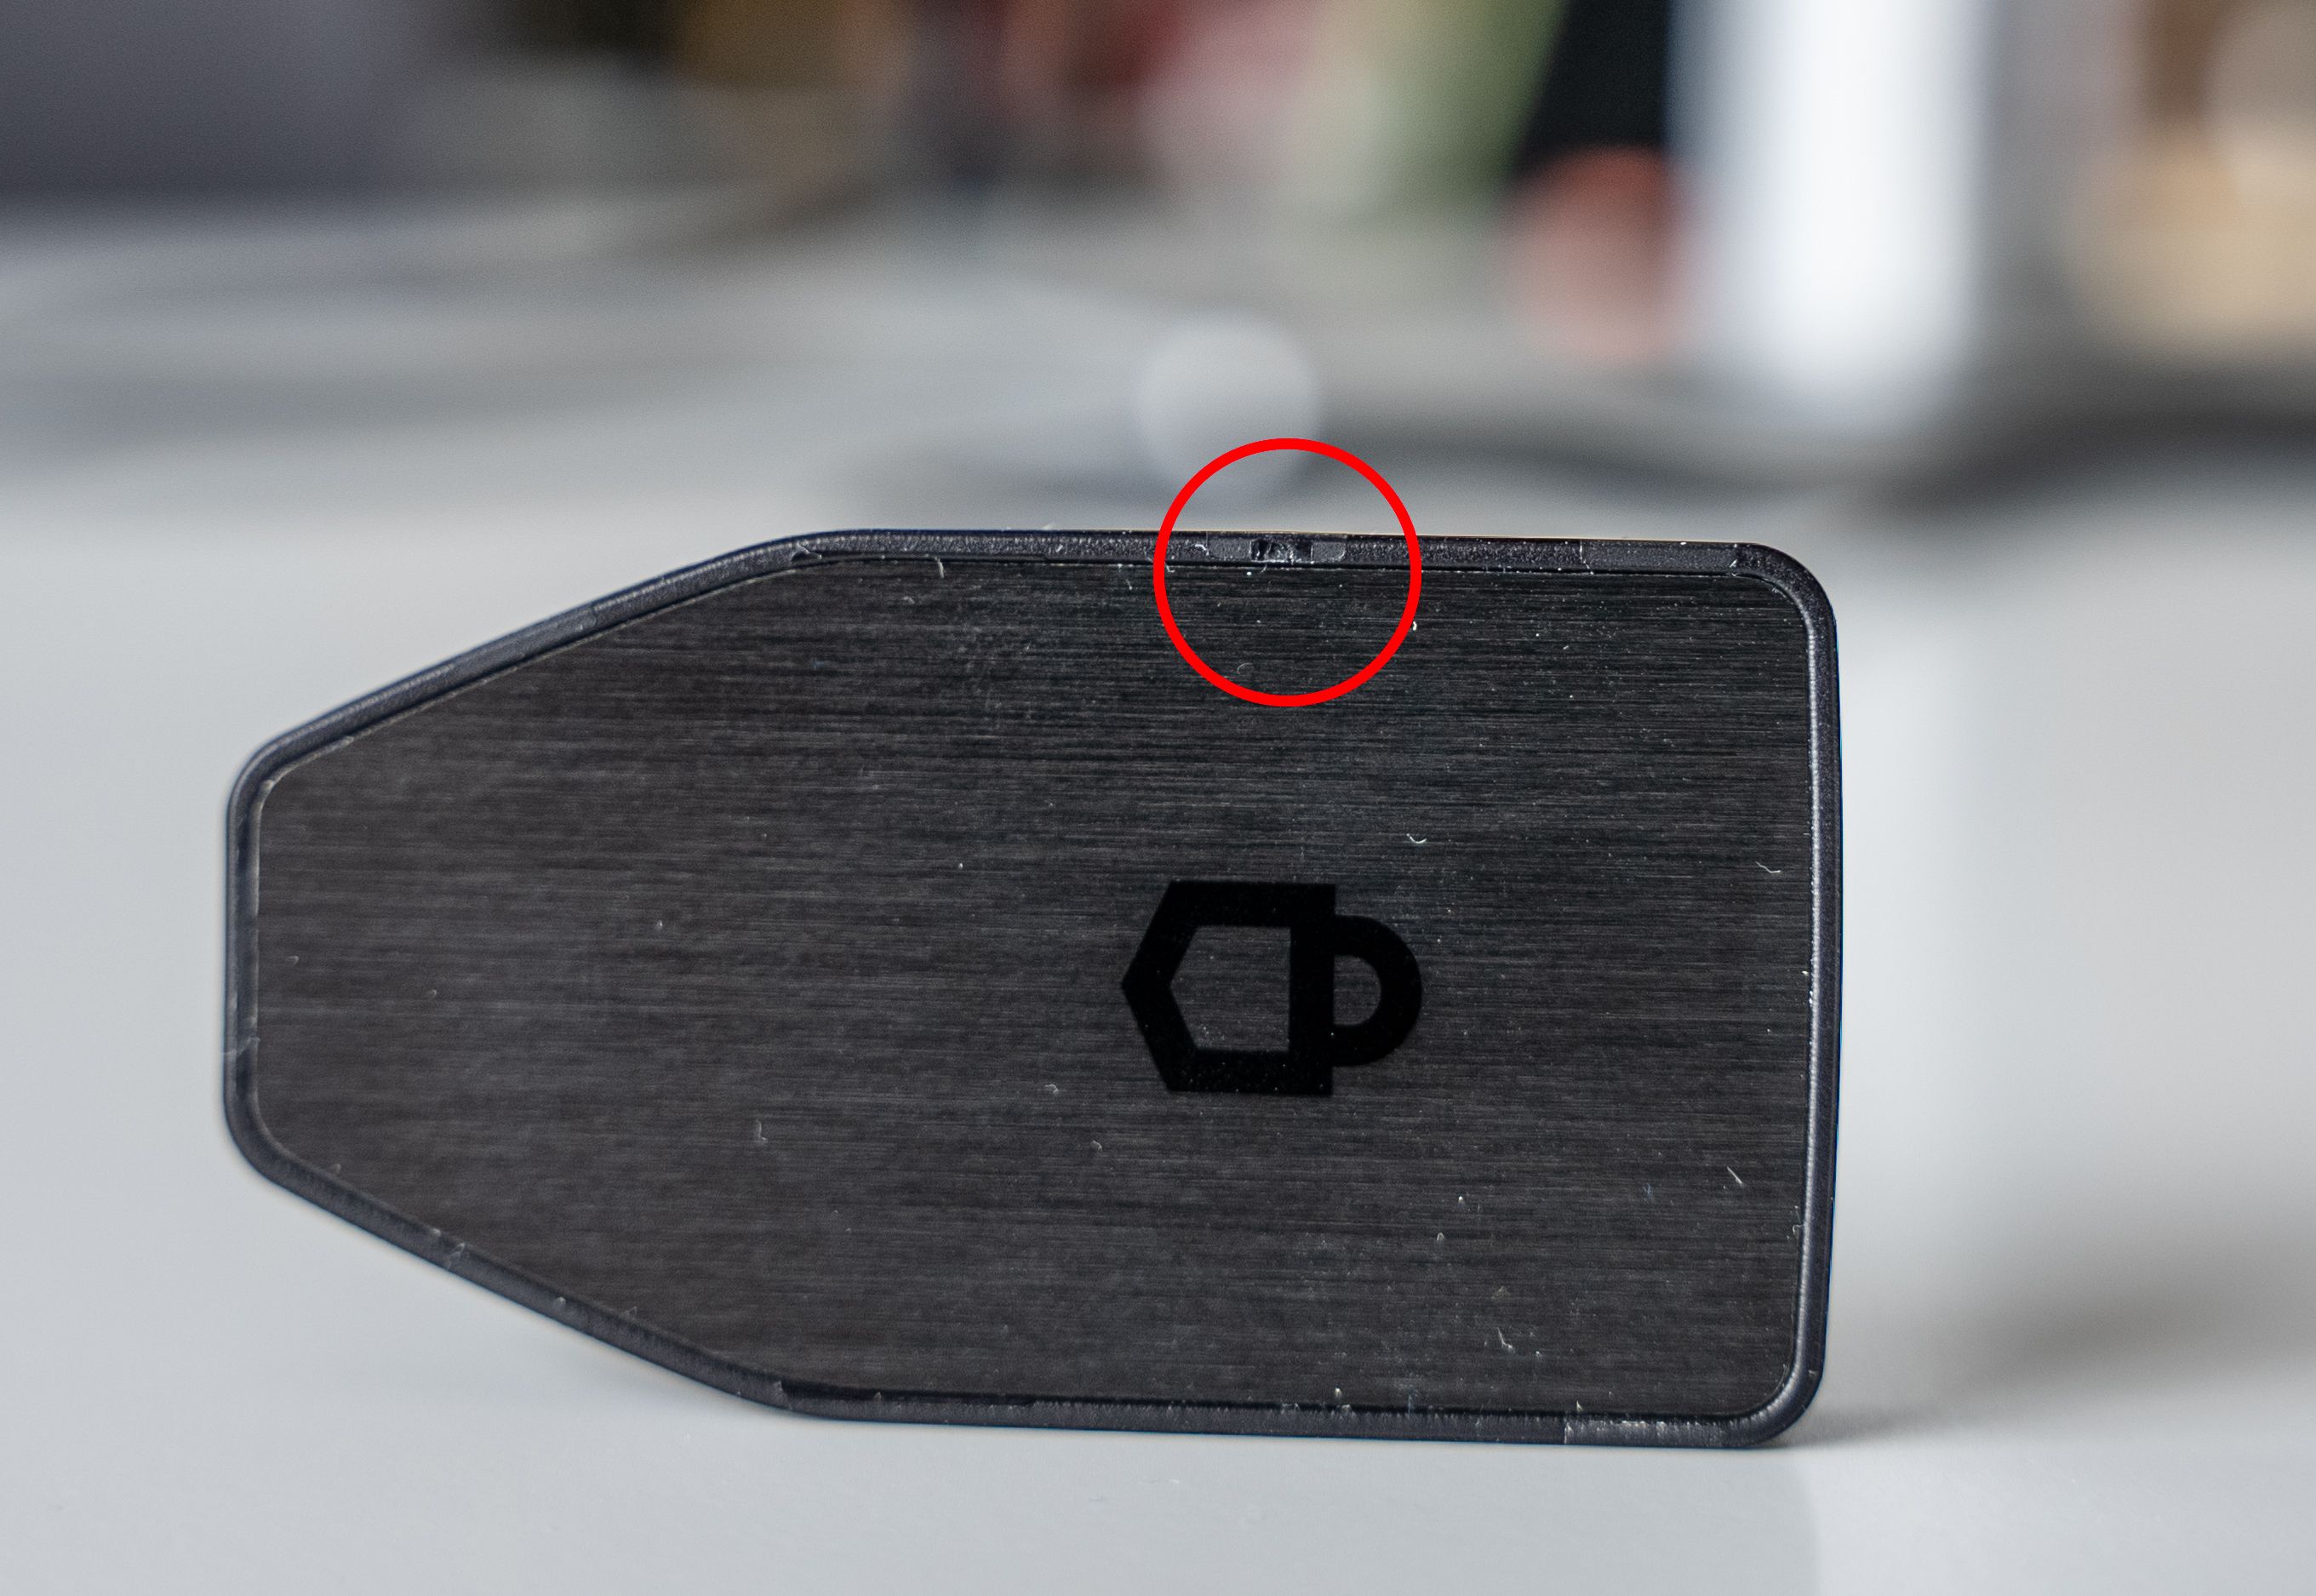
Physical appearance
Your Trezor Safe 3 may have a slightly rough edge due to the manufacturing process. This is a plastic injection molding point and is not a sign of tampering.
Video: Is Your Trezor Hardware Wallet Real? How Trezor Fights Counterfeits
What’s next
Once you’ve confirmed your Trezor Safe 3 is genuine, you’re ready to set it up. Follow our guide: Get started with Trezor Safe 3