Receive crypto in Trezor Suite
Receiving crypto in Trezor Suite works the same way for almost every asset: pick the account you want to receive into, copy the address, paste it to whoever is paying you, then check it against your Trezor.
This guide covers the general flow on desktop and mobile, plus the checks that make sure the funds land where they should.
Before you receive
A few things apply no matter which asset you're receiving or which device you're on.
Choose the right account and network
Each account in Trezor Suite corresponds to one network, and its address works only for that network. To receive an asset, pick the account on the network the sender will use.
Tokens don't get their own address. They use the address of the account they live in. To receive USDT on Ethereum, you share your Ethereum account's address, the same address that receives ETH. So when someone asks where to send a token, give them the address of the account for that token's network.
Get the network right, because it can't be undone. If an asset is sent to an address on a network that doesn't support it, the funds can be lost. When you withdraw from an exchange, set the exchange to send on the same network as the account you're receiving into.
To learn more, please visit How to choose the correct blockchain network when withdrawing from or sending to Trezor.
How your address works
Bitcoin and other UTXO coins give you a new address each time you receive. Reusing an old one still works, but a new address per payment makes your funds harder to link together. See Use a new address for each transaction.
Ethereum and other account-based networks use one address that you reuse for every payment, including tokens.
Your Trezor doesn't need to be connected to receive. An address keeps receiving whether the device is connected or not.
Checking your address
Sharing your receive address is safe. It's public by design, and anyone can send to it.
What you can't fully trust is your computer or phone. Malware there can swap the address before you copy it or after, so the sender pays an attacker instead of you. Your Trezor shows the same address independently, on its own screen, so comparing the two catches this.
Copy your address and paste it into the exchange, wallet, or platform you'll receive from. Then check the address you pasted there against the one your Trezor displays. If they match, it's safe to use.
Learn more about why the device screen can be trusted in What is a Trusted Display?
Receive on desktop
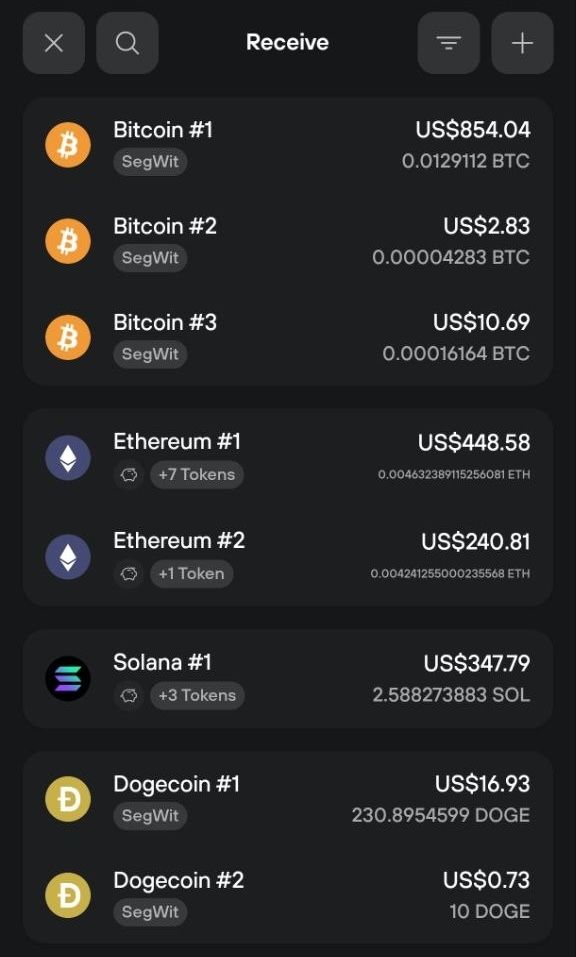
Open the Receive form
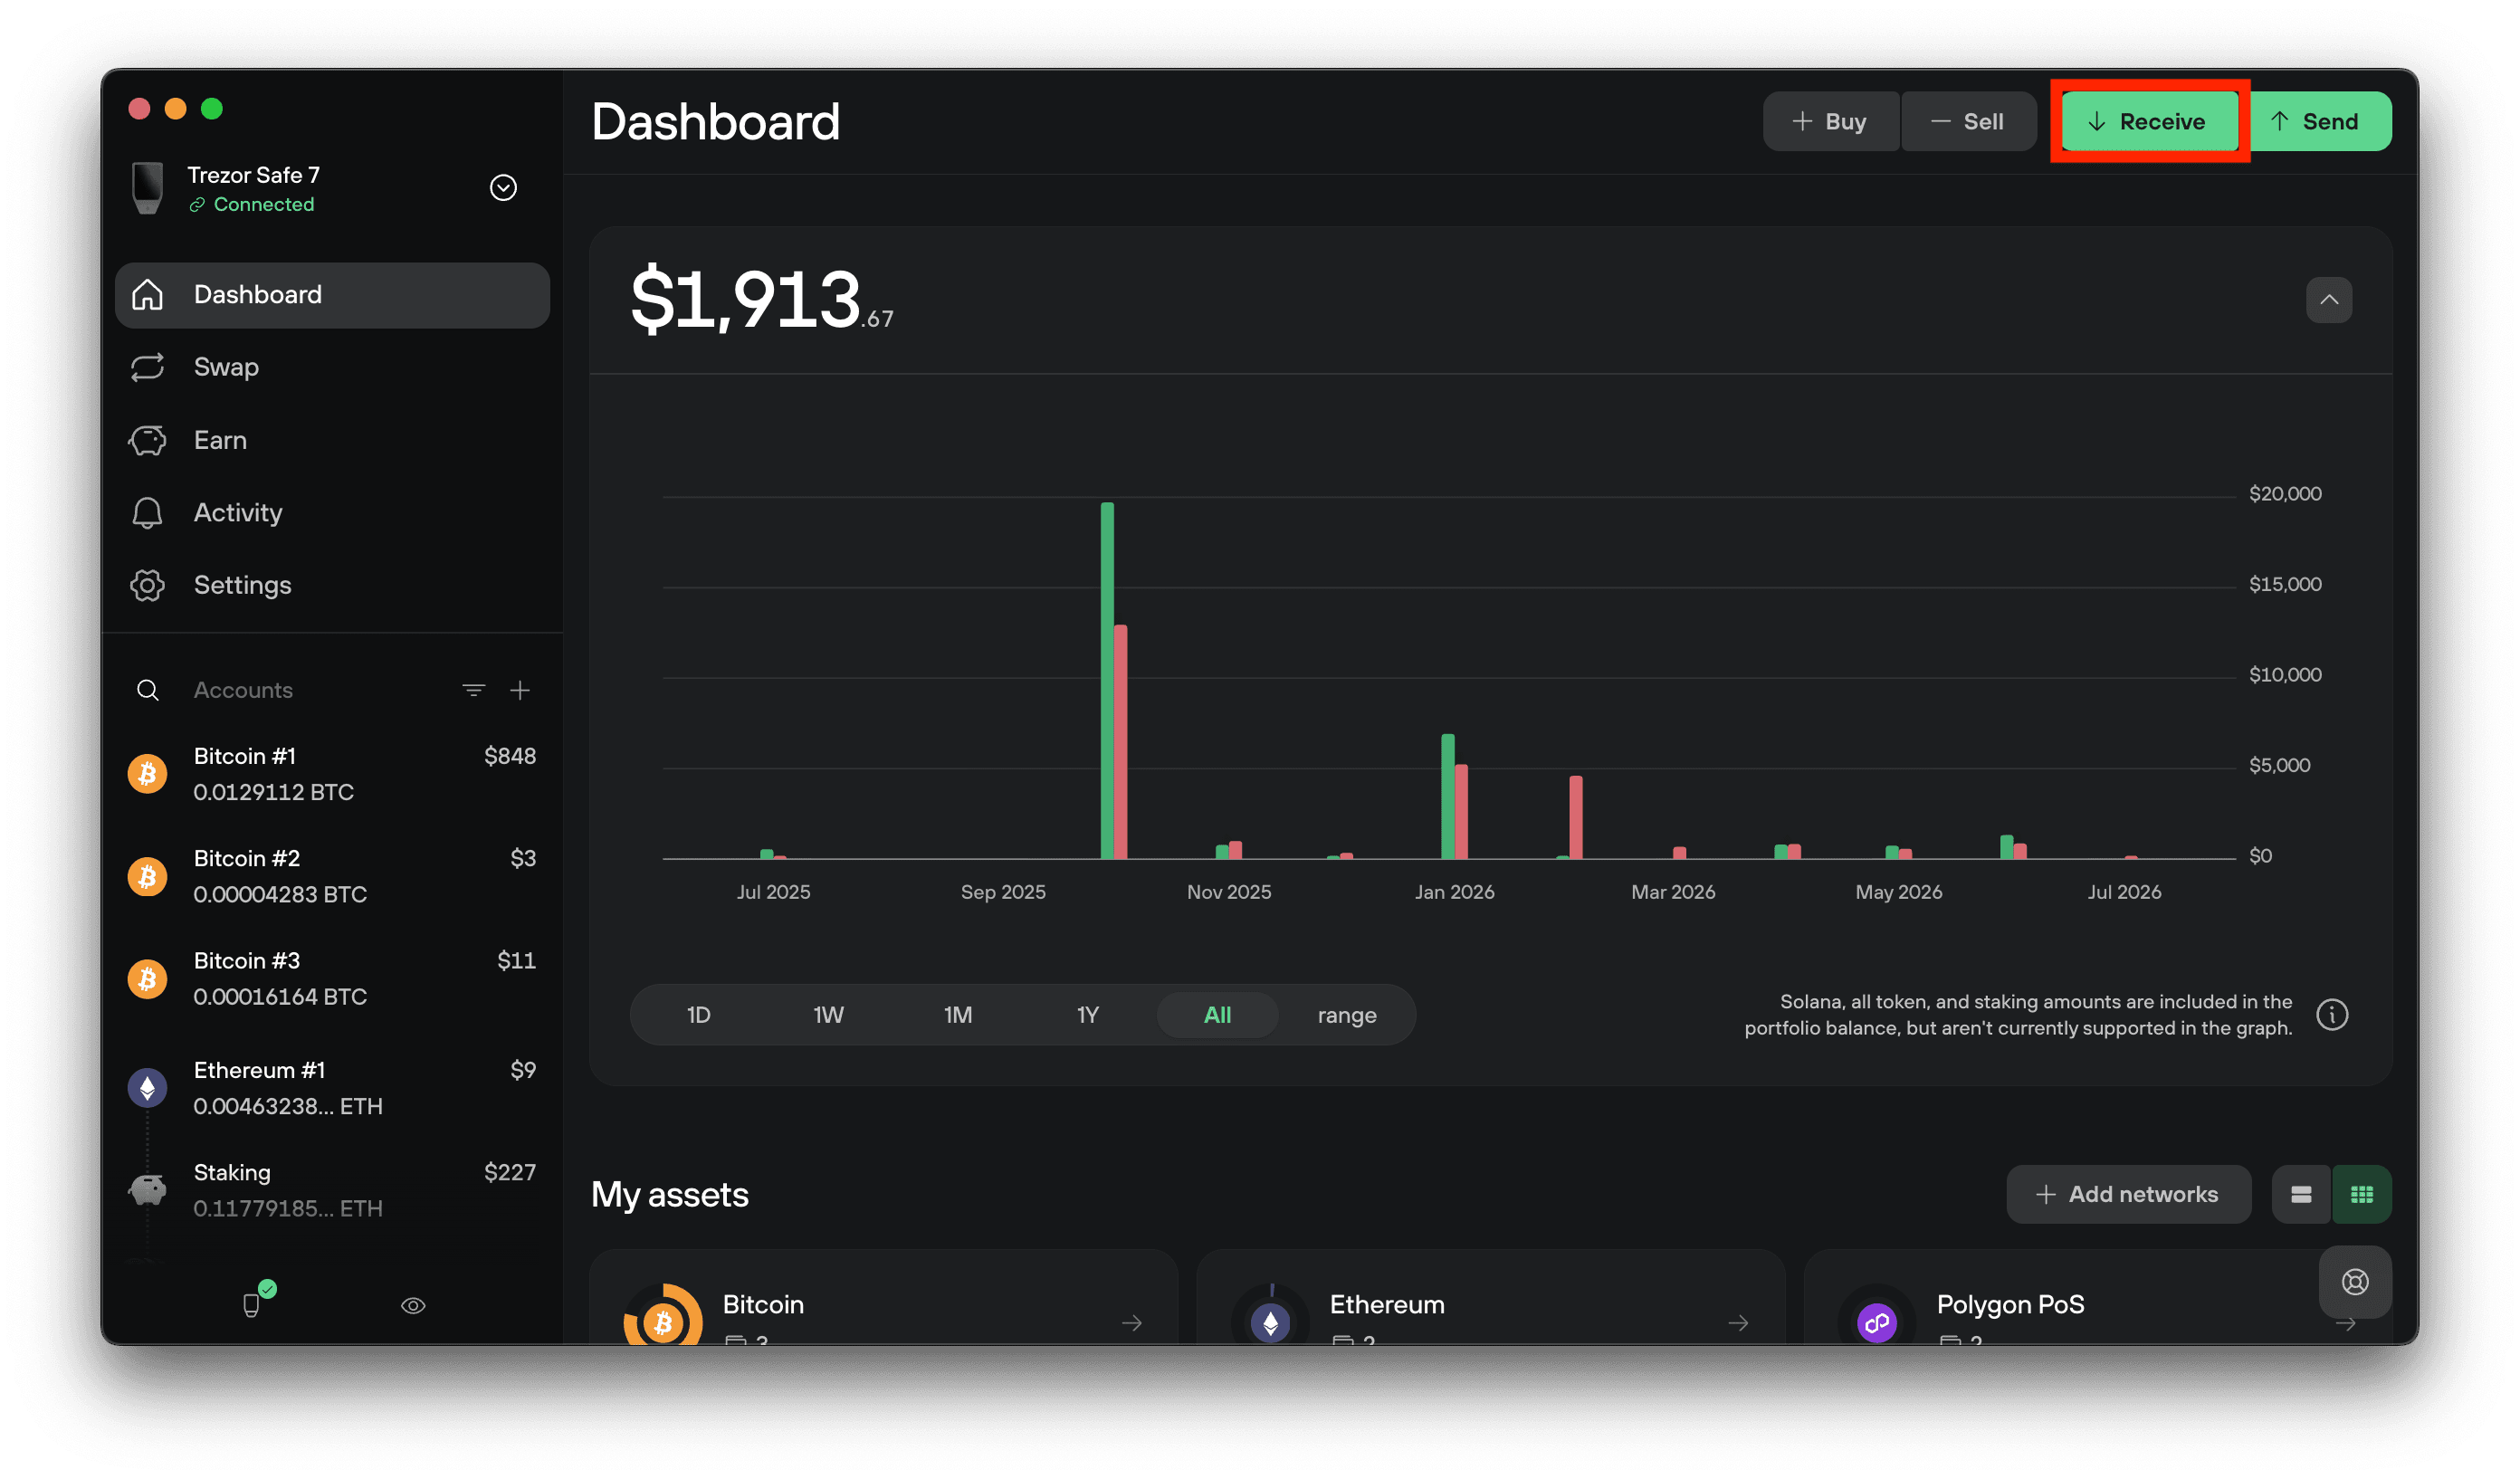
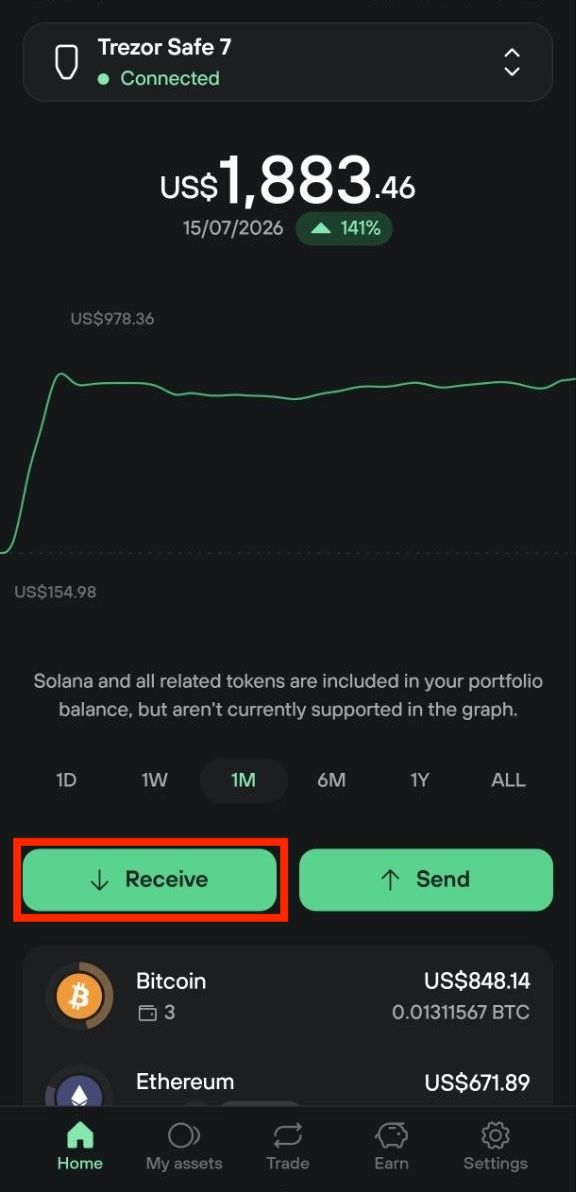
Connect and unlock your Trezor. From the Dashboard, click Receive in the top right corner.
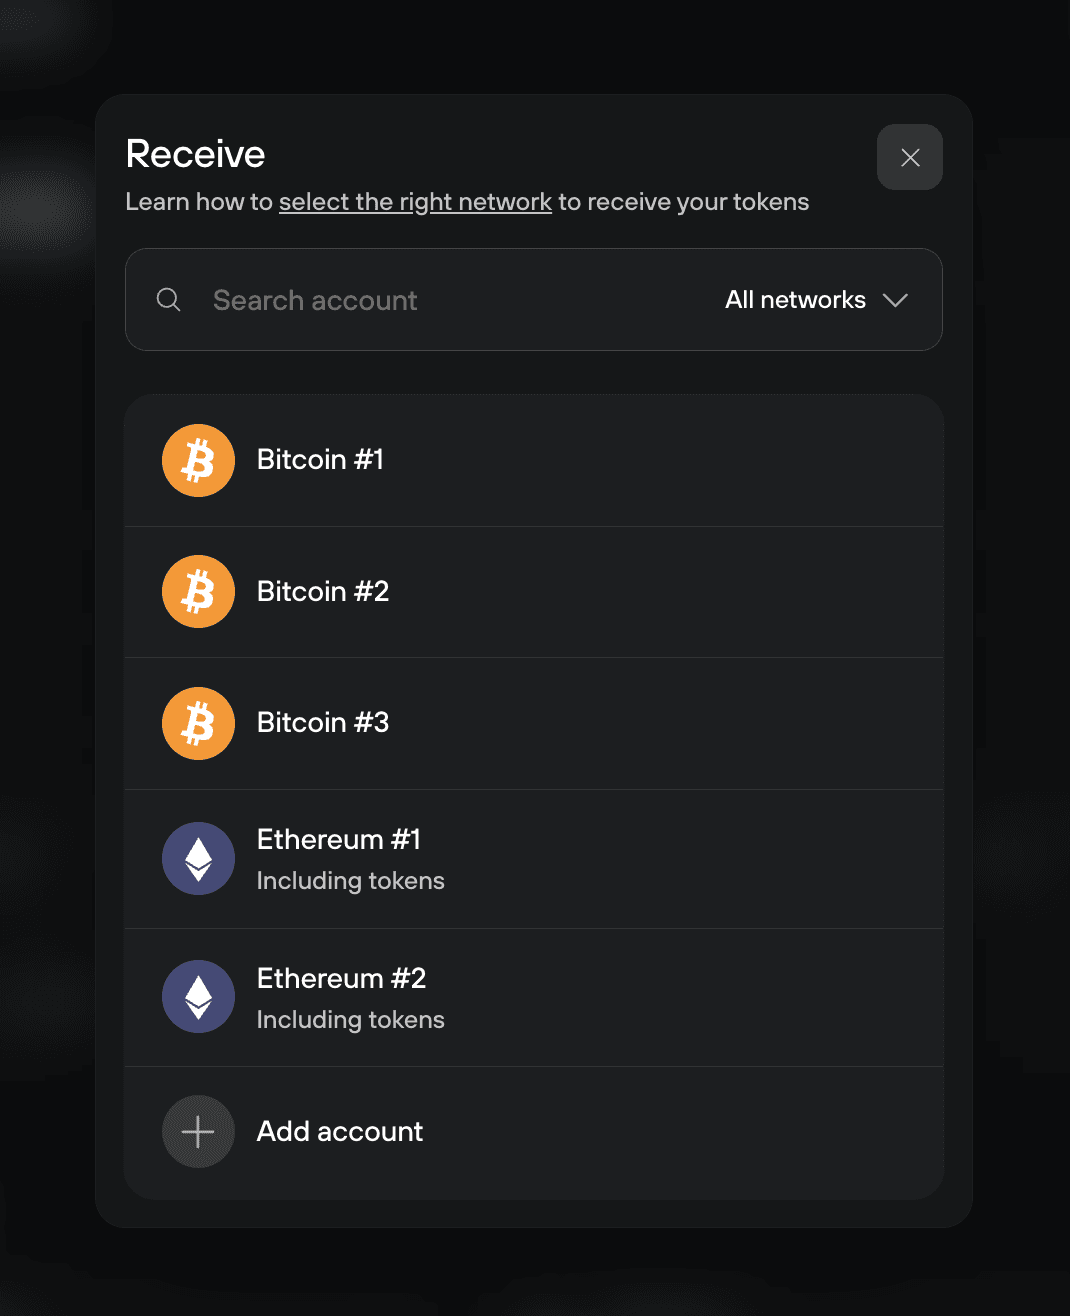
In the account picker, use the search box and the network filter to find what you want. If the network you want isn't listed, you can add it here by scrolling to the bottom of the page and clicking Add account.
You can also open the receive page from the account view: in the left panel, select the account you want to receive into, then click Receive.
Get your address
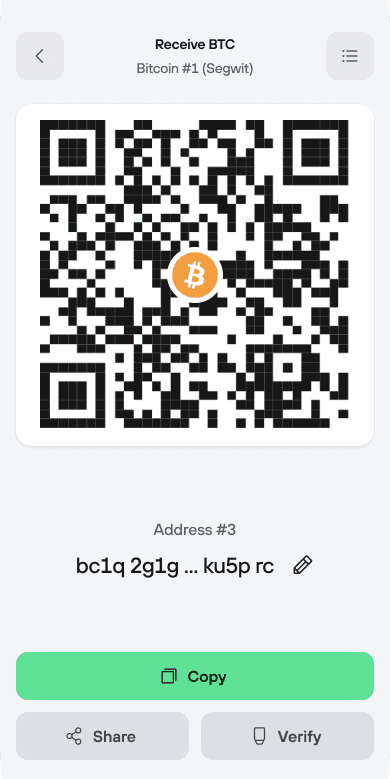
The account's Receive screen shows the address and its QR code.
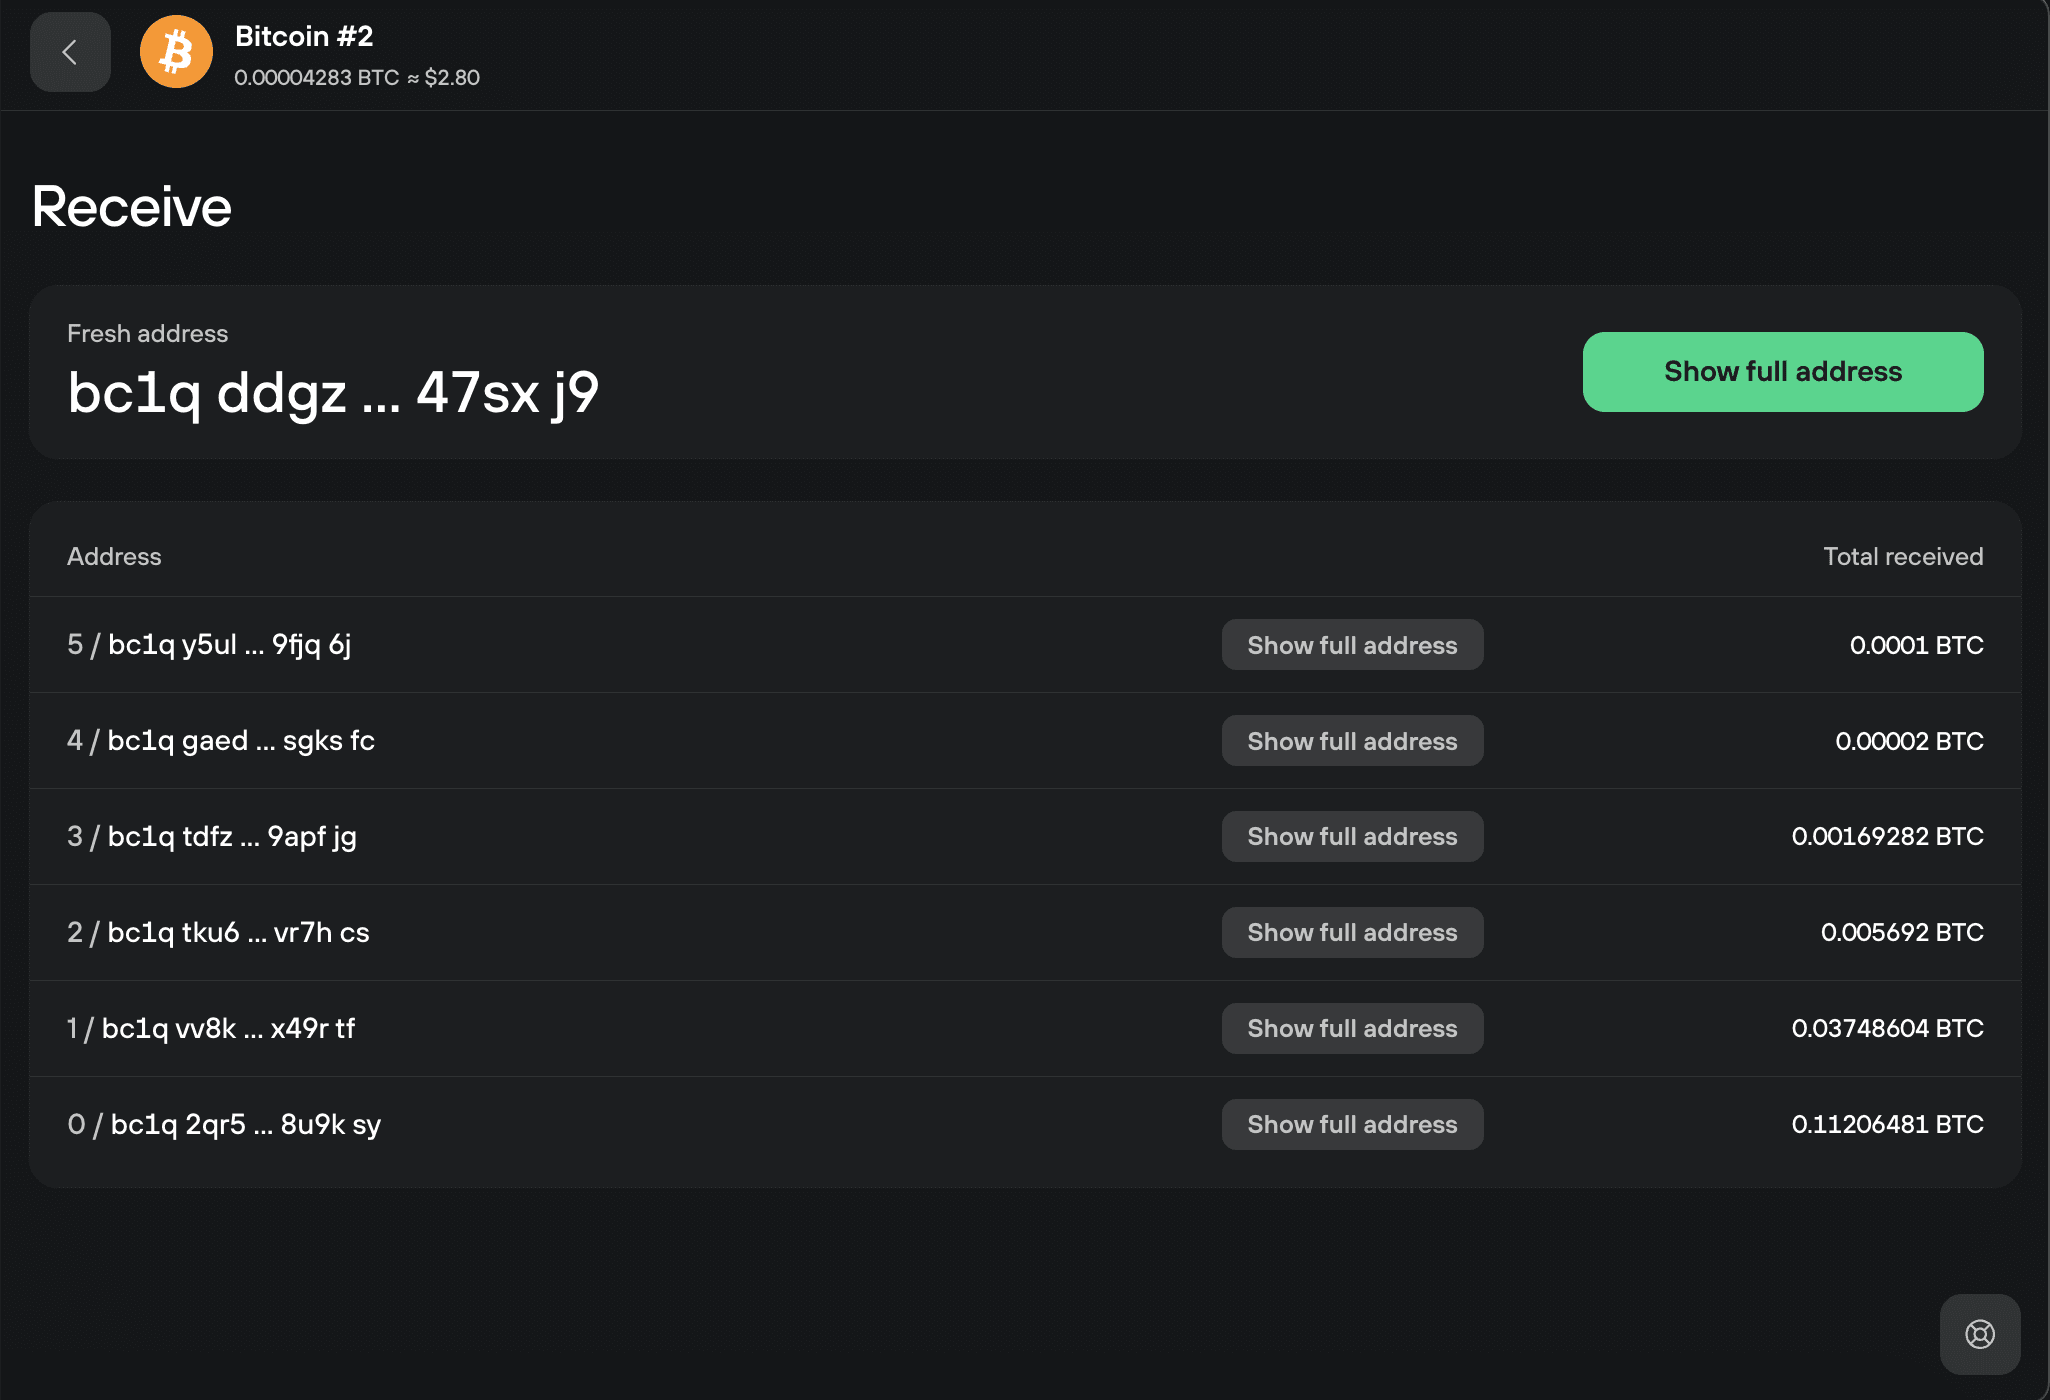
Copy the address, then paste it into the exchange, wallet, or platform you'll receive from, or scan the QR code,
Click Verify to see the full address on your Trezor screen, then compare it to the address you pasted. If they match, it's safe to use or share.
Transfer crypto to your Trezor from an exchange
Moving crypto from an exchange to your Trezor is just receiving. You get your Trezor address as above, then use it as the withdrawal address on the exchange.
Two things matter when you do this:
- Match the network. Send on the same network as the account you're receiving into. An exchange often offers several networks for the same asset, and picking the wrong one can lose your funds. See How to choose the correct blockchain network when withdrawing from or sending to Trezor.
- Check on your Trezor. Paste your address into the exchange's withdrawal field, then check it against the one your Trezor displays before submitting the withdrawal.
Exchanges may hold withdrawals for a short time or ask you to confirm by email. That's normal and set by the exchange, not your Trezor.
After you receive
An incoming transaction first appears as unconfirmed. Once the network includes it in a block, Trezor Suite shows the confirmation time next to it.
You can check the status any time in a block explorer by clicking the transaction in your history. Confirmation times vary with the fee the sender set and how busy the network is.
You can't send regular money like dollars or euros to a Trezor. A Trezor holds crypto, not fiat currency.