Getting to know Trezor Suite
Trezor Suite is your secure, all-in-one interface for setting up your Trezor hardware wallet and managing your crypto. This guide walks through the main features and layout to help you navigate your wallet with confidence.
For specific actions (like recovering a wallet or sending crypto), check the related how-to guides in the Knowledge Base.
Setting up your Trezor hardware wallet in Trezor Suite is easy and takes only about 15 minutes. However, if you're new to the concept of self-custody or simply prefer professional guidance, you can book a 1 : 1 online session with a Trezor Expert who will walk you through the setup and answer any questions you may have — just follow the link below:
Trezor Expert Onboarding Session
session with Trezor Expert
Using Trezor Suite on desktop or mobile
Trezor Suite is the official app for managing your crypto with a Trezor hardware wallet. You can use it on Desktop or Mobile, depending on what’s most convenient.
Both versions let you stay in control of your wallet, check your balances, and manage your coins securely. Choose the platform you’re using below to see its main features.
Trezor Suite for desktop
Trezor Suite on desktop provides a secure and convenient interface for connecting your Trezor, managing accounts, and handling your crypto.
You can view your portfolio, send and receive transactions, swap assets, and adjust app and device settings, all in one place.
The sections below walk through the main areas of the desktop app so you can get familiar with its layout and features.
Set up and connect your Trezor
When you connect a new device, Trezor Suite guides you through setup. Here's what you'll do:
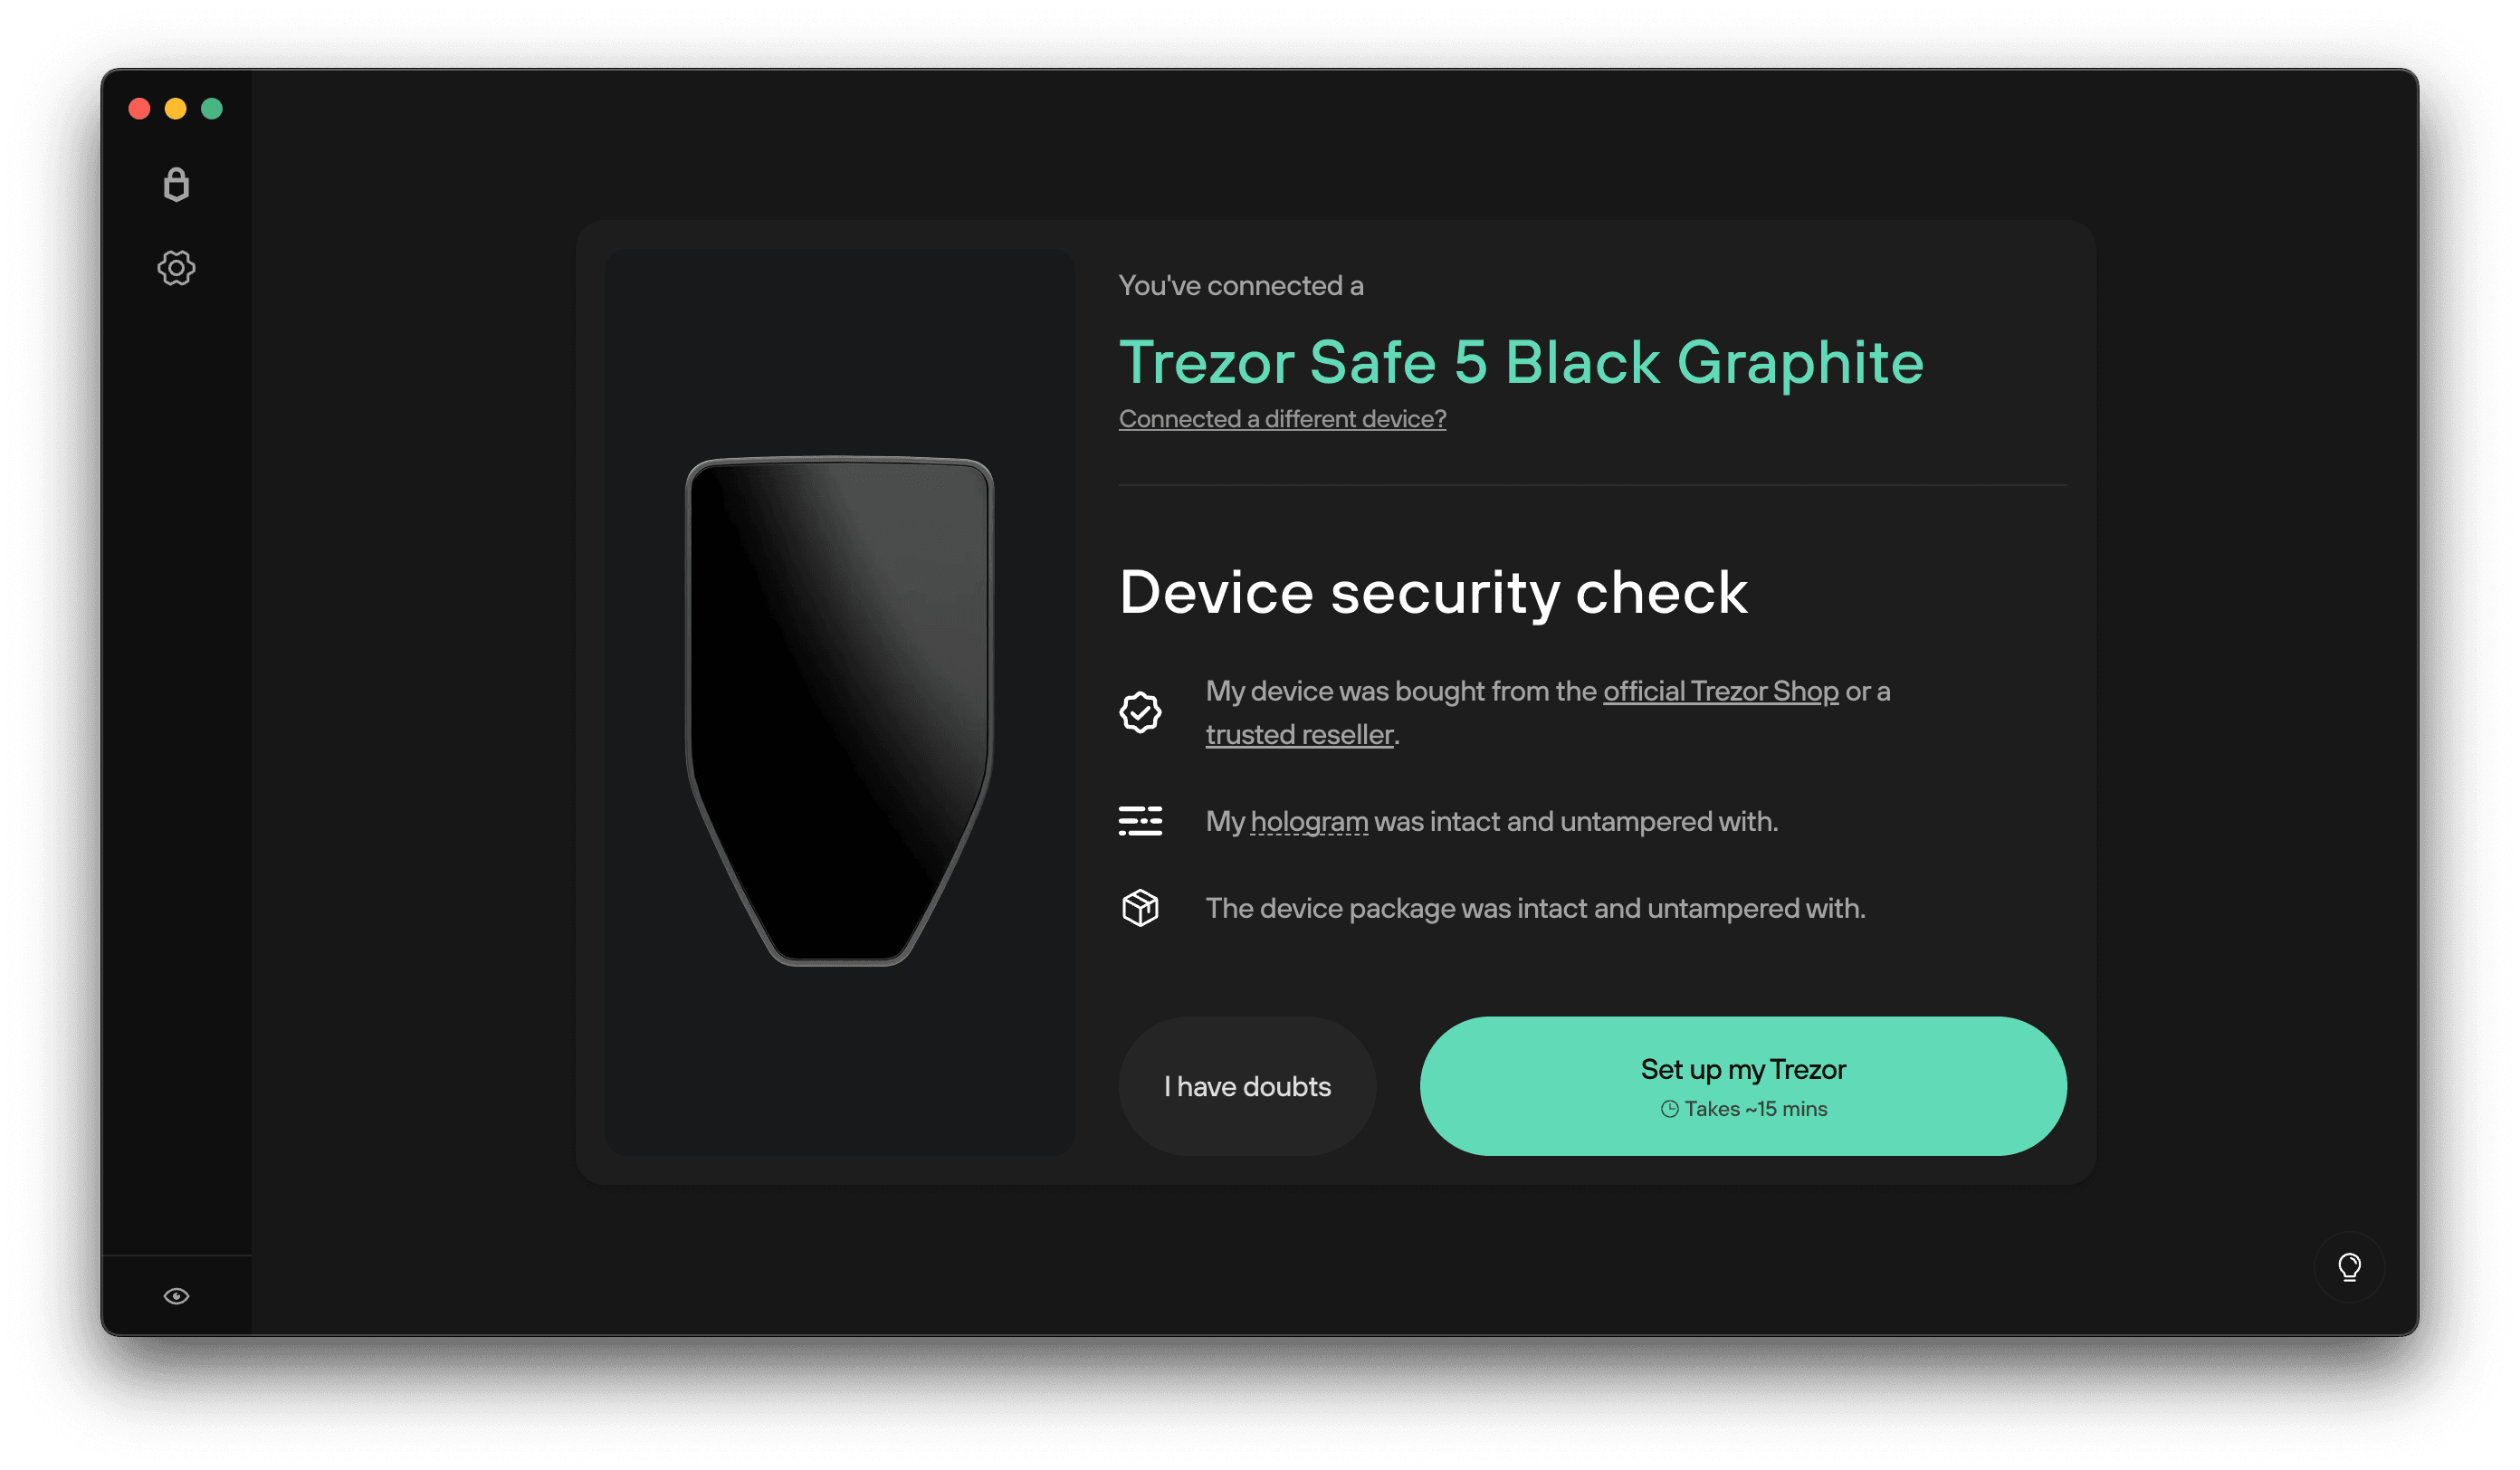
- Check device authenticity
- Install firmware if needed
- Back up your wallet: Write down the words shown on your Trezor’s screen and store them safely offline.
- Set a PIN to secure your Trezor
- Enable coins to start managing crypto
- Customize (optional): Add a device name or homescreen
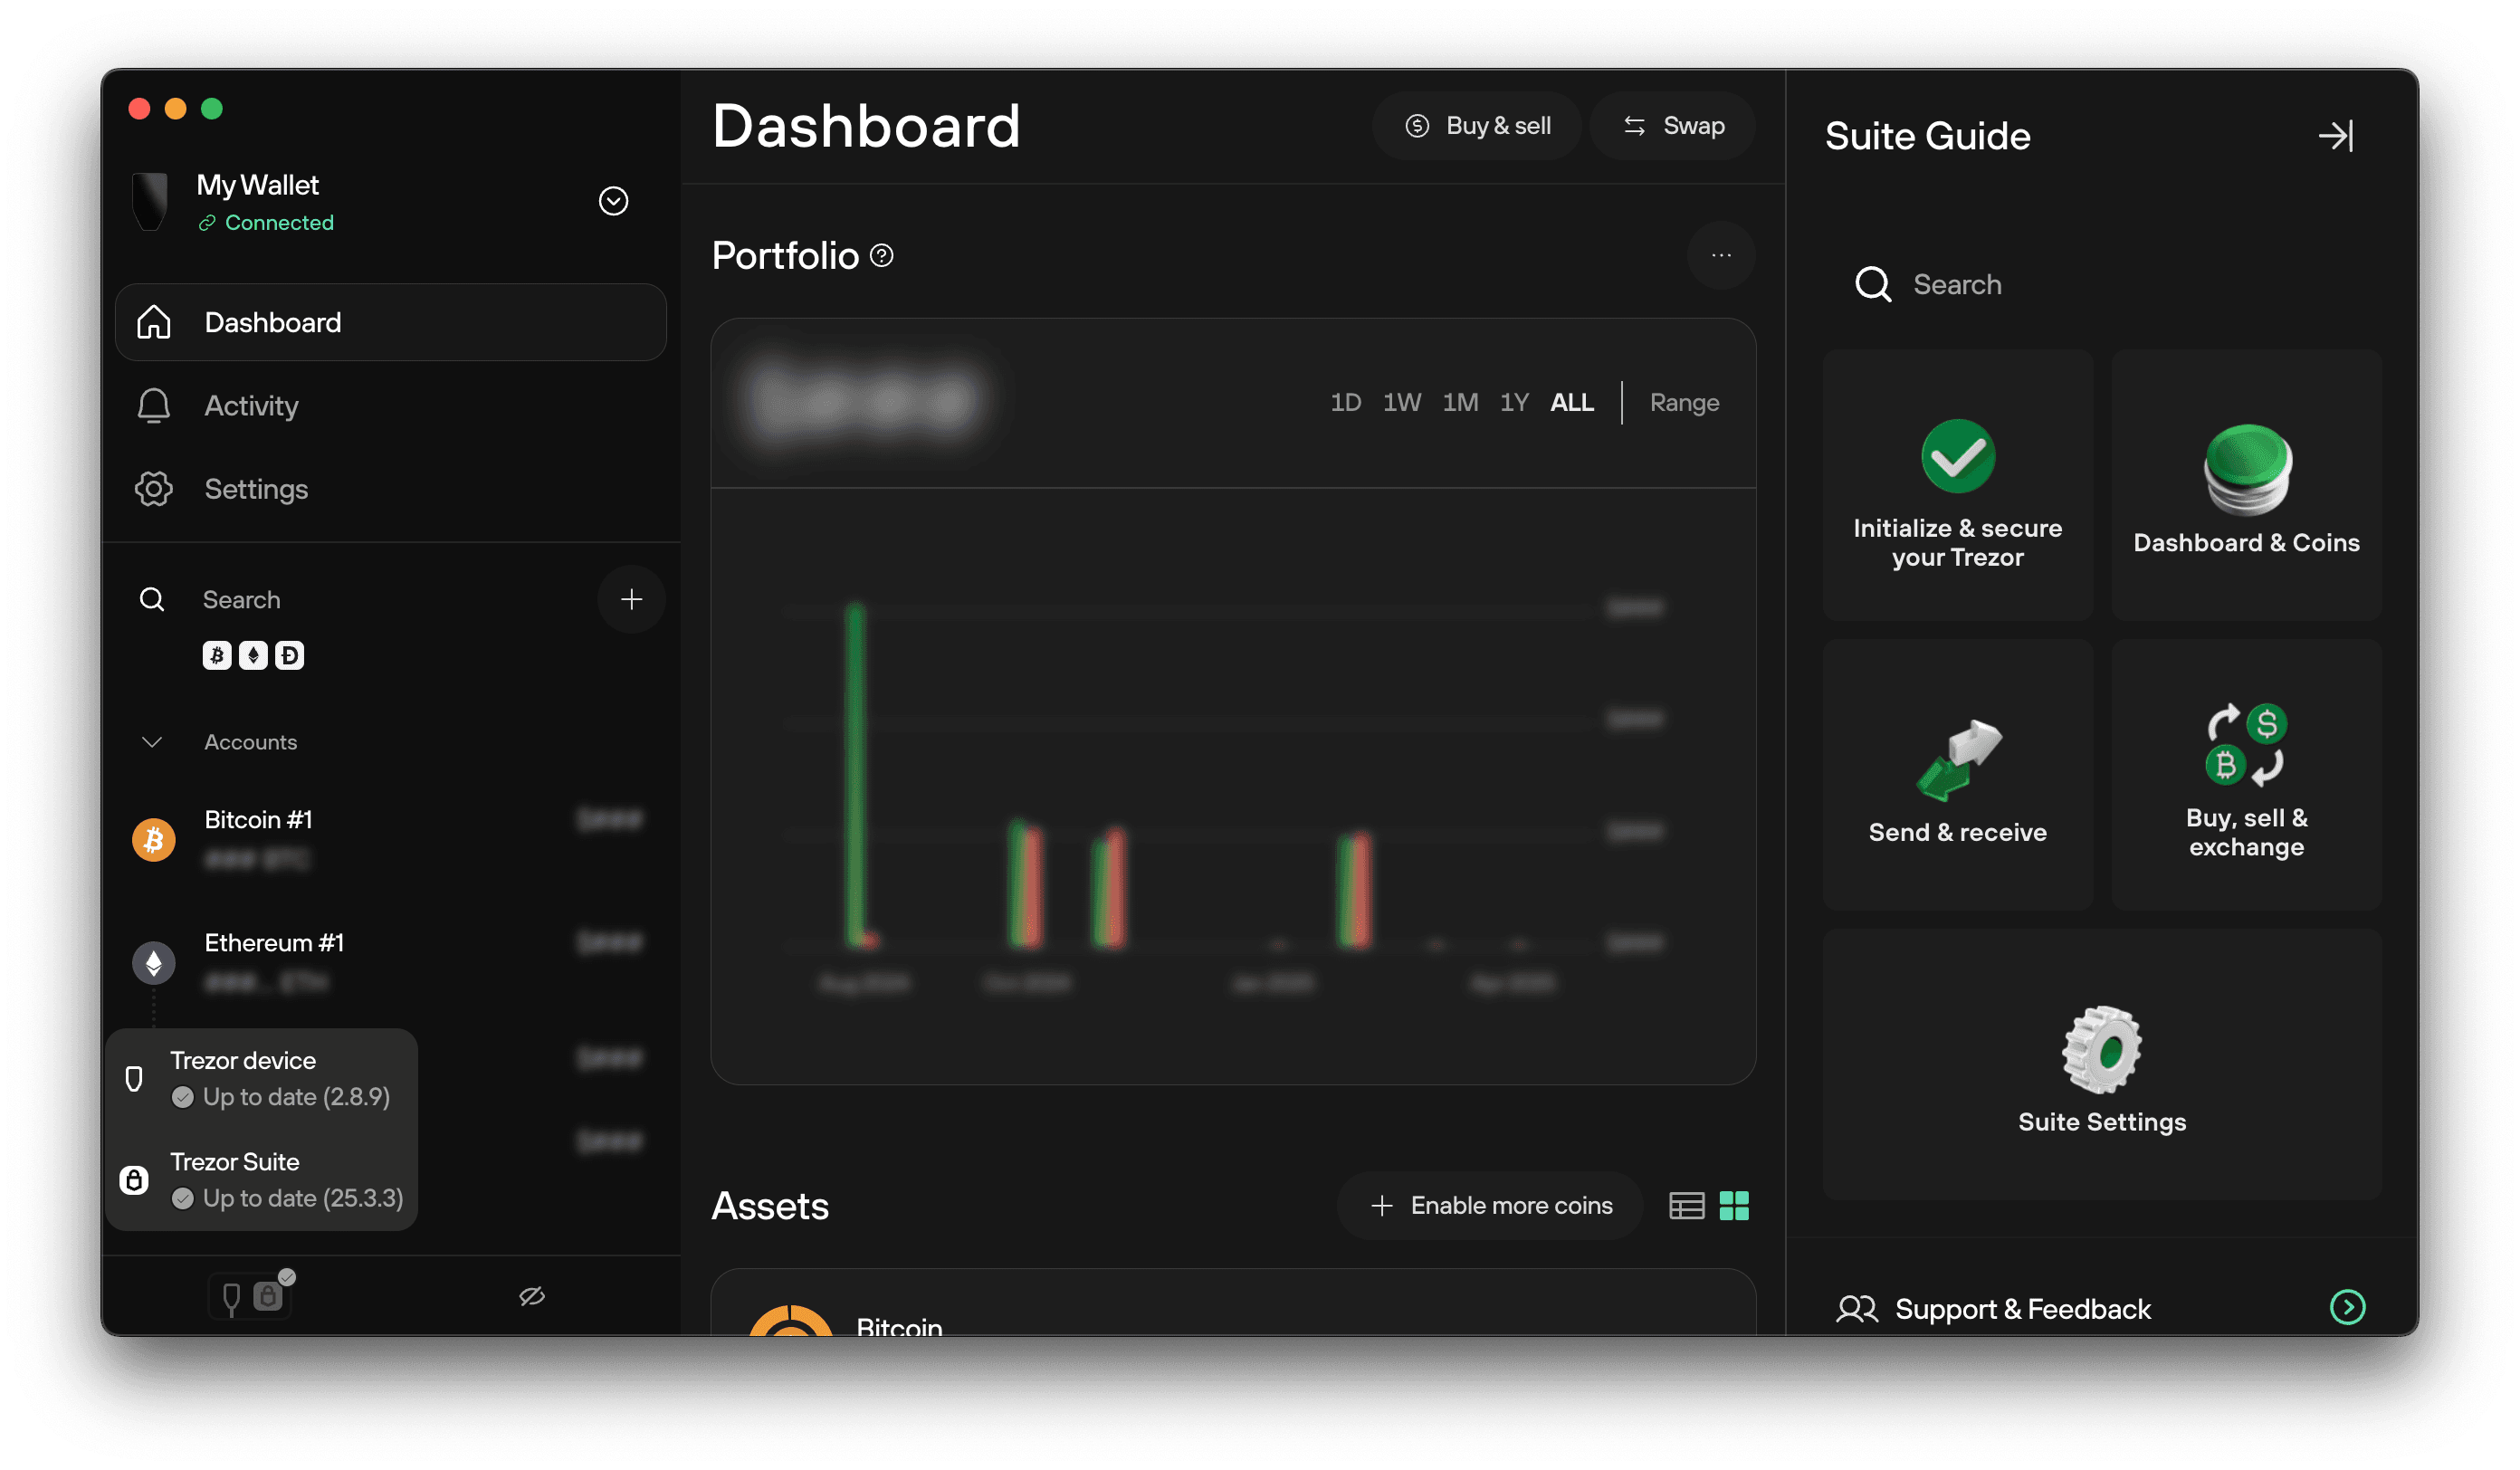
Explore the Trezor Suite dashboard
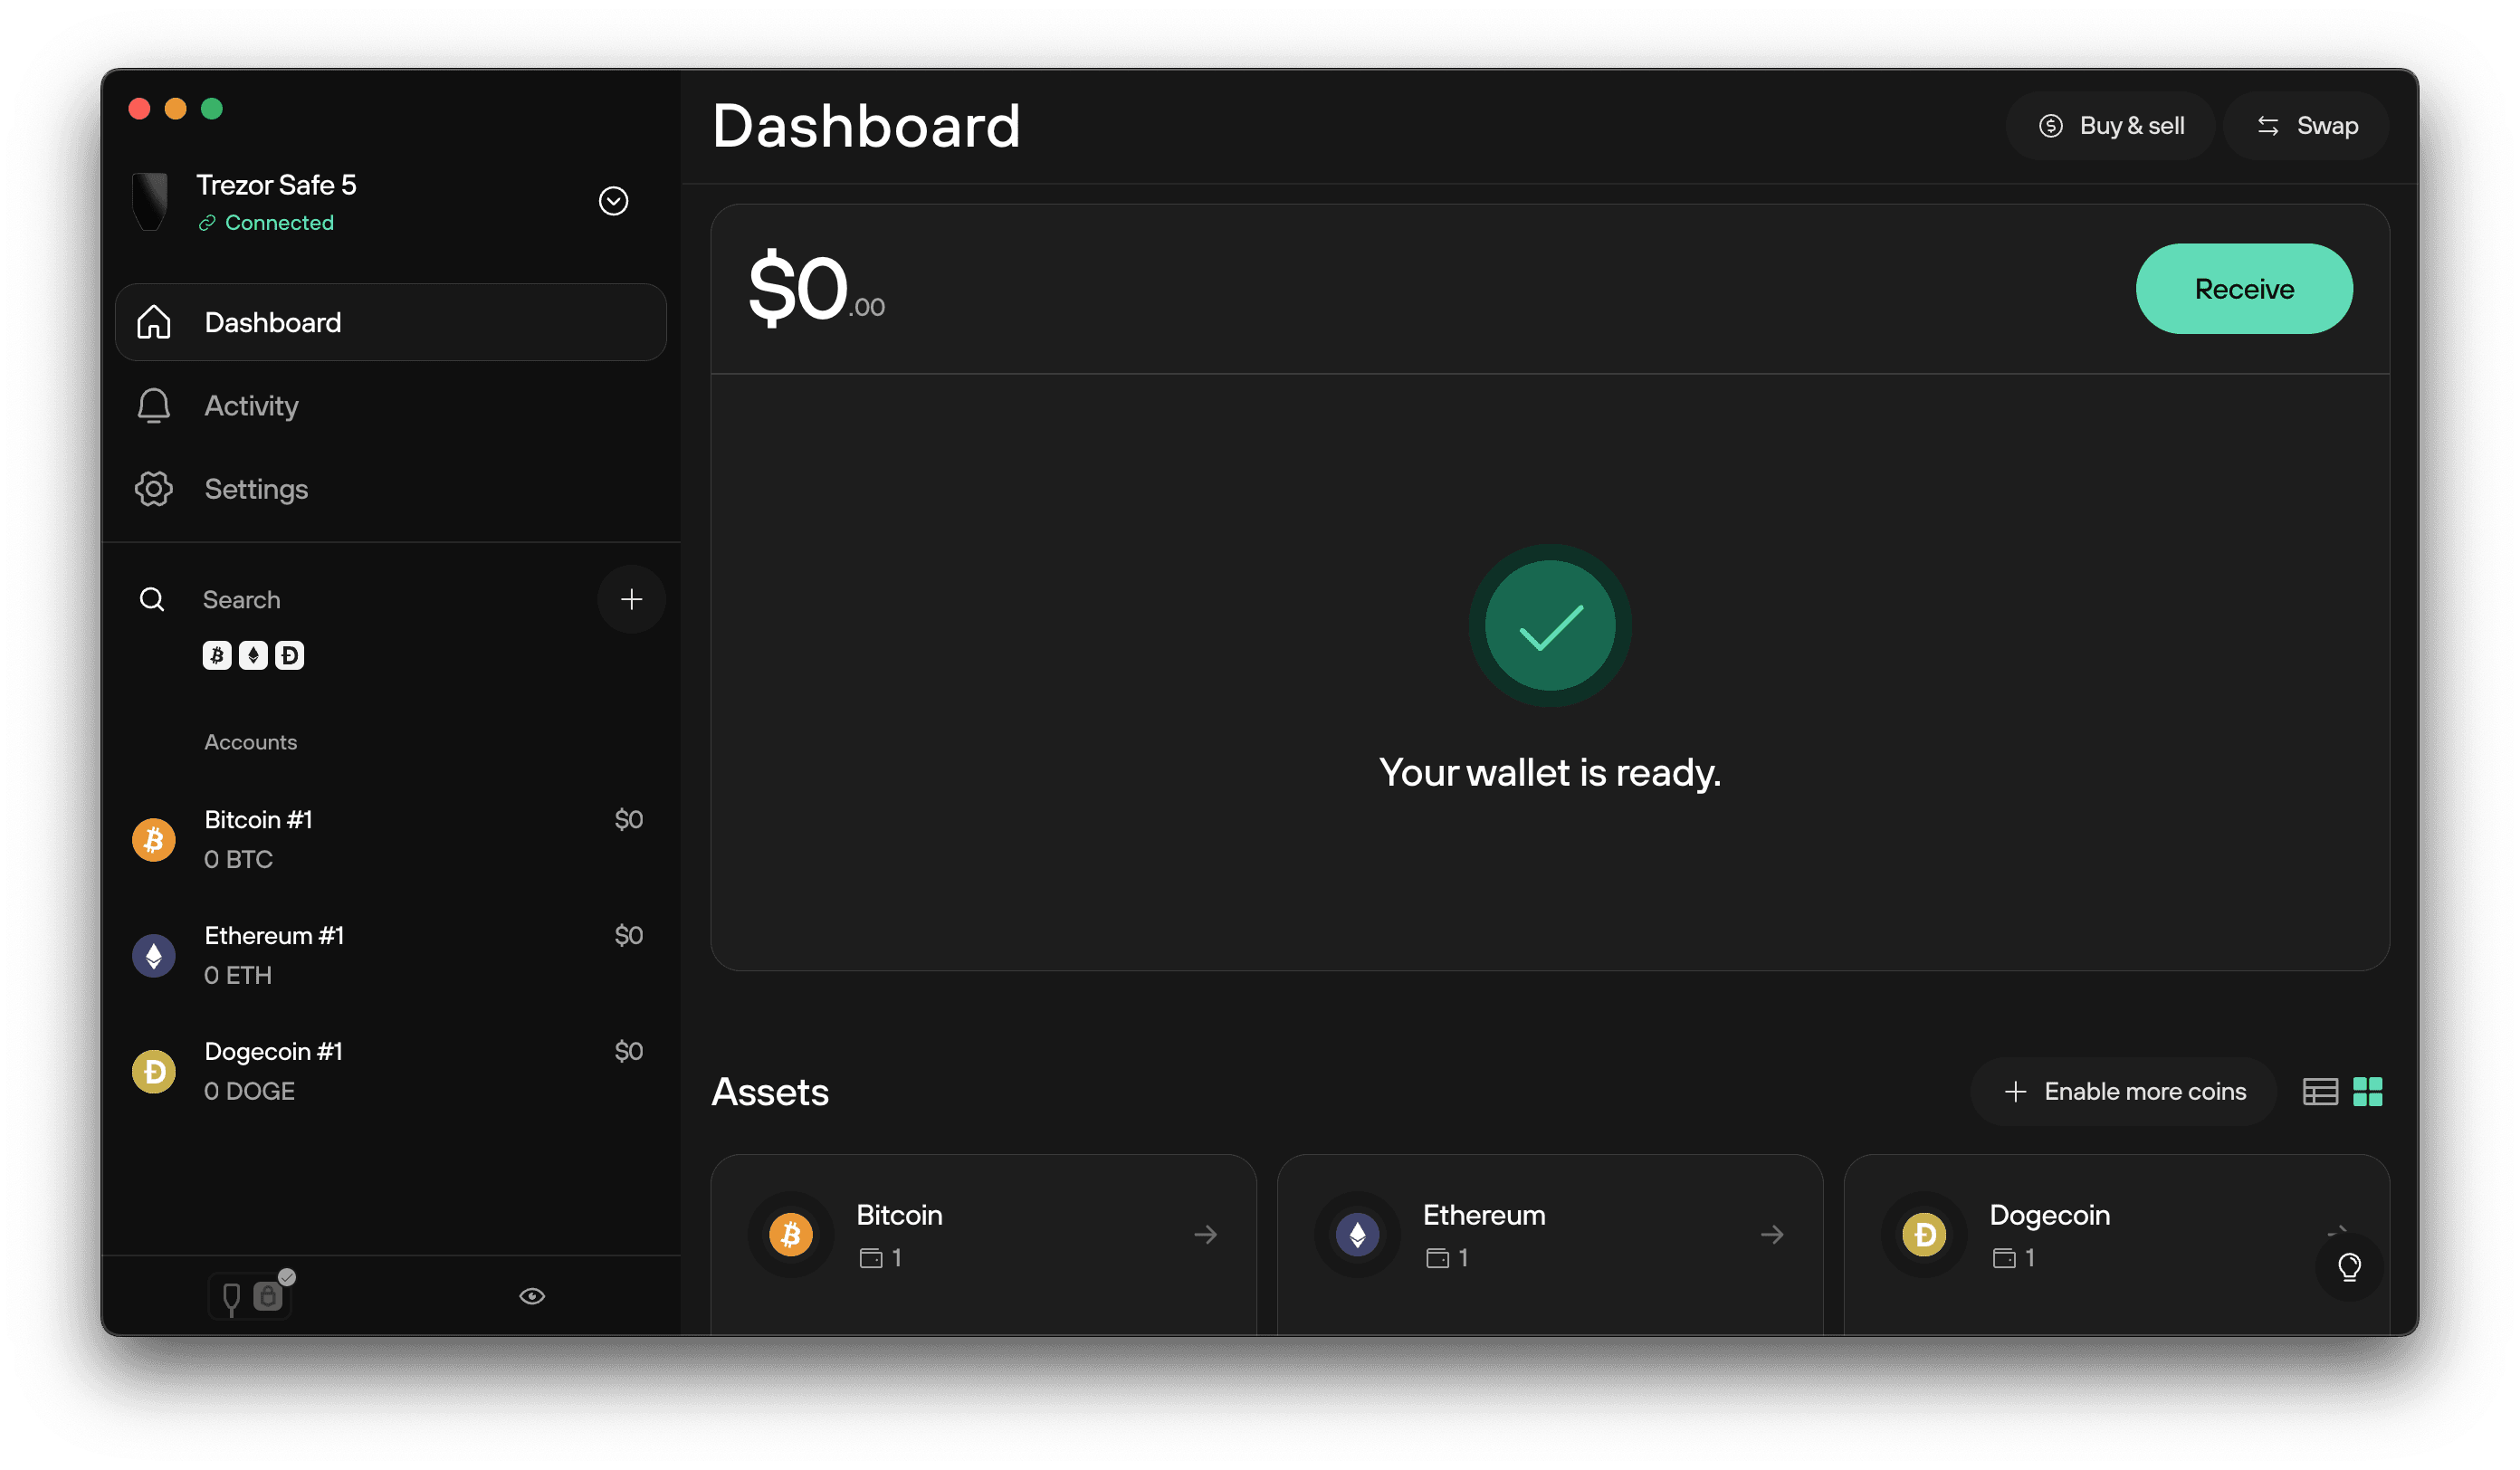
After setup, you will land on the Dashboard, where you can view your portfolio and manage your assets.
If no crypto has been received yet:
- You’ll see a message: “Your wallet is ready.”
- The left sidebar lists accounts for each coin.
- Use the + button in the left sidebar or Enable more coins at the bottom to add more cryptocurrencies to Trezor Suite.
- Click Receive to get started by receiving crypto, or use the Buy & sell button to purchase crypto directly through the app.
Coins are not interchangeable. Always select the correct coin before sending or receiving (for example, you cannot send Bitcoin to a Bitcoin Cash address).
Once your wallet holds crypto:
- The Portfolio section displays a historical chart of your account values over time.
- Use the filter in the top-right corner to adjust the time range.
- Scroll to Assets for a breakdown by cryptocurrency.

Manage your Trezor devices and wallets
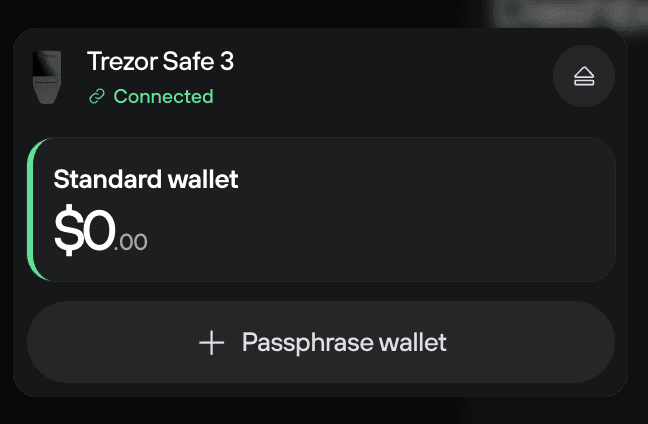
You can use the wallet switcher in the top-left corner of Suite to manage which Trezor device is currently active.
The wallet switcher also lets you switch between Standard and Passphrase wallets, add or remove wallets, and eject a wallet from Trezor Suite.
- When the Auto-eject wallets feature is disabled, Trezor Suite stores your wallet’s public key (XPUB), allowing you to monitor balances and activity without your Trezor connected.
- When the Auto-eject wallets feature is enabled, your wallet overview and balances disappear from Trezor Suite until the device is connected again.
By default, wallets stay visible in view-only mode after you disconnect your Trezor. To hide balances until you reconnect, go to Settings → Application → Auto-eject wallets.
On shared computers, eject saved wallets to keep your balances private.
To send crypto from a view-only wallet, you still need to reconnect your device and enter the correct passphrase if you use one.
This menu also lets you:
- Switch between Standard and Passphrase wallets
- Add or remove wallets
- Eject a wallet from Trezor Suite
Eject wallet
Click the Eject icon (located in the wallet switcher) to remove a wallet from Suite:
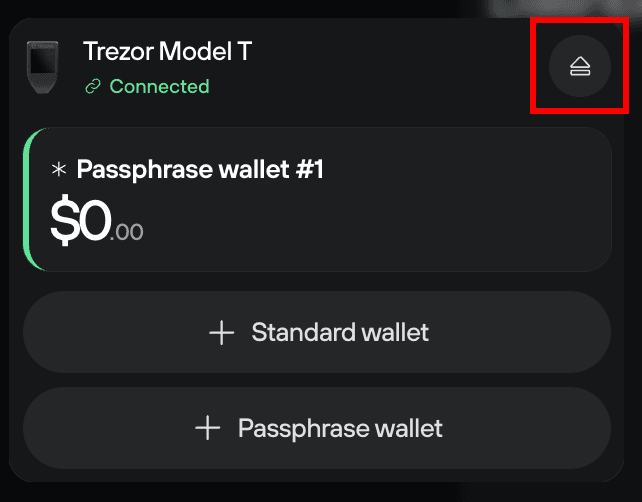
- For Standard wallets, the wallet will disappear until you reconnect your Trezor.
- For Passphrase wallets, you must re-enter the exact passphrase to regain access. Entering a different passphrase will open a different (empty) wallet.
Passphrase wallets are an optional feature that lets you create a new wallet using a custom passphrase. Learn more about passphrases.
Work with accounts and coins
Each Trezor wallet can hold multiple coins, and each coin can have up to 10 accounts.
Use the left-hand sidebar to:
- Select a coin and view associated accounts
- Add new accounts
- Search across accounts Accounts that are created but left empty won’t appear the next time you open Suite. Click Refresh to rescan.
Always make sure you’ve selected the correct cryptocurrency before sending or receiving funds. Coins are not interchangeable—sending to the wrong type of address may result in loss.
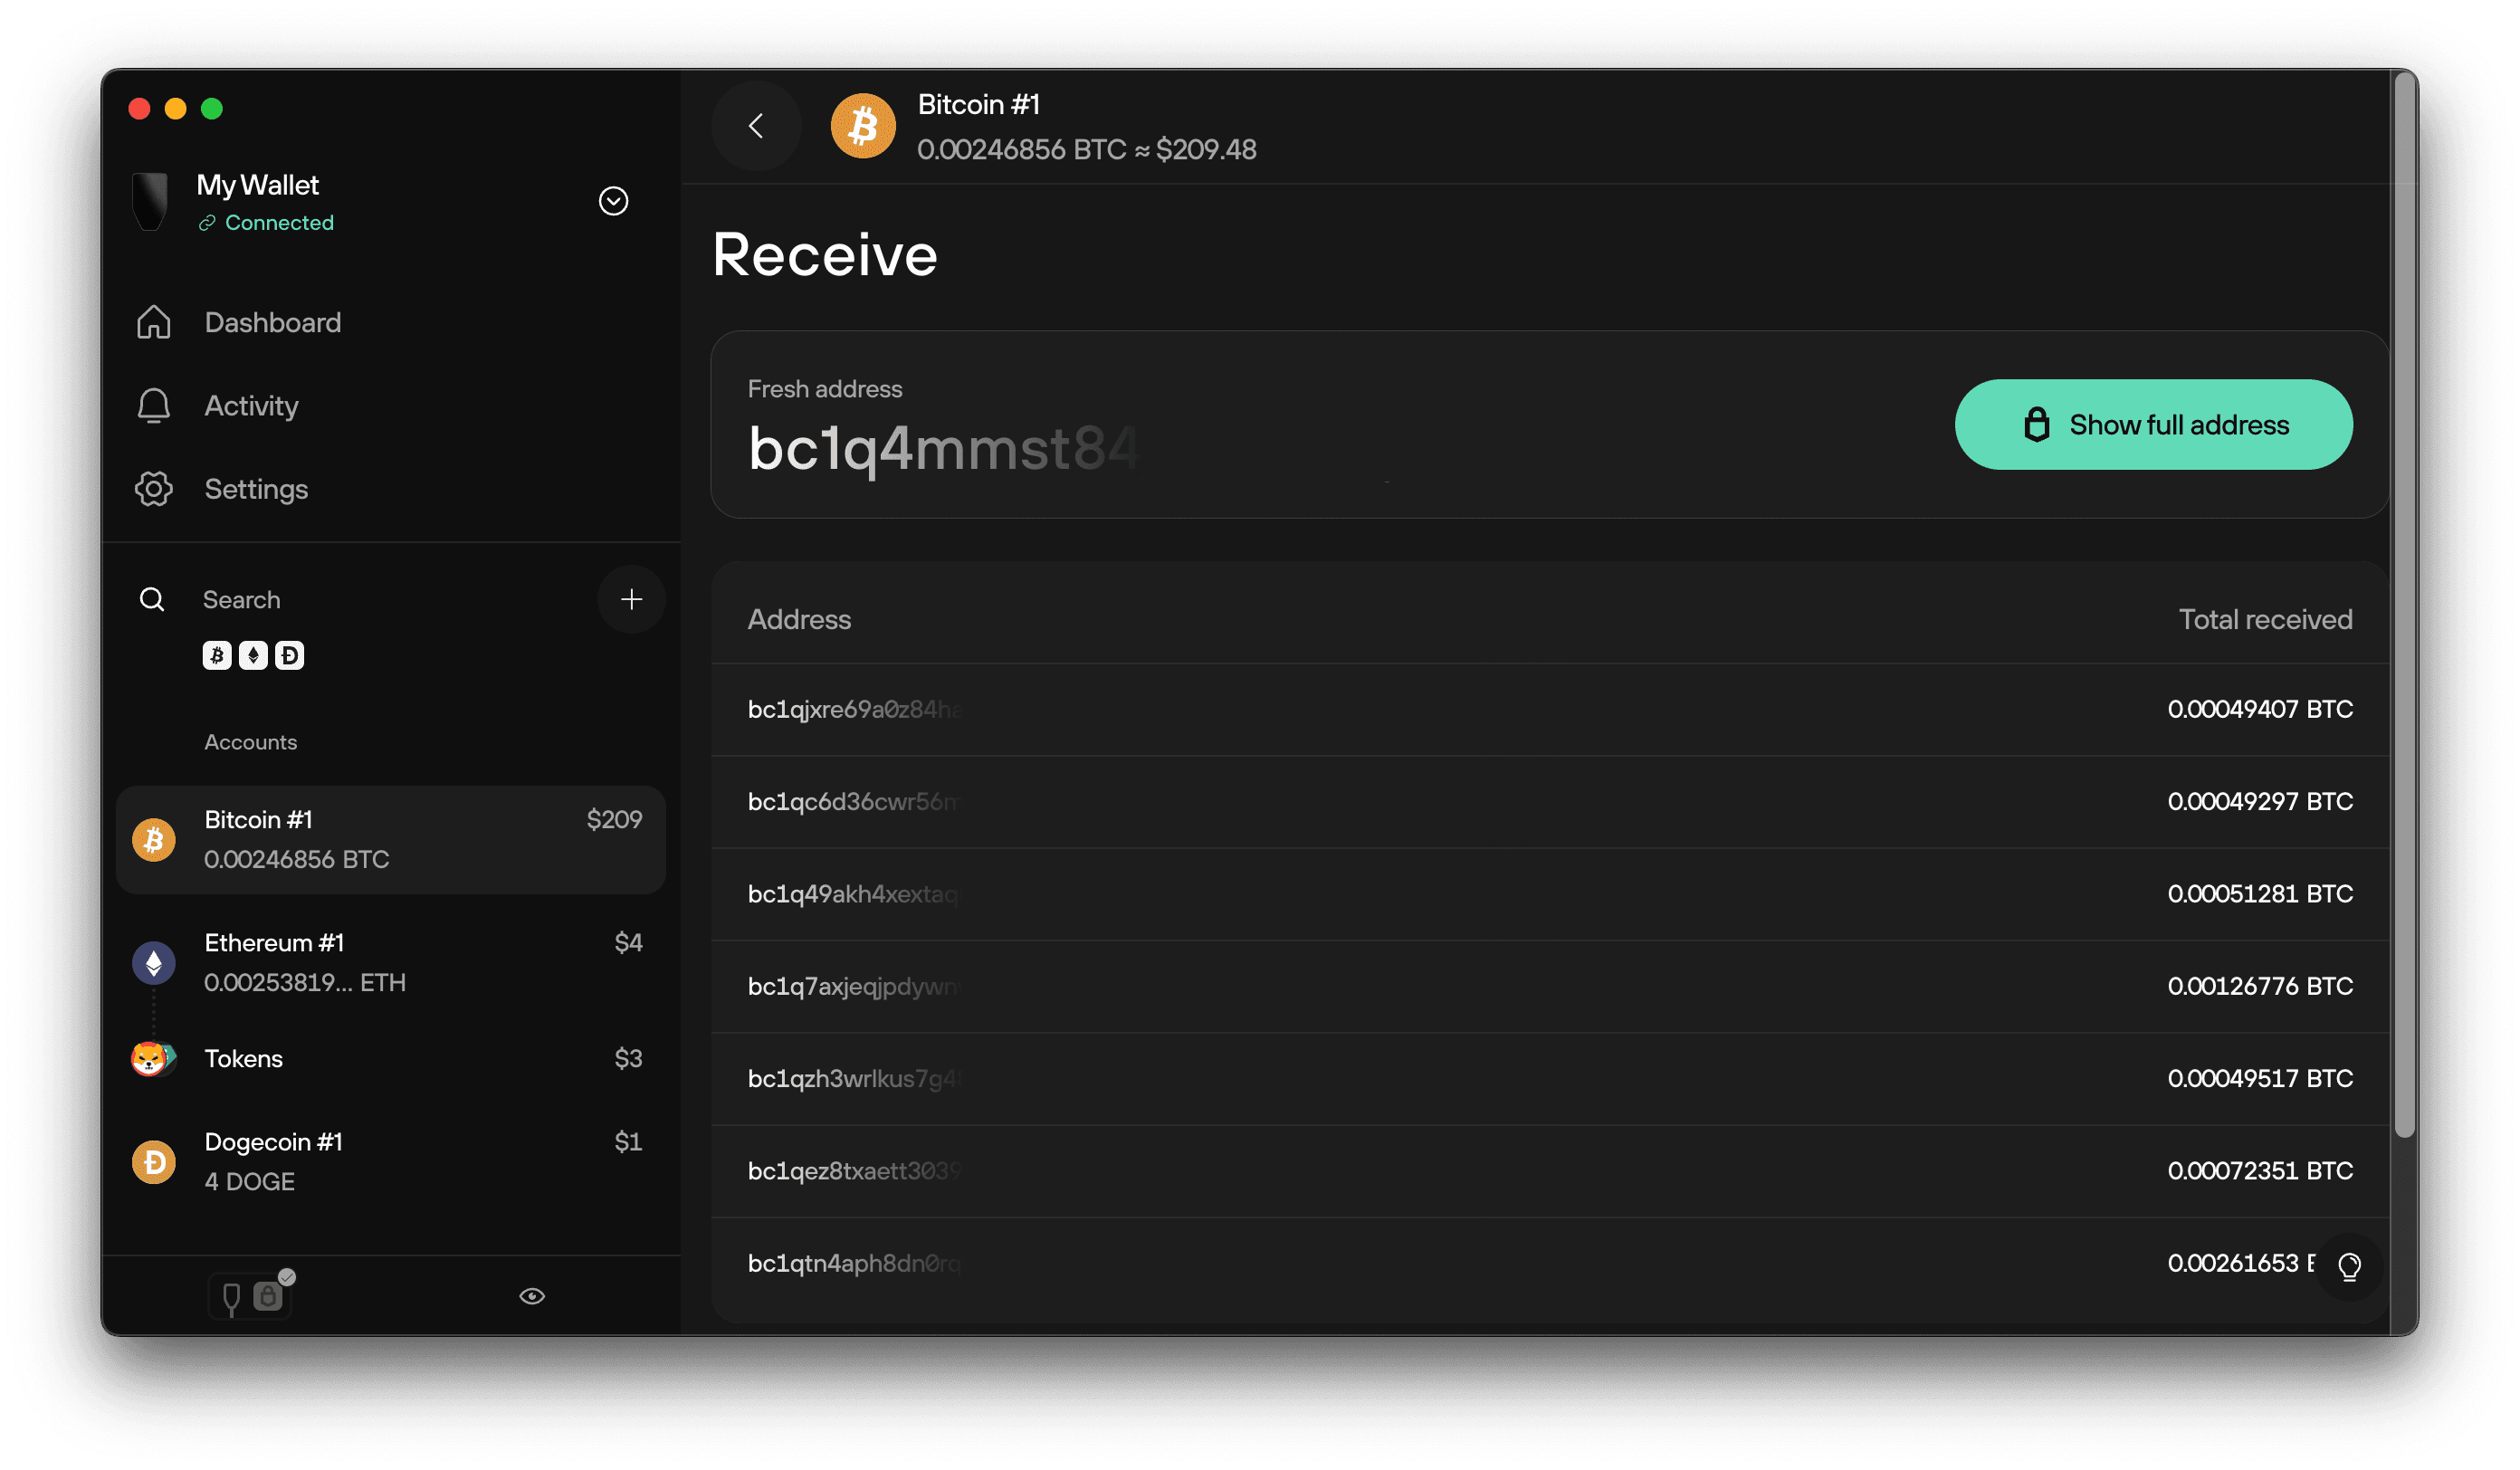
Receive, send, and swap crypto
Receive
Use the Receive tab to generate an address. Before sharing or using it, always confirm that it matches the one shown on your Trezor device.
For more details onhow to safely receive crypto, see Receive crypto in Trezor Suite.
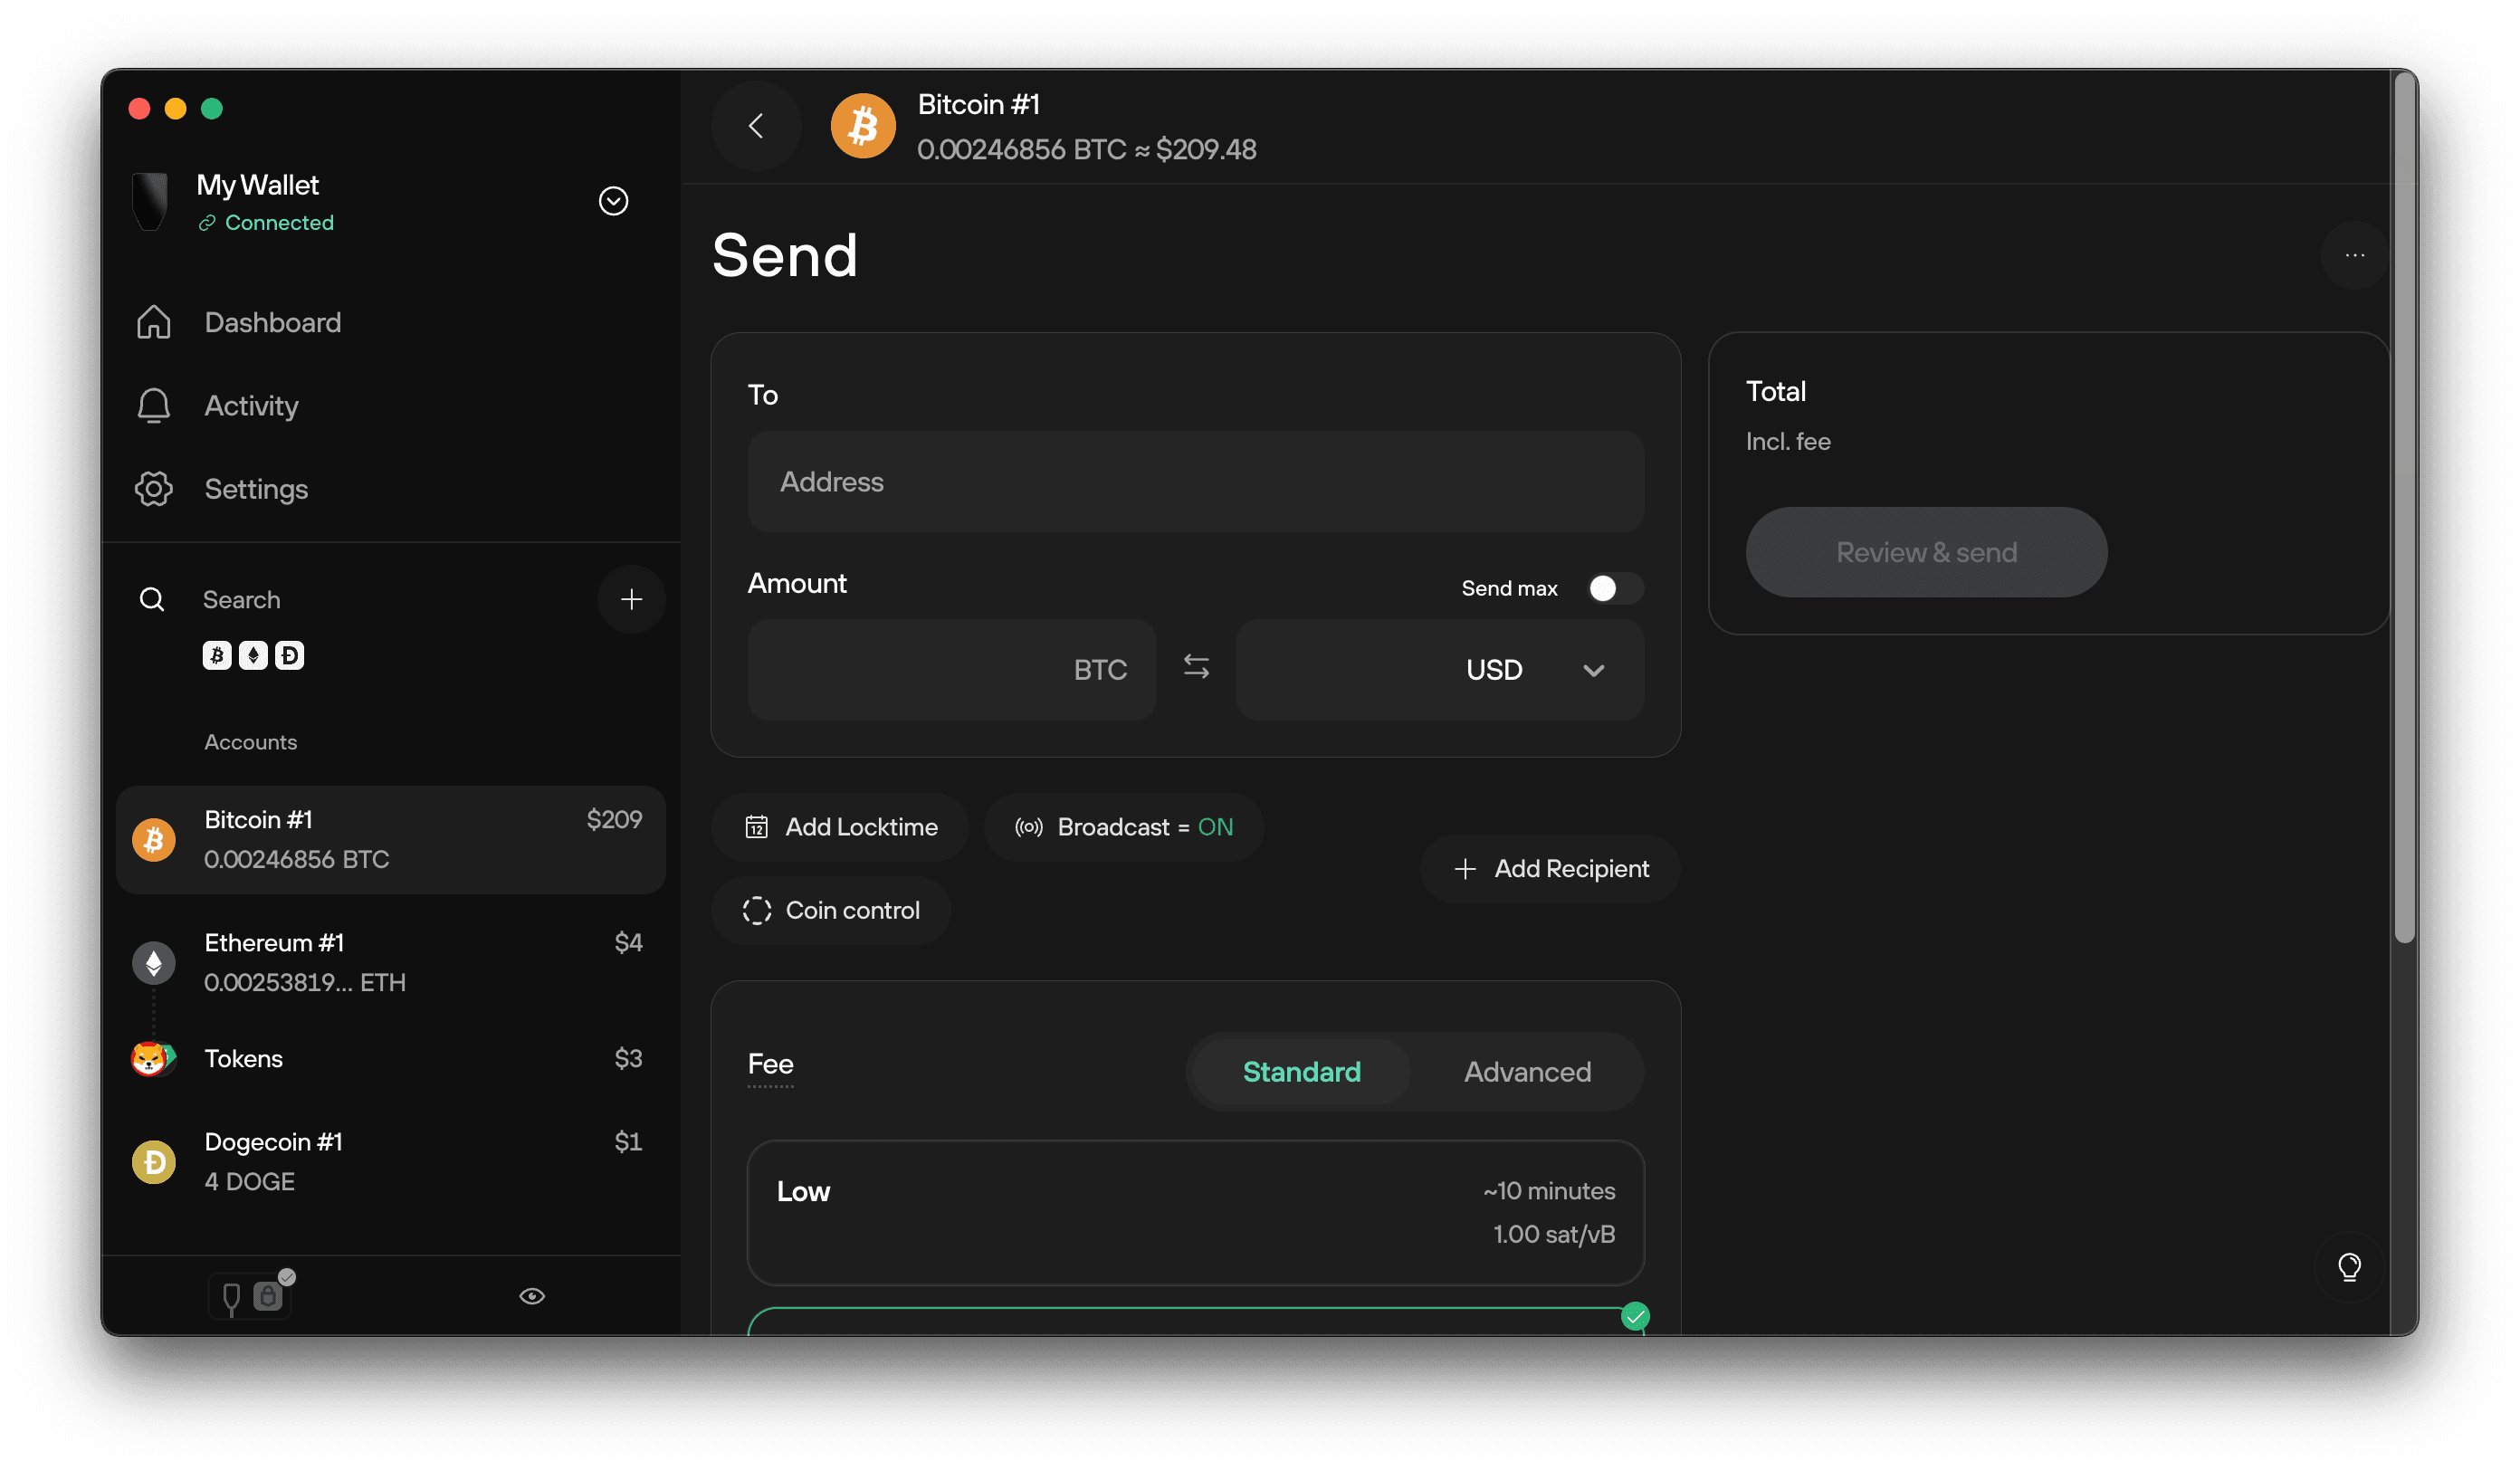
Send
Send funds from the Send tab in your account:
- Enter the destination address and amount
- Adjust the fee if needed
- Confirm the transaction on your Trezor device: make sure the amount and fee are correct and that the address shown matches the intended destination before approving.
Learn more on how to send crypto safely by reading our article Send crypto in Trezor Suite.
Never copy addresses from your transaction history, as this can lead to mistakes. Learn more about address poisoning attacks.
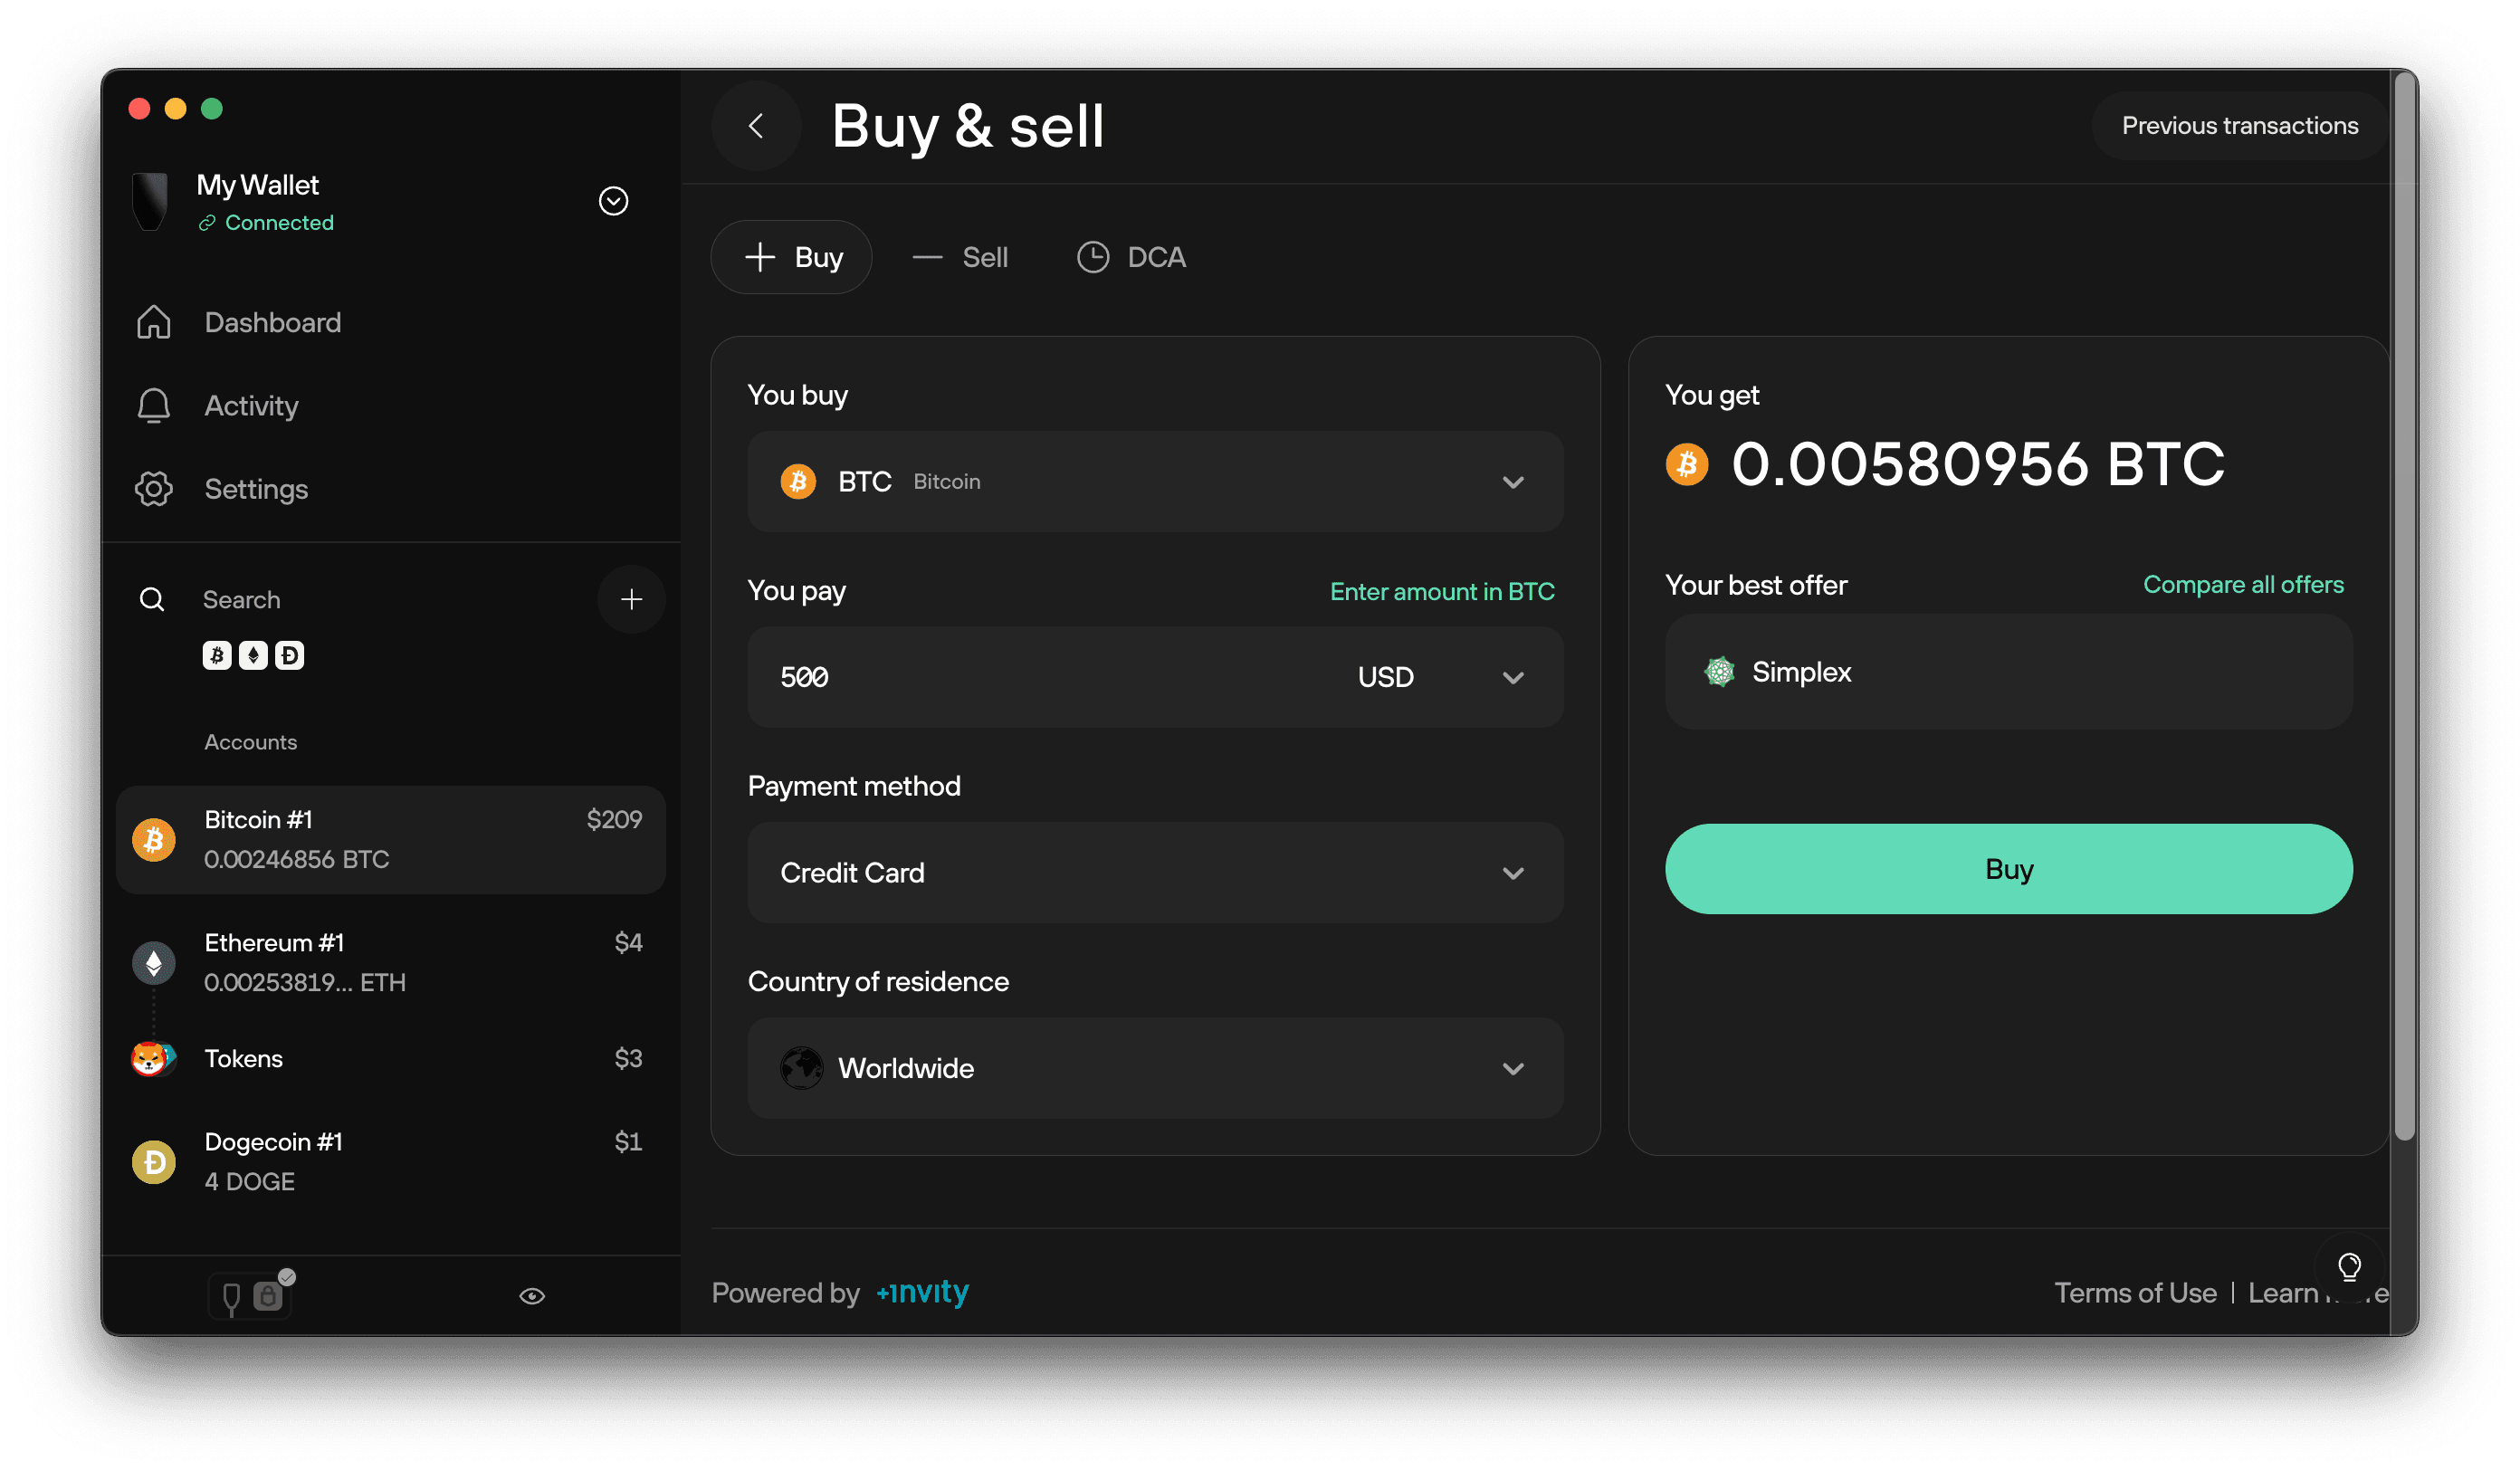
Buy & Sell
Click the Buy & sell button in the top-right corner of Suite to access tools for buying, selling, and saving crypto with verified providers.
- Buy: Instantly buy bitcoin and other cryptocurrencies using your preferred payment method—such as a credit card or bank transfer—and receive funds directly to your Trezor wallet. For more information, please visit Buy crypto in Trezor Suite.
- Sell: Convert supported cryptocurrencies to fiat and have the payout sent to your linked account. For more information, please visit Sell crypto in Trezor Suite.
- DCA (Dollar-cost averaging): Set up recurring purchases using the Invity mobile app. You can manually withdraw to your Trezor wallet anytime.
All Buy, Sell, and DCA services are provided by Invity, a SatoshiLabs company, and may require KYC depending on your chosen provider and region.
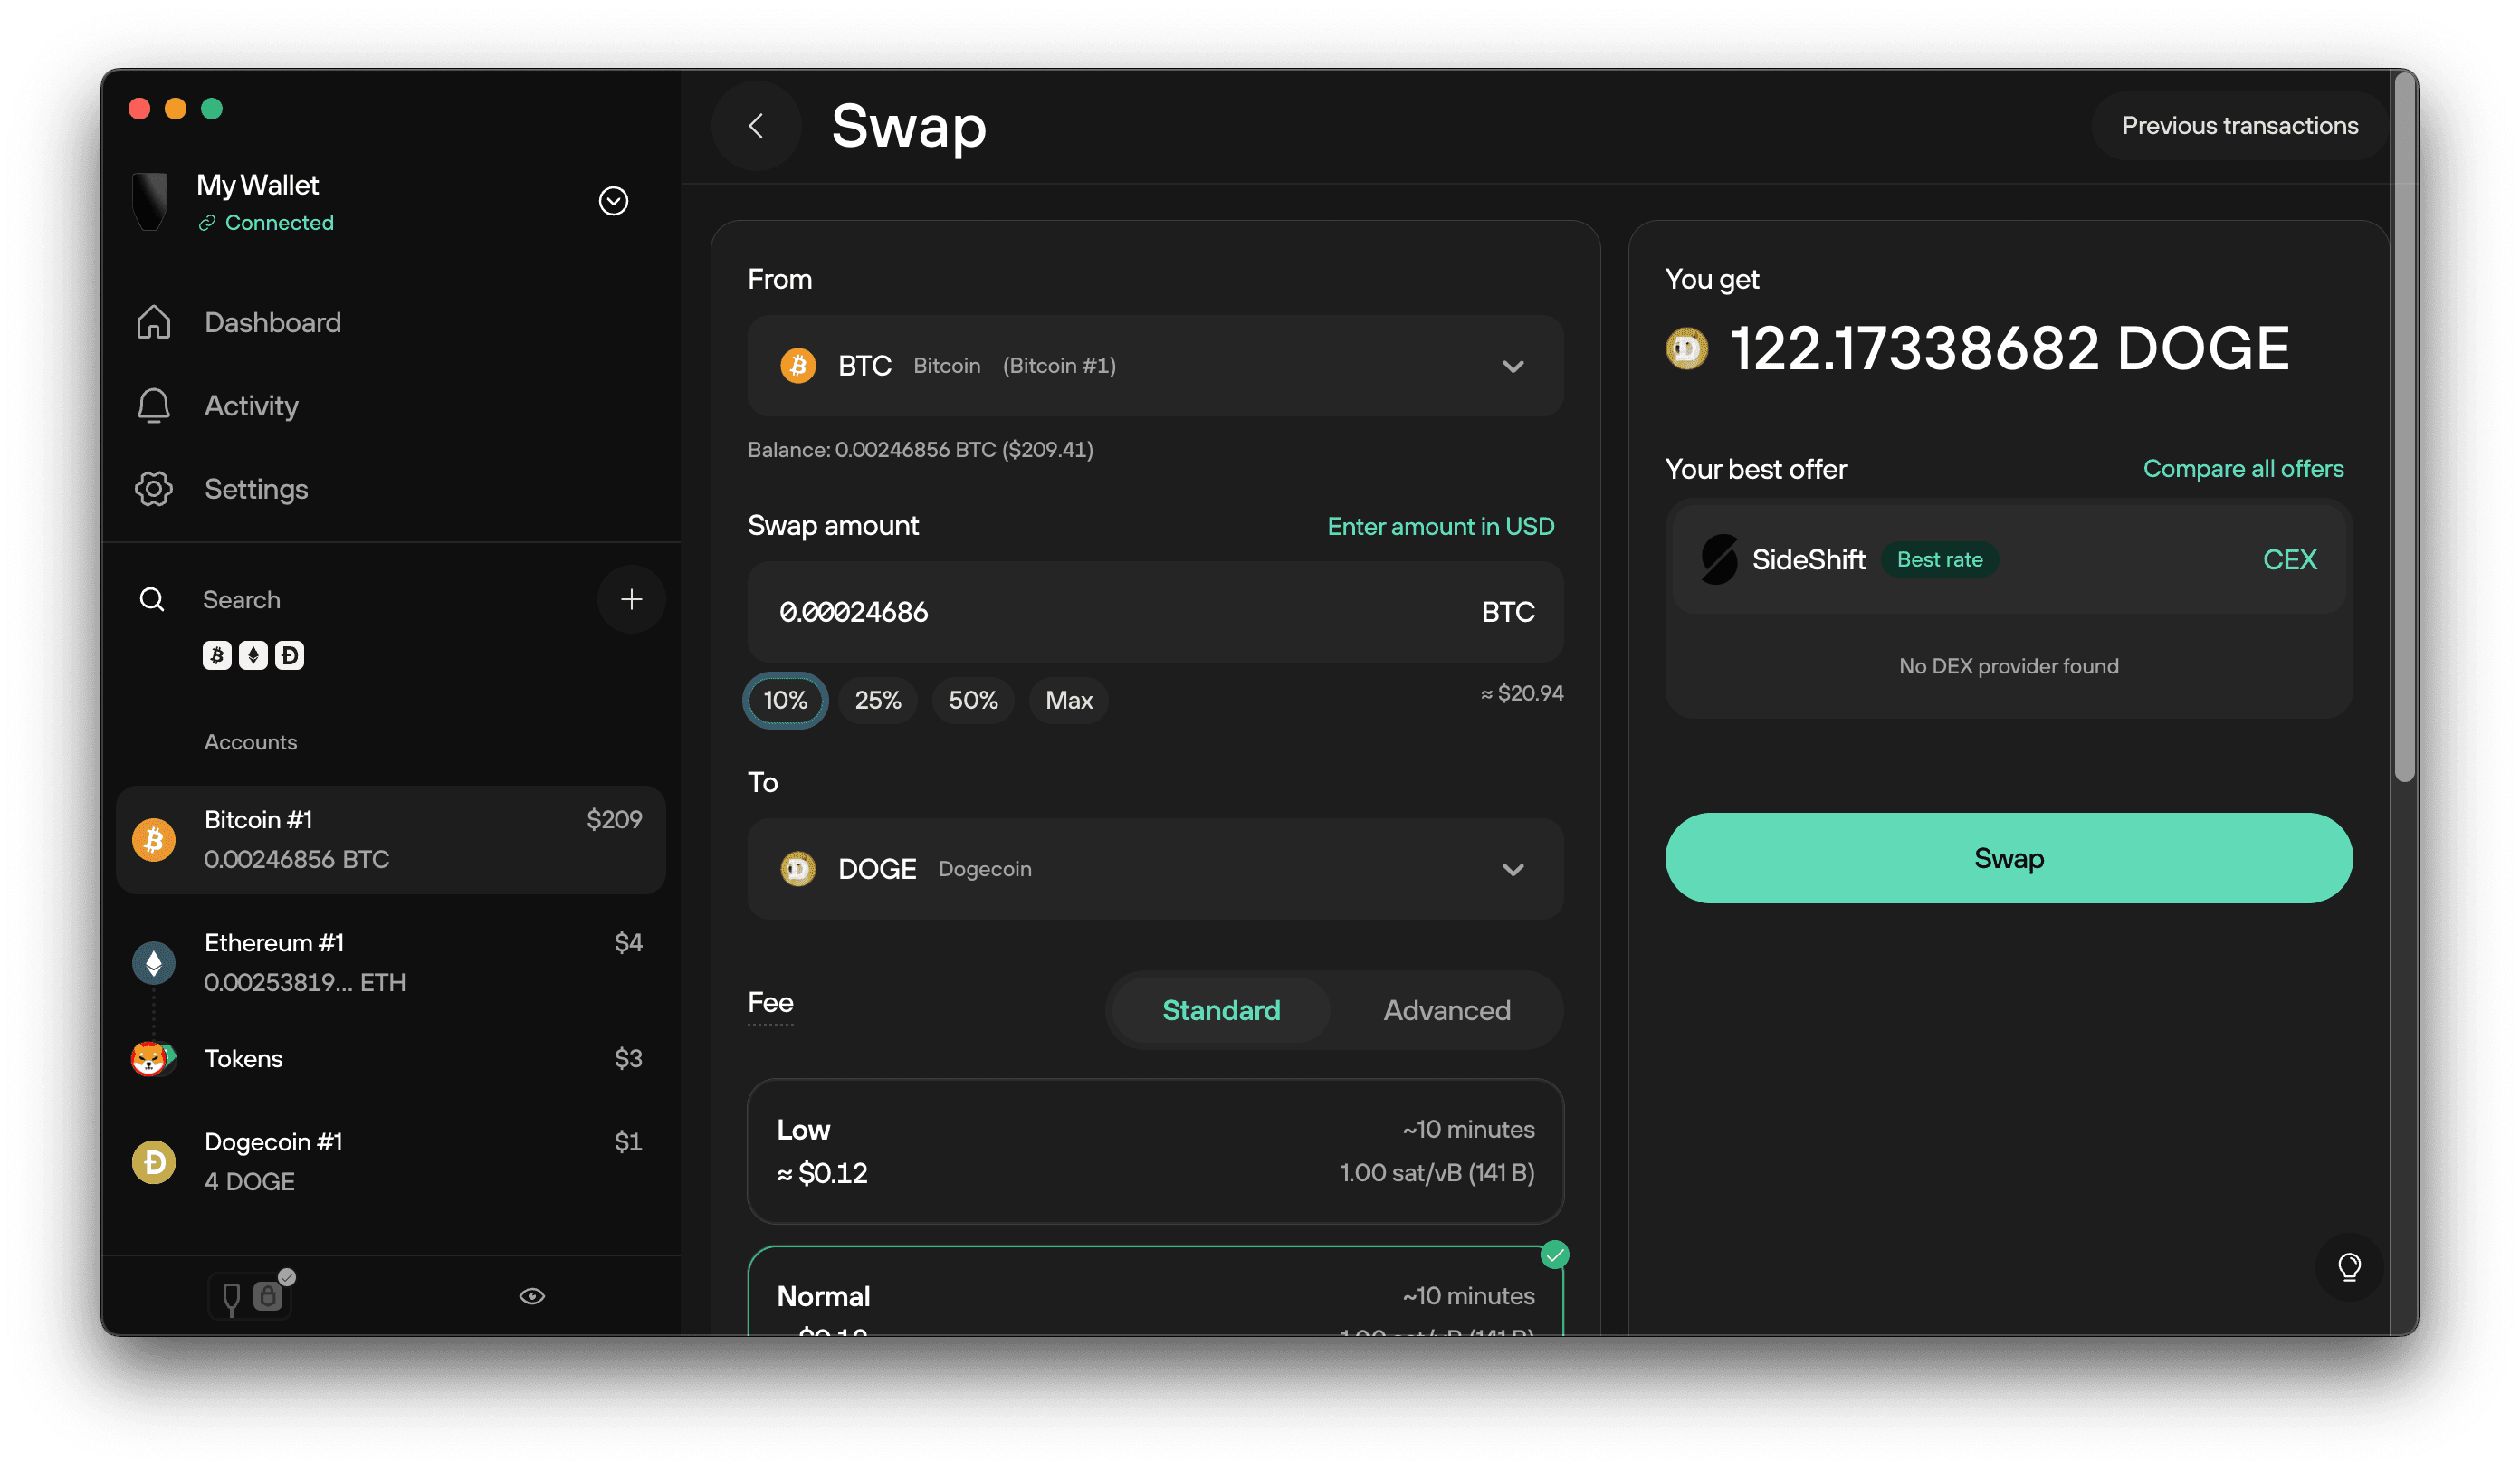
Swap
The Swap tab lets you exchange crypto from within the app. For more information, please visit Swap crypto in Trezor Suite.
Manage app and device settings
Go to Settings to access three main configuration sections:
- Application: Language, fiat currency, dark mode, labeling, discreet mode, updates, and Tor (route traffic through the Tor network for extra privacy)
- Device: PIN, passphrase, backup, wipe device, and personalization
- Coins: Enable or disable coins. Disabling a coin hides it from the Suite interface but doesn’t remove it from your wallet.
Wiping your device removes your wallet. Only wipe if you have your wallet backup (also known as a recovery seed).
Useful tools and features
Trezor Suite includes a few built-in tools to help you stay private, informed, and up to date while using the app.
- Discreet mode: Click the eye icon in the bottom-left corner to hide or show your account balances. This is useful when sharing your screen or working in public.
- Firmware and Suite version info: In the same bottom-left area, you can check the firmware version of your connected Trezor and see which version of Trezor Suite you're using. When an update is available, a notification will appear here.
- Suite Guide: Click the lightbulb icon in the bottom-right corner to open the in-app help panel. This guide offers tips, explanations, and direct links to support articles based on where you are in the app.
Trezor Suite for mobile
Trezor Suite on mobile lets you create or restore your wallet on a new Trezor, manage your portfolio, create new accounts, and send or receive crypto securely while on the go.
iOS users: iOS only supports Bluetooth connections. This means you need Trezor Safe 7 for full functionality. Other Trezor models can only be used in view-only mode on iOS (no USB support from iOS).
Android users: All Trezor models work fully via USB cable. Trezor Safe 7 can also connect via Bluetooth.
View-only mode: Monitor your portfolio without connecting your device by syncing your accounts using XPUB. You can track balances and transaction history, but you'll need to connect your Trezor to send funds.
Connect your Trezor
When you connect your Trezor to the mobile app, you can send funds, receive crypto, and verify addresses. All transactions are signed on your Trezor and verified on the screen for maximum security.
Android users can connect any Trezor model via USB. iOS users can connect Trezor Safe 7 via Bluetooth.
Manage your portfolio
The app shows your balances and transaction history across supported cryptocurrencies. You can sync and view multiple Trezor devices, switching easily between accounts and wallets.
Using view-only mode: If you want to monitor balances without connecting your device, you can sync your accounts using your extended public key (XPUB). This is especially useful for iOS users with non-Bluetooth Trezor models. The app will track your balances and transaction history, but you'll need to connect your Trezor to another device to send funds or verify receive addresses.
Receiving crypto
Select a coin in the app to generate a receive address. You can copy it or share the QR code. Always confirm the address on your Trezor device before using it.
Sending crypto
Use the Send tab to transfer funds. Enter the recipient’s address and amount, adjust the transaction fee if needed, and confirm the details on your Trezor.
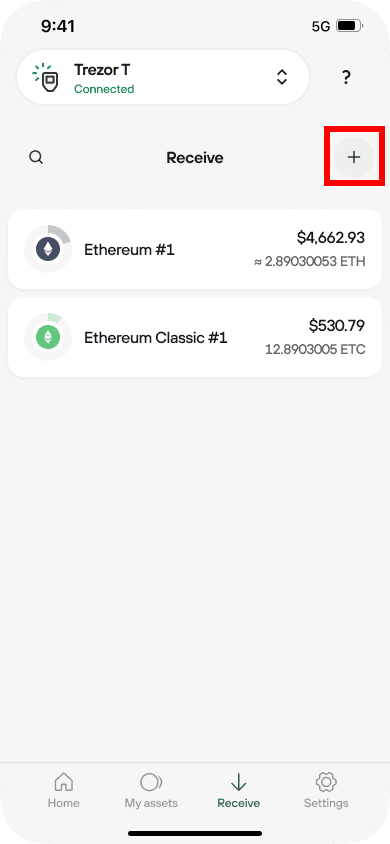
Add new coins or accounts
You can add new cryptocurrencies or create additional accounts directly in the app. This helps keep different coins and account types organized.
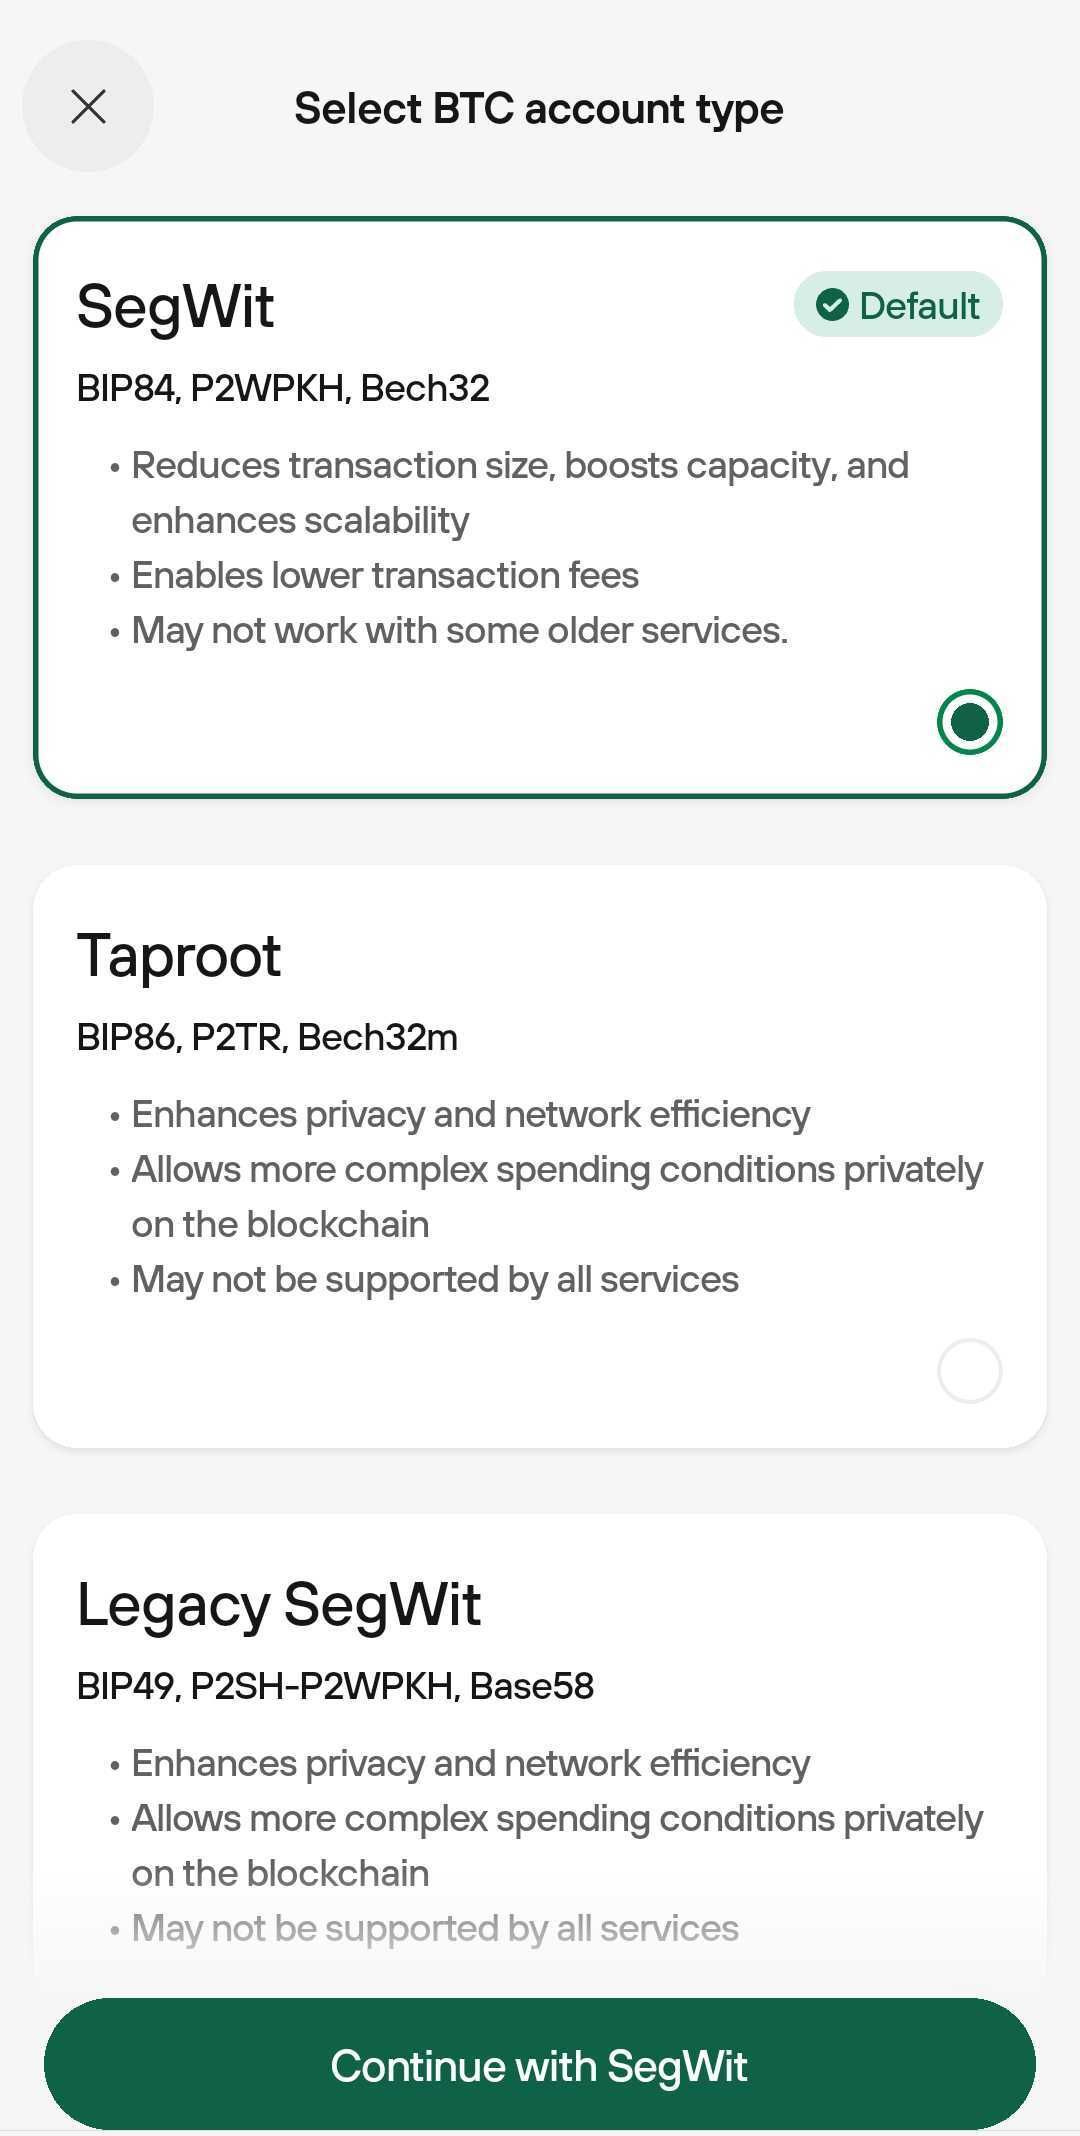
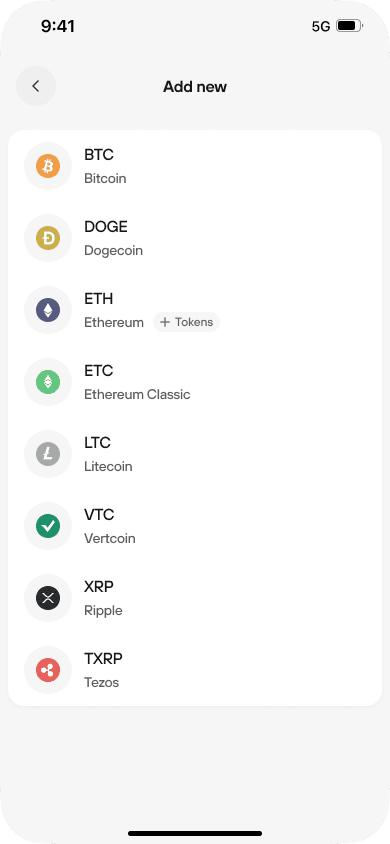
Go to My assets and tap the [+] button.
Select the cryptocurrency, and if relevant, choose the address type (e.g., Bitcoin SegWit, Taproot, or Legacy).
You must use an account before creating another empty one of the same type.
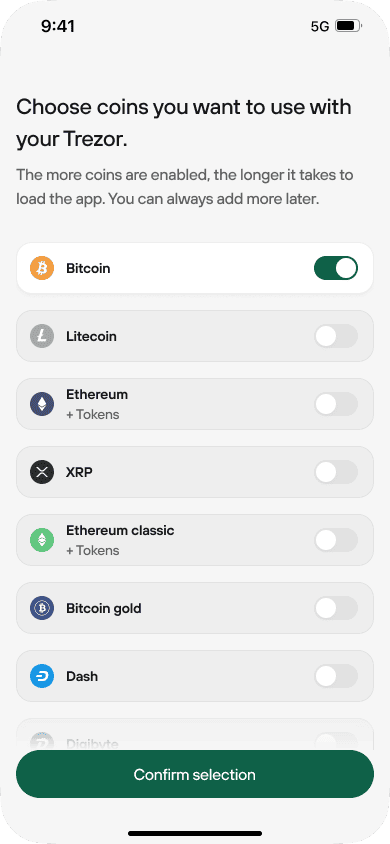
Enabling coins
You can control which coins appear in your app in three ways:
- You can enable coins during setup: when you first connect your Trezor, the app shows a list of supported coins. Use the toggle switches on the right to turn each one on or off before completing setup.
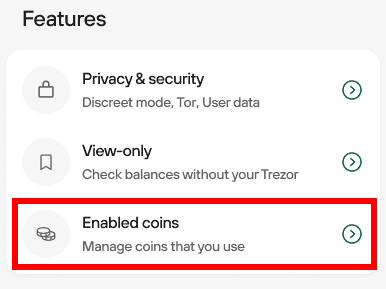
- You can also enable or disable coins later: open the app’s bottom menu and go to Settings > Features > Enabled coins, then use the toggles to adjust your list anytime.
- Additionally, you can enable coins while receiving: in the Receive window, tap the + symbol to add another supported cryptocurrency and generate an address.
FAQs
Which devices are compatible with Trezor Suite mobile?
Trezor Suite mobile works on iOS 15+ and Android 12+, including iPhones, iPads, and Android smartphones or tablets.
Important connectivity differences:
- Android users: Connect any Trezor model via USB cable, or use Bluetooth with Trezor Safe 7
- iOS users: Can only connect via Bluetooth, which means:
- Trezor Safe 7: Full functionality (Bluetooth supported)
- Other Trezor models: View-only mode using XPUB import (no USB support on iOS)
For detailed system requirements, see our OS requirements guide.
Is Trezor Suite mobile free to use?
Yes. Trezor Suite is free to download and use. It's also open source, meaning you can verify the code yourself. We don't sell your data or track your activity.
Is Trezor Suite secure?
Yes. Your private keys never leave your Trezor device. The apps only display information and prepare transactions for you to approve on your hardware wallet.
Why don't I see my coin or token listed?
Trezor Suite supports a growing list of cryptocurrencies. Check our supported coins page to see if your asset is compatible.
Tokens aren't listed separately. You need to enable the network they run on (like Ethereum for ERC-20 tokens, or Solana for SPL tokens). Once the network is enabled, your tokens will appear automatically.
If your coin isn't supported yet, check back regularly, we add new assets over time.
Can I track my portfolio without connecting my Trezor?
Yes. You can use view-only mode to monitor balances without connecting your device. This is especially useful for iOS users with non-Bluetooth Trezor models.
To set this up, sync your account using your extended public key (XPUB). The app will track balances and transaction history, but you'll need to connect your Trezor to send funds or verify receive addresses.
How do I protect myself from phishing and scams?
Trezor Suite will never ask you to type your wallet backup.
Your wallet backup (recovery seed) should only ever be entered on your Trezor device. Never type it into the app, a website, or any other software. Anyone asking for this is trying to steal your crypto.
Be cautious of fake apps, emails, or messages claiming to be from Trezor. Always download Trezor Suite from official sources and verify links before clicking.
How does Trezor Suite protect my privacy?
Trezor Suite encrypts all connections using HTTPS. We don't track your activity.
For enhanced privacy on desktop, you can enable Tor routing in Settings to hide your IP address from our servers and your Internet Service Provider.
Should I keep Trezor Suite updated?
Yes. Regular updates include security patches and new features. Keep Trezor Suite desktop and mobile up to date for the best security and performance.
Can I safely unplug my Trezor from my computer or mobile device?
Yes. You can safely disconnect your Trezor from your computer at any time. No “eject” process is needed.
As long as you’ve finished any ongoing actions (like sending a transaction or updating firmware), your wallet is secure and there’s no risk in unplugging your device.
You also don’t need your Trezor connected to receive crypto. Once you've shared a receiving address, incoming transactions will still be processed, even if the device is unplugged.
There’s no need to manually eject your Trezor. Just unplug it when you’re done.